Replacing a bathroom sink drain may seem like a daunting task, but with the right tools and knowledge, it can be a simple and cost-effective DIY project. Whether your old drain is damaged or you simply want to upgrade to a new, more stylish one, replacing a bathroom sink drain is a task that anyone can tackle. In this guide, we will walk you through the step-by-step process and provide helpful tips and tricks along the way.How to Replace a Bathroom Sink Drain


How to Replace a Bathroom Sink Drain


Before you begin, make sure to gather all the necessary tools and materials. You will need a pair of pliers, a pipe wrench, a screwdriver, plumber's putty, and a new sink drain. Once you have everything ready, follow these steps to replace your bathroom sink drain:Replacing a Bathroom Sink Drain: Your Step-by-Step Guide


Replacing a Bathroom Sink Drain: Your Step-by-Step Guide


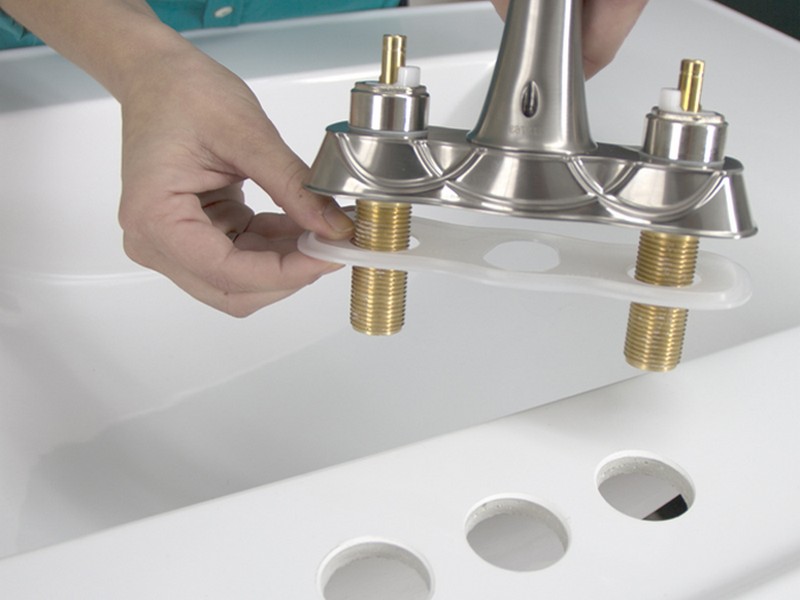
1. Turn off the water supply to your sink. This can usually be done by turning the shut-off valves under the sink clockwise. 2. Place a bucket under the sink to catch any excess water that may drain out. 3. Use pliers to loosen and remove the slip nuts connecting the drain pipe to the tailpiece of the sink drain. 4. Loosen the nut on the bottom of the drain assembly and remove the old drain. 5. Clean the area around the sink drain and remove any old plumber's putty or debris. 6. Roll a small amount of plumber's putty into a thin, snake-like shape and apply it around the bottom of the new drain. 7. Insert the new drain into the sink opening and tighten the nut on the bottom to secure it in place. 8. Attach the tailpiece of the new drain to the drain pipe, making sure to tighten the slip nuts securely. 9. Turn the water supply back on and check for any leaks. 10. If everything looks good, you can now enjoy your new bathroom sink drain!DIY: Replacing a Bathroom Sink Drain


DIY: Replacing a Bathroom Sink Drain


Replacing a bathroom sink drain may seem straightforward, but there are a few tips and tricks that can make the process even easier: Tip #1: Use a hairdryer to loosen any old caulk or putty around the drain before attempting to remove it. Tip #2: If the slip nuts are too tight to loosen with pliers, try using a pipe wrench for better leverage. Tip #3: Make sure to tighten the slip nuts securely to avoid any future leaks.Replacing a Bathroom Sink Drain: Tips and Tricks

Replacing a Bathroom Sink Drain: Tips and Tricks


While replacing a bathroom sink drain is a relatively simple task, there are a few common mistakes that people make. These include: Mistake #1: Not turning off the water supply before beginning the process. Mistake #2: Forgetting to place a bucket under the sink to catch any excess water. Mistake #3: Not using enough plumber's putty, resulting in leaks.Replacing a Bathroom Sink Drain: Common Mistakes to Avoid


Replacing a Bathroom Sink Drain: Common Mistakes to Avoid


As mentioned earlier, you will need a few tools and materials to replace your bathroom sink drain. These include: Tools: Pliers, pipe wrench, screwdriver. Materials: Plumber's putty, new sink drain.Replacing a Bathroom Sink Drain: Tools and Materials You'll Need


Replacing a Bathroom Sink Drain: Tools and Materials You'll Need


If you encounter any issues during the replacement process, here are a few troubleshooting tips: Issue #1: Leak between the sink and drain. Solution: Make sure to tighten the slip nuts securely and check for any cracks or damage in the drain assembly. Issue #2: Leaking from the bottom of the drain assembly. Solution: This could be a sign of a damaged or faulty drain assembly. Consider replacing it with a new one. Issue #3: Water draining slowly from the sink. Solution: This could be a sign of a clogged drain pipe. Use a drain cleaner or a plunger to clear the blockage.Replacing a Bathroom Sink Drain: Troubleshooting Common Issues

Replacing a Bathroom Sink Drain: Troubleshooting Common Issues
While you can definitely replace your bathroom sink drain on your own, some people prefer to hire a professional plumber to do the job. Here are a few things to consider before making a decision: DIY: Replacing a bathroom sink drain on your own can save you money, and it is a relatively simple process if you have the right tools and follow the steps carefully. Professional: If you are not confident in your DIY skills or you encounter any issues during the replacement process, it may be best to hire a professional plumber to avoid any further damage or costly repairs.Replacing a Bathroom Sink Drain: Professional vs. DIY


Replacing a Bathroom Sink Drain: Professional vs. DIY

Replacing a bathroom sink drain can be an inexpensive project if you choose to do it yourself. Here are a few ways to save even more money: 1. Choose a simple, basic sink drain instead of a more expensive, decorative one. 2. Compare prices at different hardware stores or online to find the best deal on a new sink drain. 3. Reuse old parts, such as the tailpiece, if they are still in good condition.Replacing a Bathroom Sink Drain: How to Save Money

Replacing a Bathroom Sink Drain: How to Save Money

If you prefer a visual guide, there are many helpful video tutorials available online that can walk you through the process of replacing a bathroom sink drain. Make sure to follow along carefully and pause the video as needed to ensure that you are completing each step correctly. With the right tools, materials, and knowledge, replacing a bathroom sink drain can be a simple and rewarding DIY project. Remember to take your time, follow the steps carefully, and troubleshoot any issues that may arise. With a little effort, you can have a brand new, fully functioning bathroom sink drain in no time!Replacing a Bathroom Sink Drain: Step-by-Step Video Tutorial

Replacing a Bathroom Sink Drain: Step-by-Step Video Tutorial

Additional Ways to Improve Your Bathroom Sink Drain

Upgrade to a Pop-Up Drain
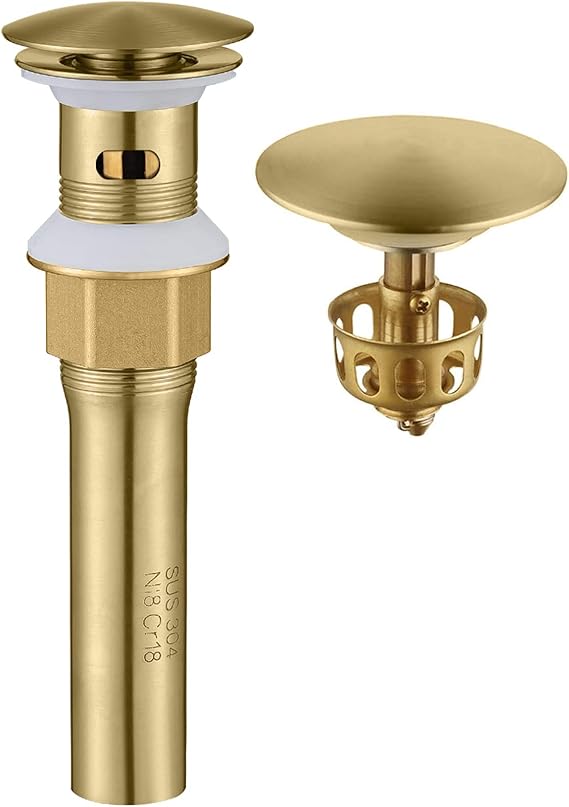
 If you're looking to give your bathroom sink a modern and sleek look, consider upgrading to a pop-up drain. This type of drain is typically made of metal and has a small handle or lever that can be pushed down to close the drain and pulled up to open it. Not only does this add a touch of elegance to your sink, but it also eliminates the need for a separate drain stopper. This means you won't have to worry about losing your stopper or dealing with a clogged drain due to hair or other debris getting stuck in it.
Pop-up drains
are also easier to clean and maintain, as they can be easily removed and wiped down. They also have fewer parts compared to traditional drain stoppers, making them less likely to break or malfunction. Additionally, many pop-up drains come with a built-in strainer to catch debris, preventing clogs from forming in the first place.
If you're looking to give your bathroom sink a modern and sleek look, consider upgrading to a pop-up drain. This type of drain is typically made of metal and has a small handle or lever that can be pushed down to close the drain and pulled up to open it. Not only does this add a touch of elegance to your sink, but it also eliminates the need for a separate drain stopper. This means you won't have to worry about losing your stopper or dealing with a clogged drain due to hair or other debris getting stuck in it.
Pop-up drains
are also easier to clean and maintain, as they can be easily removed and wiped down. They also have fewer parts compared to traditional drain stoppers, making them less likely to break or malfunction. Additionally, many pop-up drains come with a built-in strainer to catch debris, preventing clogs from forming in the first place.
Consider Installing a P-Trap
 If you're dealing with frequent
clogs
in your bathroom sink, it may be time to install a P-trap. A P-trap is a U-shaped pipe that is installed under the sink and helps to prevent sewer gases from entering your home. It also traps debris and prevents it from entering your plumbing system, reducing the risk of clogs.
Installing a P-trap may require some plumbing knowledge, so it's best to consult a professional if you're not confident in your abilities. However, once it's installed, you'll notice a significant decrease in clogs and foul odors coming from your sink. Plus, P-traps are relatively inexpensive and can be found at most hardware stores.
If you're dealing with frequent
clogs
in your bathroom sink, it may be time to install a P-trap. A P-trap is a U-shaped pipe that is installed under the sink and helps to prevent sewer gases from entering your home. It also traps debris and prevents it from entering your plumbing system, reducing the risk of clogs.
Installing a P-trap may require some plumbing knowledge, so it's best to consult a professional if you're not confident in your abilities. However, once it's installed, you'll notice a significant decrease in clogs and foul odors coming from your sink. Plus, P-traps are relatively inexpensive and can be found at most hardware stores.
Invest in a Water Filter
 If you live in an area with hard water, you may notice that your bathroom sink drain gets clogged more frequently. Hard water contains minerals that can build up in your pipes over time, eventually leading to clogs and reduced water flow. Investing in a water filter can help to prevent this buildup, keeping your sink drain clear and functioning properly.
There are various types of water filters available, so be sure to do some research and choose one that best fits your needs and budget. Regularly changing your water filter can also help to prolong the life of your sink and other plumbing fixtures.
If you live in an area with hard water, you may notice that your bathroom sink drain gets clogged more frequently. Hard water contains minerals that can build up in your pipes over time, eventually leading to clogs and reduced water flow. Investing in a water filter can help to prevent this buildup, keeping your sink drain clear and functioning properly.
There are various types of water filters available, so be sure to do some research and choose one that best fits your needs and budget. Regularly changing your water filter can also help to prolong the life of your sink and other plumbing fixtures.
Conclusion
 Replacing a bathroom sink drain may seem like a daunting task, but there are many ways to improve the functionality and appearance of your current drain. Whether you choose to upgrade to a pop-up drain, install a P-trap, or invest in a water filter, these simple changes can make a big difference in the long run. Consider consulting a professional for any major plumbing changes, and don't forget to regularly clean and maintain your sink drain to prevent future issues.