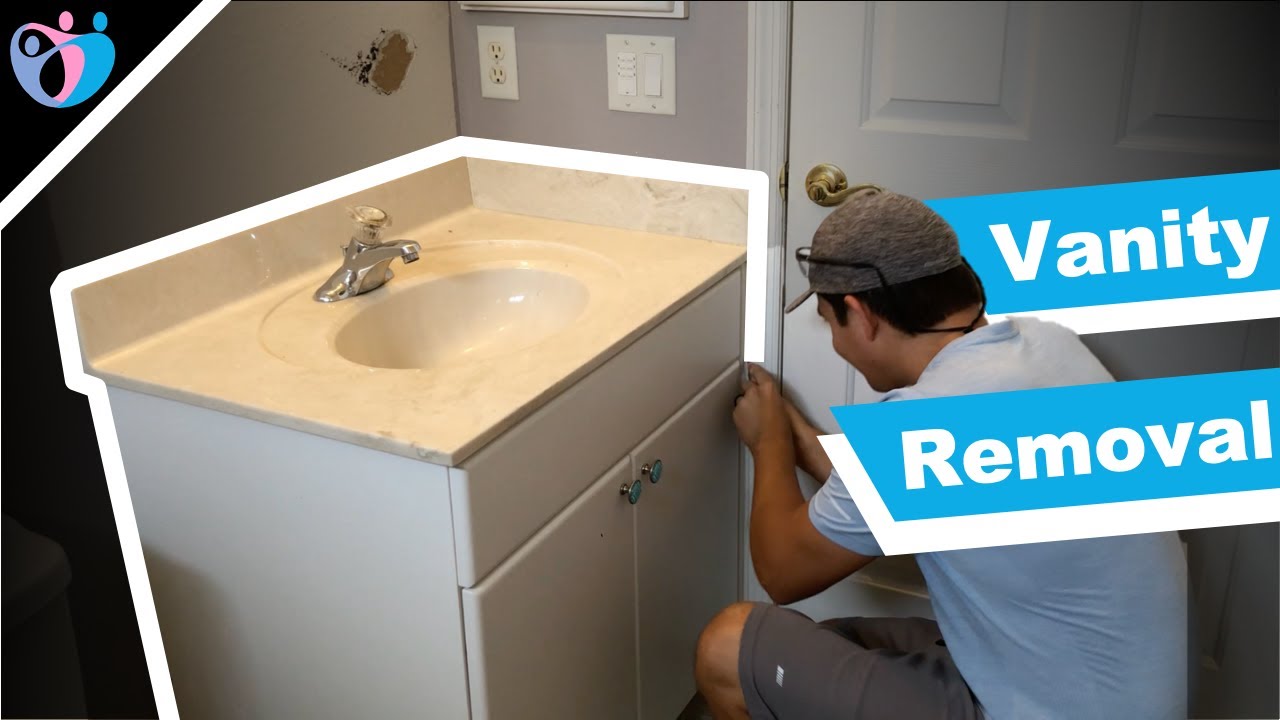
Are you looking to update your RV bathroom? One of the first things you may want to do is remove the old, outdated vanity. This can be a daunting task, but with the right tools and techniques, it can be a simple and satisfying DIY project. In this article, we will guide you through the process of removing your RV bathroom vanity and give you some helpful tips along the way. Remove RV Bathroom Vanity


Remove RV Bathroom Vanity


Before you begin, make sure you have all the necessary tools and materials. This may include a screwdriver, pliers, adjustable wrench, and a utility knife. It is also important to have a plan for what you will do with the old vanity once it is removed. Will you be replacing it with a new one, or do you plan on repurposing the space? RV Bathroom Vanity Removal


RV Bathroom Vanity Removal


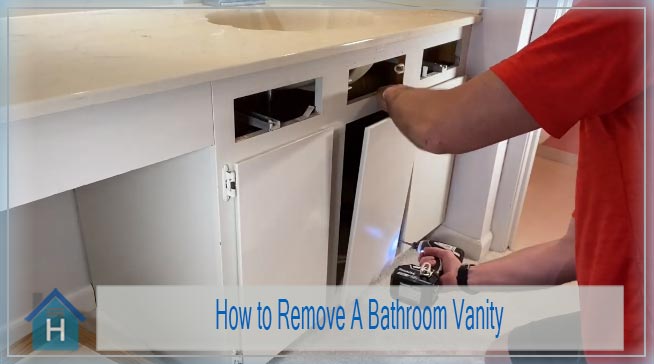
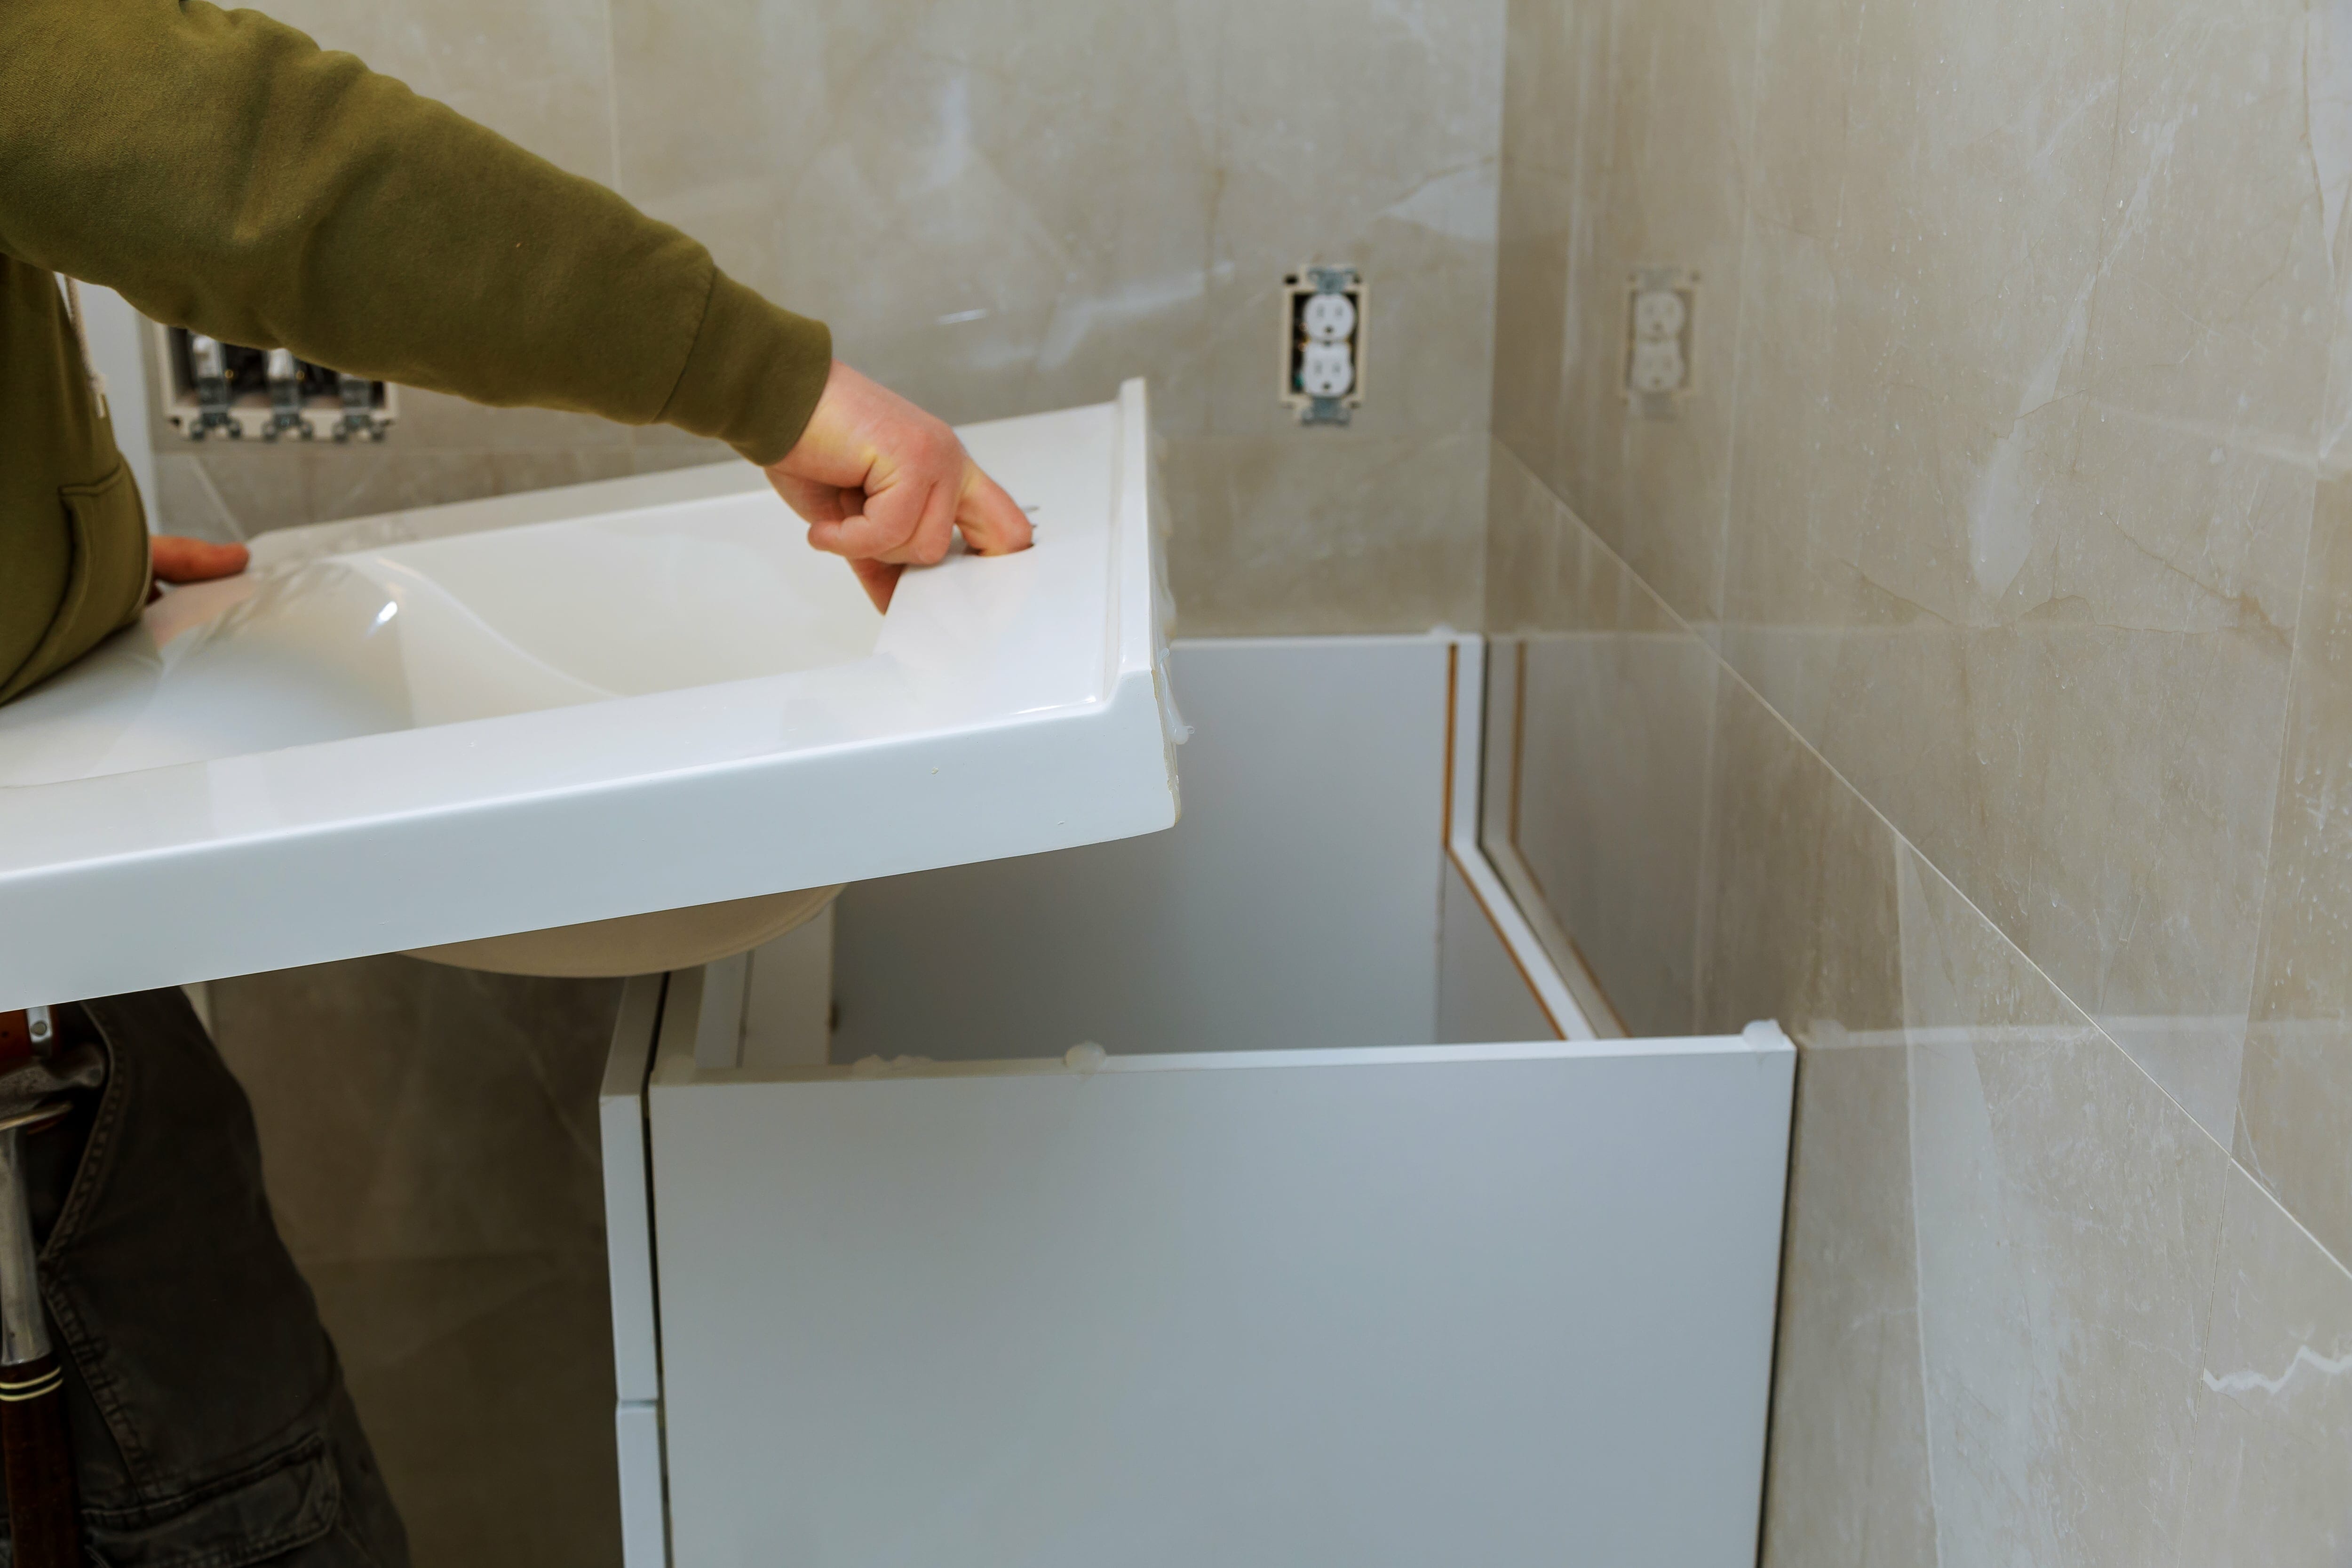
The first step in removing your RV bathroom vanity is to turn off the water supply to the sink and disconnect the water lines. This can usually be done with a wrench. Be sure to have a bucket or towel handy to catch any excess water. Next, you will need to remove the sink from the vanity. This is typically held in place with clips or brackets. Once the sink is removed, you can access the screws or brackets that hold the vanity to the wall. Use a screwdriver or pliers to remove these and carefully pull the vanity away from the wall. Removing RV Bathroom Vanity


Removing RV Bathroom Vanity


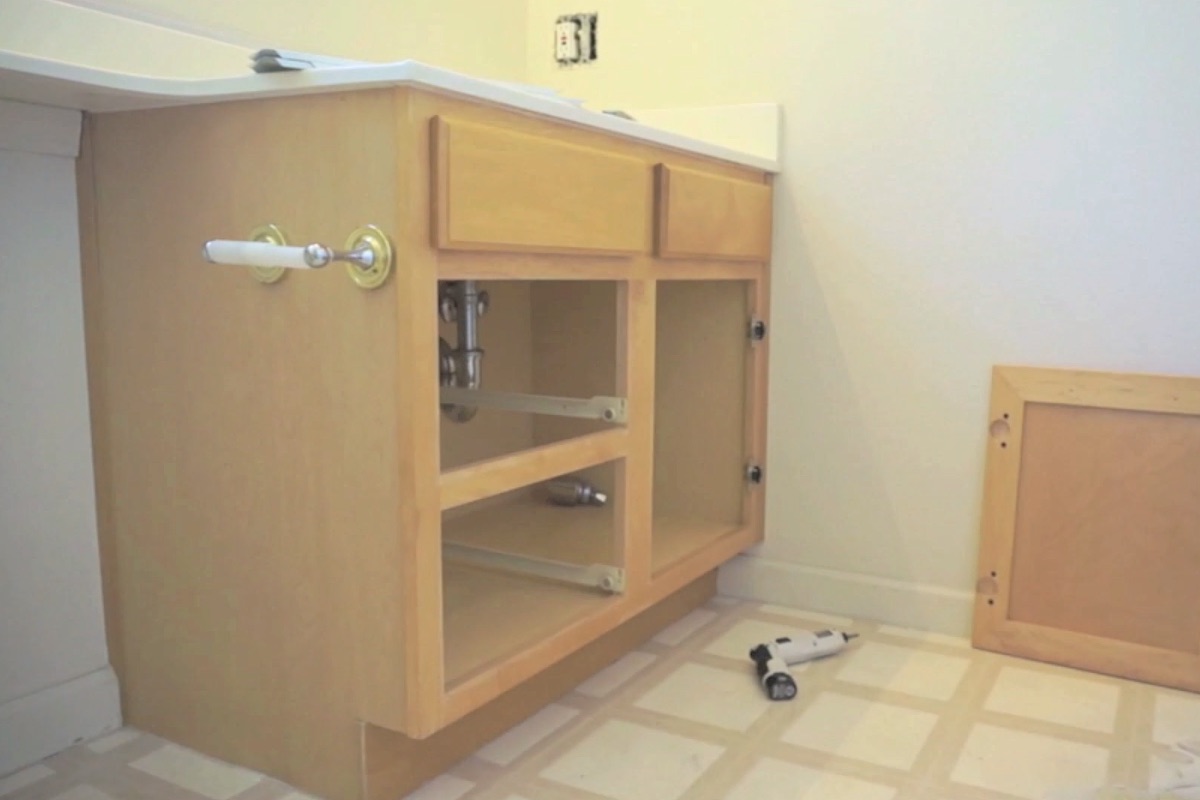
If the vanity is attached to the floor, you will need to remove the screws or brackets holding it in place. Once the vanity is completely detached, you can carefully lift it out of the bathroom. Be sure to have someone help you if the vanity is heavy or awkward to handle. After removing the vanity, you may find that there are still some water lines or electrical wires attached. Use caution when disconnecting these and be sure to turn off the power supply before working with any electrical components. RV Vanity Removal

RV Vanity Removal


Now that the vanity is completely removed, you can take this opportunity to clean the area and make any necessary repairs to the wall or flooring. If you plan on installing a new vanity, you may also need to make adjustments to the plumbing or electrical connections. If you are not replacing the vanity, you may want to consider repurposing the space. This could include adding shelves or storage units, or even creating a small laundry area. Removing Vanity in RV Bathroom


Removing Vanity in RV Bathroom
If you are replacing your RV bathroom vanity, you will need to disassemble the old vanity to make room for the new one. This may involve removing any drawers, doors, or shelves that are still attached. Use caution when disassembling to avoid damaging any parts that you may want to reuse or sell. RV Bathroom Vanity Disassembly


RV Bathroom Vanity Disassembly


Once the old vanity is completely disassembled, you can remove it from the bathroom. Be sure to dispose of any parts or materials responsibly. Now is also a good time to check the condition of the plumbing and make any necessary repairs or upgrades. You may also want to consider painting or updating the walls and flooring while the bathroom is empty. Taking Out RV Bathroom Vanity


Taking Out RV Bathroom Vanity


If you do not plan on replacing the vanity, you will need to dismantle it before removing it from the bathroom. This may involve cutting or unscrewing any large pieces that cannot easily fit through the bathroom door. Again, use caution when dismantling to avoid damaging any parts. Once the vanity is dismantled, it can be removed from the bathroom and disposed of responsibly. RV Bathroom Vanity Dismantling

RV Bathroom Vanity Dismantling


If you are only looking to replace the sink in your RV bathroom, the process will be similar to removing the entire vanity. However, you will not need to worry about disconnecting the plumbing or electrical connections to the vanity itself. Once the sink is removed, you can install the new one or make any necessary repairs or upgrades to the surrounding area. Removing RV Bathroom Sink and Vanity


Removing RV Bathroom Sink and Vanity


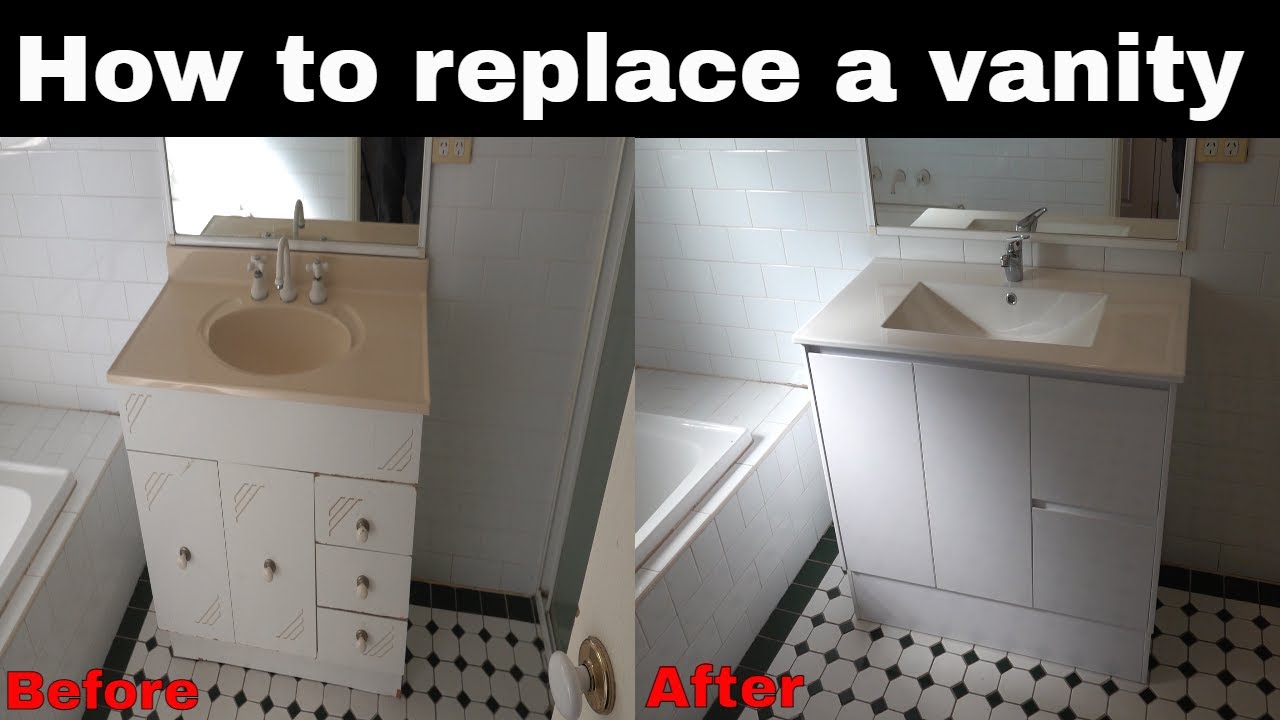
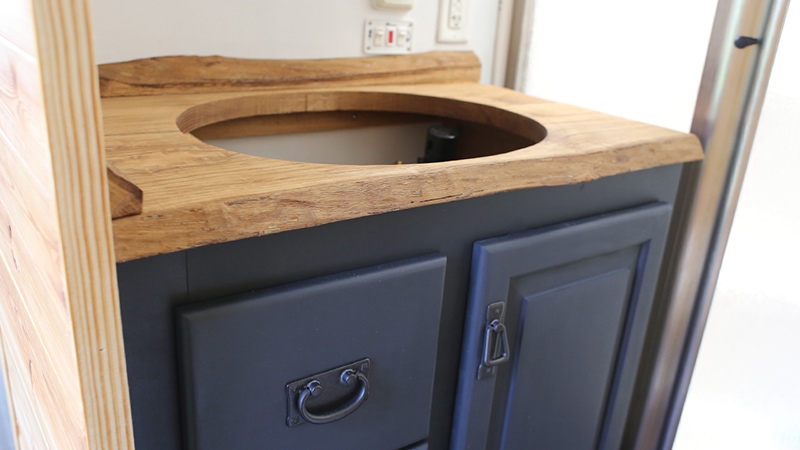
If you are replacing your RV bathroom vanity, be sure to carefully measure the space and purchase a vanity that will fit properly. You may also want to consider upgrading to a more modern or functional vanity to better suit your needs. When installing the new vanity, be sure to follow the manufacturer's instructions and use the appropriate tools and materials. Once the vanity is securely in place, you can reconnect the plumbing and electrical connections and turn the water supply back on. RV Bathroom Vanity Replacement

RV Bathroom Vanity Replacement


Maximizing Space with a Bathroom Vanity Removal in Your RV

Creating a Functional and Stylish Space
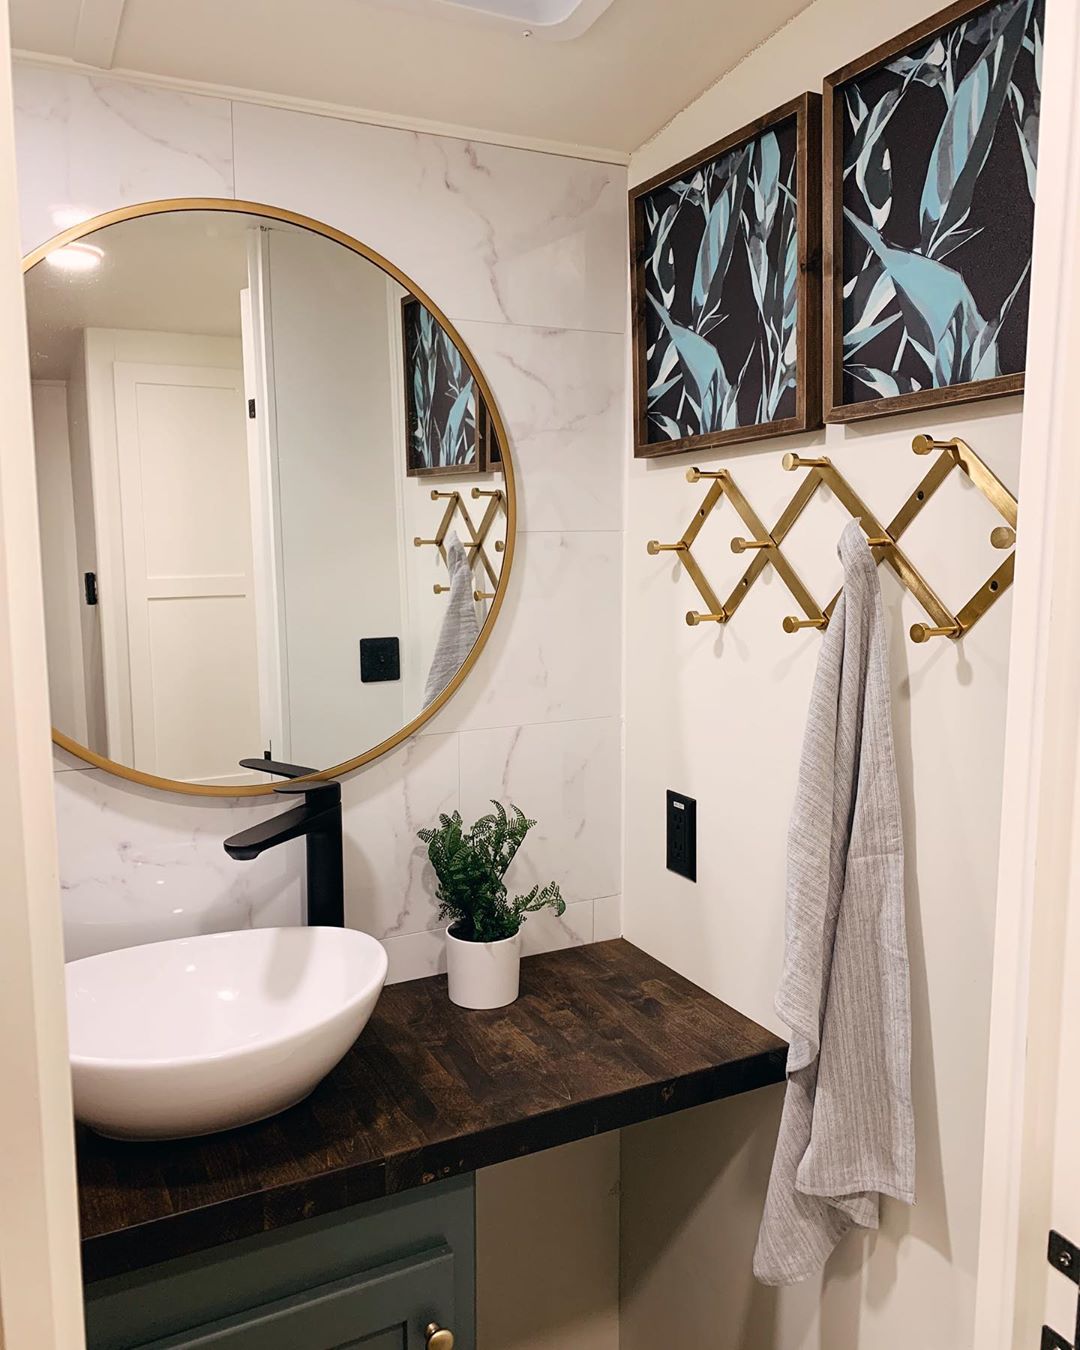
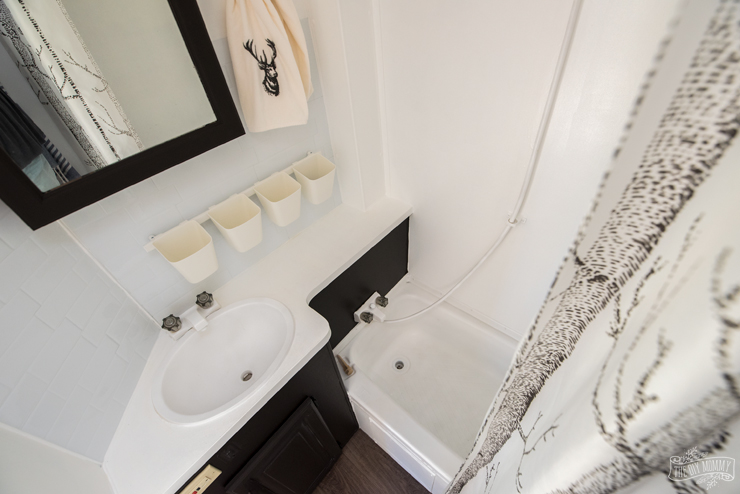
 One of the key aspects of designing a home, whether it's a traditional house or an RV, is maximizing the use of available space. This is especially important in an RV, where every inch counts. One area that often takes up valuable space is the bathroom vanity. Some RVs come equipped with large, bulky vanities that can make the bathroom feel cramped and cluttered. This is where removing the vanity can make a huge difference.
Removing the RV bathroom vanity
is not only a practical solution for creating more space, but it can also add a touch of style to your bathroom. By getting rid of the vanity, you open up the room and give it a more spacious and airy feel. This can make your RV bathroom feel more like a luxury spa rather than a cramped cubicle.
One of the key aspects of designing a home, whether it's a traditional house or an RV, is maximizing the use of available space. This is especially important in an RV, where every inch counts. One area that often takes up valuable space is the bathroom vanity. Some RVs come equipped with large, bulky vanities that can make the bathroom feel cramped and cluttered. This is where removing the vanity can make a huge difference.
Removing the RV bathroom vanity
is not only a practical solution for creating more space, but it can also add a touch of style to your bathroom. By getting rid of the vanity, you open up the room and give it a more spacious and airy feel. This can make your RV bathroom feel more like a luxury spa rather than a cramped cubicle.
Benefits of Removing the Bathroom Vanity
 Aside from creating more space, there are other benefits to removing the bathroom vanity in your RV. One major advantage is that it can make cleaning and maintenance a breeze. With no bulky vanity taking up space, you have more room to maneuver and clean. This can also help prevent mold and mildew build-up in hard-to-reach areas.
Moreover, removing the vanity can also give you the opportunity to get creative with storage solutions. You can install shelves, baskets, or even a hanging organizer to keep your bathroom essentials organized and easily accessible. This not only frees up valuable counter space but also adds a personalized touch to your RV bathroom.
Another major benefit of removing the bathroom vanity is the added weight savings.
RVs have weight restrictions, and every pound counts. By removing the vanity, you are reducing the overall weight of your RV, which can lead to better gas mileage and less wear and tear on your vehicle.
Aside from creating more space, there are other benefits to removing the bathroom vanity in your RV. One major advantage is that it can make cleaning and maintenance a breeze. With no bulky vanity taking up space, you have more room to maneuver and clean. This can also help prevent mold and mildew build-up in hard-to-reach areas.
Moreover, removing the vanity can also give you the opportunity to get creative with storage solutions. You can install shelves, baskets, or even a hanging organizer to keep your bathroom essentials organized and easily accessible. This not only frees up valuable counter space but also adds a personalized touch to your RV bathroom.
Another major benefit of removing the bathroom vanity is the added weight savings.
RVs have weight restrictions, and every pound counts. By removing the vanity, you are reducing the overall weight of your RV, which can lead to better gas mileage and less wear and tear on your vehicle.
Conclusion
 In conclusion, removing the bathroom vanity in your RV is a practical and stylish solution for maximizing space and adding a personal touch to your bathroom. It can also make cleaning and maintenance easier and save on weight. So if you're looking to revamp your RV bathroom, consider
removing the vanity
for a functional and stylish space.
In conclusion, removing the bathroom vanity in your RV is a practical and stylish solution for maximizing space and adding a personal touch to your bathroom. It can also make cleaning and maintenance easier and save on weight. So if you're looking to revamp your RV bathroom, consider
removing the vanity
for a functional and stylish space.