If you're planning to replace your old kitchen sink, one of the first tasks you'll need to tackle is removing the sink clips. These small metal brackets are used to secure the sink to the countertop and can be tricky to remove without causing damage. But don't worry, with the right tools and techniques, you can easily remove kitchen sink clips like a pro. In this guide, we'll take you through the step-by-step process of removing kitchen sink clips without any hassle.Removing Kitchen Sink Clips: A Step-by-Step Guide


Removing Kitchen Sink Clips: A Step-by-Step Guide


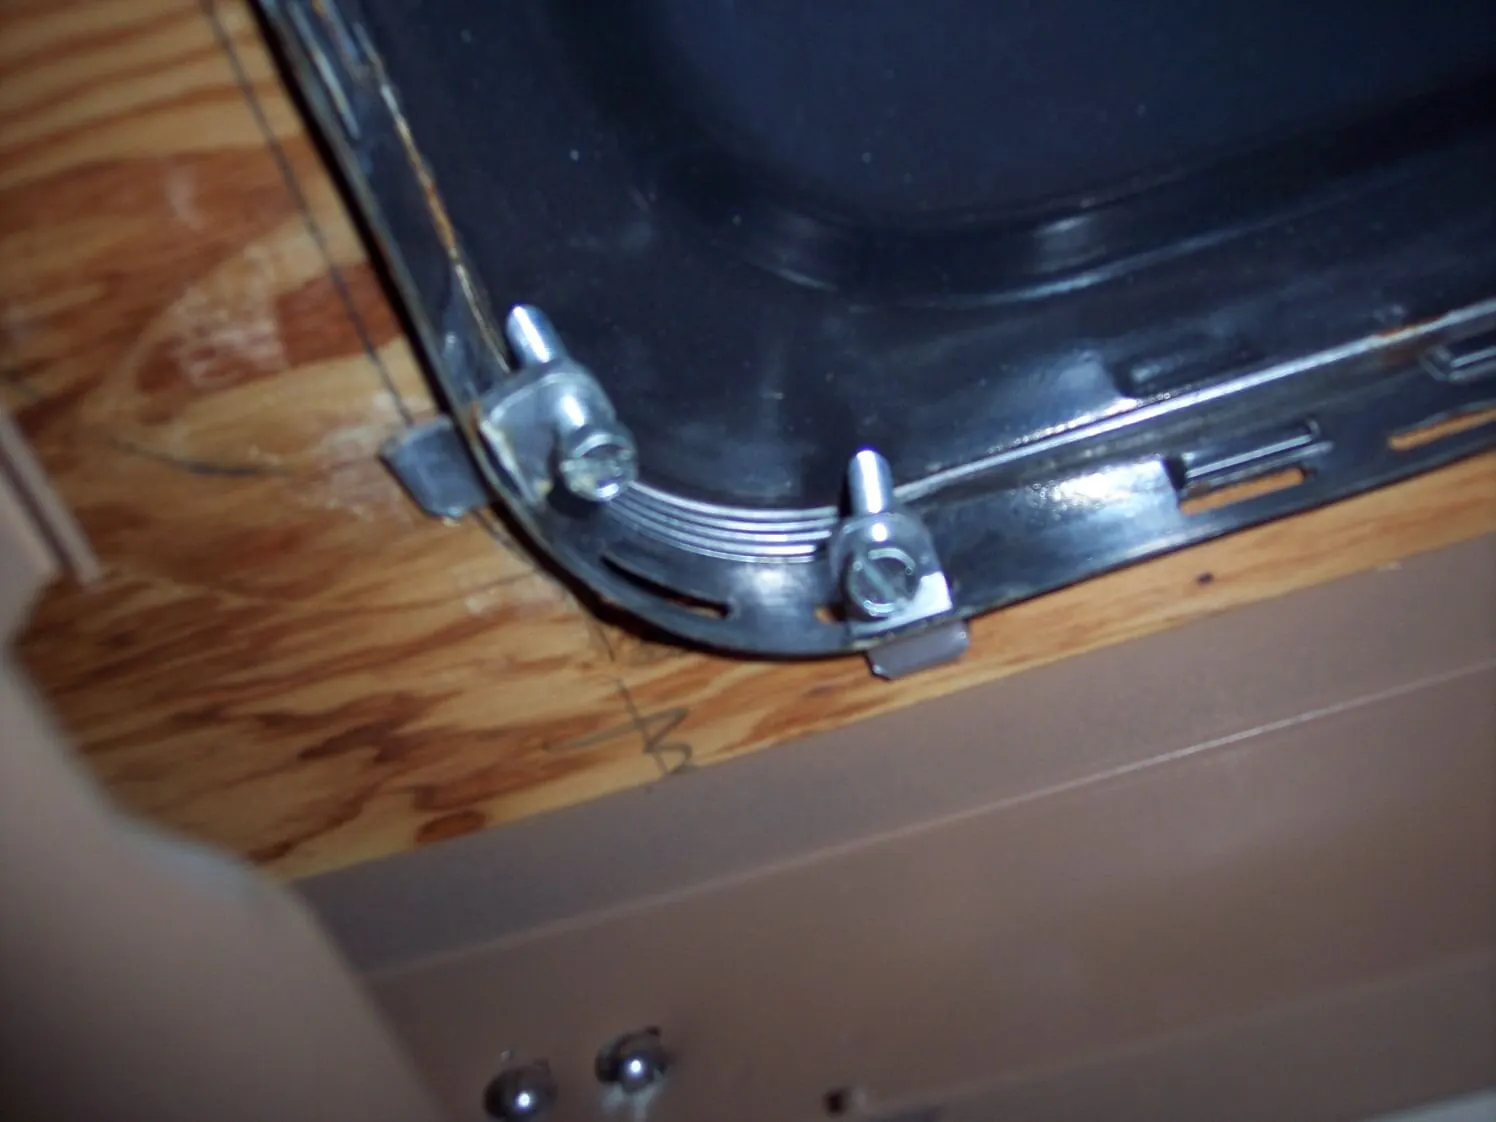
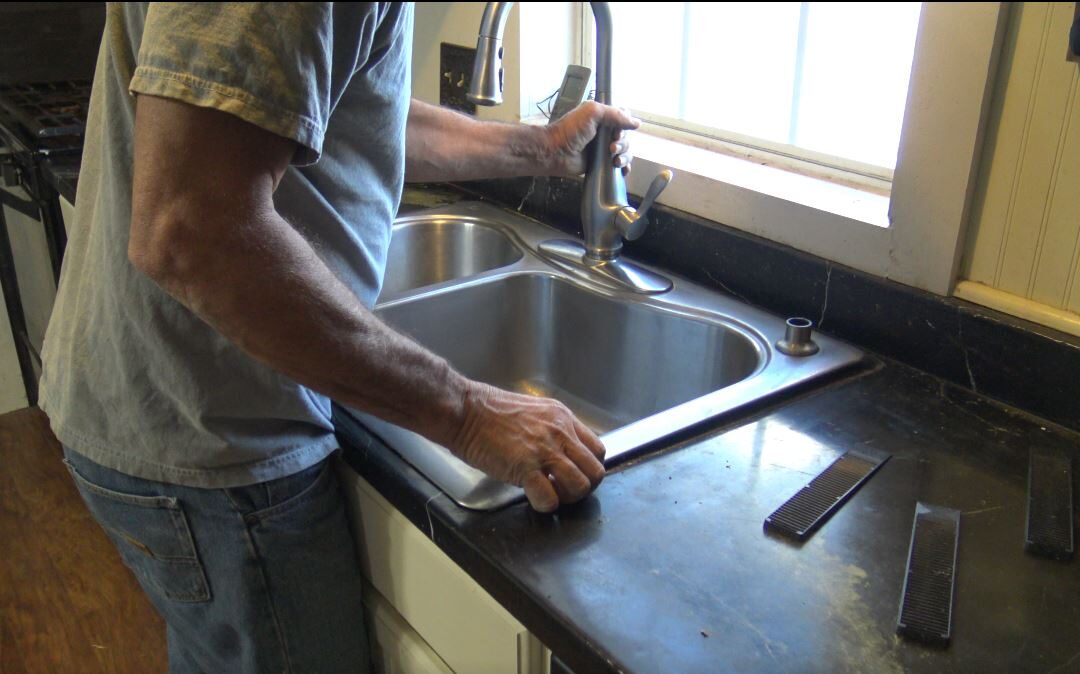
Before you get started, make sure you have all the necessary tools on hand. You'll need a screwdriver, pliers, and a putty knife. It's also a good idea to have a bucket or towel handy to catch any water that may spill out during the process. Step 1: Start by turning off the water supply to your sink. This is usually done by turning off the shut-off valves located under the sink. If you can't find the shut-off valves, you may need to turn off the main water supply to your house. Step 2: Next, disconnect the sink's plumbing. This includes removing the P-trap and any other connections leading to the sink. Use a bucket or towel to catch any water that may leak out. Step 3: Once the plumbing is disconnected, use a putty knife to loosen the caulk around the edges of the sink. This will make it easier to remove the sink without damaging the countertop. Step 4: Now it's time to remove the sink clips. Use a screwdriver to unscrew the clips from underneath the sink. If the clips are very tight, you may need to use pliers to loosen them. Be careful not to bend or damage the clips as you remove them. Step 5: Once all the clips are removed, you should be able to lift the sink out of the countertop. If the sink is stuck, gently tap it with a hammer to loosen it. Once the sink is removed, use a putty knife to scrape off any remaining caulk or adhesive from the countertop.How to Remove Kitchen Sink Clips in 5 Easy Steps


How to Remove Kitchen Sink Clips in 5 Easy Steps


If you're a DIY enthusiast, you may be tempted to try removing the kitchen sink clips yourself. While it's certainly doable, keep in mind that it can be a difficult and time-consuming task. If you're not confident in your abilities, it's best to hire a professional to avoid any potential damage to your sink or countertop. However, if you do decide to tackle this project on your own, make sure to follow the steps outlined above and take your time to avoid any accidents.DIY: Removing Kitchen Sink Clips


DIY: Removing Kitchen Sink Clips


:max_bytes(150000):strip_icc()/replacing-existing-surface-mounted-sink-1824896-06-d8eb6b67fe4f451b90c415551f75ad0f.jpg)
Here are a few tips and tricks that will make removing kitchen sink clips a breeze: Use the right tools: Make sure you have a good quality screwdriver and pliers on hand. Using the wrong tools can make the task much more difficult. Protect your sink: To avoid damaging your sink, place a towel or cloth on top of it before using a hammer to loosen the sink. Be patient: Removing sink clips can be a tedious process, so take your time and don't rush. It's better to be slow and careful than to accidentally damage your sink or countertop. Have a helper: If you have a friend or family member who can assist you, it can make the task easier and faster. They can help hold the sink while you remove the clips, or vice versa.Removing Kitchen Sink Clips: Tips and Tricks


Removing Kitchen Sink Clips: Tips and Tricks


If you're short on time or just want a quick and easy method for removing kitchen sink clips, here's a trick you can try. Instead of using a screwdriver to unscrew the clips, use a reciprocating saw to cut through the clips. This method is much faster and doesn't require as much effort.Quick and Easy Method for Removing Kitchen Sink Clips


Quick and Easy Method for Removing Kitchen Sink Clips
Before you start removing your kitchen sink clips, here are a few things you should know: Some clips may be hidden: Depending on the type of sink you have, some clips may be hidden or hard to access. You may need to use a flashlight to locate and remove them. Replace old clips: If you're replacing your sink, it's a good idea to replace the old clips with new ones. This will ensure that your new sink is securely attached to the countertop. Be careful not to damage the countertop: When removing the sink clips, be careful not to damage the countertop. If your countertop is made of a delicate material like marble or granite, it's best to hire a professional to avoid any damage.Removing Kitchen Sink Clips: What You Need to Know

Removing Kitchen Sink Clips: What You Need to Know


To summarize, here's a step-by-step guide for removing kitchen sink clips: Step 1: Turn off the water supply to your sink. Step 2: Disconnect the sink's plumbing. Step 3: Loosen the caulk around the edges of the sink. Step 4: Remove the sink clips using a screwdriver or pliers. Step 5: Lift the sink out of the countertop. Step 6: Scrape off any remaining caulk or adhesive from the countertop.Step-by-Step Guide for Removing Kitchen Sink Clips


Step-by-Step Guide for Removing Kitchen Sink Clips

Here are some common mistakes to avoid when removing kitchen sink clips: Not turning off the water supply: Make sure to turn off the water supply to your sink before starting the removal process. This will prevent any water from leaking out and causing a mess. Not using the right tools: As mentioned earlier, using the right tools is crucial to successfully removing sink clips without causing damage. Forgetting to disconnect the plumbing: Before attempting to remove the sink, make sure to disconnect the plumbing to avoid any accidents or damage. Rushing the process: Take your time and be patient when removing sink clips. Rushing can lead to mistakes and potential damage to your sink or countertop.Removing Kitchen Sink Clips: Common Mistakes to Avoid

Removing Kitchen Sink Clips: Common Mistakes to Avoid


Now that you know how to remove kitchen sink clips, here are some recommended tools and techniques: Tools: Screwdriver, pliers, putty knife, hammer, reciprocating saw (optional). Techniques: Use a putty knife to loosen caulk, unscrew clips with a screwdriver, use pliers if needed, use a hammer to gently tap the sink if stuck, use a reciprocating saw for a quicker method.Removing Kitchen Sink Clips: Tools and Techniques


Removing Kitchen Sink Clips: Tools and Techniques


To remove kitchen sink clips without damaging your sink, make sure to follow the steps outlined above carefully. Use the right tools and techniques, and take your time to avoid any accidents. If you're unsure or uncomfortable with removing the clips yourself, it's best to hire a professional to ensure the job is done correctly without causing any damage. Now that you have a better understanding of how to remove kitchen sink clips, you can confidently tackle this task and move on to installing your new sink. Just remember to be patient and careful, and your sink will be removed in no time!How to Remove Kitchen Sink Clips Without Damaging Your Sink


How to Remove Kitchen Sink Clips Without Damaging Your Sink


The Importance of Properly Removing Kitchen Sink Clips in House Design

Why Should You Consider Removing Kitchen Sink Clips?
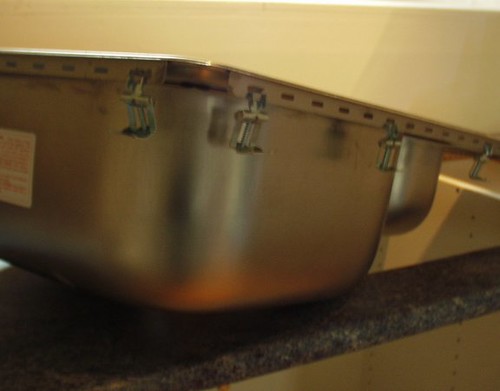
 Kitchen sinks are an essential part of any functional kitchen. They not only provide a place to wash dishes and prepare food, but they also add to the overall aesthetic of the space. However, when it comes to house design, it is important to pay attention to even the smallest details, such as the kitchen sink clips. These small metal brackets that hold the sink in place may seem insignificant, but their removal can greatly impact the overall look and functionality of your kitchen.
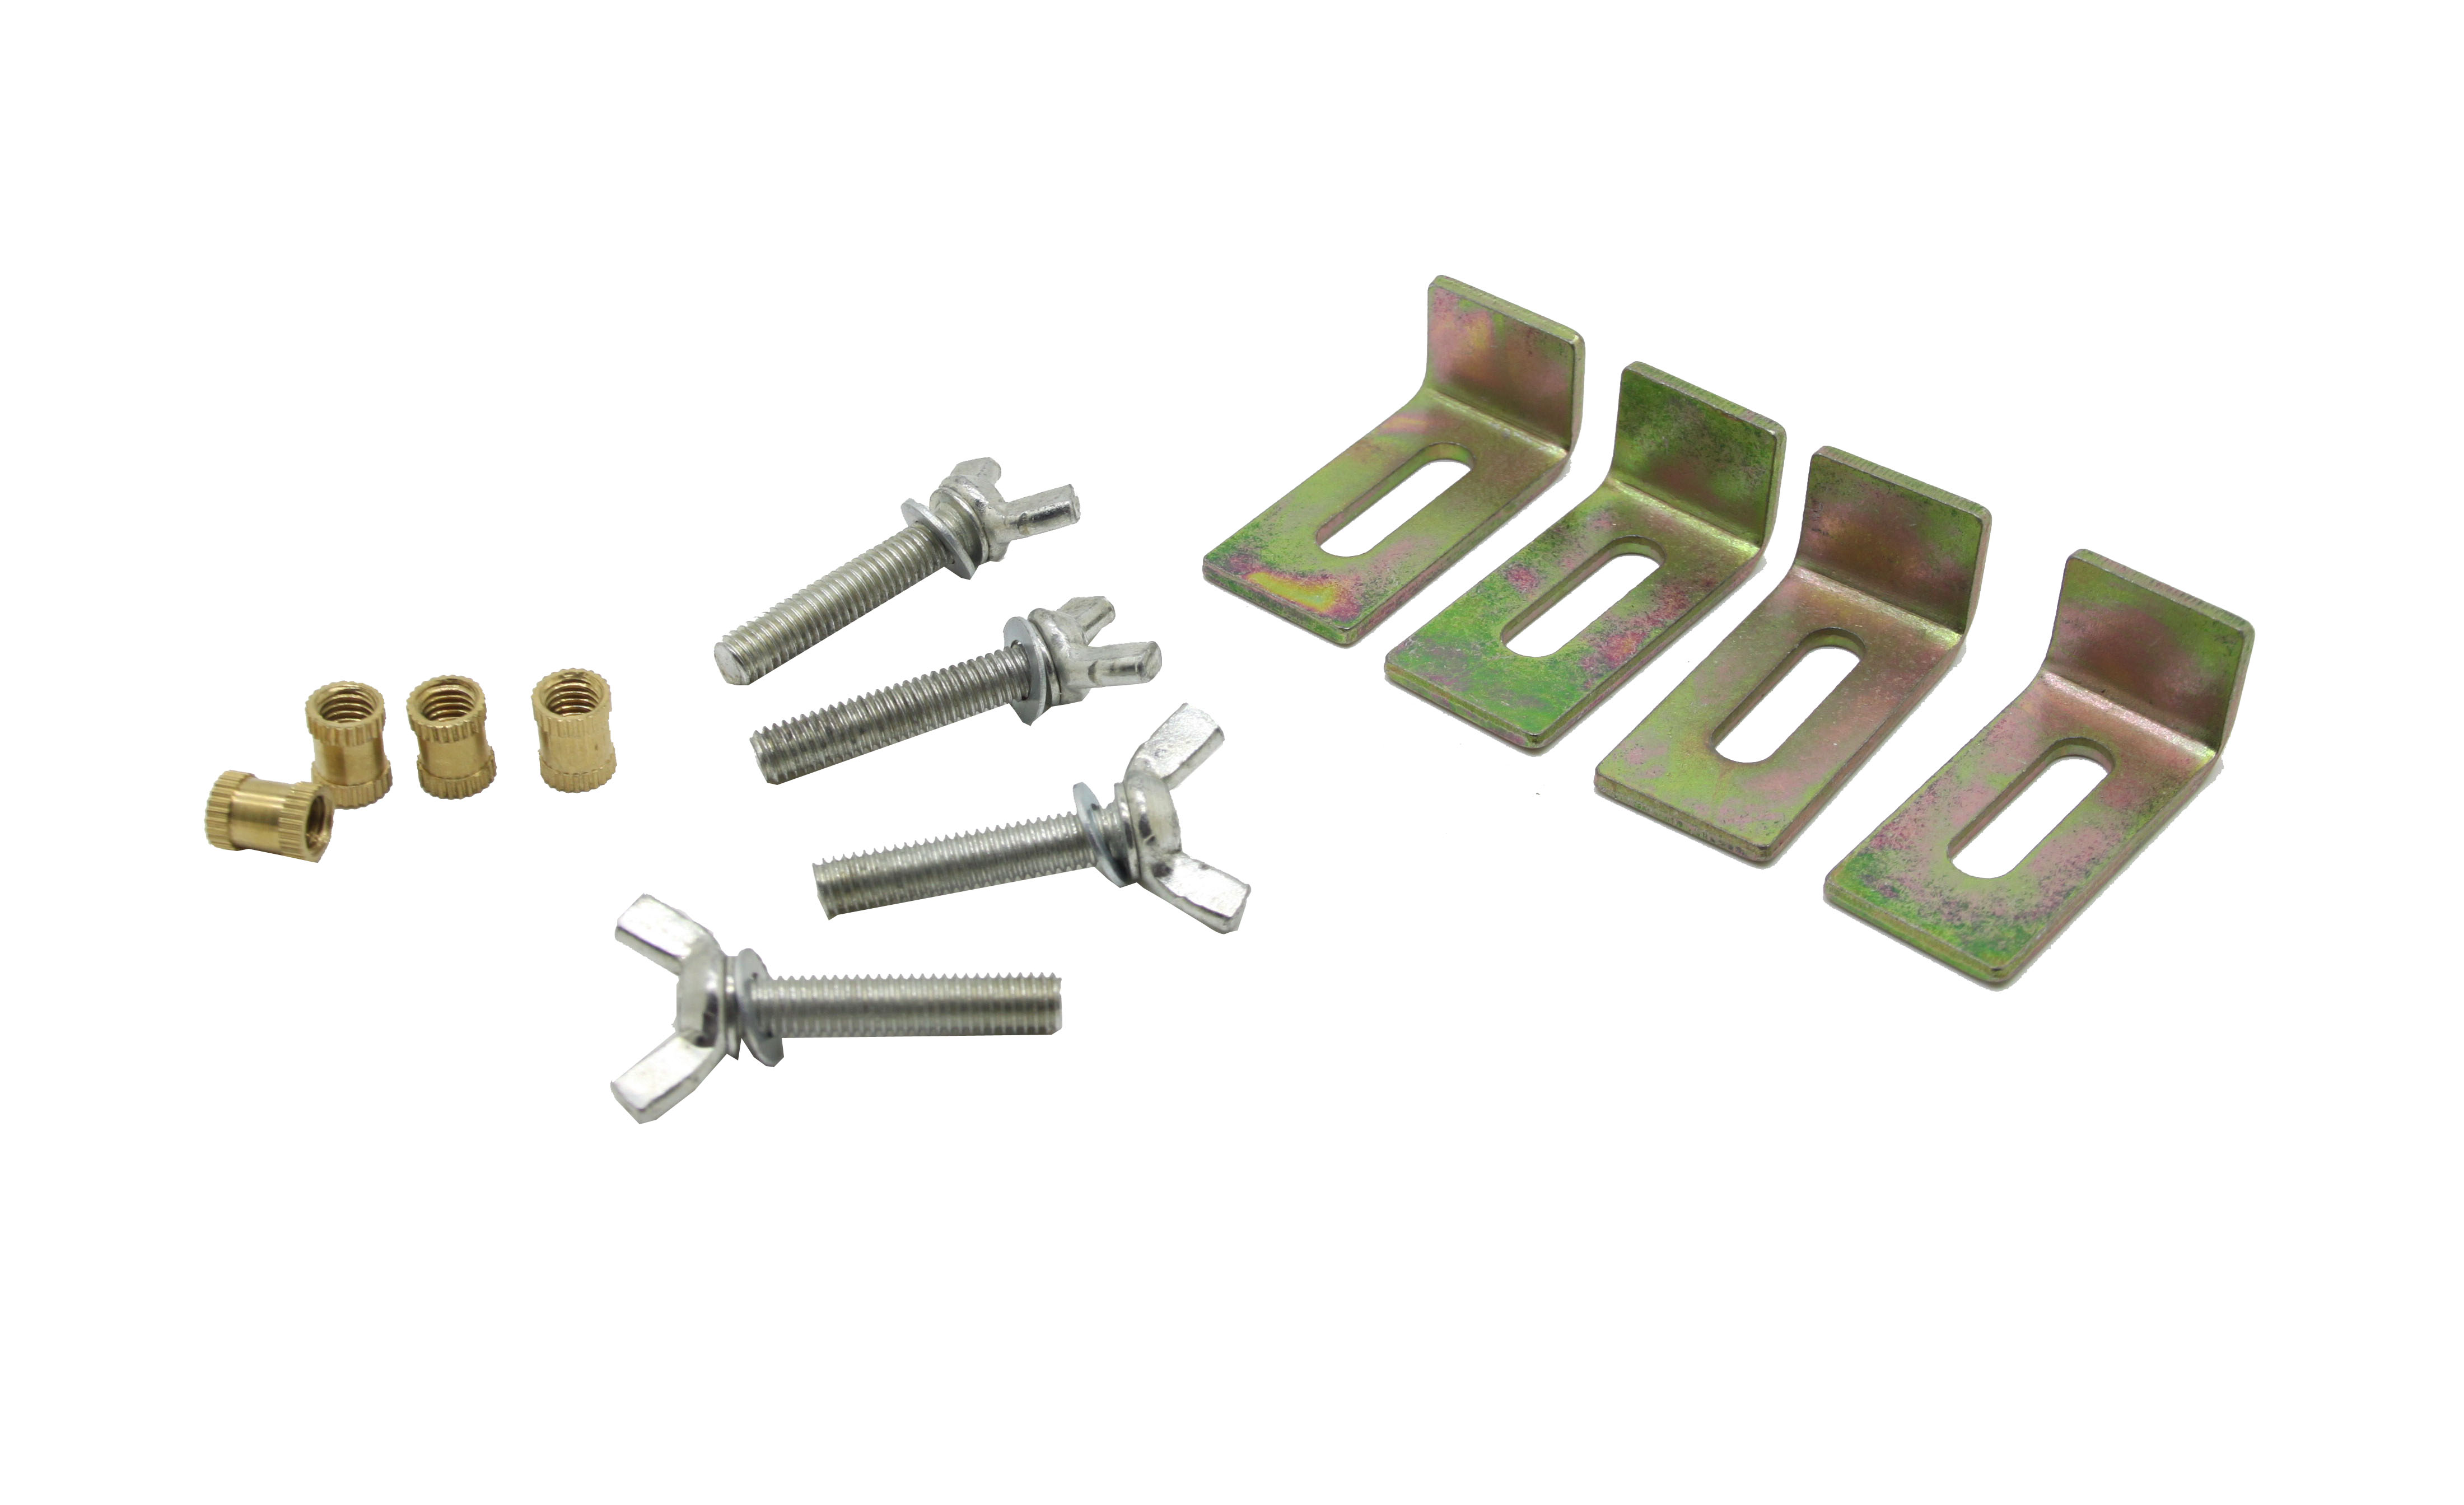
Kitchen Sink Clips
are typically used to secure the sink to the countertop, preventing it from shifting or falling. They are usually hidden underneath the sink, making them easily overlooked during the design process. However, these clips can be a hindrance when it comes to installing a new sink or making upgrades to your kitchen. This is why it is important to consider removing them.
Kitchen sinks are an essential part of any functional kitchen. They not only provide a place to wash dishes and prepare food, but they also add to the overall aesthetic of the space. However, when it comes to house design, it is important to pay attention to even the smallest details, such as the kitchen sink clips. These small metal brackets that hold the sink in place may seem insignificant, but their removal can greatly impact the overall look and functionality of your kitchen.
Kitchen Sink Clips
are typically used to secure the sink to the countertop, preventing it from shifting or falling. They are usually hidden underneath the sink, making them easily overlooked during the design process. However, these clips can be a hindrance when it comes to installing a new sink or making upgrades to your kitchen. This is why it is important to consider removing them.
The Benefits of Removing Kitchen Sink Clips
 One of the main benefits of removing
kitchen sink clips
is the ability to install a new sink without any restrictions. With the clips out of the way, you have more freedom to choose the type of sink and faucet you want without having to worry about compatibility with the clips. This opens up a whole new range of design options for your kitchen.
Moreover, the removal of
kitchen sink clips
also allows for easier maintenance and cleaning of the sink. With the clips gone, there are no obstructions when it comes to wiping down the sink or reaching underneath for any necessary repairs. This can save you time and effort in the long run.
One of the main benefits of removing
kitchen sink clips
is the ability to install a new sink without any restrictions. With the clips out of the way, you have more freedom to choose the type of sink and faucet you want without having to worry about compatibility with the clips. This opens up a whole new range of design options for your kitchen.
Moreover, the removal of
kitchen sink clips
also allows for easier maintenance and cleaning of the sink. With the clips gone, there are no obstructions when it comes to wiping down the sink or reaching underneath for any necessary repairs. This can save you time and effort in the long run.
Proper Removal of Kitchen Sink Clips
 It is important to note that removing
kitchen sink clips
should be done carefully to avoid any damage to the sink or countertop. It is recommended to seek professional help to ensure proper removal and installation of the sink. Additionally, it is important to have a plan in place for how the sink will be supported without the clips. This can be achieved through the use of additional support brackets or adhesive mounting tape.
In conclusion, removing
kitchen sink clips
may seem like a small and insignificant task in house design, but it can make a big impact on the overall look and functionality of your kitchen. With the freedom to choose any sink and easier maintenance, it is definitely worth considering when designing or upgrading your kitchen.
It is important to note that removing
kitchen sink clips
should be done carefully to avoid any damage to the sink or countertop. It is recommended to seek professional help to ensure proper removal and installation of the sink. Additionally, it is important to have a plan in place for how the sink will be supported without the clips. This can be achieved through the use of additional support brackets or adhesive mounting tape.
In conclusion, removing
kitchen sink clips
may seem like a small and insignificant task in house design, but it can make a big impact on the overall look and functionality of your kitchen. With the freedom to choose any sink and easier maintenance, it is definitely worth considering when designing or upgrading your kitchen.