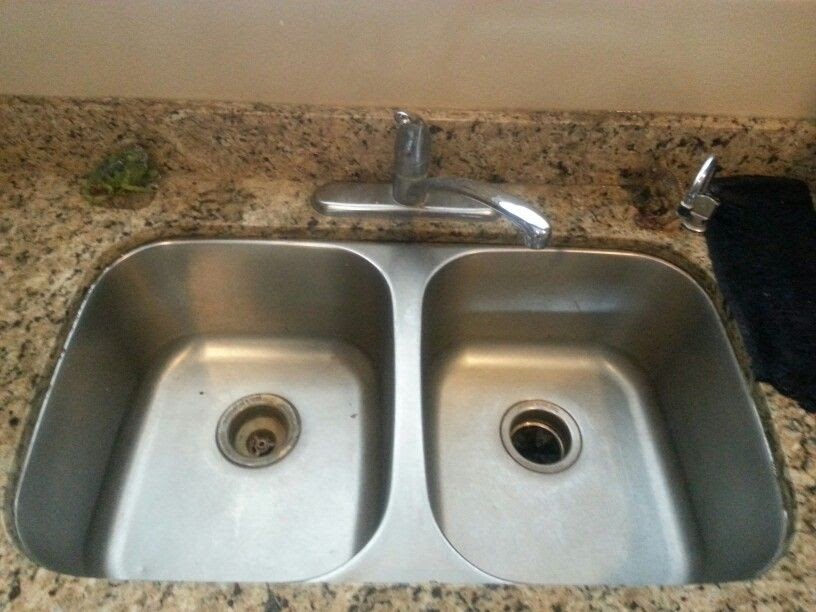
Is your kitchen sink looking a bit old and worn out? Are you noticing black stains or mold around the edges? It may be time to remove the old caulk and give your sink a fresh new look. Removing caulk from a kitchen sink may seem like a daunting task, but with the right tools and techniques, you can do it yourself and save some money. In this article, we will guide you through the best methods for removing caulk from a kitchen sink.How to Remove Caulk from a Kitchen Sink


How to Remove Caulk from a Kitchen Sink


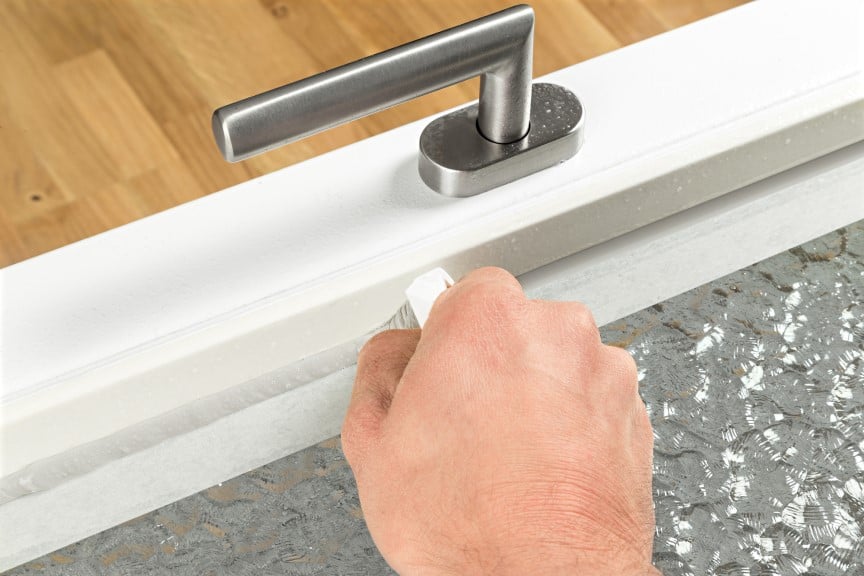
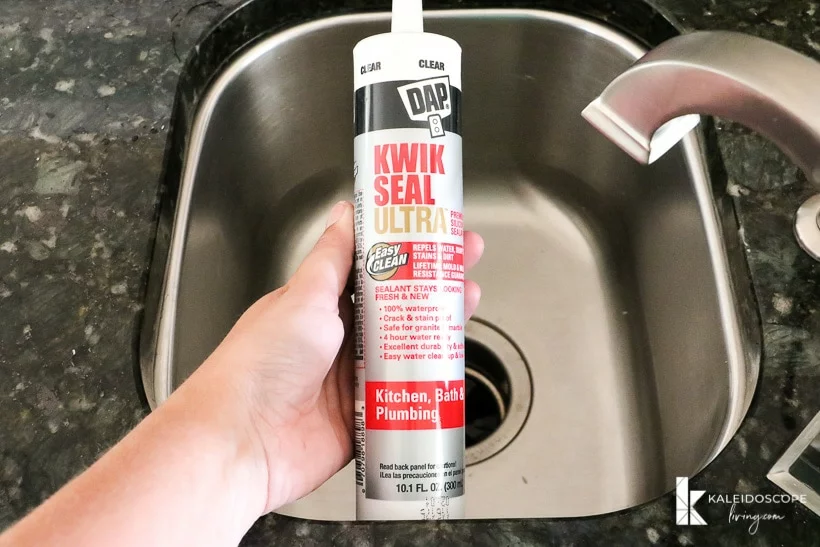
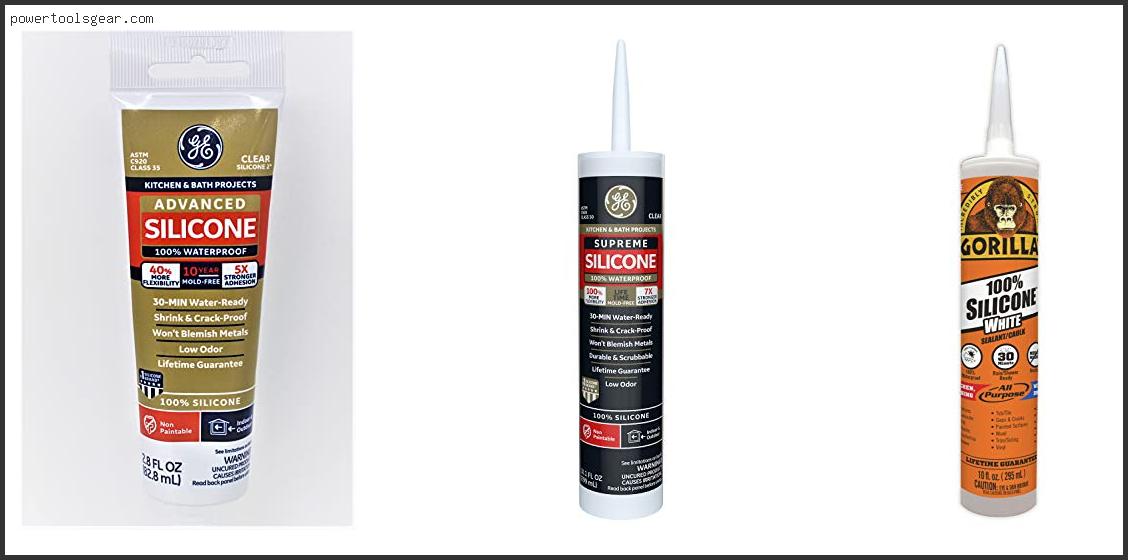
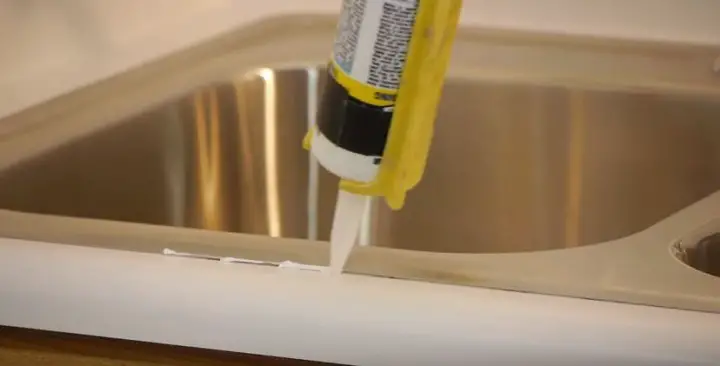
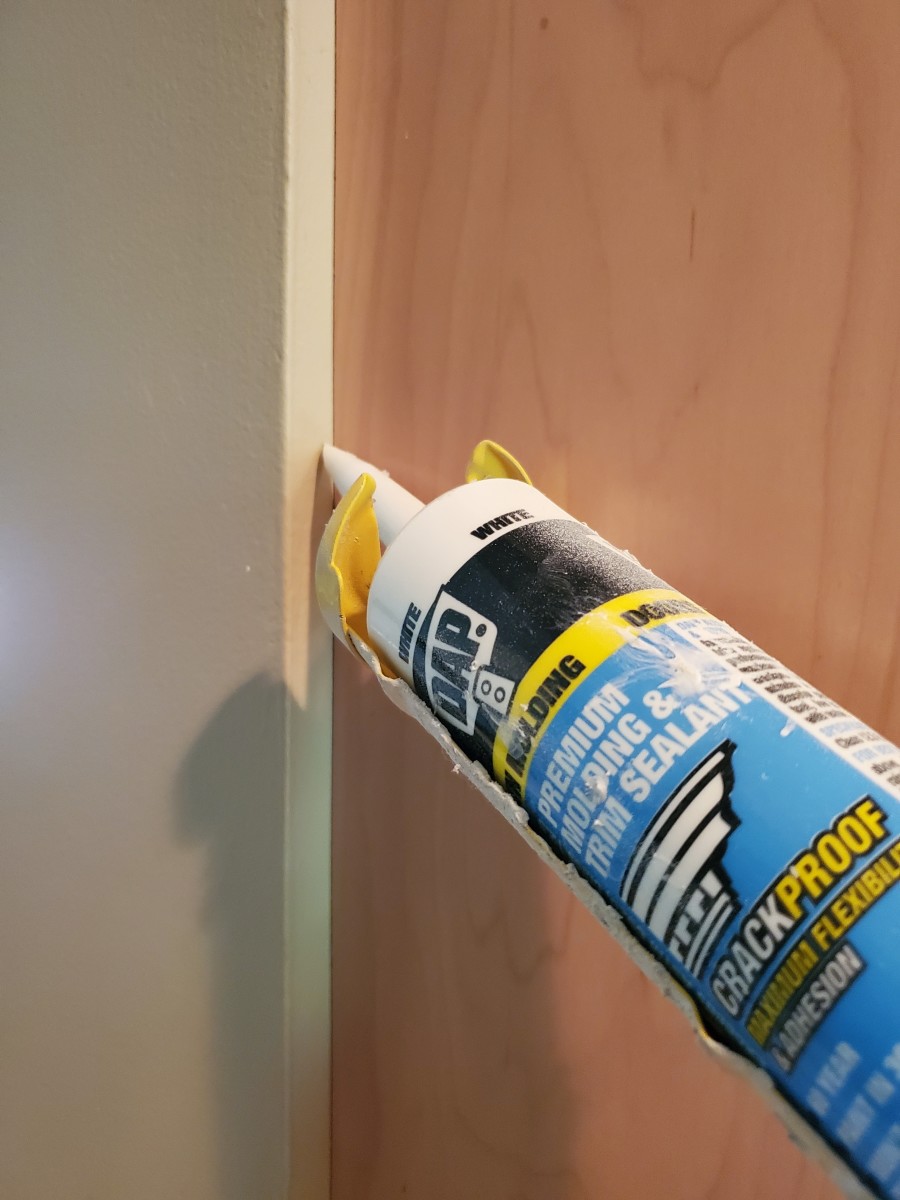
Before you start removing the caulk, make sure to gather all the necessary tools. You will need a caulk remover, a utility knife or scraper, a caulk gun, and a cleaning solution. Once you have everything ready, follow these simple steps to remove the caulk from your kitchen sink: Step 1: Use the caulk remover to soften the caulk. Apply the remover along the edges of the caulk and leave it for the recommended time (usually 15-30 minutes). This will help loosen the caulk and make it easier to remove. Step 2: Using a utility knife or scraper, gently scrape off the softened caulk. Be careful not to scratch the sink surface. Use a steady hand and work in small sections at a time. Step 3: Once the caulk is removed, use a caulk gun to apply a new layer of caulk. Make sure to use a caulk that is specifically designed for kitchen and bathroom use and is mold and mildew resistant. Step 4: Smooth out the new caulk with a caulk tool or your finger. This will give it a clean and professional finish. Step 5: Let the caulk dry for the recommended time before using the sink. Removing Caulk from a Kitchen Sink: A Step-by-Step Guide


Removing Caulk from a Kitchen Sink: A Step-by-Step Guide


There are a few different methods for removing caulk from a kitchen sink. Some people prefer using a caulk remover while others opt for more natural solutions like vinegar or baking soda. Here are some of the best methods for removing caulk from a kitchen sink: Using a caulk remover: This is the most common and effective method for removing caulk. The caulk remover softens the caulk, making it easier to scrape off. Using vinegar: Soak a cloth in vinegar and place it over the caulk for a few hours. The acid in the vinegar helps dissolve the caulk, making it easier to remove. Using baking soda: Make a paste with baking soda and water and apply it to the caulk. Let it sit for a few hours before scraping it off.Best Methods for Removing Caulk from a Kitchen Sink


Best Methods for Removing Caulk from a Kitchen Sink


Removing caulk from a kitchen sink is a DIY project that anyone can do. You don't need to hire a professional or spend a lot of money on specialized tools. With the right techniques and a little bit of patience, you can remove the old caulk and give your kitchen sink a fresh new look. Tip: Before starting the caulk removal process, make sure to protect the surrounding area with a drop cloth or plastic sheet. This will prevent any damage or stains to your countertops or cabinets.DIY: Removing Caulk from a Kitchen Sink


DIY: Removing Caulk from a Kitchen Sink


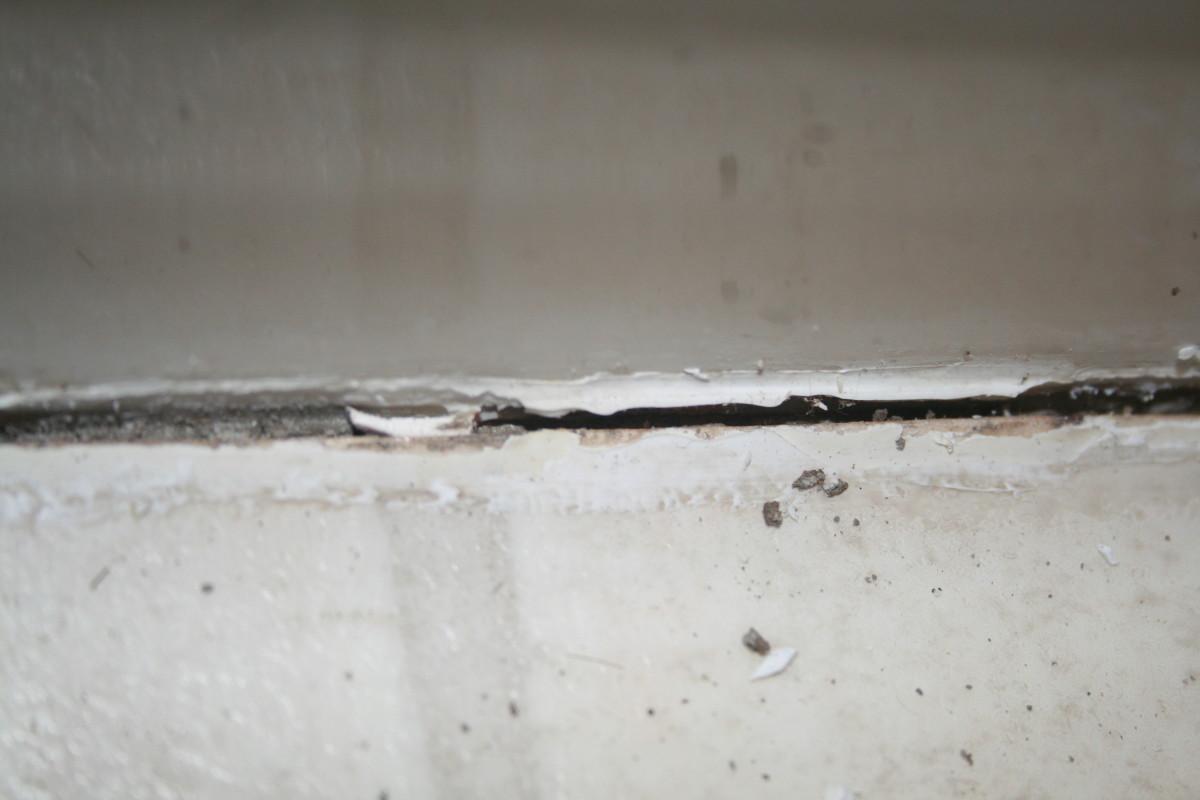
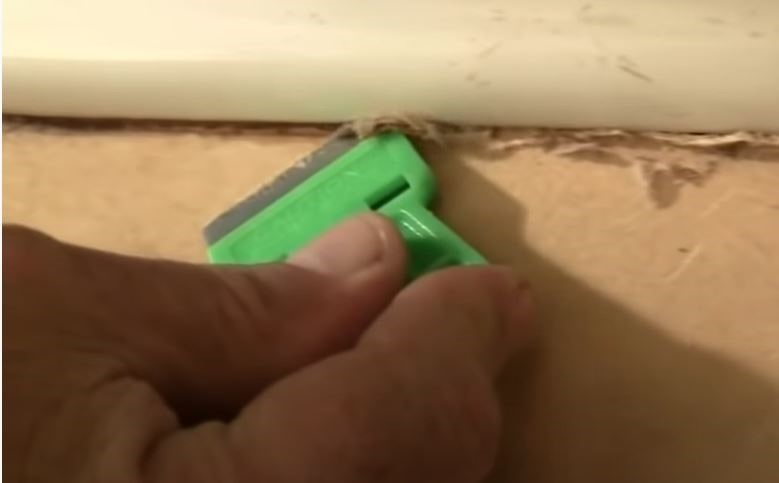
Removing caulk from a kitchen sink can be a messy and time-consuming process. To make things easier, here are some tips and tricks to keep in mind: Tip 1: Use a caulk remover with a pointed nozzle to get into tight corners and edges. Tip 2: For stubborn caulk, use a heat gun to soften it before scraping it off. Be careful not to damage the sink surface with the heat. Tip 3: If the caulk is still difficult to remove, try using a razor blade or putty knife to carefully scrape it off. Tip 4: After removing the old caulk, make sure to thoroughly clean the area with a cleaning solution. This will remove any leftover residue and ensure a clean surface for the new caulk to adhere to.Removing Old Caulk from a Kitchen Sink: Tips and Tricks


Removing Old Caulk from a Kitchen Sink: Tips and Tricks
:max_bytes(150000):strip_icc()/how-to-remove-old-caulk-1824827-01-3d0370c59e124dbbaa6560c68bab111c.jpg)


Every kitchen sink is different, and some caulk may be more stubborn to remove than others. If you're having trouble getting rid of the old caulk, here are some effective ways to help you out: Method 1: Apply a mixture of vinegar and baking soda to the caulk and let it sit for a few hours before scraping it off. Method 2: Use a caulk removal tool or a utility knife to carefully cut along the edges of the caulk before scraping it off. This will help loosen the caulk and make it easier to remove. Method 3: If the caulk is still difficult to remove, try using a caulk removal gel. This gel is specially designed to dissolve and remove old caulk without damaging the sink surface. Effective Ways to Remove Caulk from a Kitchen Sink


Effective Ways to Remove Caulk from a Kitchen Sink

When removing caulk from a kitchen sink, it's important to know what you're dealing with. Some caulk may contain harmful chemicals, so make sure to read the label and use proper safety precautions. If you're unsure, it's always best to consult a professional. Tip: When applying a new layer of caulk, make sure to use a caulk gun for a clean and even application. This will ensure a professional-looking finish.Removing Caulk from a Kitchen Sink: What You Need to Know
Removing Caulk from a Kitchen Sink: What You Need to Know

To summarize, here is a step-by-step guide for removing caulk from a kitchen sink: Step 1: Gather all necessary tools and materials. Step 2: Apply a caulk remover and let it sit for the recommended time. Step 3: Gently scrape off the softened caulk with a utility knife or scraper. Step 4: Apply a new layer of caulk using a caulk gun. Step 5: Smooth out the caulk and let it dry.Step-by-Step Guide for Removing Caulk from a Kitchen Sink


Step-by-Step Guide for Removing Caulk from a Kitchen Sink

With the right tools and techniques, you can remove caulk from a kitchen sink like a pro. Make sure to follow the steps and tips mentioned in this article for a successful and professional-looking result. Tip: If you're unsure about any steps or are having trouble removing the caulk, don't hesitate to seek help from a professional. It's better to be safe than sorry.How to Remove Caulk from a Kitchen Sink Like a Pro

How to Remove Caulk from a Kitchen Sink Like a Pro
:max_bytes(150000):strip_icc()/caulk-removal-tool-56ec7f1b3df78ce5f83535fe.jpg)
When removing caulk from a kitchen sink, there are a few common mistakes that people tend to make. Here are some things to avoid: Mistake 1: Using a sharp tool to scrape off the caulk, which can damage the sink surface. Mistake 2: Not properly cleaning the area before applying a new layer of caulk, which can affect the adhesion and durability of the new caulk. Mistake 3: Using a caulk that is not specifically designed for kitchen and bathroom use, which can lead to mold and mildew growth. Now that you know how to remove caulk from a kitchen sink, it's time to give your sink a fresh new look. Follow these tips and steps, and you'll have a clean and professionally caulked kitchen sink in no time.Removing Caulk from a Kitchen Sink: Common Mistakes to Avoid


Removing Caulk from a Kitchen Sink: Common Mistakes to Avoid


Importance of Removing Caulk from Your Kitchen Sink

Why Remove Caulk from Your Kitchen Sink?
 Caulk is a sealant used to fill gaps and cracks in various surfaces, including kitchen sinks. While it serves as an effective barrier against water and moisture, caulk can also accumulate dirt, grime, and mold over time. This not only makes your kitchen sink look unsightly but also creates a breeding ground for bacteria and other harmful pathogens. Therefore, it is important to regularly remove caulk from your kitchen sink to maintain a clean and hygienic environment in your home.
The Benefits of Removing Caulk
:max_bytes(150000):strip_icc()/how-to-remove-old-caulk-1824827-01-3d0370c59e124dbbaa6560c68bab111c.jpg) Removing caulk from your kitchen sink has several benefits that go beyond just aesthetics. By getting rid of the old, dirty caulk, you can prevent the growth of mold and mildew, which can cause health issues such as allergies and respiratory problems. It also helps to maintain the structural integrity of your sink by preventing water from seeping into the cracks and causing damage. Additionally, removing caulk can improve the overall cleanliness and appearance of your kitchen, making it a more pleasant and inviting space for cooking and entertaining.
Removing caulk from your kitchen sink has several benefits that go beyond just aesthetics. By getting rid of the old, dirty caulk, you can prevent the growth of mold and mildew, which can cause health issues such as allergies and respiratory problems. It also helps to maintain the structural integrity of your sink by preventing water from seeping into the cracks and causing damage. Additionally, removing caulk can improve the overall cleanliness and appearance of your kitchen, making it a more pleasant and inviting space for cooking and entertaining.
Step-by-Step Guide to Remove Caulk from Your Kitchen Sink
 Removing caulk from your kitchen sink may seem like a daunting task, but with the right tools and technique, it can be a relatively simple process. Here are the steps to follow:
1. Gather Your Supplies: You will need a caulk remover tool, a utility knife, a scraper, rubbing alcohol, and a clean cloth.
2. Soften the Caulk: Use the caulk remover tool to soften the caulk by running it along the caulk line.
3. Cut and Scrape the Caulk: Use a utility knife to cut along the softened caulk and then use a scraper to remove the caulk from the surface of the sink.
4. Clean the Area: Use rubbing alcohol and a clean cloth to wipe away any remaining caulk residue and to disinfect the area.
5. Let it Dry: Allow the area to dry completely before applying any new caulk.
Removing caulk from your kitchen sink may seem like a daunting task, but with the right tools and technique, it can be a relatively simple process. Here are the steps to follow:
1. Gather Your Supplies: You will need a caulk remover tool, a utility knife, a scraper, rubbing alcohol, and a clean cloth.
2. Soften the Caulk: Use the caulk remover tool to soften the caulk by running it along the caulk line.
3. Cut and Scrape the Caulk: Use a utility knife to cut along the softened caulk and then use a scraper to remove the caulk from the surface of the sink.
4. Clean the Area: Use rubbing alcohol and a clean cloth to wipe away any remaining caulk residue and to disinfect the area.
5. Let it Dry: Allow the area to dry completely before applying any new caulk.
When to Seek Professional Help
 While removing caulk from your kitchen sink can be a DIY project, there are certain situations where it may be best to seek professional help. This includes when the caulk is difficult to remove, the sink is damaged, or if you are not comfortable doing the job yourself. In these cases, it is best to hire a professional to ensure the job is done correctly and to avoid any potential damage to your sink or surrounding areas.
In conclusion, removing caulk from your kitchen sink is an important aspect of maintaining a clean and hygienic home. By following the steps outlined above, you can easily remove old, dirty caulk and improve the overall appearance and functionality of your kitchen sink. Remember to regularly check and remove any buildup of caulk to prevent potential health hazards and keep your kitchen looking its best.
While removing caulk from your kitchen sink can be a DIY project, there are certain situations where it may be best to seek professional help. This includes when the caulk is difficult to remove, the sink is damaged, or if you are not comfortable doing the job yourself. In these cases, it is best to hire a professional to ensure the job is done correctly and to avoid any potential damage to your sink or surrounding areas.
In conclusion, removing caulk from your kitchen sink is an important aspect of maintaining a clean and hygienic home. By following the steps outlined above, you can easily remove old, dirty caulk and improve the overall appearance and functionality of your kitchen sink. Remember to regularly check and remove any buildup of caulk to prevent potential health hazards and keep your kitchen looking its best.