Removing the bottom of a kitchen sink may seem like a daunting task, but with the right tools and techniques, it can be a simple and straightforward process. Whether you're replacing an old sink or just need to clean out the drain, removing the bottom of your kitchen sink is an important step in maintaining a clean and functional kitchen.1. How to Remove the Bottom of a Kitchen Sink


1. How to Remove the Bottom of a Kitchen Sink


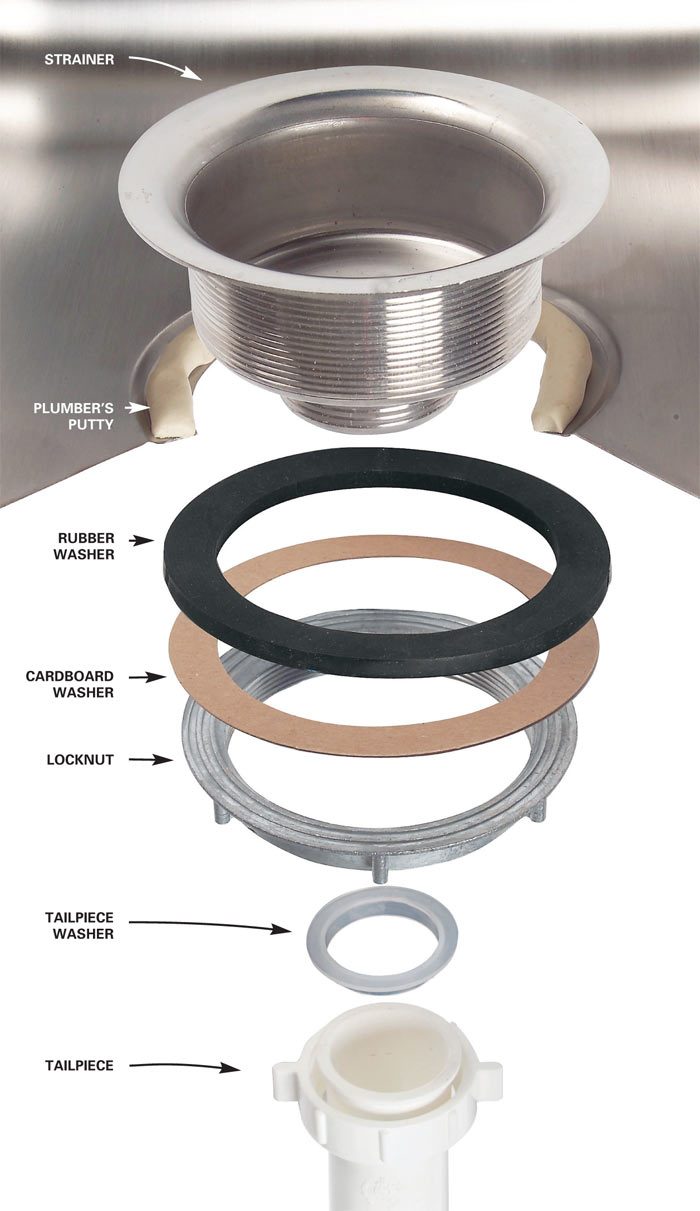
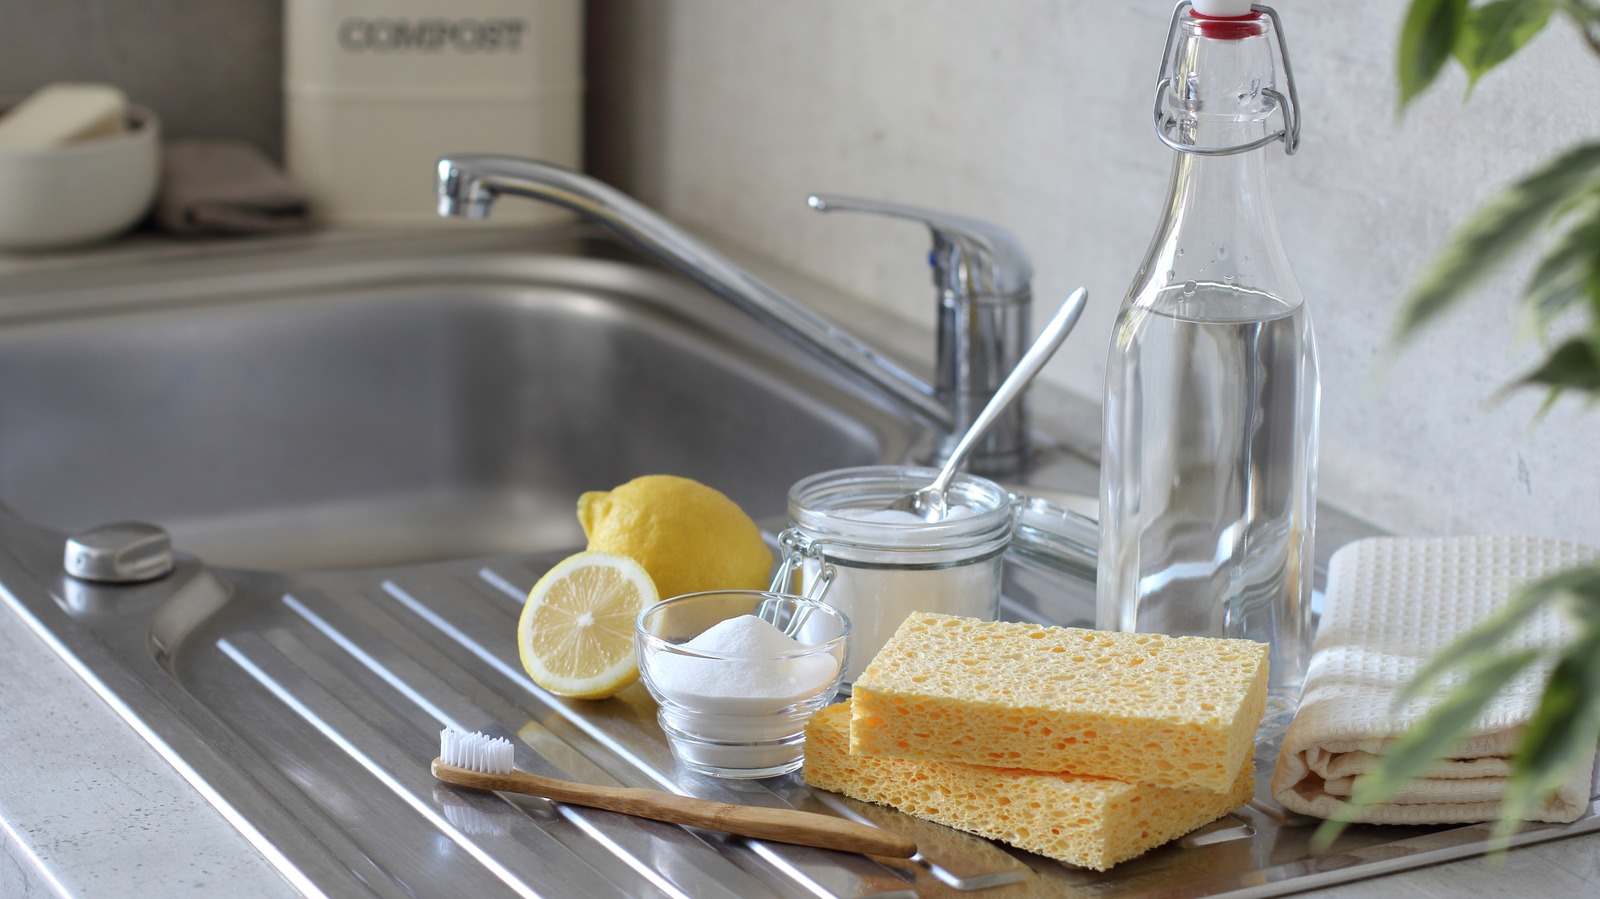
Before you get started, make sure you have all the necessary tools and materials. You'll need a pair of pliers, an adjustable wrench, a screwdriver, and a bucket or container to catch any water or debris that may come out of the sink. It's also a good idea to have some rags or towels on hand to clean up any spills. Start by turning off the water supply to your sink. This can usually be done by shutting off the valves under the sink or turning off the main water supply to your home. Next, use the pliers to loosen and remove the nuts or screws that hold the drain and strainer in place. Once these are removed, you should be able to lift the strainer and drain out of the sink. If your sink has a disposal unit, you'll need to disconnect it from the drain and remove it before proceeding. This may require a special tool or key that came with the disposal unit. Once the disposal is removed, you can continue with the rest of the process.2. Step-by-Step Guide to Removing the Bottom of a Kitchen Sink


2. Step-by-Step Guide to Removing the Bottom of a Kitchen Sink


One of the most important things to keep in mind when removing the bottom of a kitchen sink is to work slowly and carefully. If the sink is old or has been in use for a long time, the components may be rusted or corroded, making them difficult to remove. In this case, it's a good idea to use a penetrating oil, such as WD-40, to loosen the connections before attempting to remove them. Another tip is to have a helper on hand to hold the sink in place while you work. This will prevent it from moving around and causing any damage to the plumbing or surrounding fixtures.3. Removing the Bottom of a Kitchen Sink: Tips and Tricks


3. Removing the Bottom of a Kitchen Sink: Tips and Tricks


/how-to-install-a-sink-drain-2718789-hero-24e898006ed94c9593a2a268b57989a3.jpg)
If you're feeling handy and want to save some money, you can remove the bottom of your kitchen sink yourself. However, it's important to note that this task may not be suitable for everyone. If you're not comfortable working with plumbing or don't have the necessary tools, it's best to hire a professional. If you do decide to go the DIY route, make sure to follow all safety precautions and consult online tutorials or guides for additional tips and tricks.4. DIY: Removing the Bottom of a Kitchen Sink


4. DIY: Removing the Bottom of a Kitchen Sink


The best way to remove the bottom of a kitchen sink will depend on the type of sink and plumbing you have. In general, it's a good idea to consult the manufacturer's instructions or online tutorials for specific guidance on your particular sink model. One common method is to use a drain removal tool, which can be purchased at most hardware stores. This tool is designed to grip onto the strainer and provide leverage for easy removal. Another option is to use a hammer and chisel to gently tap and loosen the components.5. The Best Way to Remove the Bottom of a Kitchen Sink

5. The Best Way to Remove the Bottom of a Kitchen Sink


One of the most common mistakes people make when removing the bottom of a kitchen sink is using too much force. This can cause damage to the sink or plumbing and make the task more difficult. Instead, use gentle and controlled movements to loosen and remove the components. It's also important to make sure you have all the necessary tools and materials before getting started. Trying to improvise or use the wrong tools can lead to frustration and potential damage.6. Removing the Bottom of a Kitchen Sink: Common Mistakes to Avoid


6. Removing the Bottom of a Kitchen Sink: Common Mistakes to Avoid


Safety should always be a top priority when working on any home improvement project, and removing the bottom of a kitchen sink is no exception. Make sure to wear protective gear, such as gloves and safety glasses, to prevent any accidents or injuries. It's also a good idea to shut off the power to the disposal unit, if applicable, to avoid any electrical hazards. If you encounter any difficulties or are unsure about how to proceed, don't hesitate to call a professional for assistance.7. How to Safely Remove the Bottom of a Kitchen Sink


7. How to Safely Remove the Bottom of a Kitchen Sink


As mentioned earlier, you'll need a few basic tools to remove the bottom of a kitchen sink. These include pliers, an adjustable wrench, a screwdriver, and a bucket or container. Depending on your sink and plumbing, you may also need a drain removal tool, a hammer and chisel, or a disposal unit key. Make sure to gather all the necessary tools before starting the process.8. Tools You'll Need to Remove the Bottom of a Kitchen Sink


8. Tools You'll Need to Remove the Bottom of a Kitchen Sink


If you're a visual learner, you may find it helpful to watch a step-by-step video tutorial on how to remove the bottom of a kitchen sink. There are many resources available online, including YouTube, that provide detailed instructions and demonstrations. This can be especially useful if you're attempting the task for the first time.9. Removing the Bottom of a Kitchen Sink: A Step-by-Step Video Tutorial


9. Removing the Bottom of a Kitchen Sink: A Step-by-Step Video Tutorial


In some cases, you may encounter challenges or difficulties when trying to remove the bottom of your kitchen sink. If this happens, don't panic. There are a few troubleshooting steps you can take before calling a professional plumber. First, make sure you're using the right tools and techniques for your specific sink and plumbing. If you're still having trouble, try using a penetrating oil or applying heat to loosen any stuck components. If all else fails, it's best to seek the help of a professional to avoid causing any damage. Removing the bottom of a kitchen sink may not be the most glamorous task, but it's an important part of maintaining a clean and functional kitchen. With the right tools, techniques, and a little patience, you can easily remove the bottom of your kitchen sink and tackle any necessary repairs or maintenance.10. Troubleshooting: What to Do if You Can't Remove the Bottom of a Kitchen Sink


10. Troubleshooting: What to Do if You Can't Remove the Bottom of a Kitchen Sink


Why Removing the Bottom from Your Kitchen Sink Can Transform Your Home Design

The Importance of a Functional Kitchen Sink
 A kitchen sink is one of the most essential fixtures in any household. It is where we wash our dishes, prepare food, and even fill up our water glasses. However, the design and functionality of a kitchen sink often go overlooked. Many homeowners settle for a basic and standard sink, not realizing the potential it has to elevate their kitchen's overall design.
Why Removing the Bottom from Your Kitchen Sink is a Game-Changer
 If you're looking to upgrade your kitchen's design, one simple yet effective way to do so is by removing the bottom from your kitchen sink. This may seem like a minor change, but it can make a world of difference in terms of both functionality and aesthetics.
Improved Accessibility
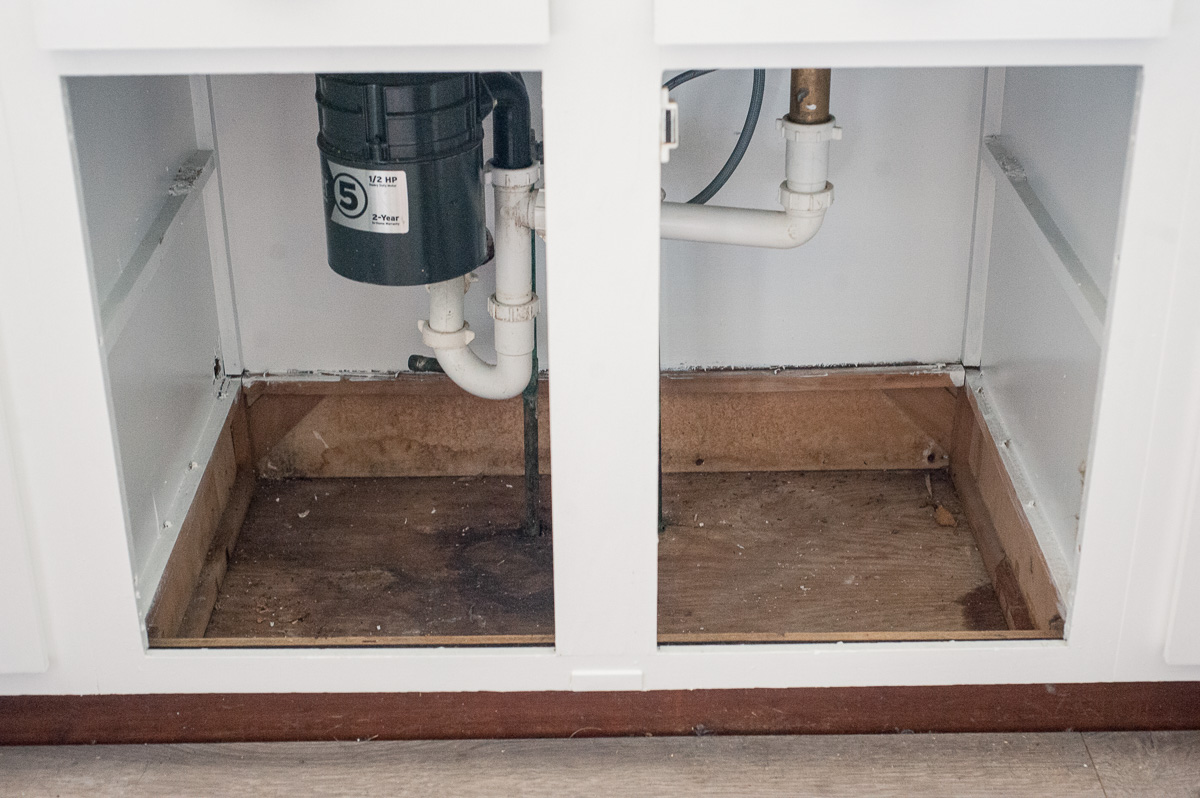
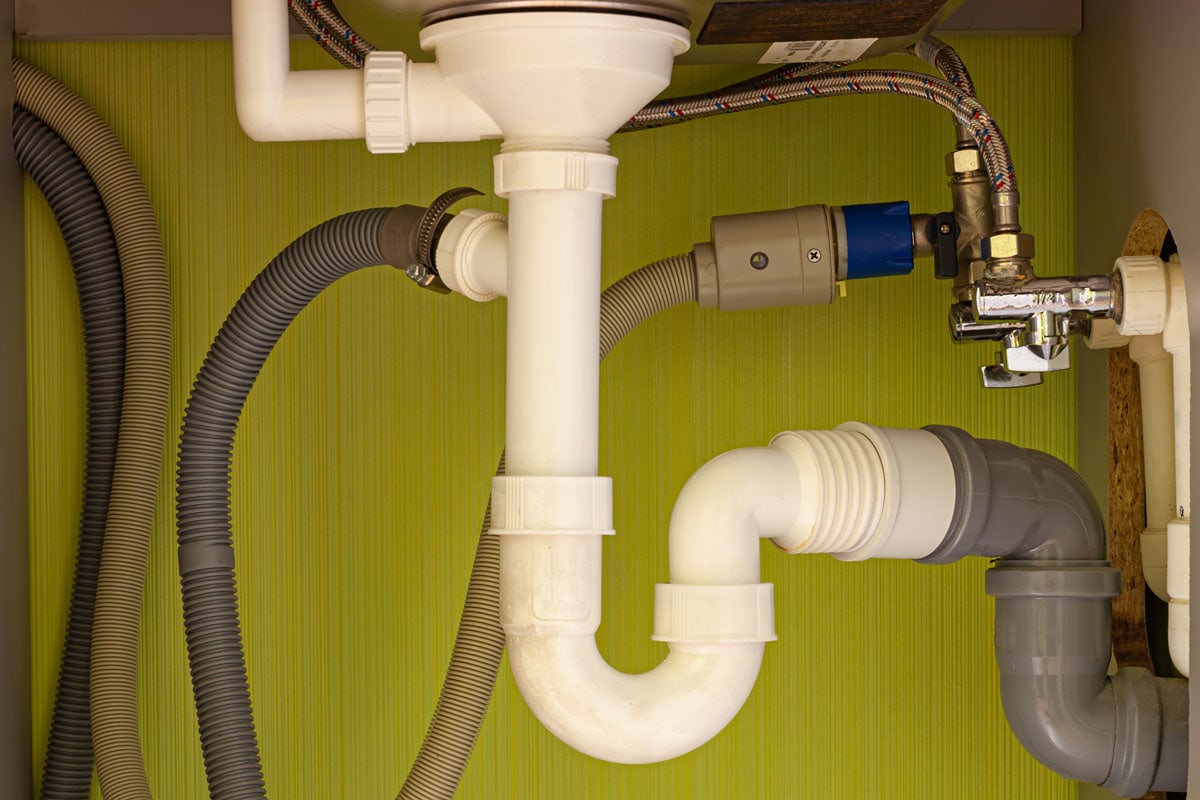
By removing the bottom from your kitchen sink, you are essentially creating an open space underneath the sink. This makes it easier to access your plumbing for any necessary repairs or maintenance. You no longer have to remove the bottom cabinet or crawl under the sink to reach the pipes. This simple change can save you time and hassle in the long run.
Maximized Storage Space
Without the bottom of the sink taking up space, you now have more room for storage underneath. You can install shelves or drawers to store cleaning supplies, dish towels, or even pots and pans. This not only declutters your kitchen but also adds functionality to the space.
Enhanced Visual Appeal
Removing the bottom from your kitchen sink creates a sleek and modern look. The open space gives the illusion of a larger kitchen, making it feel more spacious and inviting. This design also allows for more natural light to flow through, brightening up the space.
If you're looking to upgrade your kitchen's design, one simple yet effective way to do so is by removing the bottom from your kitchen sink. This may seem like a minor change, but it can make a world of difference in terms of both functionality and aesthetics.
Improved Accessibility
By removing the bottom from your kitchen sink, you are essentially creating an open space underneath the sink. This makes it easier to access your plumbing for any necessary repairs or maintenance. You no longer have to remove the bottom cabinet or crawl under the sink to reach the pipes. This simple change can save you time and hassle in the long run.
Maximized Storage Space
Without the bottom of the sink taking up space, you now have more room for storage underneath. You can install shelves or drawers to store cleaning supplies, dish towels, or even pots and pans. This not only declutters your kitchen but also adds functionality to the space.
Enhanced Visual Appeal
Removing the bottom from your kitchen sink creates a sleek and modern look. The open space gives the illusion of a larger kitchen, making it feel more spacious and inviting. This design also allows for more natural light to flow through, brightening up the space.
Final Thoughts
 In conclusion, removing the bottom from your kitchen sink may seem like a small and insignificant change, but it can have a significant impact on your home's design. Not only does it improve accessibility and storage space, but it also adds a modern and visually appealing touch to your kitchen. Consider this simple yet effective upgrade to transform the overall look and feel of your kitchen.


/harry-potter-bedroom-58a6b8c43df78c345b206779.jpg)