Removing a bathroom sink may seem like a daunting task, but with the right tools and preparation, it can be a simple and straightforward process. Whether you're upgrading your bathroom or dealing with a broken sink, knowing how to properly remove it is a valuable skill to have. In this guide, we'll take you through the step-by-step process of removing a bathroom sink on your own.How to Remove a Bathroom Sink


How to Remove a Bathroom Sink


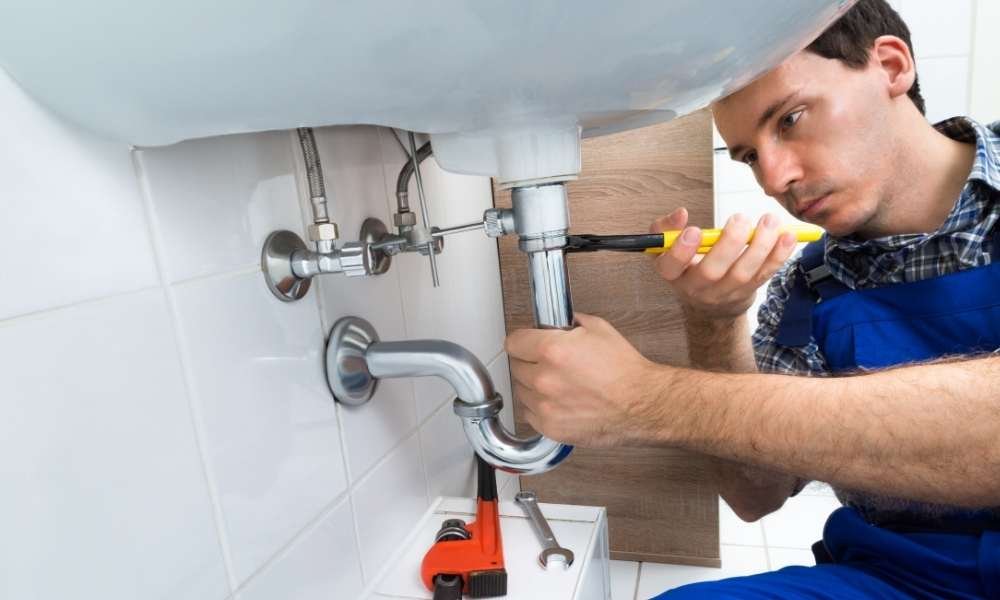
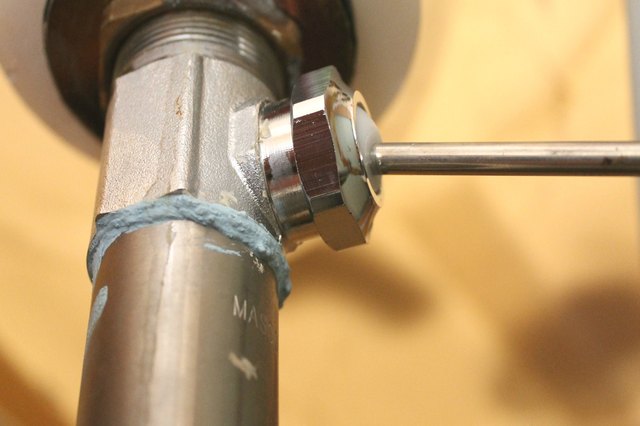
Before you begin, gather all the necessary tools and materials. You will need a wrench, pliers, a bucket, and a putty knife. Turn off the water supply to the sink and place a towel or bucket underneath the pipes to catch any excess water. Once you have everything you need, follow these steps: Step 1: Remove the Drain Using pliers, loosen the nut connecting the drain pipe to the bottom of the sink. Then, use a wrench to remove the nut and pull out the drain pipe. Be sure to have a bucket or towel handy to catch any water that may spill out. Step 2: Disconnect the Water Supply Lines Using a wrench, disconnect the water supply lines from the bottom of the sink. Make sure to place a bucket or towel underneath to catch any water that may come out. Step 3: Remove the Sink Clips or Mounting Brackets If your sink is secured with clips or brackets, use a screwdriver to remove them. These are usually located underneath the sink and hold the sink in place against the wall. Step 4: Loosen the Caulk Using a putty knife, gently loosen the caulk around the edges of the sink. This will help to free the sink from the countertop and make it easier to remove. Step 5: Carefully Lift and Remove the Sink With the caulk loosened, carefully lift the sink from the countertop. Be sure to have a friend or family member assist you, as sinks can be heavy and awkward to handle on your own. Place the sink on a towel or blanket to prevent any damage.Removing a Bathroom Sink: A Step-by-Step Guide


Removing a Bathroom Sink: A Step-by-Step Guide


Removing a bathroom sink can be a DIY project for those who are comfortable with basic plumbing tasks. However, if you are unsure of your abilities or if your sink is particularly complex, it may be best to hire a professional plumber to ensure the job is done correctly. If you do choose to tackle this project on your own, be sure to follow all safety precautions and consult online tutorials or professional resources for guidance.DIY: Removing a Bathroom Sink


DIY: Removing a Bathroom Sink


When removing a bathroom sink, there are a few tips and tricks that can make the process easier and more efficient: Tip 1: Use a towel or blanket to protect the sink from any scratches or damage during removal. Tip 2: Have a friend or family member assist you in lifting and removing the sink to prevent any injuries. Tip 3: Use a putty knife to gently loosen the caulk around the edges of the sink for easier removal. Tip 4: Keep a bucket or towel handy to catch any water that may spill out during the removal process.Removing a Bathroom Sink: Tips and Tricks


Removing a Bathroom Sink: Tips and Tricks


When removing a bathroom sink, there are a few common mistakes that can lead to complications or injuries. Avoid these mistakes to ensure a smooth and safe removal process: Mistake 1: Forgetting to turn off the water supply before removing the sink. Mistake 2: Attempting to remove the sink on your own without the assistance of a friend or family member. Mistake 3: Not disconnecting the water supply lines before attempting to remove the sink. Mistake 4: Using excessive force and causing damage to the sink or countertop.Removing a Bathroom Sink: Common Mistakes to Avoid

Removing a Bathroom Sink: Common Mistakes to Avoid


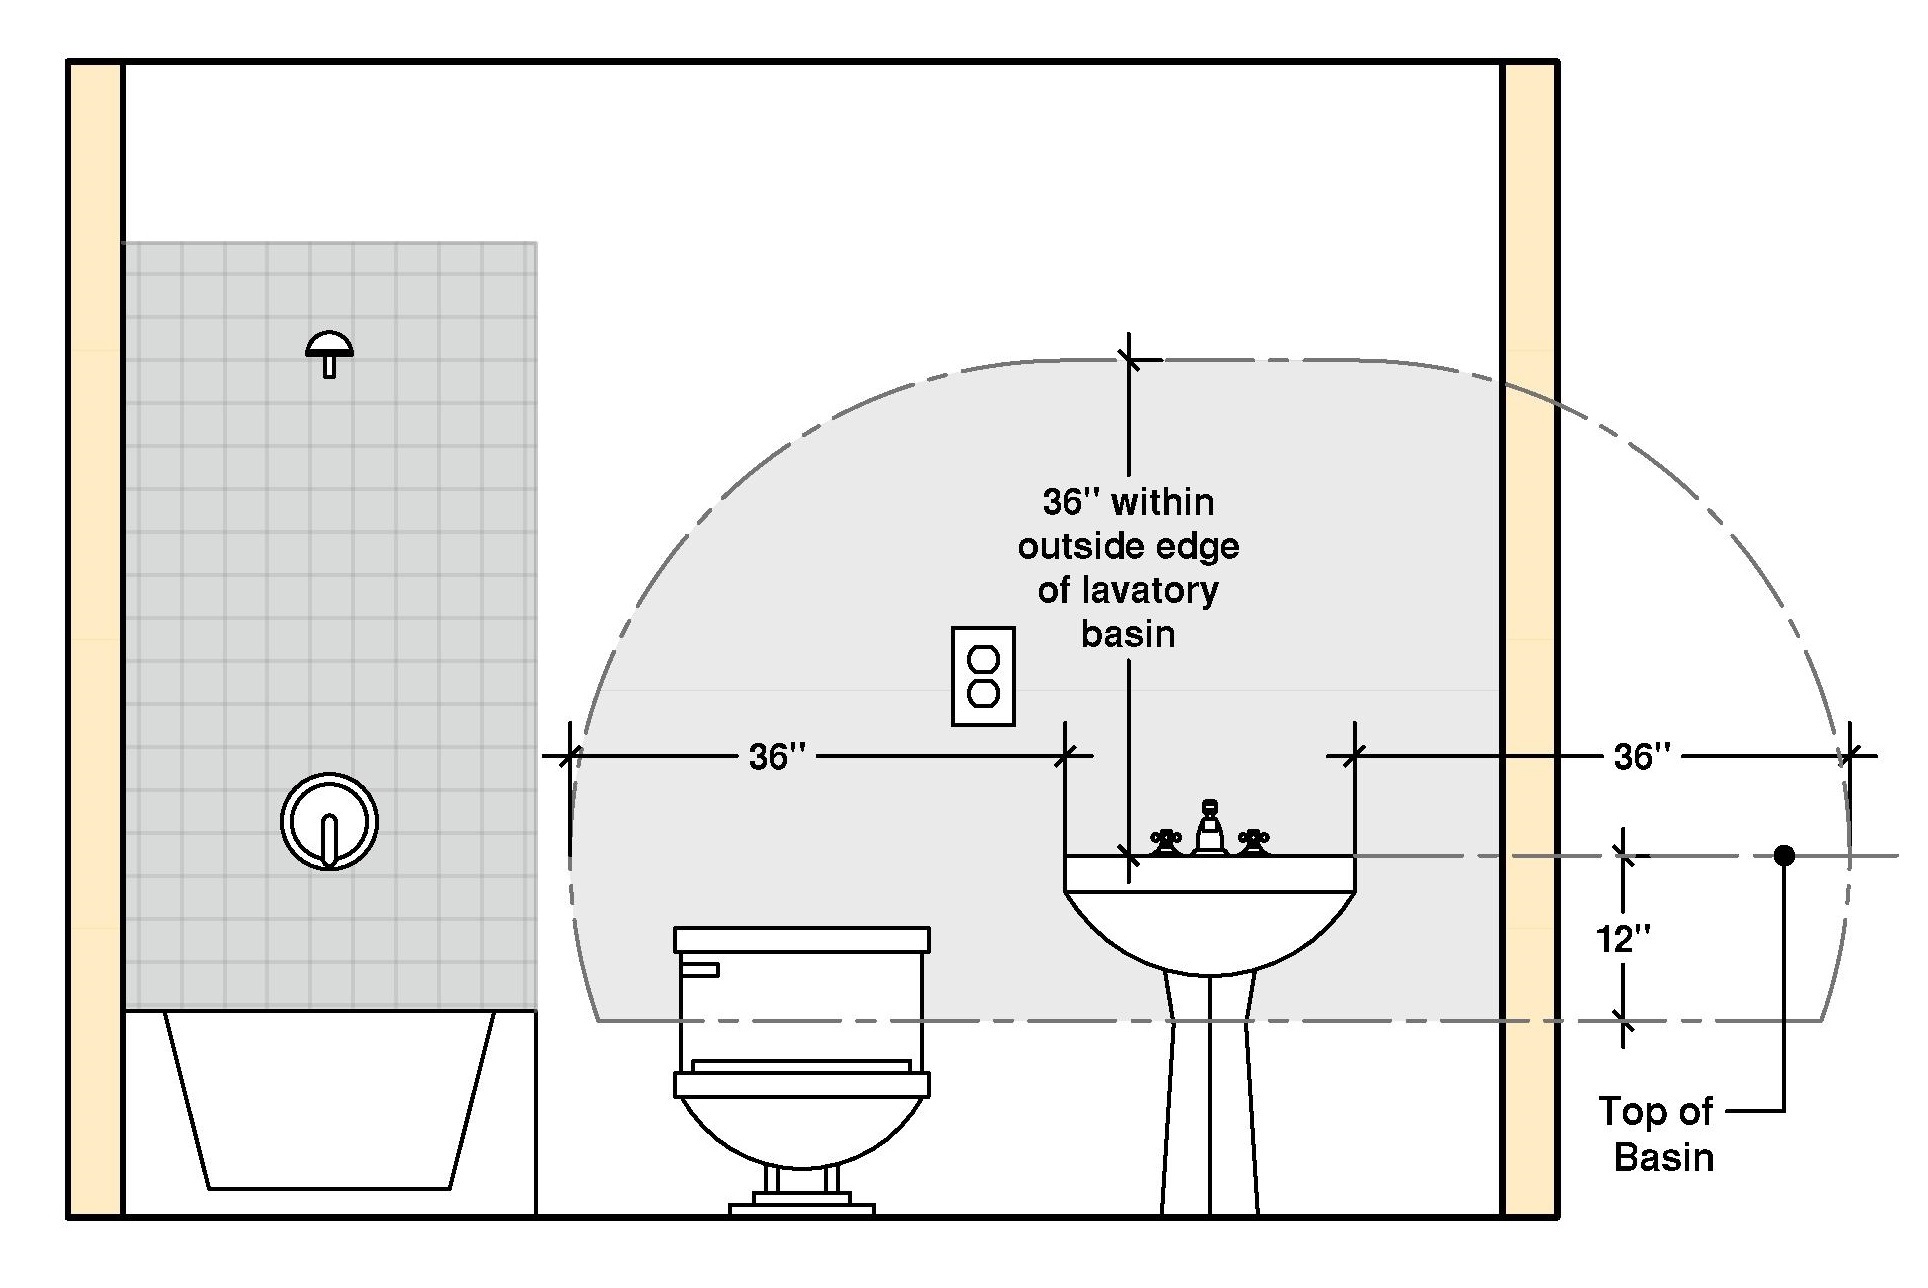
Before you begin removing a bathroom sink, make sure you have all the necessary tools and materials. These may include: Wrench Pliers Screwdriver Bucket or towel Putty knifeRemoving a Bathroom Sink: Tools You'll Need


Removing a Bathroom Sink: Tools You'll Need


When removing a bathroom sink, it's important to take proper safety precautions to avoid any injuries or accidents. These may include: Safety Precaution 1: Turning off the water supply before beginning the removal process. Safety Precaution 2: Wearing protective gloves and eyewear to prevent any cuts or injuries. Safety Precaution 3: Having a friend or family member assist you in lifting and removing the sink.Removing a Bathroom Sink: Safety Precautions

Removing a Bathroom Sink: Safety Precautions
If you encounter any issues during the removal process, here are some troubleshooting tips: Issue 1: The sink is stuck to the countertop. Solution: Use a putty knife to gently loosen the caulk around the edges of the sink. Issue 2: The water supply lines are difficult to disconnect. Solution: Use pliers or a wrench to loosen the connections. If they are still stuck, use a lubricant to make it easier to disconnect them. Issue 3: The sink clips or mounting brackets are difficult to remove. Solution: Use a screwdriver to carefully remove them. If they are still stuck, use a lubricant to make it easier to remove them.Removing a Bathroom Sink: Troubleshooting Common Issues


Removing a Bathroom Sink: Troubleshooting Common Issues

When it comes to removing a bathroom sink, you may be wondering whether it's better to hire a professional or tackle the project on your own. Here are some things to consider when making your decision: Professional: Hiring a professional plumber can ensure that the job is done correctly and efficiently. They also have the necessary tools and experience to handle any unexpected issues that may arise. DIY: Removing a bathroom sink can be a DIY project for those who are comfortable with basic plumbing tasks. It can also save you money on hiring a professional.Removing a Bathroom Sink: Professional vs. DIY


Removing a Bathroom Sink: Professional vs. DIY

After successfully removing the sink, be sure to clean up any mess and properly dispose of the old sink. You may also need to patch or repair any damage to the countertop caused by the removal process. If you plan on installing a new sink, now is the time to do so. Removing a bathroom sink may seem like a daunting task, but with the right tools and knowledge, it can be a simple and rewarding DIY project. Remember to follow all safety precautions and consult professional resources if needed. Happy removing!Removing a Bathroom Sink: Final Steps and Clean-Up

Removing a Bathroom Sink: Final Steps and Clean-Up
Why You Should Consider Removing a Bathroom Sink for Your House Design

The Importance of a Well-Designed Bathroom
 When it comes to designing a house, the bathroom is often an overlooked space. However, a well-designed bathroom can greatly enhance the overall aesthetic and functionality of a house. One simple way to achieve this is by removing a bathroom sink. This may seem like an unnecessary step, but it can actually have a significant impact on the design and layout of your bathroom.
Creating More Space
 One of the main reasons to remove a bathroom sink is to create more space. In smaller bathrooms, every inch counts, and a bulky sink can take up valuable room. By opting for a wall-mounted or pedestal sink, you can free up space and make the bathroom feel more open and spacious. This is especially beneficial for guest bathrooms or powder rooms, where a smaller sink can still serve its purpose without taking up too much space.
Related keyword:
small bathroom design
One of the main reasons to remove a bathroom sink is to create more space. In smaller bathrooms, every inch counts, and a bulky sink can take up valuable room. By opting for a wall-mounted or pedestal sink, you can free up space and make the bathroom feel more open and spacious. This is especially beneficial for guest bathrooms or powder rooms, where a smaller sink can still serve its purpose without taking up too much space.
Related keyword:
small bathroom design
Adding a Touch of Elegance
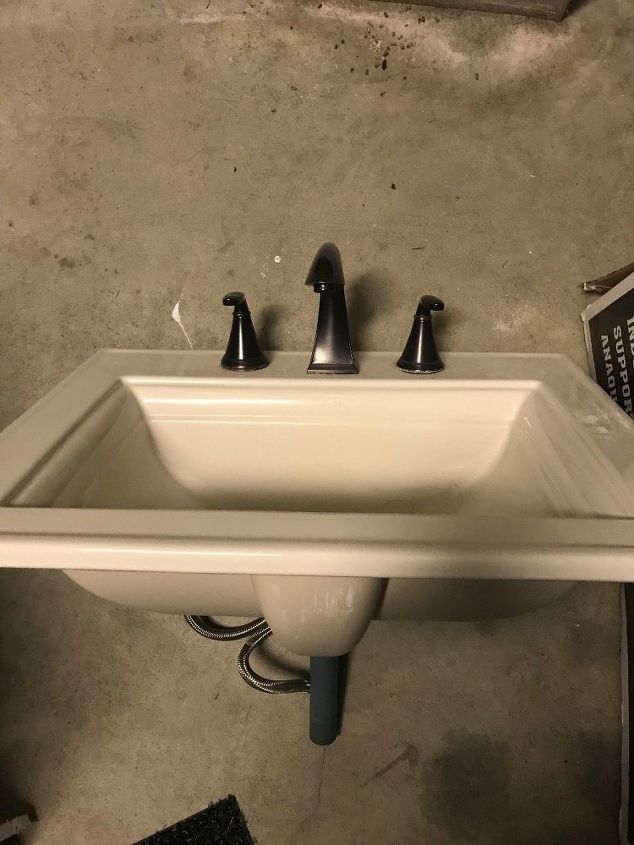
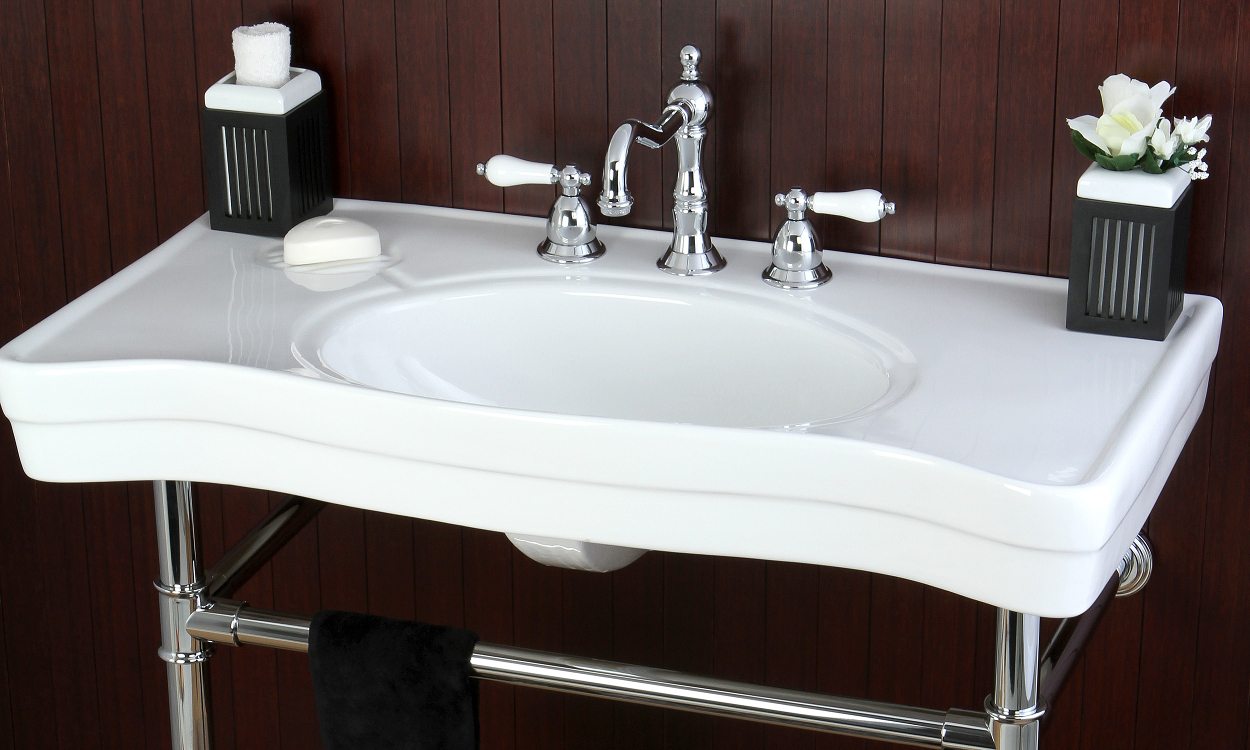
 Another reason to remove a bathroom sink is to add a touch of elegance to your bathroom design. A pedestal sink, with its classic and streamlined look, can elevate the style of a bathroom and make it feel more sophisticated. This is especially true for older homes with traditional or vintage design elements. By removing a dated or clunky sink and replacing it with a pedestal sink, you can instantly update the look and feel of your bathroom.
Featured keyword:
bathroom design
Another reason to remove a bathroom sink is to add a touch of elegance to your bathroom design. A pedestal sink, with its classic and streamlined look, can elevate the style of a bathroom and make it feel more sophisticated. This is especially true for older homes with traditional or vintage design elements. By removing a dated or clunky sink and replacing it with a pedestal sink, you can instantly update the look and feel of your bathroom.
Featured keyword:
bathroom design
Making Cleaning Easier
 Let's face it, cleaning a bathroom sink can be a hassle. With all the nooks and crannies around a traditional sink, it can be difficult to thoroughly clean and maintain. By removing a bathroom sink and opting for a simpler design, such as a wall-mounted sink, you can make cleaning a breeze. This not only saves you time and effort, but it also ensures that your bathroom stays hygienic and well-maintained.
Related keyword:
bathroom maintenance
Let's face it, cleaning a bathroom sink can be a hassle. With all the nooks and crannies around a traditional sink, it can be difficult to thoroughly clean and maintain. By removing a bathroom sink and opting for a simpler design, such as a wall-mounted sink, you can make cleaning a breeze. This not only saves you time and effort, but it also ensures that your bathroom stays hygienic and well-maintained.
Related keyword:
bathroom maintenance
Conclusion
 In conclusion, removing a bathroom sink may seem like a small and insignificant change, but it can have a big impact on your house design. It can create more space, add a touch of elegance, and make cleaning easier. So, if you're looking to upgrade your bathroom design, consider removing the sink and opting for a more modern and functional option. Your bathroom will thank you for it.