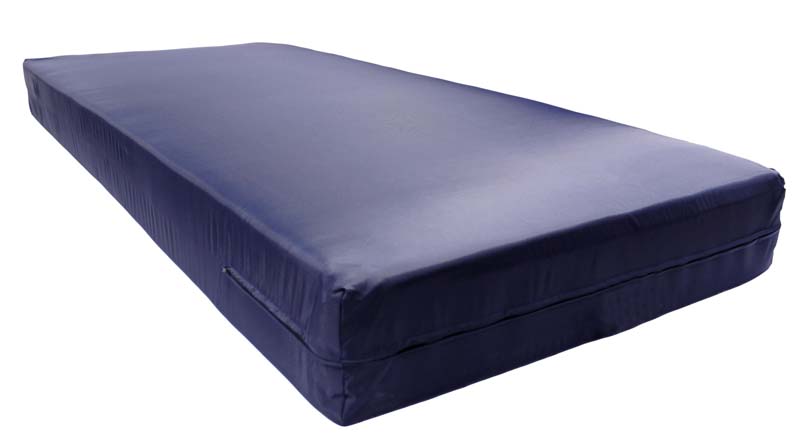
Vinyl air mattresses are a convenient and comfortable option for sleeping, whether you're camping or hosting guests. However, like any inflatable item, they are susceptible to tears and leaks. While it may seem daunting to patch a vinyl air mattress, it's actually a simple process that can save you money on purchasing a new one. In this article, we will discuss the top 10 steps for patching a vinyl air mattress to ensure a good night's sleep.How to Patch a Vinyl Air Mattress


How to Patch a Vinyl Air Mattress
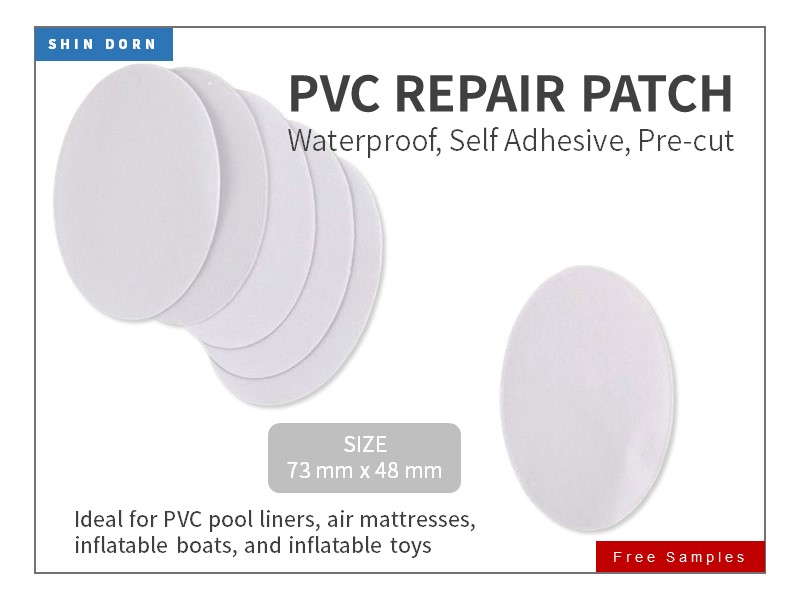


The best way to repair a vinyl air mattress is to use a patch specifically designed for vinyl materials. These patches are usually included in vinyl air mattress repair kits, which can be found at most outdoor and camping stores. The patches are made of strong adhesive and durable vinyl material, ensuring a long-lasting repair.Best Way to Repair a Vinyl Air Mattress


Best Way to Repair a Vinyl Air Mattress


:max_bytes(150000):strip_icc()/aerobed-opti-comfort-queen-air-mattress-with-headboard-93c9f99d65ee4cce88edf90b9411b1cd.jpg)

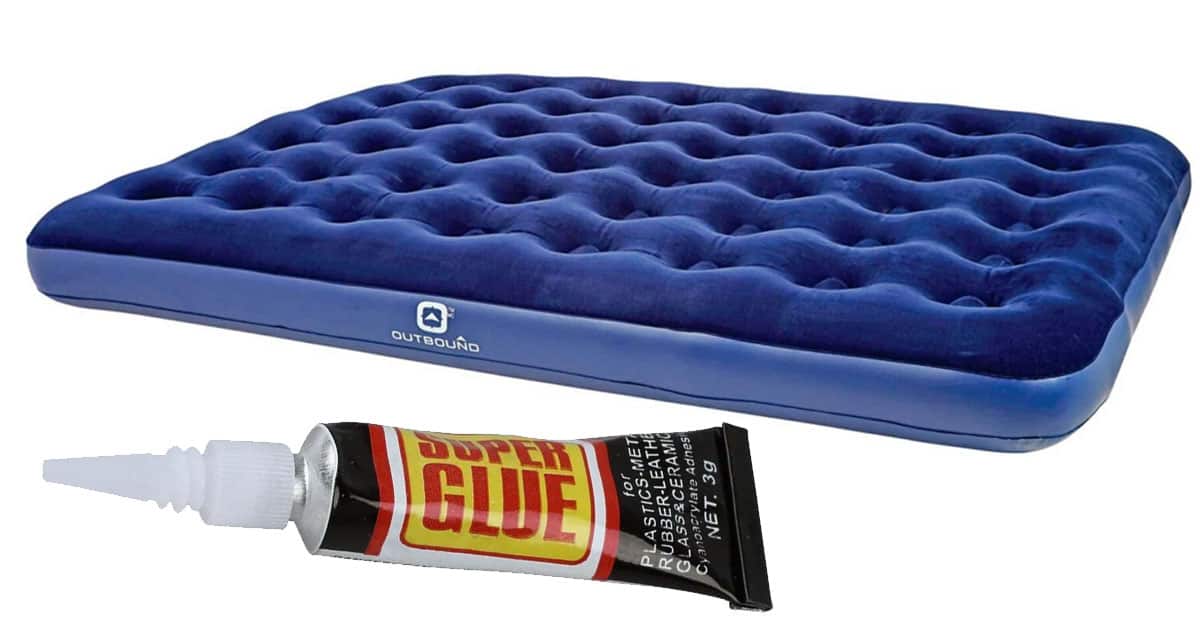
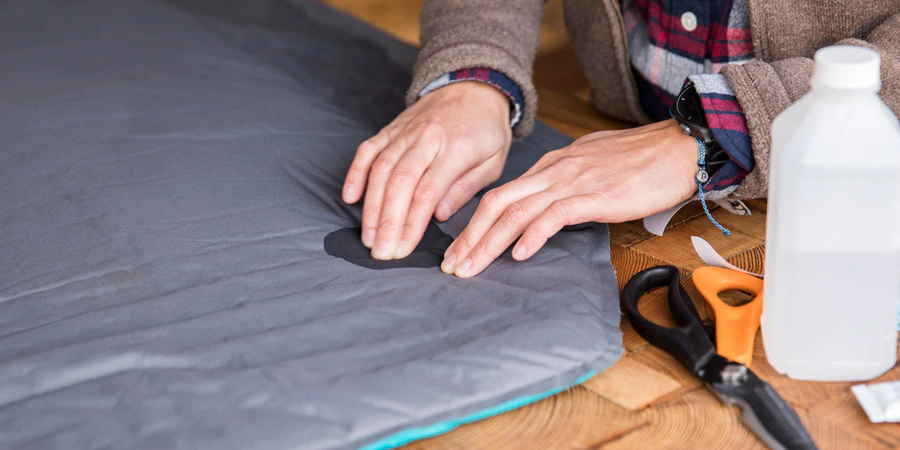
If you don't have access to a vinyl air mattress repair kit, you can also create a DIY patch using materials you may already have at home. One option is to use a piece of vinyl from an old shower curtain or pool float and cut it into a shape slightly larger than the tear or hole in your air mattress. Then, use a strong adhesive, such as waterproof glue, to attach the patch to the mattress. Make sure to apply pressure and let it dry completely before using the mattress again.DIY Vinyl Air Mattress Patch


DIY Vinyl Air Mattress Patch


When it comes to patching a vinyl air mattress, there are a few key steps to follow to ensure a successful repair. First, locate the leak by inflating the mattress and listening for any hissing or feeling for any escaping air. Once you've found the leak, deflate the mattress and clean the area around it with rubbing alcohol. This will help the patch adhere better. Then, follow the instructions on your patch kit or DIY patch to apply it to the leak. Finally, let the patch dry completely before reinflating the mattress.Steps for Fixing a Vinyl Air Mattress


Steps for Fixing a Vinyl Air Mattress


As mentioned earlier, a vinyl air mattress repair kit is a handy tool to have for any air mattress owner. These kits usually include vinyl patches, adhesive, and sometimes a vinyl repair sealant. They are compact and easy to pack for camping trips or keep on hand for quick fixes at home. Investing in a repair kit can save you time and money in the long run.Vinyl Air Mattress Repair Kit
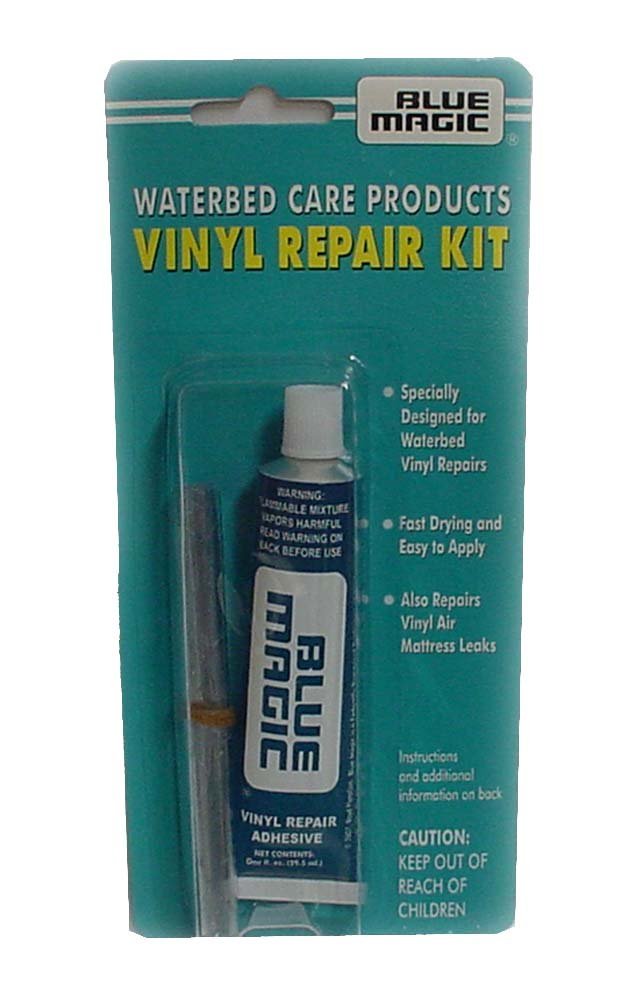

Vinyl Air Mattress Repair Kit

If you're in a pinch and need a quick fix for a leaking vinyl air mattress, there are a few temporary solutions you can try. One option is to use duct tape to cover the leak. While this may not be the most aesthetically pleasing solution, it can provide a temporary fix until you can properly patch the mattress. Another option is to use a vinyl repair sealant, which can be found in some vinyl air mattress repair kits or purchased separately.Quick Fixes for a Leaking Vinyl Air Mattress


Quick Fixes for a Leaking Vinyl Air Mattress


When patching a vinyl air mattress, there are a few things to keep in mind to ensure a successful repair. First, make sure to clean the area around the leak thoroughly with rubbing alcohol to ensure the patch adheres properly. Additionally, make sure to follow the instructions on the patch kit or DIY patch carefully, as different materials may require different application methods. Finally, always let the patch dry completely before using the mattress again.Tips for Patching a Vinyl Air Mattress


Tips for Patching a Vinyl Air Mattress


While vinyl air mattresses are a popular and convenient choice, they do have some common problems that may require patching. The most common issue is leaks, which can be caused by sharp objects, wear and tear, or manufacturing defects. Another issue is mold and mildew, which can occur if the mattress is not properly dried before being stored. To prevent these issues, make sure to properly inflate and deflate the mattress and store it in a dry place.Common Problems with Vinyl Air Mattresses


Common Problems with Vinyl Air Mattresses


If your vinyl air mattress is losing air but you're not sure where the leak is, there are a few methods you can use to find it. One option is to listen for any hissing sounds while the mattress is inflated. Another option is to use a mixture of water and dish soap and apply it to the mattress. The soap will create bubbles at the site of the leak, making it easier to locate.How to Find a Leak in a Vinyl Air Mattress


How to Find a Leak in a Vinyl Air Mattress


While patching a vinyl air mattress is a simple process, it's always best to prevent leaks from happening in the first place. To do this, make sure to properly inflate and deflate the mattress, avoid placing it on rough or sharp surfaces, and store it in a dry place. It's also a good idea to regularly check for leaks and address them as soon as possible to prevent them from getting worse.Preventing Future Leaks in a Vinyl Air Mattress

Preventing Future Leaks in a Vinyl Air Mattress


Patching Vinyl Air Mattress: A Guide to Fixing Your Favorite Inflatable Bed

Introduction
 If you own an air mattress, chances are you have experienced the frustration of a leak or tear. Vinyl air mattresses are a popular choice for their comfort and convenience, but they can also be prone to damage. Whether it's from a sharp object or wear and tear, a hole in your air mattress can quickly ruin a good night's sleep. While it may seem like a daunting task, patching a vinyl air mattress is actually a simple and cost-effective solution. In this article, we will guide you through the steps to successfully patching your vinyl air mattress and getting it back to its fully functional state.
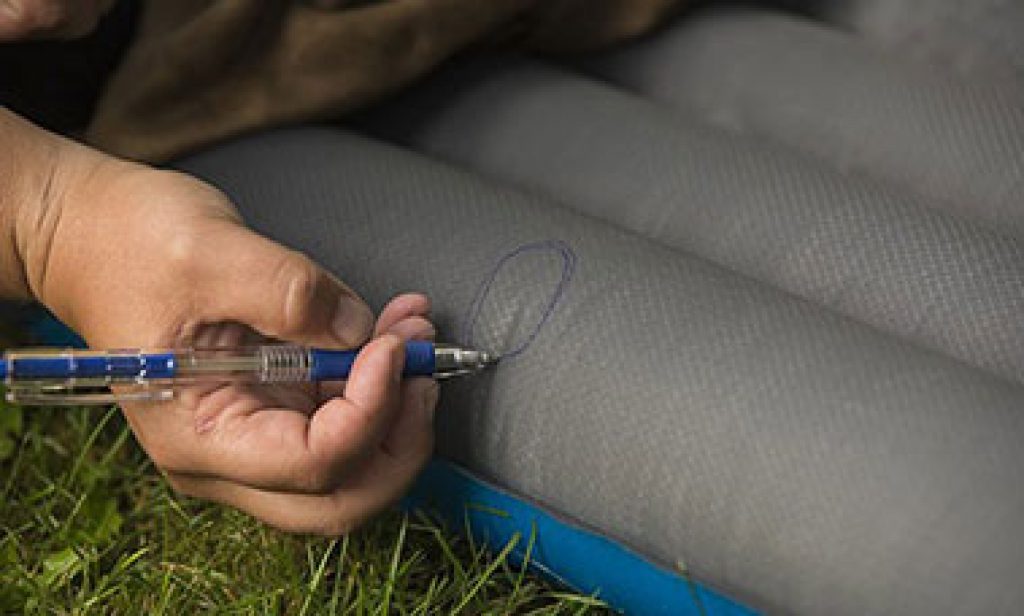
Step 1: Locate the Leak
 The first step in patching a vinyl air mattress is to locate the leak. This may seem obvious, but it can be a tricky task, especially if the hole is small. Start by inflating the mattress and listening for any hissing sounds. If you can't hear anything, try running a damp cloth over the surface of the mattress. The cloth will create bubbles over the damaged area, making it easier to spot the leak. Once you have located the leak, mark it with a pen or tape so you can easily find it again.
Step 2: Clean and Dry the Area
 Before applying any patch, it's important to clean and dry the area around the leak. Use a mild soap and water to gently clean the surface and remove any dirt or debris. Then, dry the area completely with a clean towel. This will ensure that the patch adheres properly and creates a strong seal.
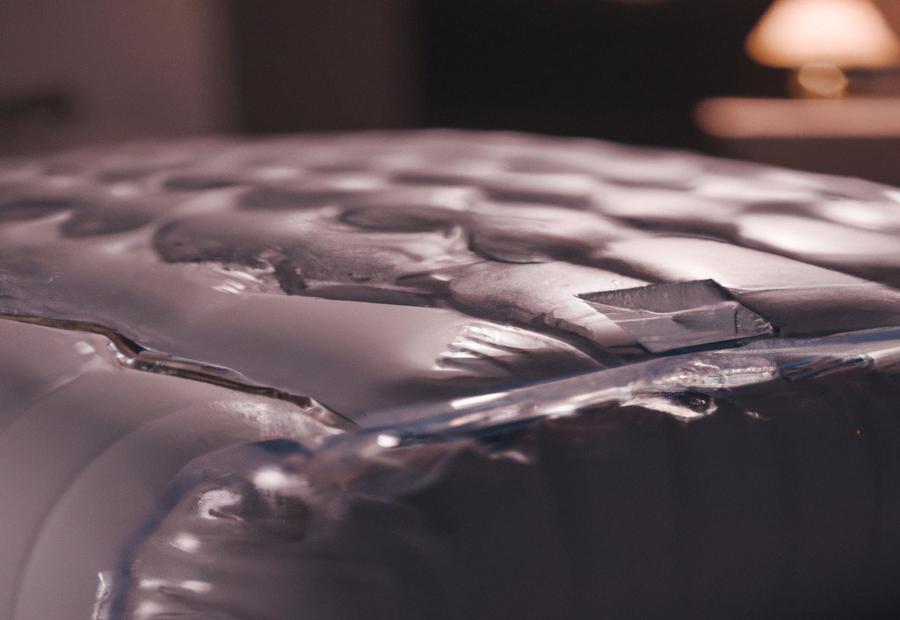
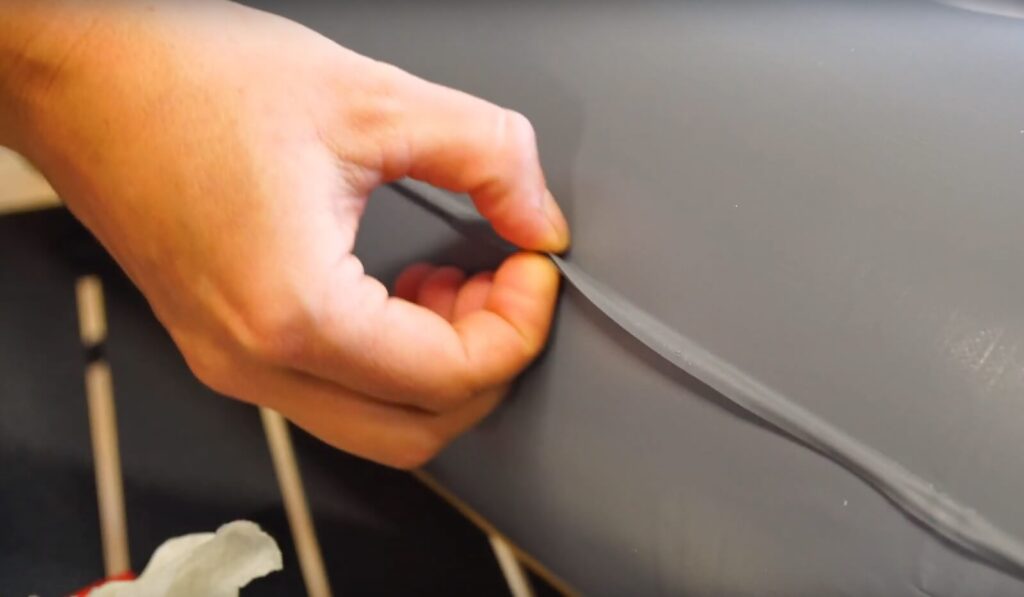
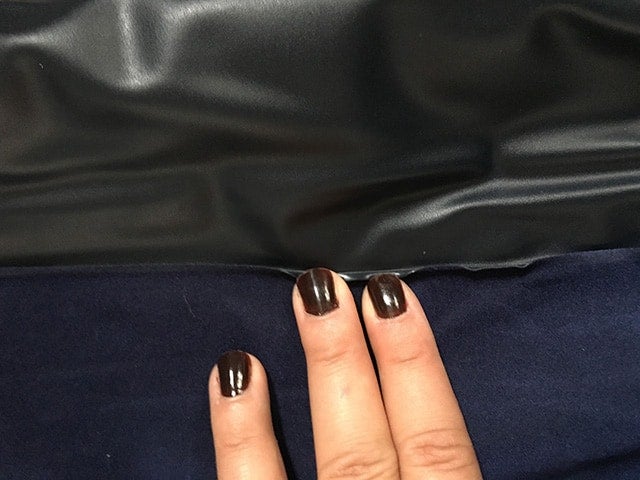
Step 3: Prepare the Patch
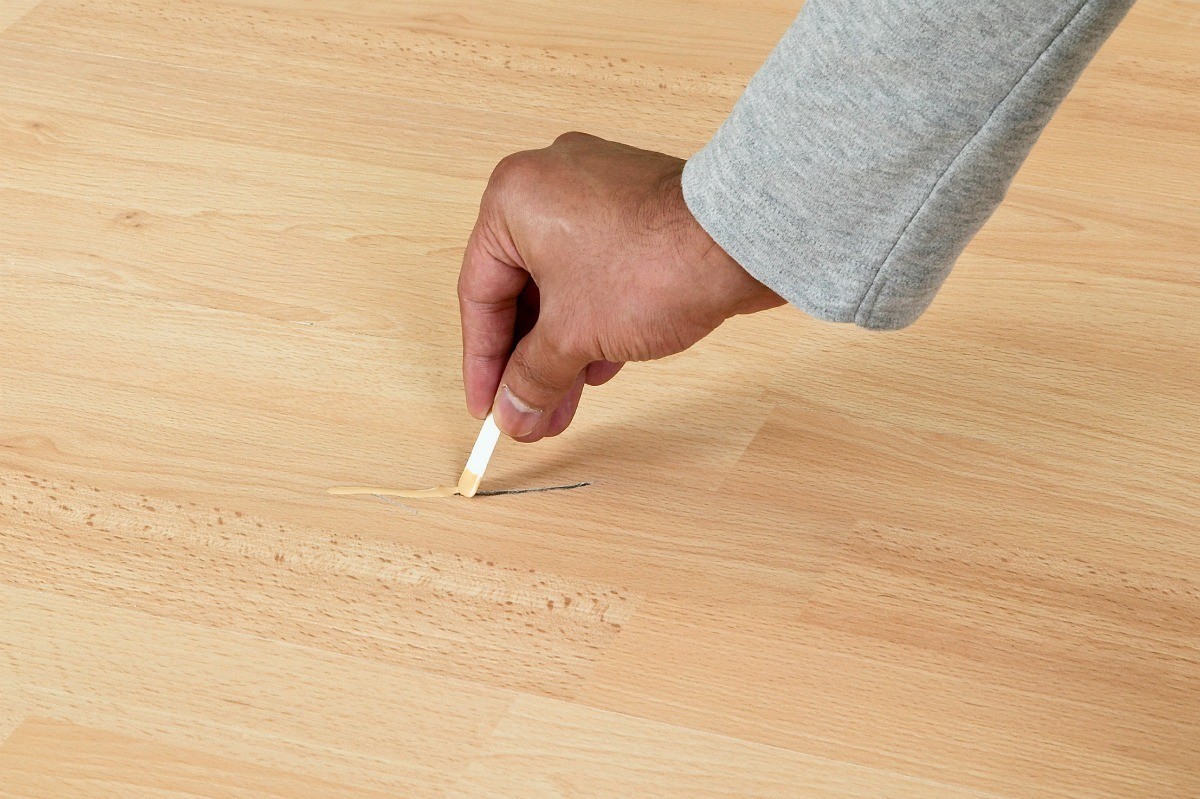
 There are various options for patches for vinyl air mattresses, including adhesive patches, vinyl patch kits, or even duct tape. Whichever option you choose, make sure it is specifically designed for use on vinyl. Cut the patch to a size that is at least 1 inch larger than the hole on all sides. This will give the patch enough surface area to create a strong bond with the mattress.
Step 4: Apply the Patch
 Once the patch is prepared, it's time to apply it to the mattress. If you are using an adhesive patch, simply peel off the backing and carefully place it over the leak, pressing down firmly to ensure a secure bond. If you are using a vinyl patch kit, follow the instructions included to mix the adhesive and apply it to the patch and the mattress. If you are using duct tape, cut a piece of tape that is larger than the hole and place it over the leak, smoothing out any wrinkles or air bubbles.
Step 5: Allow Time to Dry
 After applying the patch, it's important to give it enough time to dry completely. This can take anywhere from a few hours to overnight, depending on the type of patch used. It's best to let the patch dry for at least 24 hours before using the air mattress again.
Conclusion
 Patching a vinyl air mattress is a simple and cost-effective solution to fixing a leak or tear. By following these steps and using the right materials, you can extend the life of your favorite inflatable bed and get back to enjoying a comfortable night's sleep. Remember to always thoroughly clean and dry the area before applying the patch, and allow enough time for the patch to dry completely. With these tips, you can easily fix your vinyl air mattress and get back to using it for years to come.