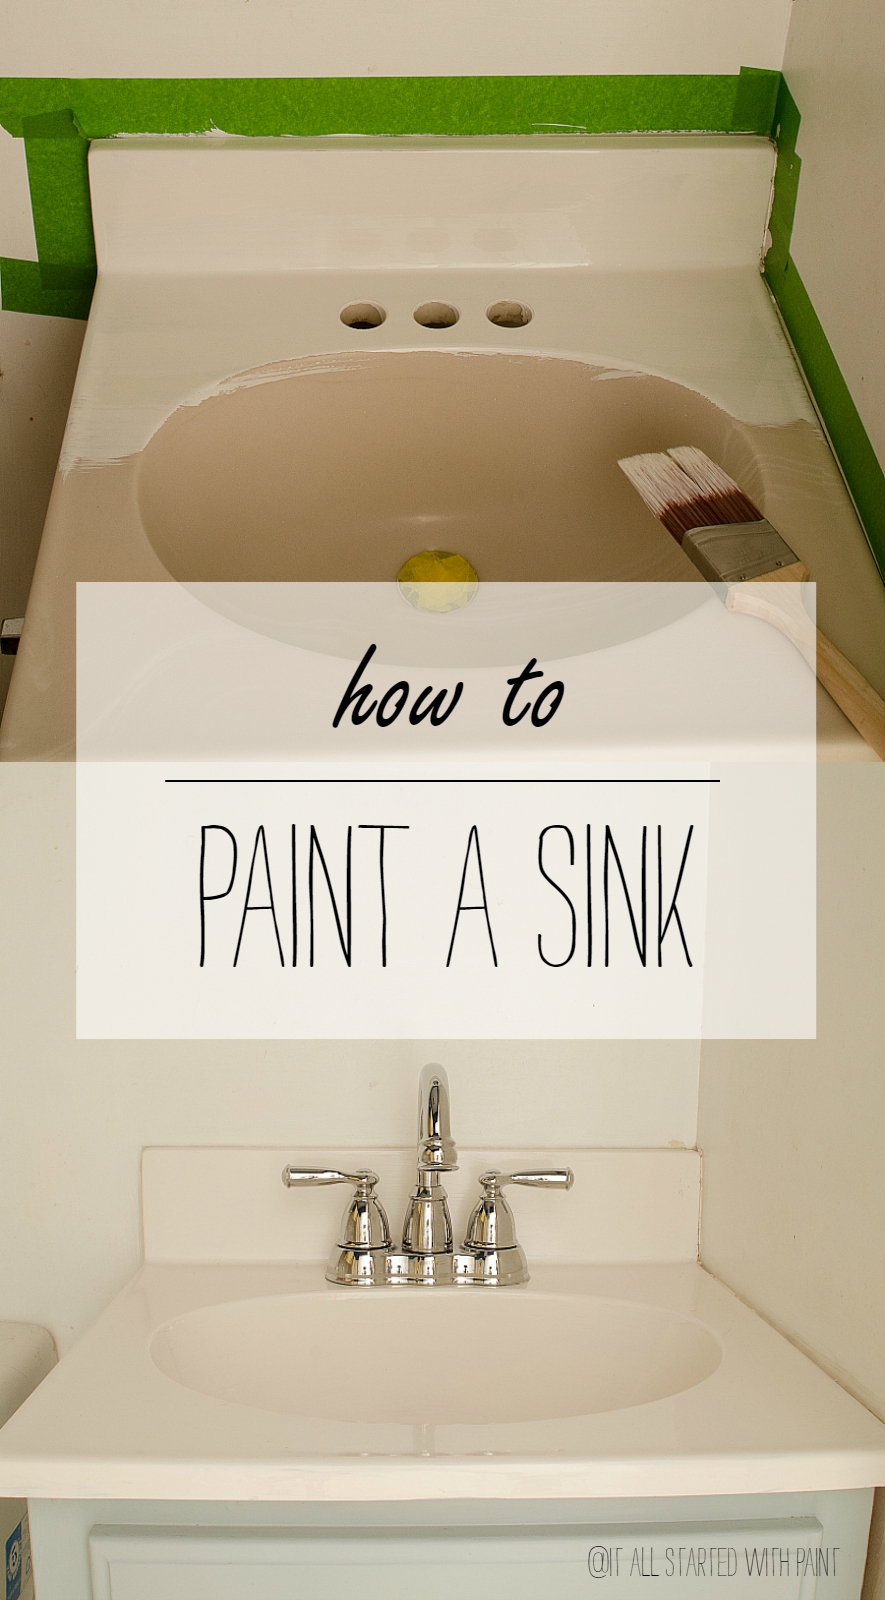
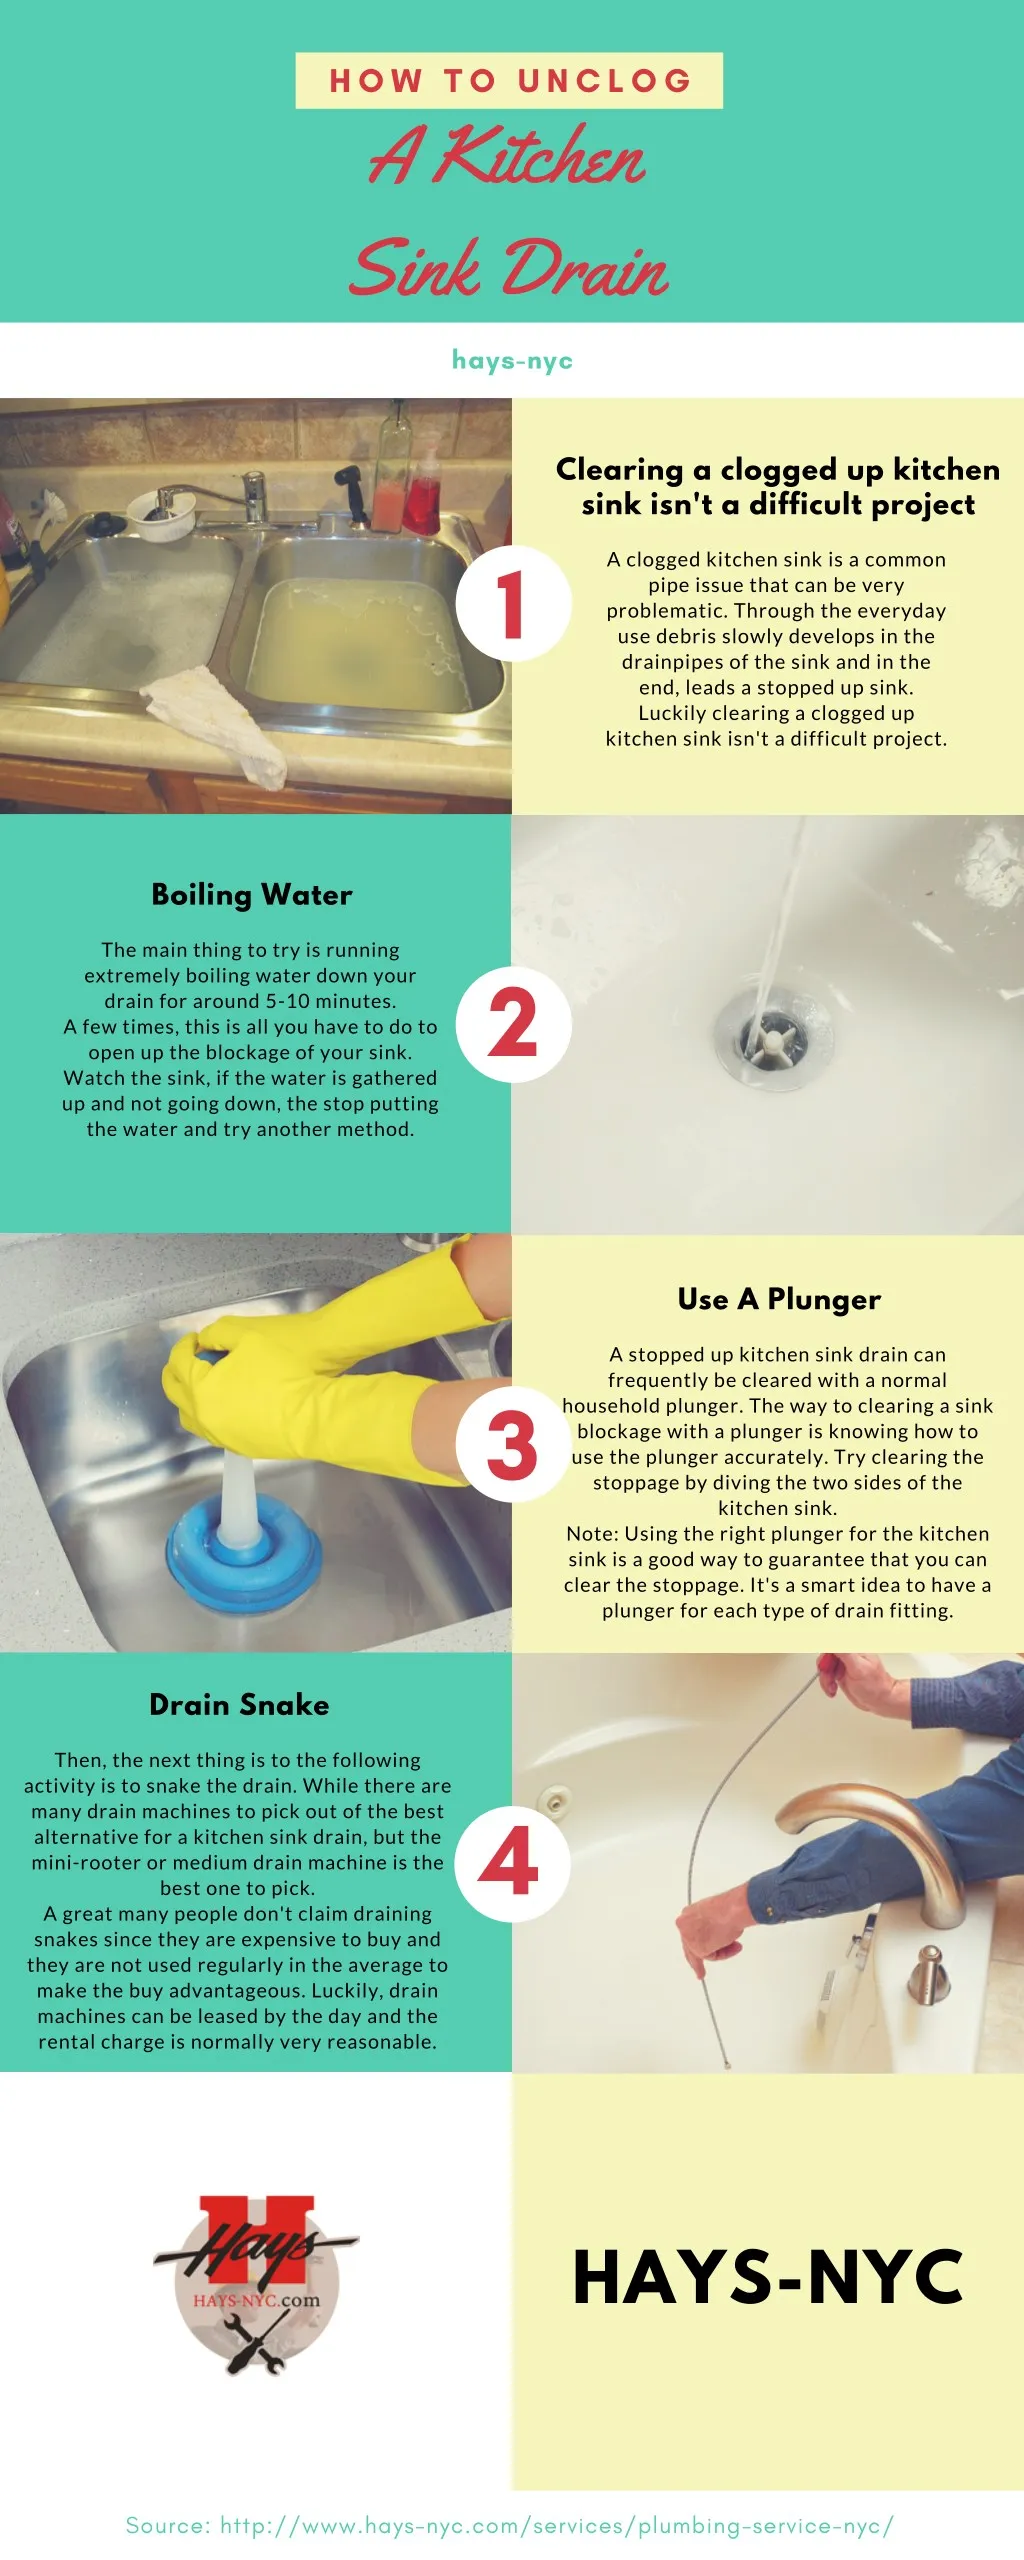
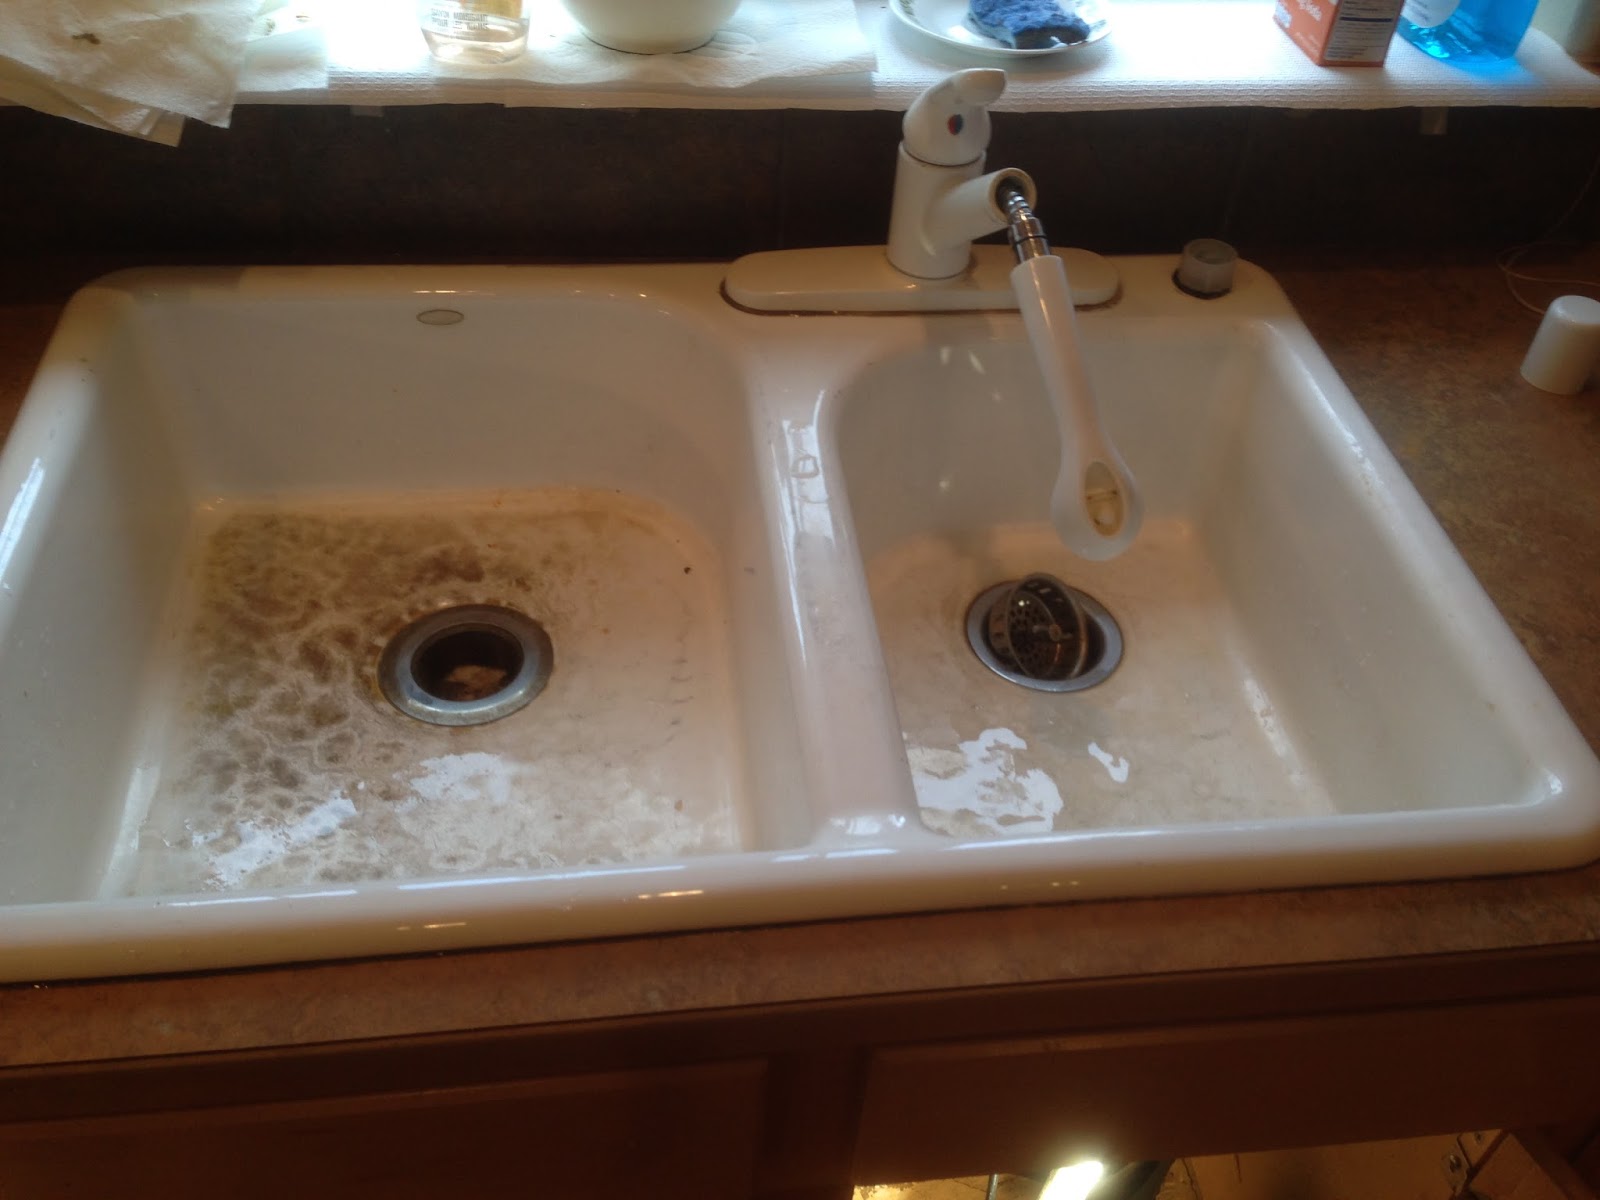
Is your old kitchen sink looking worn and outdated? Instead of replacing it, why not give it a fresh new look with a coat of paint? Painting your kitchen sink is a budget-friendly and easy way to transform the look of your entire kitchen. With the right tools and techniques, you can have a brand new sink in no time. Before you get started, make sure to choose the right type of paint for your sink. Look for a high-quality, durable and waterproof paint that can withstand daily wear and tear. Acrylic enamel paint is a popular choice for painting sinks as it bonds well with the sink's surface and is resistant to chipping and peeling.1. How to Paint an Old Kitchen Sink


1. How to Paint an Old Kitchen Sink


Once you have your paint, it's time to prep your sink for painting. Start by cleaning the sink thoroughly with a degreaser to remove any built-up grime and grease. Rinse it off and let it dry completely. TIP: Use a scouring pad to lightly sand the sink's surface to help the paint adhere better. Next, mask off the areas around the sink with painter's tape to avoid any accidental paint splatters. You can also remove the faucet and drain covers if you wish to paint them separately or use painter's tape to cover them as well.2. Transform Your Kitchen Sink with a Fresh Coat of Paint

2. Transform Your Kitchen Sink with a Fresh Coat of Paint


Before you start painting, make sure to apply a coat of primer on the sink's surface. This will help the paint adhere better and prevent any discoloration. Once the primer is dry, it's time to start painting. Using a small foam roller, apply thin and even coats of paint on the sink's surface. Make sure to use long, smooth strokes and avoid going over the same area too many times to prevent brush marks. Let the first coat dry completely before applying a second coat.3. DIY Kitchen Sink Painting Tutorial


3. DIY Kitchen Sink Painting Tutorial


When painting your sink, it's important to pay attention to the corners and edges. Use a small detail brush to get into those hard-to-reach areas and ensure a smooth and even finish. It's also recommended to use a sealing topcoat to protect the paint and add extra durability to your sink. Additionally, make sure to let the paint dry completely between coats and before using the sink. This will help prevent any smudging or damage to the paint.4. Tips for Painting an Old Kitchen Sink


4. Tips for Painting an Old Kitchen Sink


After the final coat of paint is dry, remove the painter's tape and reattach the faucet and drain covers if you removed them earlier. You can also add some extra decorative touches to your sink, such as stenciling a design or adding a mosaic pattern using different colored paints. With a fresh coat of paint, your old kitchen sink will look like new again and add a pop of color to your kitchen. Plus, you'll save money by not having to replace the entire sink.5. Revamp Your Kitchen Sink with a New Paint Job


5. Revamp Your Kitchen Sink with a New Paint Job


When choosing the right paint for your kitchen sink, it's important to consider its durability and resistance to water and chemicals. Acrylic enamel paint is a popular choice for its long-lasting and waterproof properties, making it perfect for painting sinks. You can also opt for epoxy paint which is specifically designed for high-moisture areas and is resistant to stains and scratches. Whichever paint you choose, make sure it is suitable for your sink's material and can withstand frequent use.6. The Best Paint for an Old Kitchen Sink


6. The Best Paint for an Old Kitchen Sink


To recap, here's a step-by-step guide to painting your old kitchen sink: 1. Clean and degrease the sink's surface. 2. Sand the surface lightly with a scouring pad to help the paint adhere. 3. Mask off the surrounding areas with painter's tape. 4. Apply a coat of primer and let it dry. 5. Use a small foam roller to apply thin and even coats of paint. 6. Let each coat dry completely before applying the next one. 7. Use a detail brush for corners and edges. 8. Apply a sealing topcoat for extra protection. 9. Let the final coat dry completely before using the sink.7. Step-by-Step Guide to Painting Your Kitchen Sink


7. Step-by-Step Guide to Painting Your Kitchen Sink


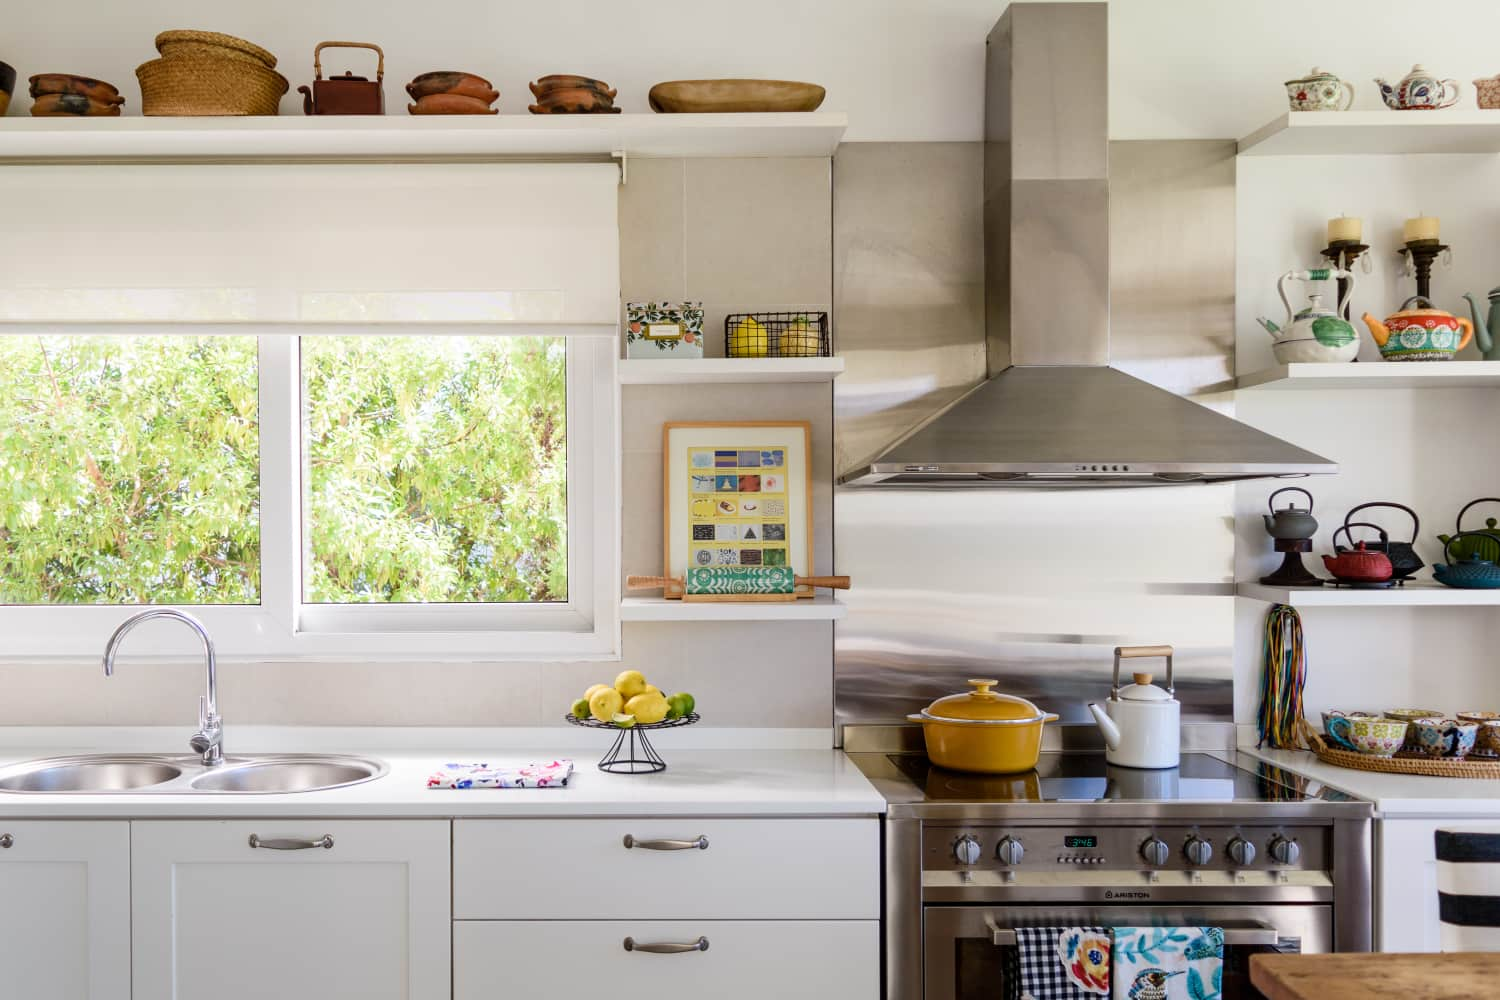

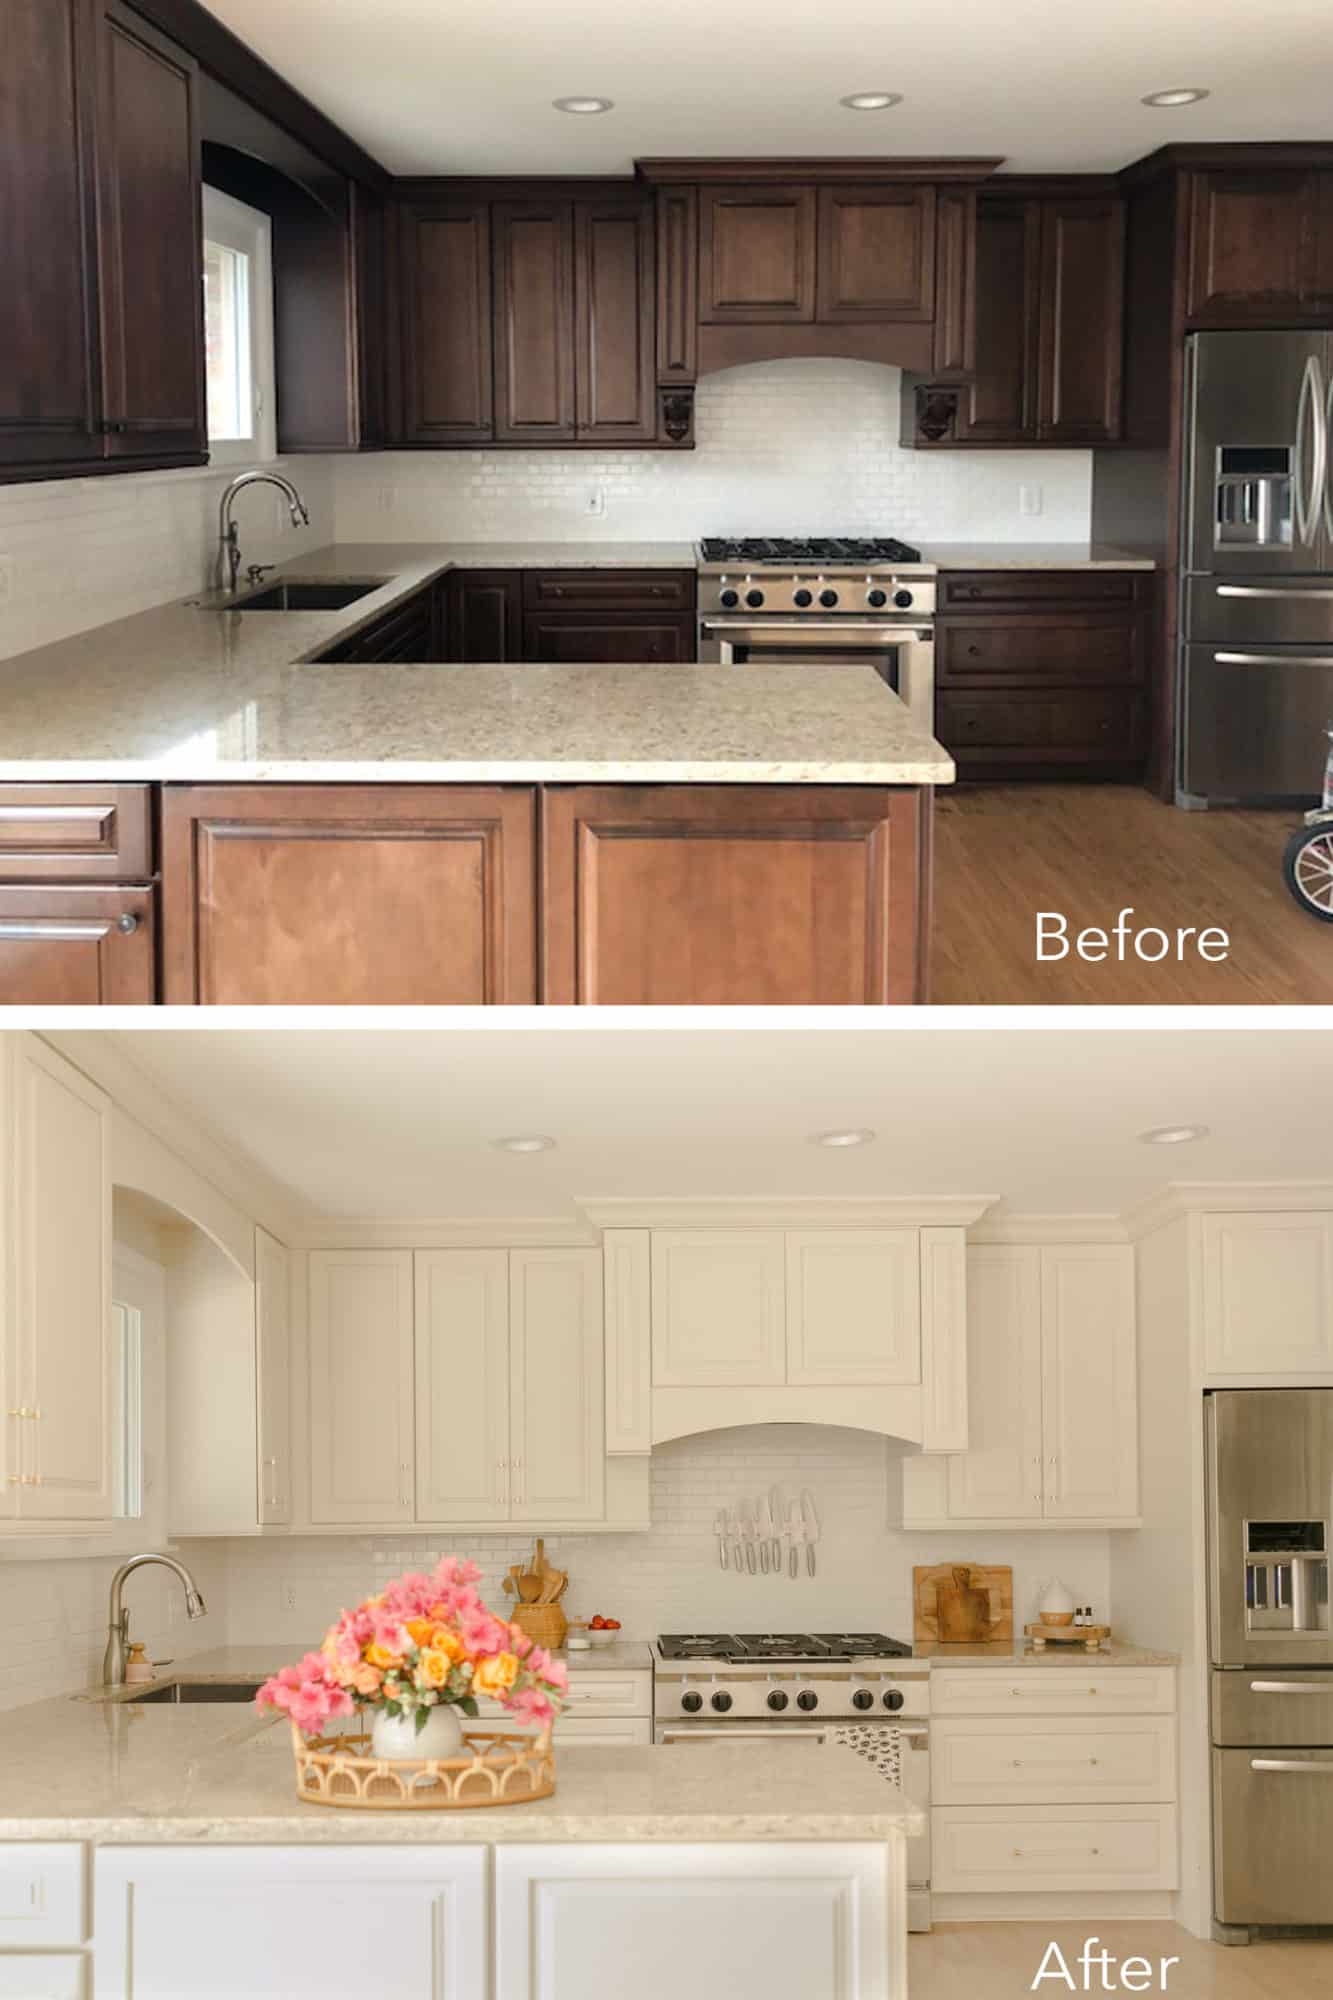
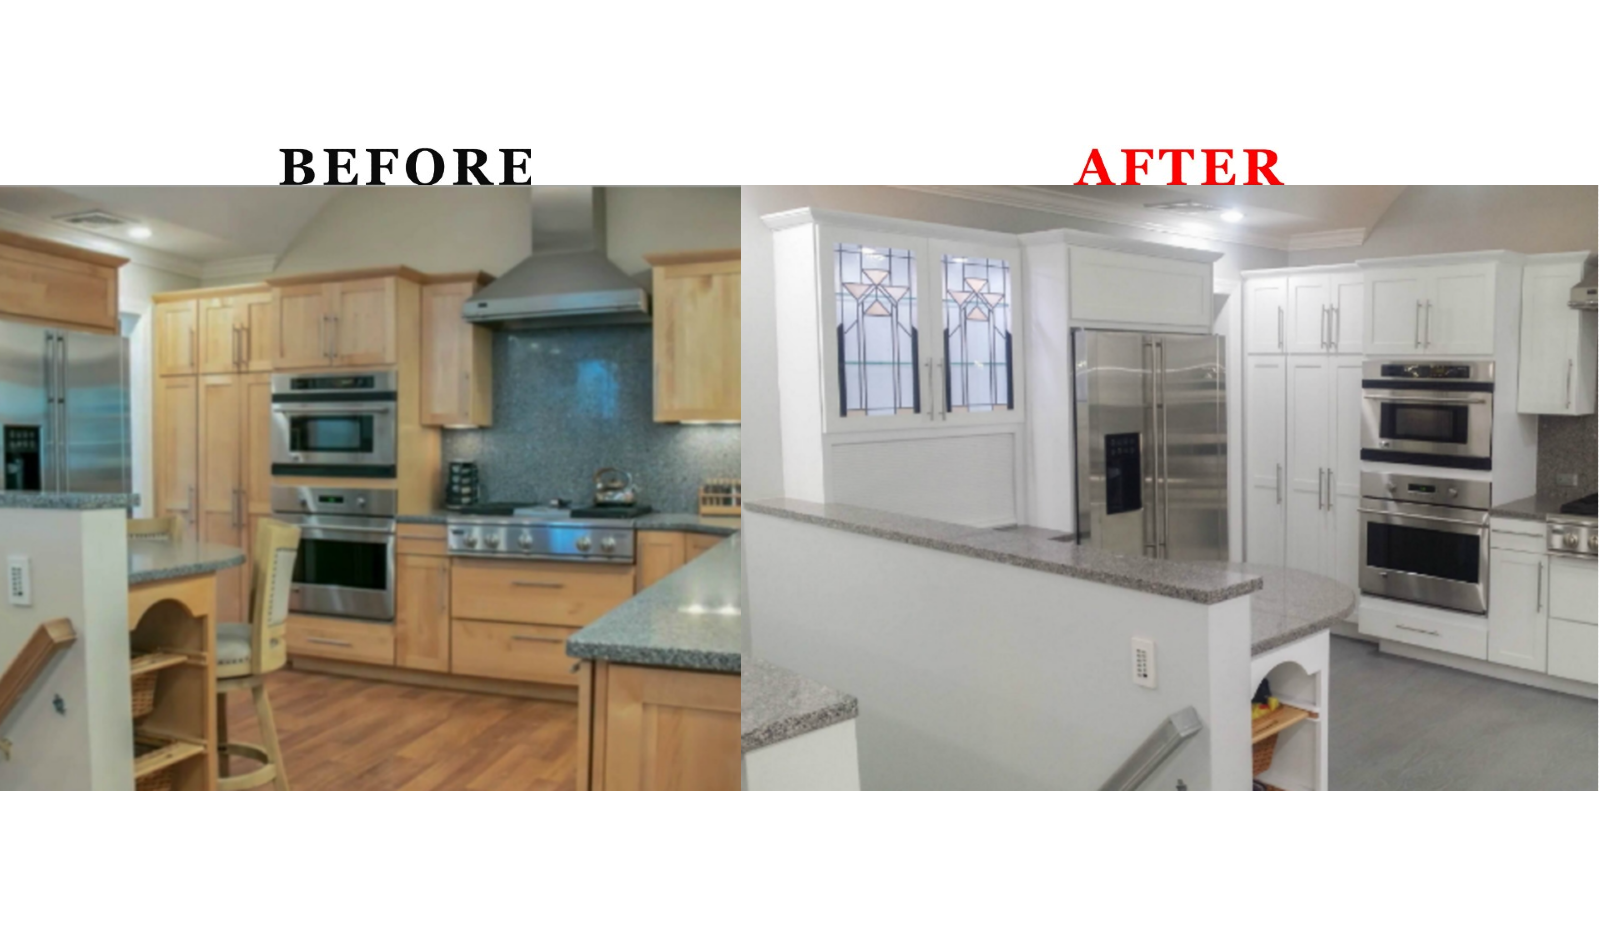
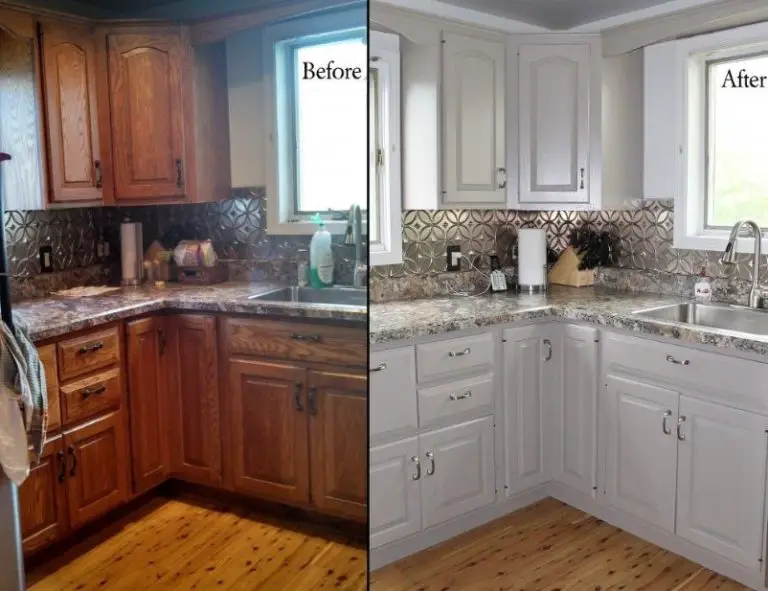
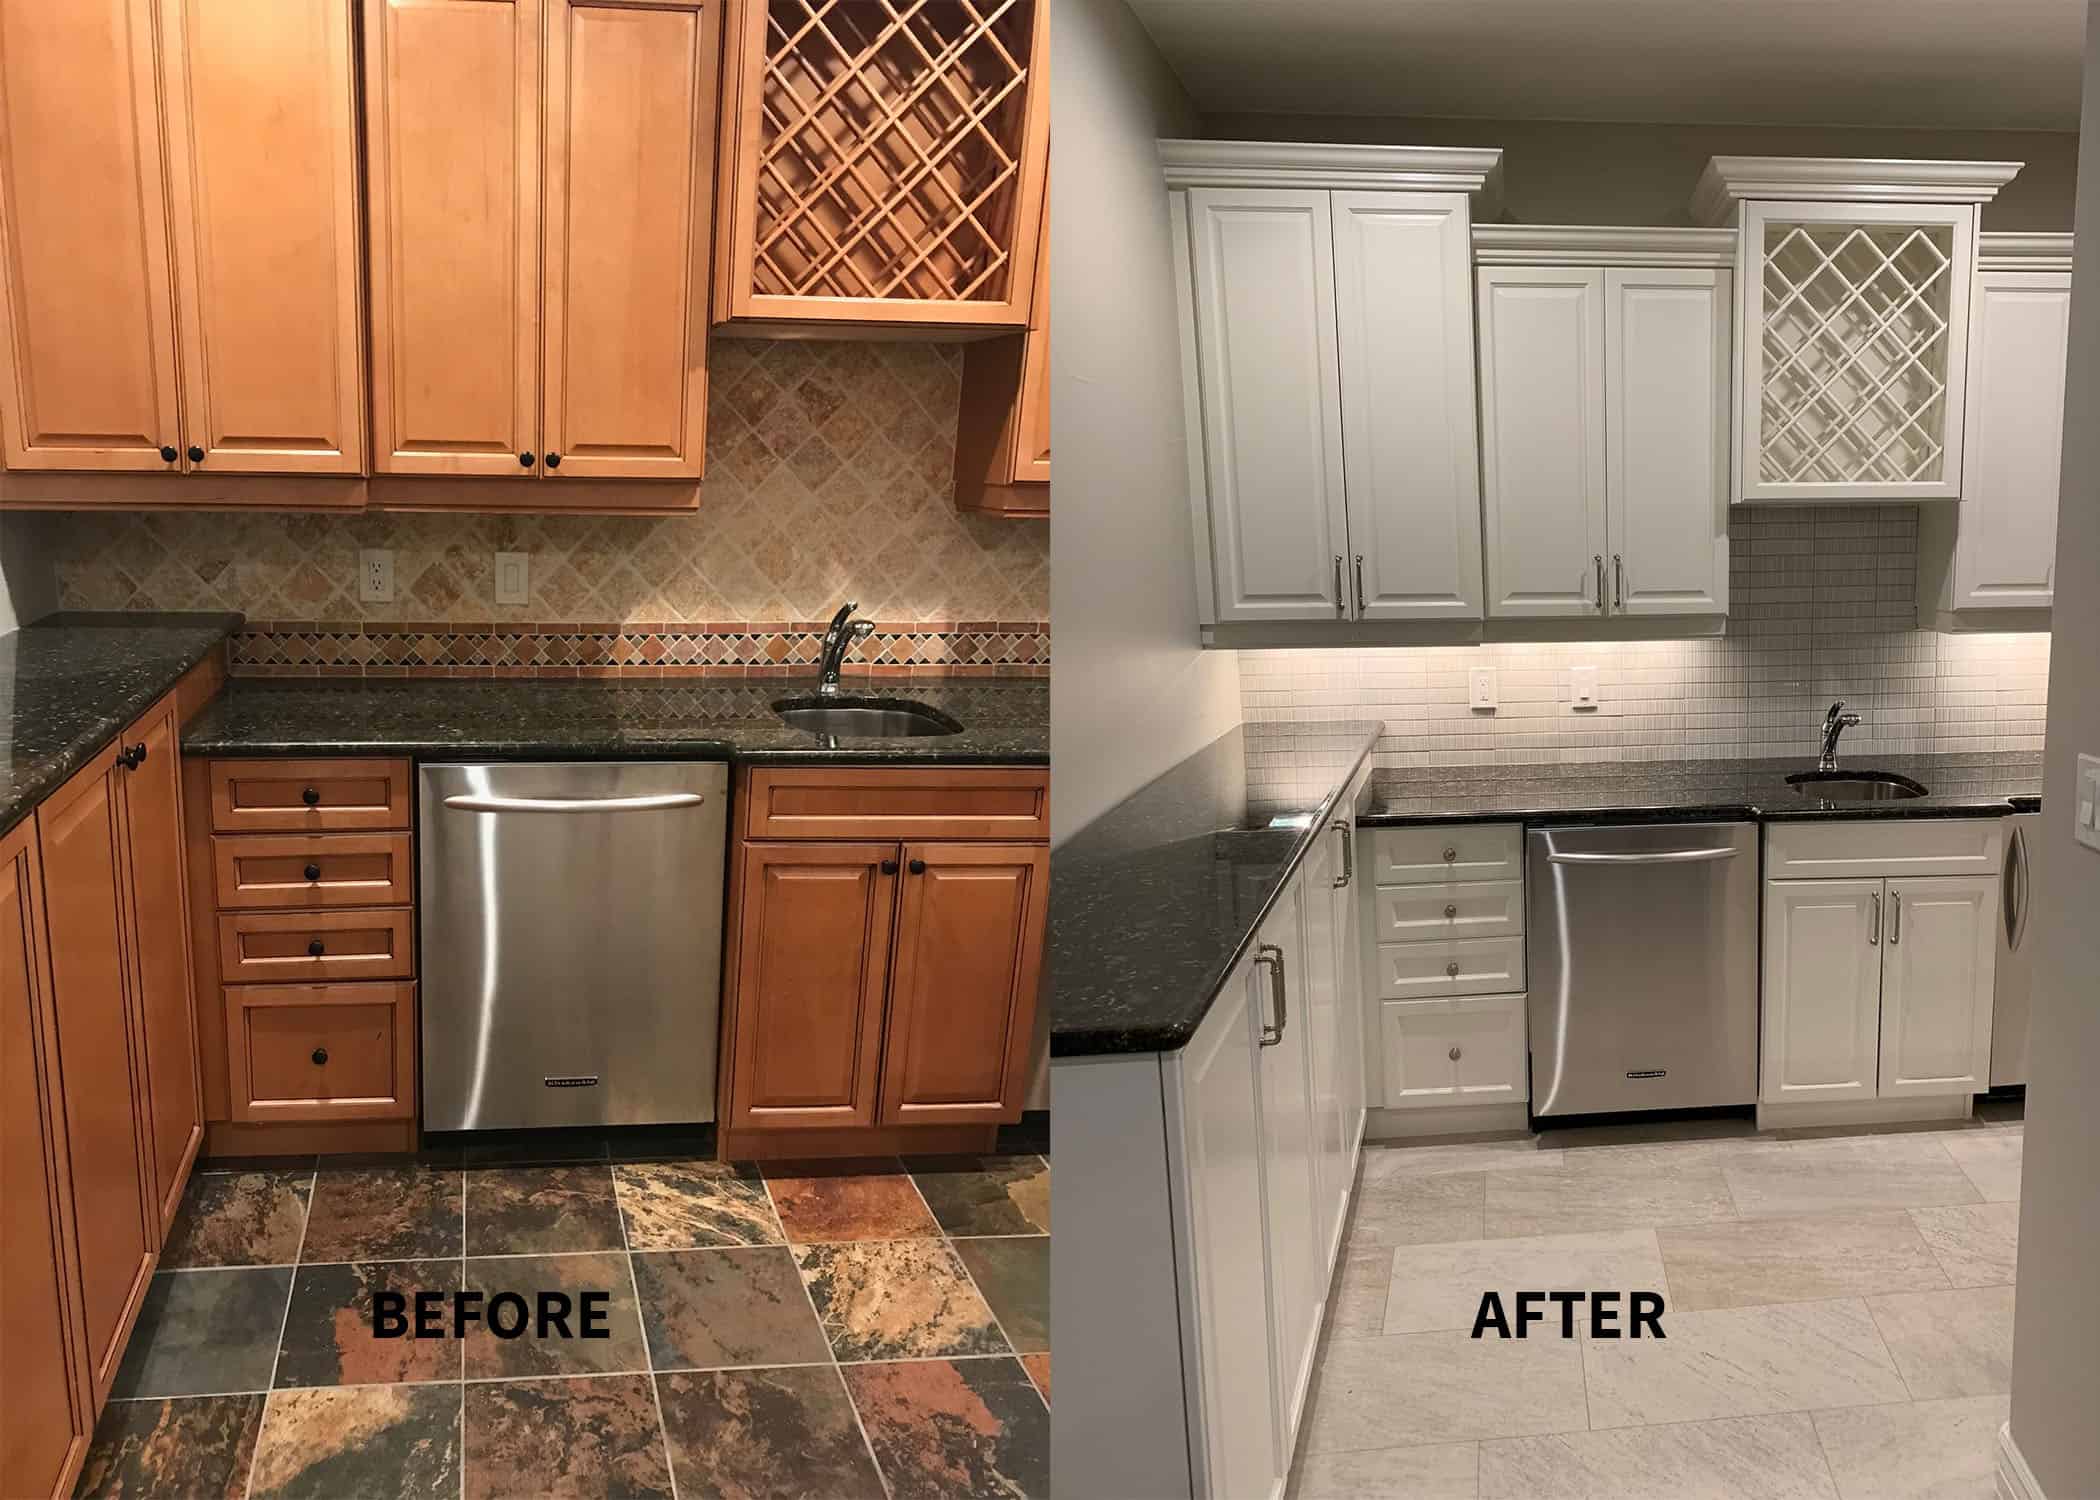
If you're still not convinced about painting your kitchen sink, take a look at some before and after pictures. You'll be amazed at the transformation a simple coat of paint can bring to your old and worn sink. Not only will it look better, but it will also give your kitchen a fresh and updated look without breaking the bank.8. Before and After: Painting an Old Kitchen Sink

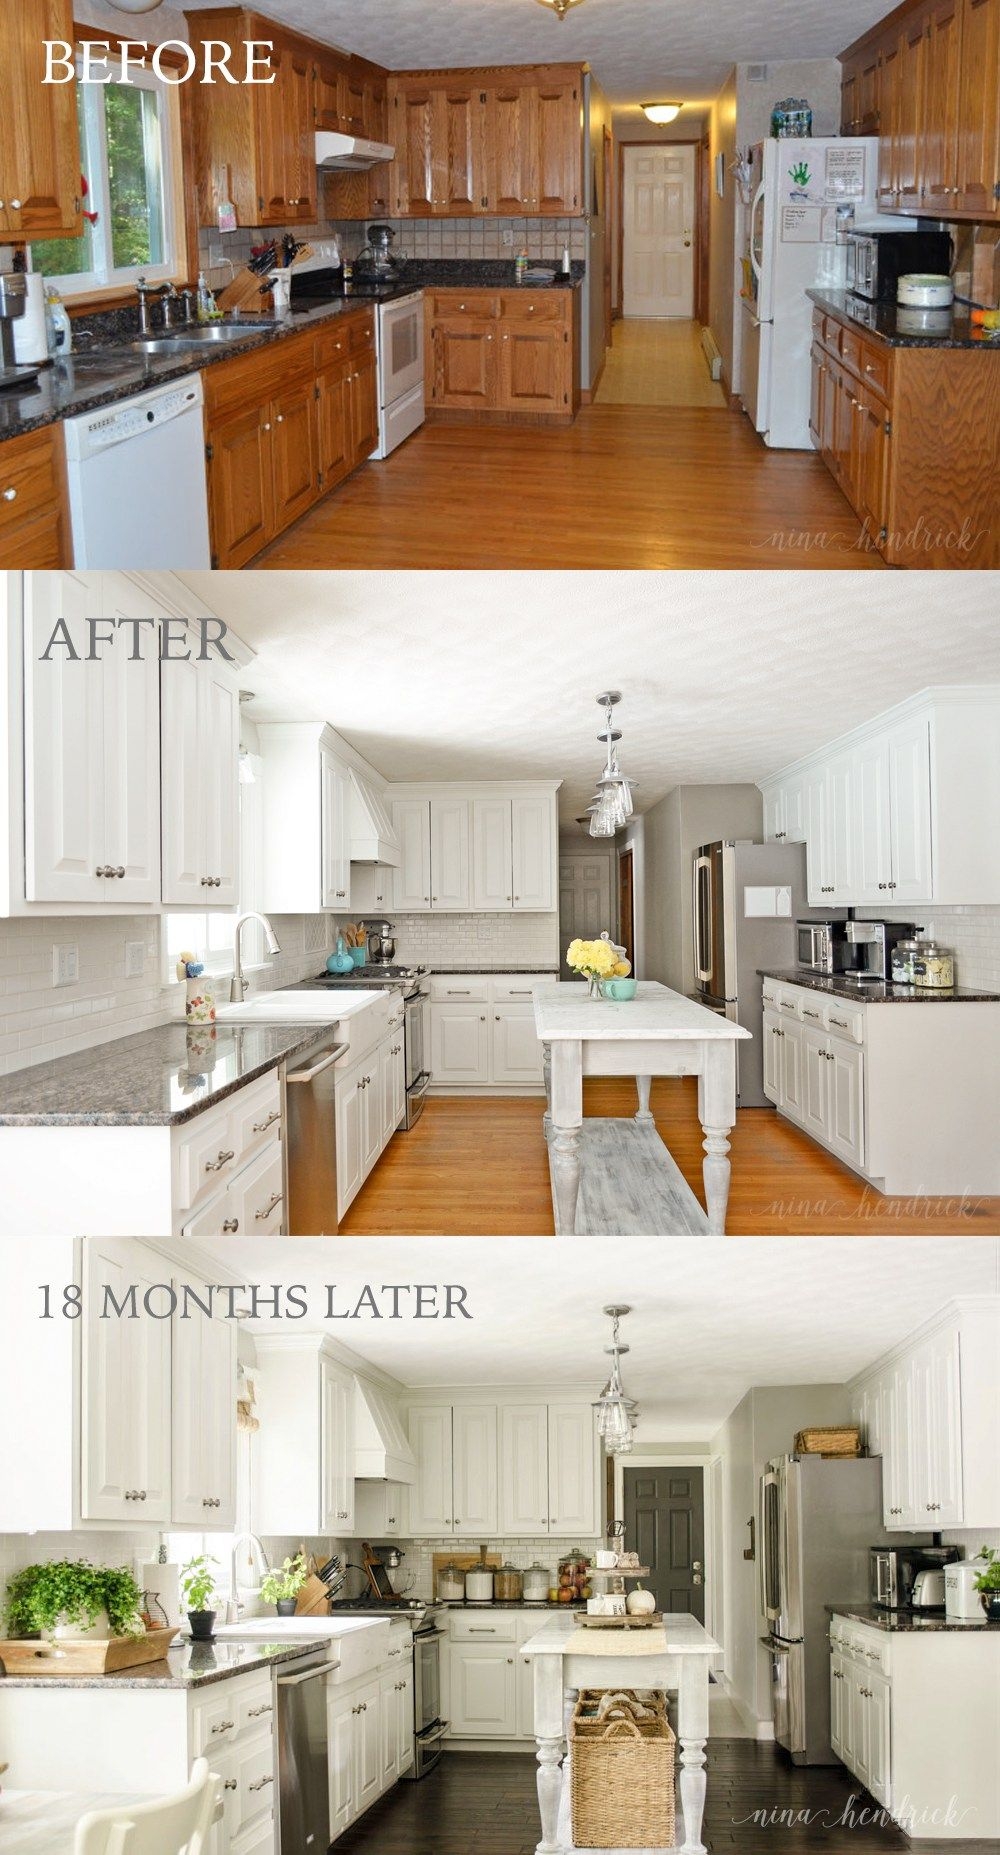
8. Before and After: Painting an Old Kitchen Sink


Painting your kitchen sink doesn't have to be limited to just one color. Get creative and add some extra flair to your sink with these ideas: - Use a stencil to create a pattern or design on your sink. - Add a mosaic pattern using different colored paints. - Paint the edges or rim of the sink in a contrasting color. - Use a metallic paint for a modern and luxurious look.9. Creative Ideas for Painting Your Kitchen Sink


9. Creative Ideas for Painting Your Kitchen Sink


:max_bytes(150000):strip_icc()/Basic-kitchen-sink-types-1821207_color_rev-0b539306b9ef4236a136624ad2a89a4c.jpg)
To sum it up, here's a quick guide for prepping and painting your old kitchen sink: 1. Choose a high-quality and waterproof paint suitable for your sink's material. 2. Clean and degrease the sink's surface. 3. Sand the surface lightly and mask off the surrounding areas. 4. Apply a coat of primer and let it dry. 5. Paint the sink using a small foam roller, letting each coat dry completely. 6. Use a detail brush for corners and edges. 7. Apply a sealing topcoat for extra protection. With these simple steps, you can transform your old and dull kitchen sink into a stunning centerpiece in your kitchen. So why wait? Grab some paint and get started on your kitchen sink makeover today!10. How to Prep and Paint Your Old Kitchen Sink


10. How to Prep and Paint Your Old Kitchen Sink


The Power of Transforming Your Kitchen Sink with a Fresh Coat of Paint

Revitalize Your Kitchen with a Simple DIY Project
 Painting your old kitchen sink may not be the first thing that comes to mind when considering a kitchen makeover. However, this simple DIY project can have a powerful impact on the overall design and feel of your kitchen. Not only is it a cost-effective way to update your kitchen, but it also gives you the opportunity to showcase your creativity and personal style.
Transforming Your Sink to Match Your Design Aesthetic
The kitchen sink is an essential element in any kitchen, and it often serves as a focal point in the room. Over time, sinks can become dull and outdated, and replacing them can be a costly and time-consuming task. This is where painting your sink comes in. With just a few supplies and a little bit of time, you can completely transform the look of your sink to match your design aesthetic.
Choosing the Right Paint for Your Sink
When it comes to painting your kitchen sink, it's important to choose the right type of paint. Look for a paint that is specifically designed for use on surfaces that are frequently exposed to water and cleaning products. This will ensure that your newly painted sink will hold up over time and won't chip or peel easily.
Acrylic enamel paint
is a great option for painting your sink as it is durable and water-resistant.
The Step-by-Step Process
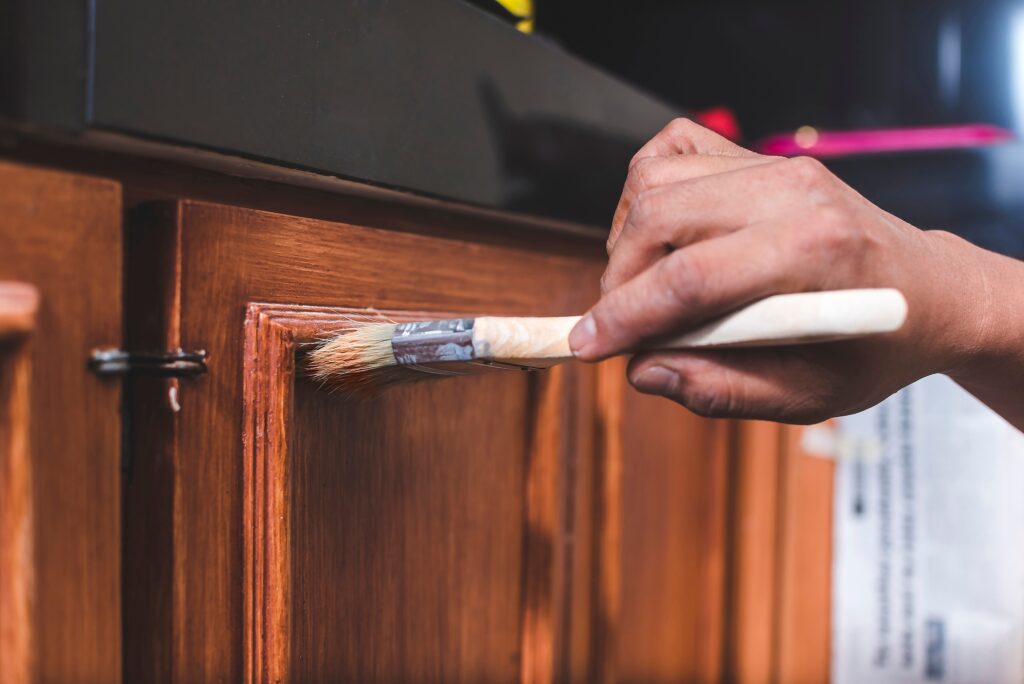
Before you begin painting, make sure to thoroughly clean your sink. Use a degreaser to remove any built-up grime, and then sand the surface lightly to help the paint adhere better. Make sure to
use a mask and gloves
to protect yourself from any fumes or chemicals. Once your sink is clean and dry, use a small paintbrush to
apply a coat of primer
to the entire surface. This will ensure that the paint adheres properly and will also help to cover any scratches or imperfections.
Once the primer has dried, it's time to
apply your chosen paint color
. Use a small paintbrush or roller to apply an even coat, making sure to cover all areas of the sink. You may need to apply multiple coats for a more opaque finish. Once the paint has dried, you can add a
sealant
to protect your newly painted sink and give it a glossy finish.
Showcase Your Personal Style
One of the best things about painting your kitchen sink is the opportunity to showcase your personal style. You can choose a bold and vibrant color to make a statement, or opt for a more subtle and classic look. You can even get creative and add patterns or designs to your sink using stencils or tape. The possibilities are endless, and the end result will be a one-of-a-kind sink that truly reflects your unique taste and personality.
In conclusion, painting your old kitchen sink is a simple and cost-effective way to revitalize your kitchen and add a personal touch to your design. It's a project that anyone can do, and the end result will be a beautifully transformed sink that will make your kitchen feel brand new. So don't underestimate the power of a fresh coat of paint and give your sink the makeover it deserves.
Painting your old kitchen sink may not be the first thing that comes to mind when considering a kitchen makeover. However, this simple DIY project can have a powerful impact on the overall design and feel of your kitchen. Not only is it a cost-effective way to update your kitchen, but it also gives you the opportunity to showcase your creativity and personal style.
Transforming Your Sink to Match Your Design Aesthetic
The kitchen sink is an essential element in any kitchen, and it often serves as a focal point in the room. Over time, sinks can become dull and outdated, and replacing them can be a costly and time-consuming task. This is where painting your sink comes in. With just a few supplies and a little bit of time, you can completely transform the look of your sink to match your design aesthetic.
Choosing the Right Paint for Your Sink
When it comes to painting your kitchen sink, it's important to choose the right type of paint. Look for a paint that is specifically designed for use on surfaces that are frequently exposed to water and cleaning products. This will ensure that your newly painted sink will hold up over time and won't chip or peel easily.
Acrylic enamel paint
is a great option for painting your sink as it is durable and water-resistant.
The Step-by-Step Process
Before you begin painting, make sure to thoroughly clean your sink. Use a degreaser to remove any built-up grime, and then sand the surface lightly to help the paint adhere better. Make sure to
use a mask and gloves
to protect yourself from any fumes or chemicals. Once your sink is clean and dry, use a small paintbrush to
apply a coat of primer
to the entire surface. This will ensure that the paint adheres properly and will also help to cover any scratches or imperfections.
Once the primer has dried, it's time to
apply your chosen paint color
. Use a small paintbrush or roller to apply an even coat, making sure to cover all areas of the sink. You may need to apply multiple coats for a more opaque finish. Once the paint has dried, you can add a
sealant
to protect your newly painted sink and give it a glossy finish.
Showcase Your Personal Style
One of the best things about painting your kitchen sink is the opportunity to showcase your personal style. You can choose a bold and vibrant color to make a statement, or opt for a more subtle and classic look. You can even get creative and add patterns or designs to your sink using stencils or tape. The possibilities are endless, and the end result will be a one-of-a-kind sink that truly reflects your unique taste and personality.
In conclusion, painting your old kitchen sink is a simple and cost-effective way to revitalize your kitchen and add a personal touch to your design. It's a project that anyone can do, and the end result will be a beautifully transformed sink that will make your kitchen feel brand new. So don't underestimate the power of a fresh coat of paint and give your sink the makeover it deserves.