Moving a kitchen sink plumbing may seem like a daunting task, but with the right knowledge and tools, it can be a manageable DIY project. Whether you're renovating your kitchen or simply want to change the layout, knowing how to move your sink plumbing is essential. In this guide, we'll break down the steps and provide tips to help you successfully move your kitchen sink plumbing.How to Move a Kitchen Sink Plumbing


How to Move a Kitchen Sink Plumbing


The first step in moving your kitchen sink plumbing is to turn off the water supply. You can do this by shutting off the main water valve to your house. Next, remove any items from under your sink and clear the area around it. Then, disconnect the water supply lines and the drain pipe from the sink. You may need to use pliers or a wrench to loosen any tight connections. Once the plumbing is disconnected, you can remove the sink from its current location. If you're keeping the sink, be sure to protect it with towels or blankets to prevent any damage during the move. Next, you'll need to determine the new location for your sink. Measure the distance from the old location to the new one and ensure that the plumbing lines can reach. If they can't, you may need to purchase longer pipes. Once you have the new location set, mark the area where the new drain and water supply lines will be installed. Before installing the new plumbing lines, it's essential to make sure the area is level and stable. If the area is not level, you may need to use shims to even it out. Then, using a drill, create holes for the new pipes in the marked area. Be sure to measure and cut the pipes to the correct length before installing them. After the new pipes are installed, you can connect them to the sink. Be sure to tighten all connections to prevent any leaks. Once everything is connected, you can turn the water supply back on and test the sink to ensure it's working correctly.Moving a Kitchen Sink Plumbing: A Step-by-Step Guide


Moving a Kitchen Sink Plumbing: A Step-by-Step Guide


Moving a kitchen sink plumbing can be a DIY project, but it's essential to have the right tools and knowledge. Some of the necessary tools for this project include a wrench, pliers, a drill, and a level. It's also crucial to have the correct materials, such as new pipes and fittings, to ensure a proper installation. It's also essential to follow safety precautions when working with plumbing. Be sure to wear protective gear, such as gloves and safety glasses, and turn off the water supply before beginning the project.DIY: Moving a Kitchen Sink Plumbing


DIY: Moving a Kitchen Sink Plumbing


Here are a few tips to keep in mind when moving your kitchen sink plumbing: Plan ahead: Before starting the project, be sure to plan out the new location for your sink and measure everything to ensure a proper fit. Label the pipes: As you disconnect the pipes, be sure to label them so you know which ones go where when reconnecting them in the new location. Consider hiring a professional: If you're not comfortable with plumbing or the project seems too complex, it's best to hire a professional to ensure a proper and safe installation. Check for leaks: After the sink is installed, be sure to check for any leaks and make any necessary adjustments.Tips for Moving a Kitchen Sink Plumbing

Tips for Moving a Kitchen Sink Plumbing
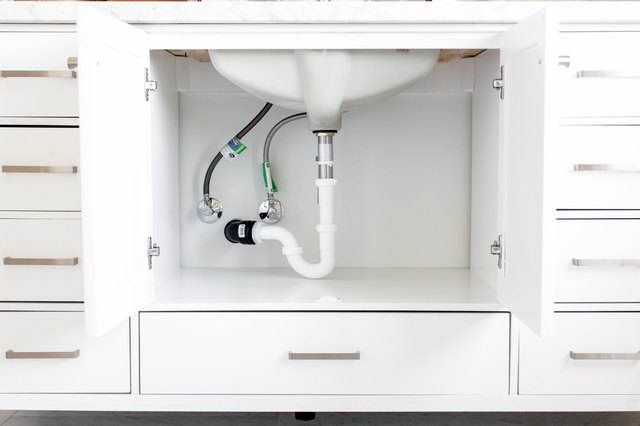
/how-to-install-a-sink-drain-2718789-hero-24e898006ed94c9593a2a268b57989a3.jpg)


The process of moving a kitchen sink plumbing may seem overwhelming, but it can be broken down into a few simple steps. First, turn off the water supply and disconnect the pipes from the sink. Then, remove the sink and determine the new location. Install new pipes and fittings in the new location and reconnect the sink. Finally, test for leaks and make any necessary adjustments.The Process of Moving a Kitchen Sink Plumbing


The Process of Moving a Kitchen Sink Plumbing

When moving a kitchen sink plumbing, there are a few things you should know to ensure a successful project. First, be sure to have the necessary tools and materials. It's also essential to plan ahead and measure everything carefully before starting the project. Additionally, following safety precautions and checking for leaks are crucial steps to ensure a proper installation.Moving a Kitchen Sink Plumbing: What You Need to Know

Moving a Kitchen Sink Plumbing: What You Need to Know
Some common mistakes to avoid when moving a kitchen sink plumbing include not turning off the water supply, not properly labeling pipes, and not checking for leaks after installation. It's also important to ensure the area is level and stable before installing the new pipes.Common Mistakes When Moving a Kitchen Sink Plumbing

Common Mistakes When Moving a Kitchen Sink Plumbing

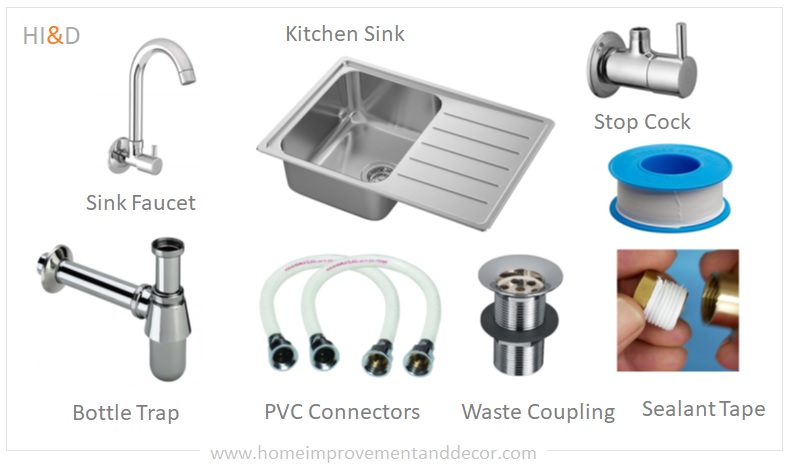
As mentioned earlier, some essential tools for moving a kitchen sink plumbing include a wrench, pliers, a drill, and a level. Some necessary materials include new pipes, fittings, and shims if needed. It's also recommended to have towels or blankets on hand to protect the sink during the move.Tools and Materials for Moving a Kitchen Sink Plumbing


Tools and Materials for Moving a Kitchen Sink Plumbing


The cost of moving a kitchen sink plumbing can vary depending on factors such as the complexity of the project and whether you hire a professional or do it yourself. It's essential to factor in the cost of tools and materials as well. On average, the cost can range from $200-$500.Costs of Moving a Kitchen Sink Plumbing
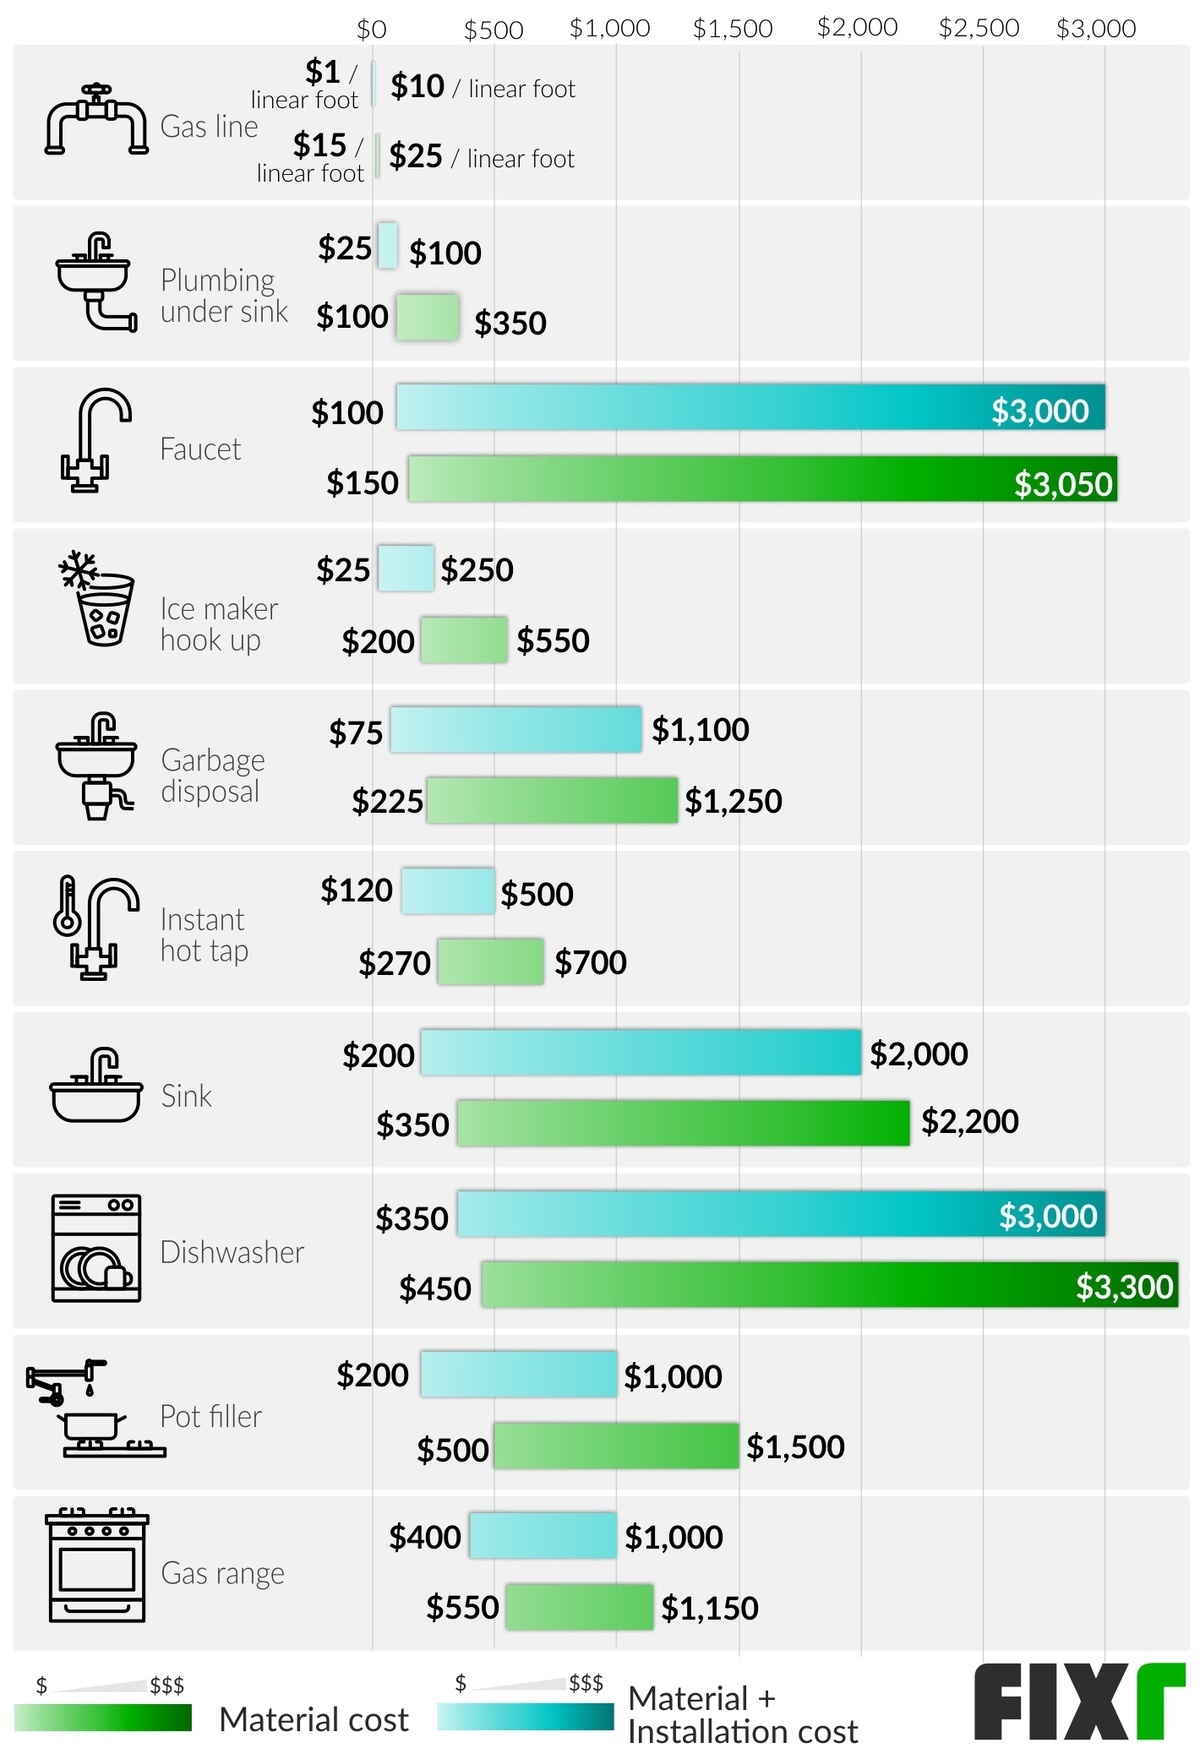
Costs of Moving a Kitchen Sink Plumbing
Deciding whether to hire a professional or do it yourself when moving a kitchen sink plumbing depends on your comfort level and the complexity of the project. If you're not experienced with plumbing or the project seems too complex, it's best to hire a professional to ensure a proper and safe installation. However, if you have the necessary tools and knowledge, it can be a manageable DIY project.Hiring a Professional vs. DIY: Moving a Kitchen Sink Plumbing

Hiring a Professional vs. DIY: Moving a Kitchen Sink Plumbing


Moving a Kitchen Sink Plumbing
Why Move Your Kitchen Sink Plumbing?
 When it comes to designing your dream kitchen, sometimes the existing layout just doesn't work for your needs. This is especially true for the kitchen sink plumbing. Whether you want to create more counter space, add a dishwasher, or simply change the aesthetic of your kitchen, moving the kitchen sink plumbing may be necessary. This may seem like a daunting task, but with the right knowledge and tools, it can be done efficiently and effectively.
Considerations Before Moving Your Kitchen Sink Plumbing
 Before jumping into the project, there are a few important things to consider. Firstly, determine the exact location where you want to move the kitchen sink plumbing. This will help you plan the new layout and ensure that the plumbing will reach the new location. Secondly, check the local building codes and regulations to ensure that you are following the proper guidelines. Lastly, consider hiring a professional plumber to assist with the project, especially if you have little to no plumbing experience.
Steps to Move Your Kitchen Sink Plumbing
 Once you have determined the new location for your kitchen sink plumbing and have all the necessary permits and assistance, it's time to begin the project. The following are the general steps to follow when moving a kitchen sink plumbing:
Step 1: Turn Off the Water
Before any work can begin, make sure to turn off the water supply to the kitchen sink. This will prevent any accidents or flooding during the process.
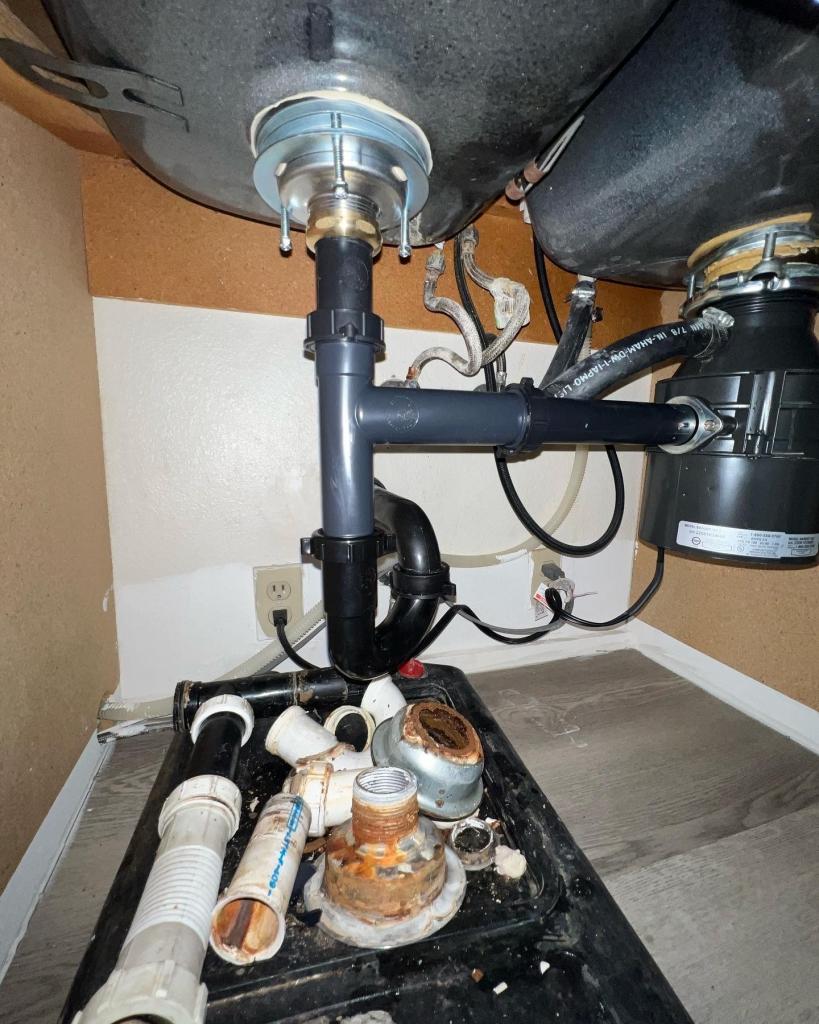
Step 2: Disconnect the Existing Plumbing
Carefully disconnect the existing plumbing, including the sink drain, supply lines, and P-trap. Make sure to have a bucket or towels handy to catch any excess water.
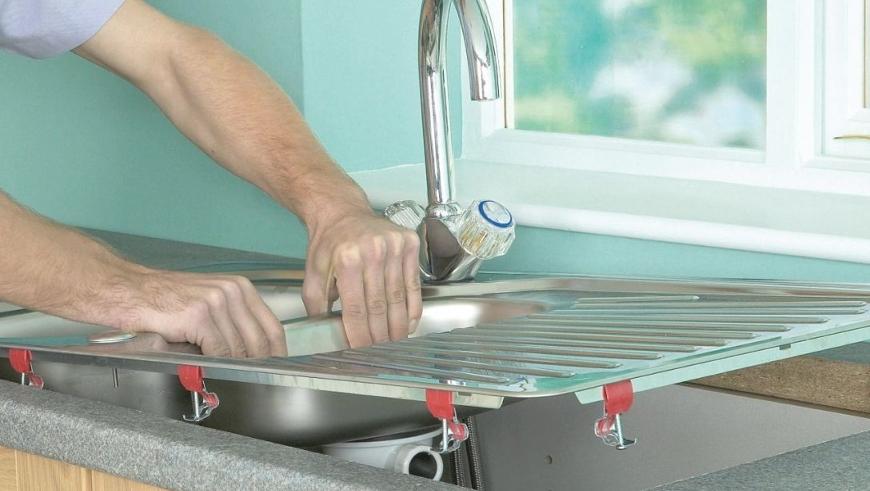
Step 3: Remove the Sink
If you are planning to replace the sink, now is the time to remove it. This will make it easier to work on the plumbing and give you a better idea of the new layout.
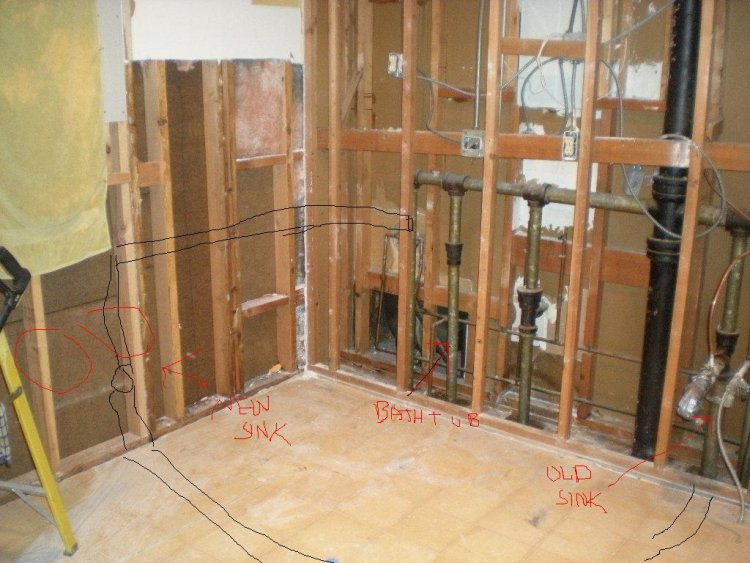
Step 4: Plan the New Layout
Using the new location as a guide, plan out the new layout for the kitchen sink plumbing. This may involve drilling new holes in the countertop or cabinets and rerouting the supply lines and drain pipes.
Step 5: Install New Plumbing
Once you have a clear plan, it's time to install the new plumbing. This may involve cutting and soldering new pipes or using flexible tubing for the supply lines. Make sure to follow the proper guidelines and double-check all connections for leaks.
Step 6: Test and Adjust
Before reinstalling the sink and connecting the plumbing, test the new layout by turning on the water supply. This will help identify any potential issues or leaks that may need to be addressed.
Step 7: Reinstall the Sink
With everything in place, it's time to reinstall the sink and connect the plumbing. Make sure all connections are secure and tight to prevent any future leaks.
Once you have determined the new location for your kitchen sink plumbing and have all the necessary permits and assistance, it's time to begin the project. The following are the general steps to follow when moving a kitchen sink plumbing:
Step 1: Turn Off the Water
Before any work can begin, make sure to turn off the water supply to the kitchen sink. This will prevent any accidents or flooding during the process.
Step 2: Disconnect the Existing Plumbing
Carefully disconnect the existing plumbing, including the sink drain, supply lines, and P-trap. Make sure to have a bucket or towels handy to catch any excess water.
Step 3: Remove the Sink
If you are planning to replace the sink, now is the time to remove it. This will make it easier to work on the plumbing and give you a better idea of the new layout.
Step 4: Plan the New Layout
Using the new location as a guide, plan out the new layout for the kitchen sink plumbing. This may involve drilling new holes in the countertop or cabinets and rerouting the supply lines and drain pipes.
Step 5: Install New Plumbing
Once you have a clear plan, it's time to install the new plumbing. This may involve cutting and soldering new pipes or using flexible tubing for the supply lines. Make sure to follow the proper guidelines and double-check all connections for leaks.
Step 6: Test and Adjust
Before reinstalling the sink and connecting the plumbing, test the new layout by turning on the water supply. This will help identify any potential issues or leaks that may need to be addressed.
Step 7: Reinstall the Sink
With everything in place, it's time to reinstall the sink and connect the plumbing. Make sure all connections are secure and tight to prevent any future leaks.
In Conclusion
 Moving a kitchen sink plumbing may seem like a daunting task, but with careful planning and the right tools and knowledge, it can be done successfully. By following the steps outlined above, you can create your dream kitchen layout and have a fully functional and efficient kitchen sink plumbing. However, if you are unsure or uncomfortable with the process, it's always best to consult a professional plumber to ensure the job is done correctly and to avoid any potential issues in the future.


