Installing a new bathroom sink can instantly upgrade the look and functionality of your bathroom. And when it comes to high-quality, stylish sinks, Kohler is a top choice for many homeowners. If you've recently purchased a Kohler undermount bathroom sink and are ready to install it, you've come to the right place. In this guide, we'll walk you through the top 10 MAIN_kohler undermount bathroom sink installation instructions for a successful and professional-looking installation. Kohler Undermount Bathroom Sink Installation Instructions


Kohler Undermount Bathroom Sink Installation Instructions


Before we dive into the specifics, let's go over the general steps for installing a Kohler undermount sink: 1. Prepare the area for installation by clearing out any clutter and removing the old sink if necessary. 2. Gather all necessary tools and materials, including a drill, silicone sealant, and mounting hardware. 3. Measure and mark the placement of the sink on the countertop. 4. Drill holes for the mounting hardware and any necessary plumbing connections. 5. Apply silicone sealant to the underside of the sink rim. 6. Carefully lower the sink into place, making sure it is properly aligned and centered. 7. Secure the sink with mounting hardware and connect any plumbing as needed. 8. Clean up any excess sealant and let it dry for at least 24 hours before using the sink. Kohler Undermount Sink Installation Instructions


Kohler Undermount Sink Installation Instructions


Now that you have a general idea of the installation process, let's get into the specifics for installing a Kohler undermount bathroom sink: 1. Begin by turning off the water supply to your bathroom sink. This can usually be done by shutting off the valves located under the sink. 2. Next, remove any old sink, countertop, or vanity that may be in place. This will give you a clean slate to work with. 3. Measure and mark the placement of your new sink on the countertop. Be sure to measure accurately and double-check your measurements before drilling any holes. 4. Using a drill with a diamond-tipped bit, carefully drill holes for the mounting hardware. The size of the holes will depend on the specific sink you are installing, so be sure to check the manufacturer's instructions. 5. Once the holes are drilled, apply a bead of silicone sealant along the underside of the sink rim. This will create a watertight seal and prevent any leaks. 6. Carefully lower the sink into place, making sure it is aligned and centered with your markings on the countertop. 7. Secure the sink with mounting hardware, tightening the screws evenly to ensure a secure fit. 8. If your sink has any additional plumbing connections, such as a drain or faucet, now is the time to connect them. Be sure to use plumber's tape to create a tight seal. 9. Once everything is connected, clean up any excess sealant and let the sink dry for at least 24 hours before using it. 10. Finally, turn the water supply back on and test your new Kohler undermount sink to ensure everything is working properly. Kohler Bathroom Sink Installation Instructions


Kohler Bathroom Sink Installation Instructions


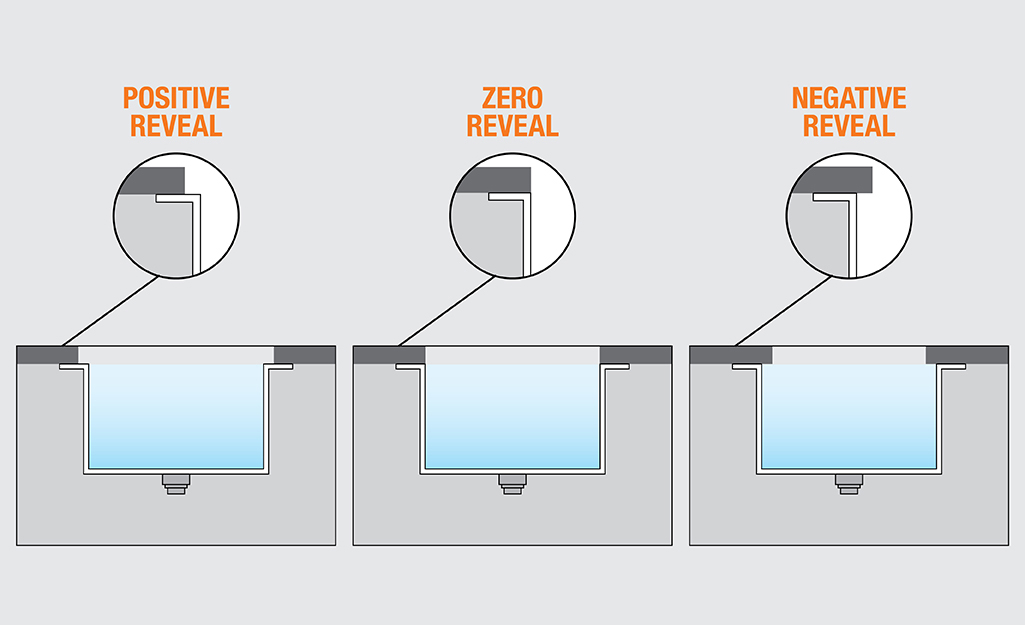
Installing an undermount sink can be a bit trickier than a traditional sink because it is mounted underneath the countertop. Here are a few additional tips to keep in mind for a successful undermount sink installation: 1. Make sure the sink you have purchased is compatible with your countertop material. Some sinks may require additional support or special installation techniques, so be sure to check the manufacturer's instructions. 2. Clean the underside of the countertop thoroughly before applying the silicone sealant. Any dirt or debris can compromise the seal and cause leaks. 3. Use a level to ensure your sink is properly aligned before securing it with mounting hardware. A crooked sink can cause drainage issues and may even crack the countertop over time. 4. If your undermount sink has a curved or rounded bottom, use additional support under the sink to prevent it from sagging over time. 5. Be patient when applying the silicone sealant. It should be applied in a continuous, even bead to ensure a watertight seal. Undermount Sink Installation Instructions


Undermount Sink Installation Instructions


Installing a Kohler sink is a relatively straightforward process, but there are a few key tips to keep in mind for a successful installation: 1. Always follow the manufacturer's instructions for your specific sink model. Different sinks may have different installation requirements. 2. Use the appropriate materials and tools for the job. This may include a drill with a diamond-tipped bit, silicone sealant, and plumber's tape. 3. Take your time and measure twice before drilling any holes or making any cuts. A mistake in the installation process can be costly and time-consuming to fix. 4. Don't be afraid to seek professional help if you are unsure about any steps in the installation process. A professional plumber or contractor can ensure your sink is installed correctly and avoid any potential issues down the road. Kohler Sink Installation Instructions
Kohler Sink Installation Instructions


Whether you are installing a Kohler undermount sink or any other type of bathroom sink, there are a few general tips to keep in mind for a successful installation: 1. Always turn off the water supply before beginning any installation. This will prevent any accidents or water damage. 2. Read and follow all instructions and safety precautions for your specific sink model. 3. Take your time and be patient. Rushing through the installation process can lead to mistakes and potential issues in the future. 4. Don't hesitate to seek professional help if you are unsure about any steps in the installation process. By following these top 10 MAIN_kohler undermount bathroom sink installation instructions, you can have a beautiful and functional bathroom sink in no time. Remember to always read and follow the manufacturer's instructions for your specific sink model, and don't hesitate to seek professional help if needed. With a little patience and attention to detail, you can achieve a professional-looking installation that will last for years to come. Bathroom Sink Installation Instructions


Bathroom Sink Installation Instructions


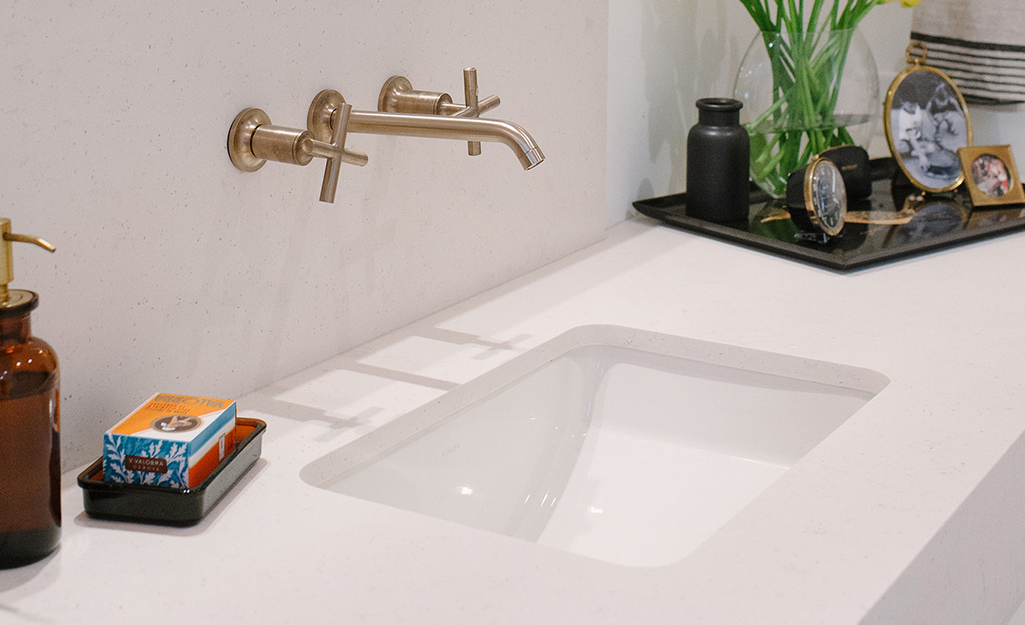
Why Choose Kohler Undermount Bathroom Sink for Your House Design?

Sleek and Modern Design
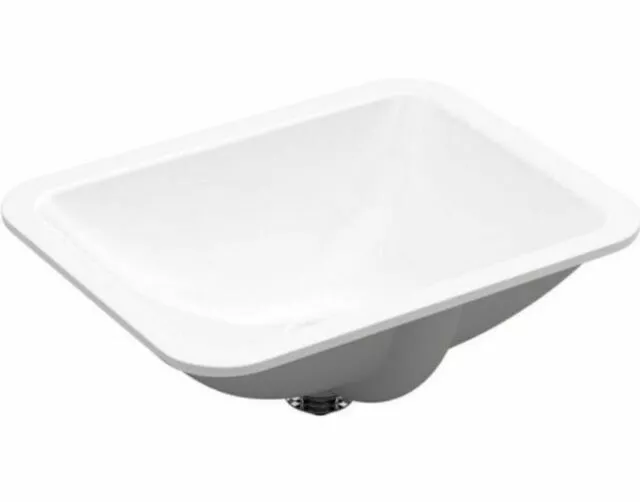
When it comes to designing your bathroom, every detail matters. That's why choosing the right sink is crucial in achieving your desired aesthetic. Kohler, a well-known brand in the home design industry, offers a wide range of undermount bathroom sinks that are perfect for modern and sleek house designs. These sinks are installed underneath the bathroom countertop, creating a seamless and clean look that adds a touch of elegance to any bathroom.
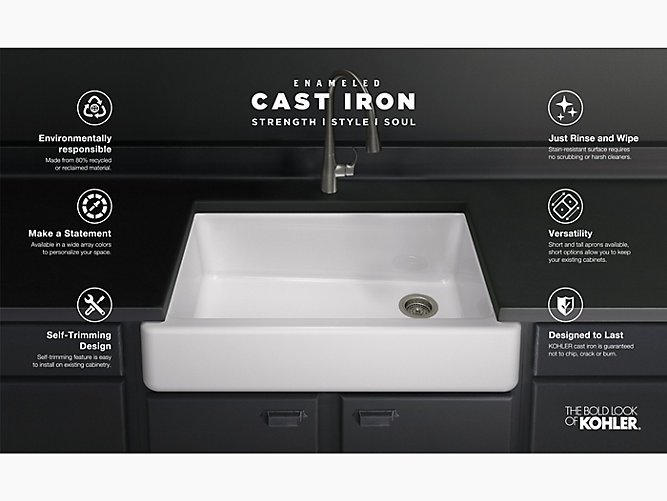
Durability and Quality

Aside from its stylish design, Kohler undermount bathroom sinks are made from high-quality materials that are built to last. The sinks are made from vitreous china, a type of ceramic that is known for its durability and resistance to scratches and stains. This makes it an ideal choice for high-traffic bathrooms, ensuring that your sink will remain in top condition for years to come.
Easy Installation with Kohler's Detailed Instructions

One of the perks of choosing Kohler undermount bathroom sinks is the ease of installation. With detailed installation instructions provided by the brand, you can easily install the sink yourself, saving you time and money from hiring a professional. The step-by-step guide includes all the necessary tools and materials needed, making the installation process hassle-free and convenient.
Customizable Options
Kohler offers a variety of undermount bathroom sinks that come in different shapes, sizes, and colors, giving you the freedom to choose the perfect sink for your house design. Whether you prefer a rectangular or oval-shaped sink, or a classic white or a bold colored sink, Kohler has got you covered. This customizable option allows you to add a personal touch to your bathroom and make it truly unique.
In conclusion, choosing Kohler undermount bathroom sinks for your house design is a no-brainer. With its sleek and modern design, durability and quality, easy installation, and customizable options, it's the perfect addition to any bathroom. So why settle for a basic and outdated sink when you can elevate your bathroom design with Kohler undermount sinks? Make the switch now and see the difference it can make in your bathroom.