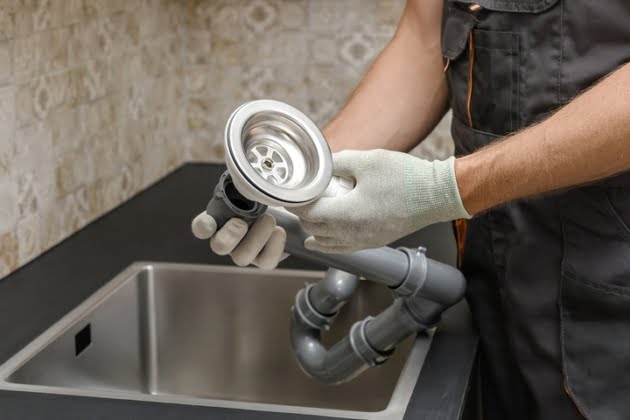
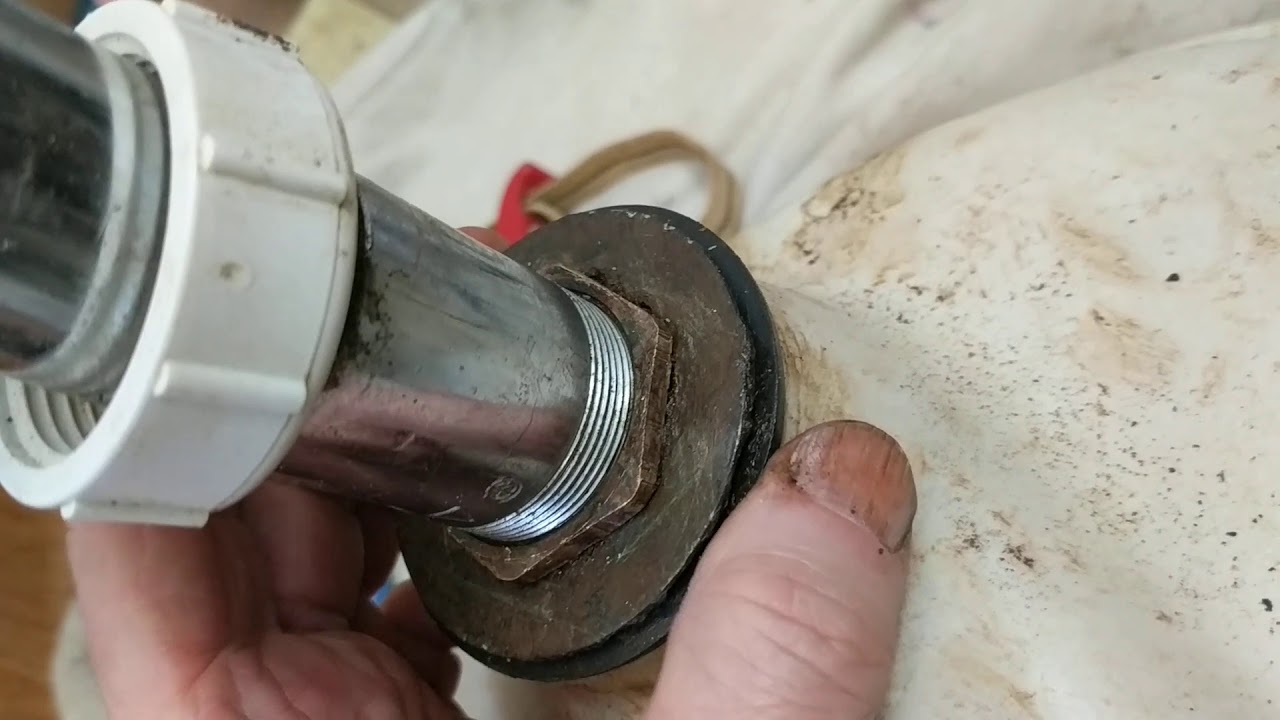
Replacing a kitchen sink drain nut may seem like a daunting task, but with the right tools and knowledge, it can be done easily and efficiently. Whether you’re dealing with a leaky sink or simply want to upgrade your kitchen hardware, replacing the drain nut is a simple and cost-effective solution. In this article, we’ll guide you through the steps of replacing a kitchen sink drain nut, so you can get your sink back in working order in no time.How to Replace a Kitchen Sink Drain Nut


How to Replace a Kitchen Sink Drain Nut
/how-to-install-a-sink-drain-2718789-hero-b5b99f72b5a24bb2ae8364e60539cece.jpg)


When it comes to replacing a kitchen sink drain nut, it’s important to also replace the washer. The washer helps create a watertight seal, preventing leaks and potential water damage. Before replacing the drain nut, make sure you have a new washer on hand. This will ensure a successful replacement and save you from having to make an extra trip to the hardware store.How to Replace a Kitchen Sink Drain Nut and Washer


How to Replace a Kitchen Sink Drain Nut and Washer


If you’re the handy type and enjoy tackling DIY projects, replacing a kitchen sink drain nut can be a fulfilling task. Not only will you save money by doing it yourself, but you’ll also gain a sense of accomplishment. With the right tools and a little know-how, you can easily replace a kitchen sink drain nut on your own.DIY Kitchen Sink Drain Nut Replacement


DIY Kitchen Sink Drain Nut Replacement


Here’s a step-by-step guide for replacing a kitchen sink drain nut:Step-by-Step Guide for Replacing a Kitchen Sink Drain Nut


Step-by-Step Guide for Replacing a Kitchen Sink Drain Nut


Here are the tools you’ll need to replace a kitchen sink drain nut:Tools Needed for Replacing a Kitchen Sink Drain Nut


Tools Needed for Replacing a Kitchen Sink Drain Nut
When it comes to choosing a replacement kitchen sink drain nut, there are a few things to consider. First, make sure you know the size and type of your current drain nut. This will ensure you purchase the correct replacement. Additionally, consider the material of the nut. Stainless steel or brass are durable options that will last longer than plastic.Tips for Choosing the Right Kitchen Sink Drain Nut Replacement

Tips for Choosing the Right Kitchen Sink Drain Nut Replacement


While replacing a kitchen sink drain nut is a relatively simple task, there are a few common problems that can arise. If the nut is stuck, try using a penetrating oil to help loosen it. If the nut is stripped, you may need to use a special tool called a drain wrench. If you encounter any issues, don’t hesitate to consult a professional for assistance.Common Problems with Kitchen Sink Drain Nuts and How to Fix Them


Common Problems with Kitchen Sink Drain Nuts and How to Fix Them


Now that you know how to replace a kitchen sink drain nut, it’s important to also know when it needs to be replaced. If you notice any leaks, corrosion, or damage to the nut, it’s time for a replacement. Additionally, if you’re upgrading your sink or faucet, it’s a good idea to replace the drain nut as well to ensure a proper fit.Replacing a Kitchen Sink Drain Nut: What You Need to Know


Replacing a Kitchen Sink Drain Nut: What You Need to Know


If you encounter a stubborn kitchen sink drain nut that just won’t budge, here are a few tips to help remove it:How to Remove a Stuck Kitchen Sink Drain Nut

How to Remove a Stuck Kitchen Sink Drain Nut


Replacing a kitchen sink drain nut may seem daunting at first, but with the right tools and knowledge, it can be done easily and cost-effectively. By following the steps outlined in this article, you can confidently replace a kitchen sink drain nut on your own. Remember to always turn off the water supply and use caution when handling tools. With a little patience and effort, your sink will be back in working order in no time.Replacing a Kitchen Sink Drain Nut: A Beginner's Guide

Replacing a Kitchen Sink Drain Nut: A Beginner's Guide

How to Easily Replace the Kitchen Sink Drain Nut for a More Functional and Stylish Kitchen

The Importance of a Well-Functioning Kitchen Sink Drain
:max_bytes(150000):strip_icc()/how-to-install-a-sink-drain-2718789-hero-24e898006ed94c9593a2a268b57989a3.jpg) A kitchen sink is one of the most frequently used fixtures in a house. From washing dishes to preparing food, it is an essential part of any household. However, with regular use, the drain nut of a kitchen sink can become loose or worn out, causing leaks and other plumbing issues. This not only affects the functionality of the sink but can also lead to water damage and mold growth. Therefore, it is important to regularly check and replace the drain nut to ensure a well-functioning kitchen sink.
A kitchen sink is one of the most frequently used fixtures in a house. From washing dishes to preparing food, it is an essential part of any household. However, with regular use, the drain nut of a kitchen sink can become loose or worn out, causing leaks and other plumbing issues. This not only affects the functionality of the sink but can also lead to water damage and mold growth. Therefore, it is important to regularly check and replace the drain nut to ensure a well-functioning kitchen sink.
Choosing the Right Replacement Drain Nut
 Before starting the replacement process, it is important to choose the right drain nut for your kitchen sink. There are various types of drain nuts available in the market, such as metal, plastic, and rubber. It is important to choose a durable and rust-resistant material to ensure a long-lasting replacement. Additionally, make sure to measure the diameter of your sink drain to ensure a proper fit for the replacement nut.
Step-by-Step Guide to Replacing the Kitchen Sink Drain Nut
 Step 1: Turn off the Water Supply
- Before starting any plumbing work, it is important to turn off the water supply to avoid any accidents or water damage. You can do this by shutting off the main water valve in your house.
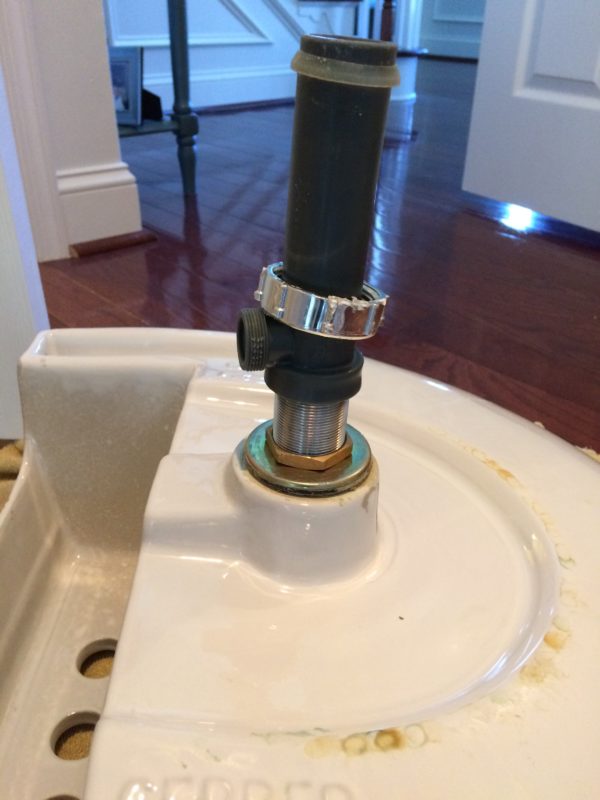
Step 2: Remove the Old Drain Nut
- Using a pair of pliers, unscrew the old drain nut from the bottom of the sink. If the nut is too tight, you can use a wrench for extra leverage. Once the nut is loose, remove it from the drain.
Step 3: Clean the Area
- Before installing the new drain nut, make sure to clean the area around the drain thoroughly. This will ensure a proper seal for the new nut.
Step 4: Install the New Drain Nut
- Place the new drain nut on the bottom of the sink and tighten it with your hands. If needed, use pliers or a wrench to secure it in place.
Step 5: Test for Leaks
- Turn the water supply back on and test the sink for any leaks. If there are no leaks, congratulations, you have successfully replaced the kitchen sink drain nut!
Step 1: Turn off the Water Supply
- Before starting any plumbing work, it is important to turn off the water supply to avoid any accidents or water damage. You can do this by shutting off the main water valve in your house.
Step 2: Remove the Old Drain Nut
- Using a pair of pliers, unscrew the old drain nut from the bottom of the sink. If the nut is too tight, you can use a wrench for extra leverage. Once the nut is loose, remove it from the drain.
Step 3: Clean the Area
- Before installing the new drain nut, make sure to clean the area around the drain thoroughly. This will ensure a proper seal for the new nut.
Step 4: Install the New Drain Nut
- Place the new drain nut on the bottom of the sink and tighten it with your hands. If needed, use pliers or a wrench to secure it in place.
Step 5: Test for Leaks
- Turn the water supply back on and test the sink for any leaks. If there are no leaks, congratulations, you have successfully replaced the kitchen sink drain nut!
Enhance Your Kitchen Design with a Stylish Drain Nut
 Apart from functionality, a drain nut can also add to the overall design of your kitchen. With various styles and finishes available, you can choose a drain nut that complements your kitchen design. From sleek stainless steel to elegant chrome, the options are endless.
Upgrade your kitchen sink with a stylish drain nut for a more functional and visually appealing kitchen.
Apart from functionality, a drain nut can also add to the overall design of your kitchen. With various styles and finishes available, you can choose a drain nut that complements your kitchen design. From sleek stainless steel to elegant chrome, the options are endless.
Upgrade your kitchen sink with a stylish drain nut for a more functional and visually appealing kitchen.
In Conclusion
 Replacing the kitchen sink drain nut may seem like a daunting task, but with the right tools and steps, it can be an easy and quick process. Regularly checking and replacing the drain nut will not only ensure a well-functioning sink but also prevent any potential water damage.
Follow these steps and enhance the functionality and design of your kitchen with a new drain nut.
Replacing the kitchen sink drain nut may seem like a daunting task, but with the right tools and steps, it can be an easy and quick process. Regularly checking and replacing the drain nut will not only ensure a well-functioning sink but also prevent any potential water damage.
Follow these steps and enhance the functionality and design of your kitchen with a new drain nut.