If you're looking to upgrade your kitchen sink, installing new brackets is an essential step in the process. These brackets provide support and stability for the sink, ensuring it stays securely in place. While it may seem like a daunting task, with the right tools and some basic knowledge, you can easily install kitchen sink brackets on your own. In this guide, we'll take you through the steps to install kitchen sink brackets for a smooth and successful installation. How to Install Kitchen Sink Brackets


How to Install Kitchen Sink Brackets


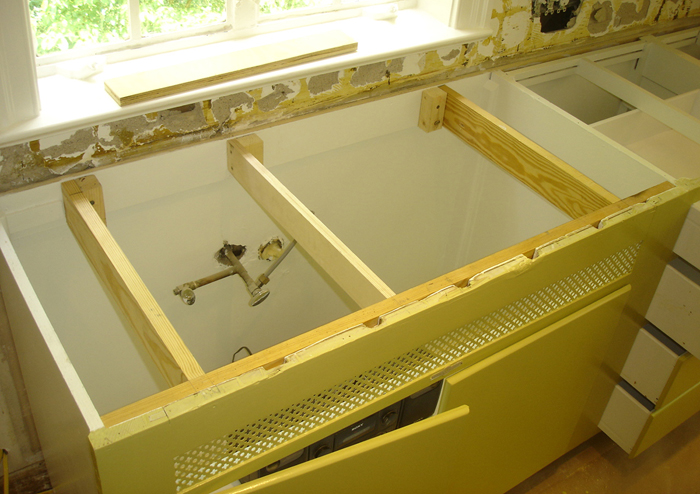
The first step in installing kitchen sink brackets is to measure the sink and the area where it will be installed. This will help you determine the size and type of brackets you'll need. Next, gather all the necessary tools and materials such as a drill, screws, brackets, and a level. Make sure to read the manufacturer's instructions carefully before beginning the installation process. Start by attaching the brackets to the underside of the sink. Place them in the designated areas and use your drill to screw them in place. Make sure the brackets are securely attached and level. Then, position the sink in its designated spot and use a level to ensure it's straight. Once the sink is in place, use your drill to attach the brackets to the countertop or cabinet for added stability.Installing Kitchen Sink Brackets: A Step-by-Step Guide


Installing Kitchen Sink Brackets: A Step-by-Step Guide
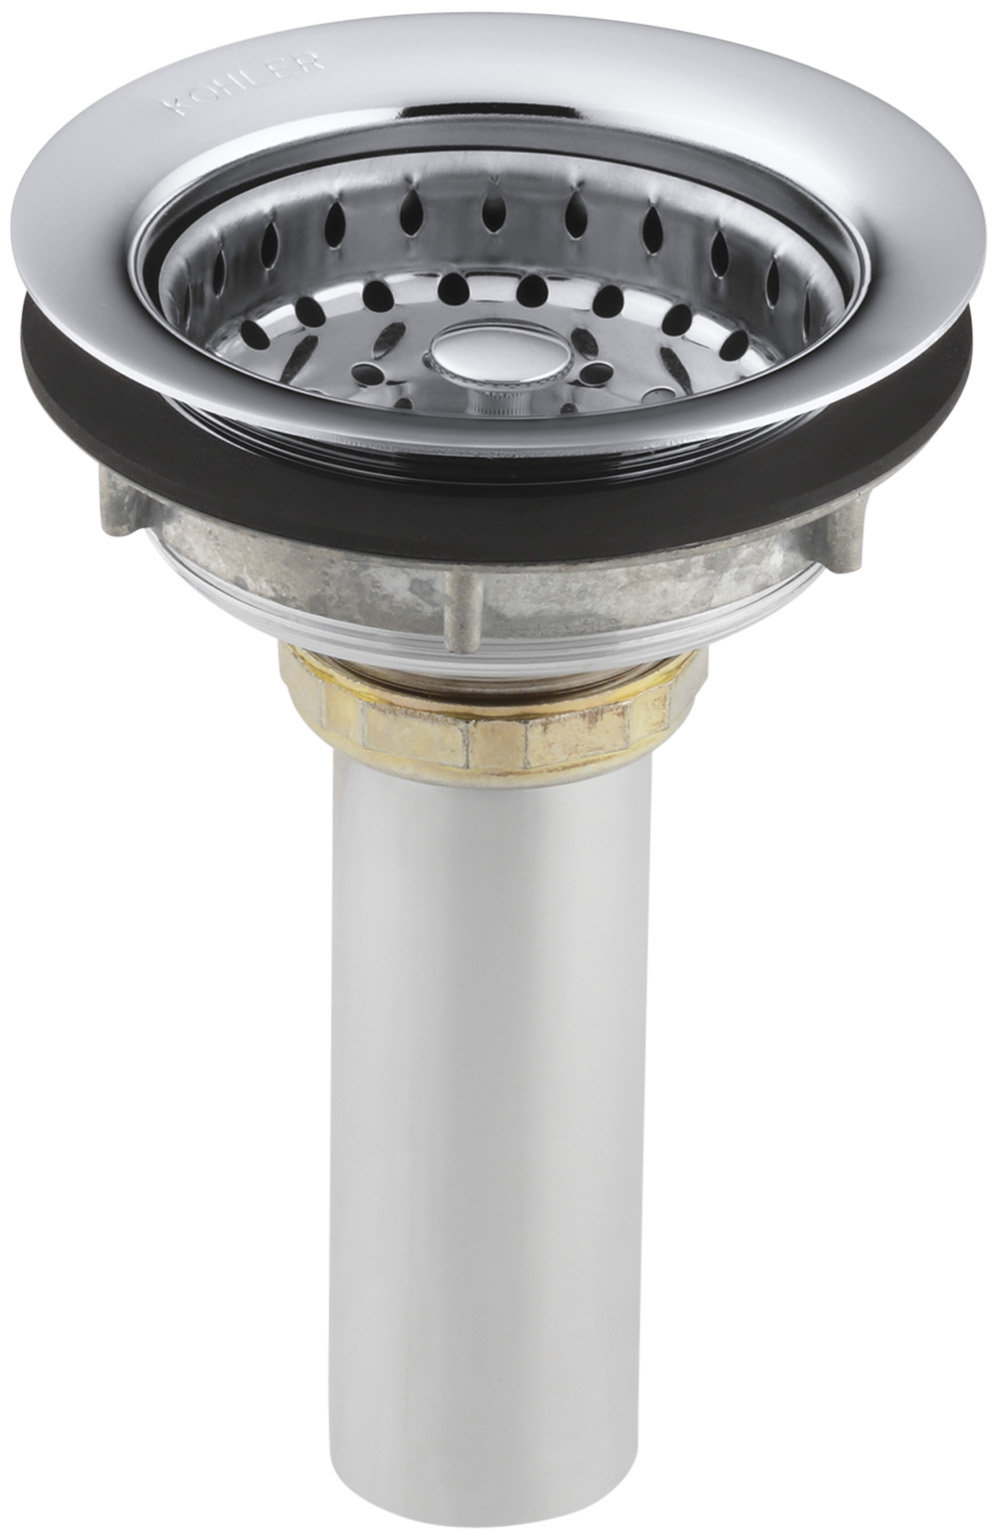
:no_upscale()/cdn.vox-cdn.com/uploads/chorus_asset/file/19495086/drain_0.jpg)


Installing kitchen sink brackets yourself can save you time and money, and it's a great way to learn a new skill. However, it's important to take all the necessary precautions and follow the instructions carefully. Make sure to wear proper safety gear and use caution when handling tools and materials. If you're unsure about any step in the process, it's always best to consult a professional for assistance.DIY Kitchen Sink Bracket Installation


DIY Kitchen Sink Bracket Installation


Here are some helpful tips and tricks to keep in mind when installing kitchen sink brackets:Installing Kitchen Sink Brackets: Tips and Tricks


Installing Kitchen Sink Brackets: Tips and Tricks


Properly installing kitchen sink brackets is crucial for the long-term stability and functionality of your sink. These brackets provide support and help distribute the weight of the sink evenly, preventing any damage or wear and tear over time. A secure installation also ensures that your sink remains in place and doesn't shift or become uneven, which can cause issues with drainage and water flow.The Importance of Properly Installing Kitchen Sink Brackets


The Importance of Properly Installing Kitchen Sink Brackets


To successfully install kitchen sink brackets, you'll need the following tools and materials:Tools You'll Need for Installing Kitchen Sink Brackets


Tools You'll Need for Installing Kitchen Sink Brackets


Here are some common mistakes to avoid when installing kitchen sink brackets:Common Mistakes to Avoid When Installing Kitchen Sink Brackets

Common Mistakes to Avoid When Installing Kitchen Sink Brackets


Choosing the right kitchen sink brackets is essential for a successful installation. Here are some factors to consider when selecting brackets for your sink:How to Choose the Right Kitchen Sink Brackets for Your Sink


How to Choose the Right Kitchen Sink Brackets for Your Sink


:max_bytes(150000):strip_icc()/Basic-kitchen-sink-types-1821207_color_rev-0b539306b9ef4236a136624ad2a89a4c.jpg)

Deciding whether to hire a professional or tackle the installation yourself is a personal choice. If you have some experience with DIY projects and feel comfortable handling tools and materials, installing kitchen sink brackets yourself can save you money. However, if you're unfamiliar with the process or have any doubts, it's always best to hire a professional for a smooth and hassle-free installation.Professional vs. DIY: Which is Better for Installing Kitchen Sink Brackets?


Professional vs. DIY: Which is Better for Installing Kitchen Sink Brackets?


:max_bytes(150000):strip_icc()/steam-cleaning-professional-vs-diy-2908776-hero-24ffd77737924bca908036dabcdcbbad.jpg)


If you encounter any issues during or after installing kitchen sink brackets, here are some troubleshooting tips:Troubleshooting Common Issues When Installing Kitchen Sink Brackets


Troubleshooting Common Issues When Installing Kitchen Sink Brackets


Installing Kitchen Sink Brackets: A Step-by-Step Guide

What are Kitchen Sink Brackets?
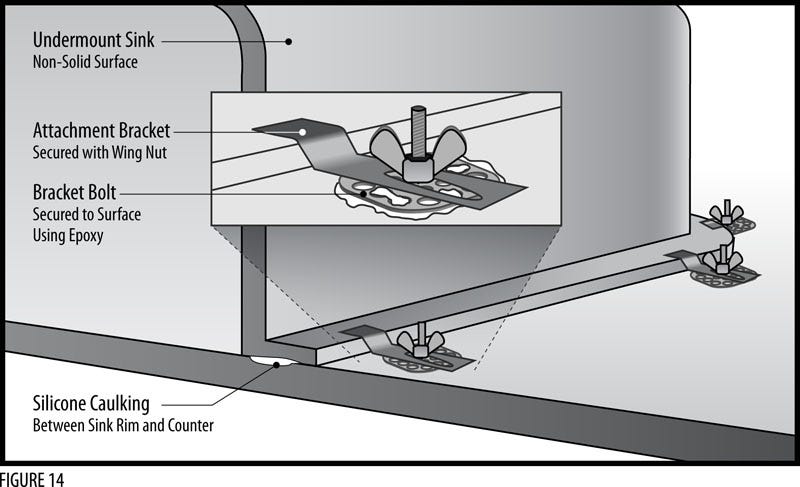
 Kitchen sink brackets are essential hardware used to securely attach kitchen sinks to the countertop. These brackets are typically made of metal, such as stainless steel or aluminum, and have a sturdy and durable design to support the weight of the sink and any dishes or items placed in it. Installing kitchen sink brackets is a crucial step in the process of designing and building a functional and aesthetically pleasing kitchen.
Why are Kitchen Sink Brackets Important?
 Kitchen sink brackets play a vital role in the overall stability and functionality of a kitchen sink. Without proper installation of brackets, the sink may become loose and wobble, causing damage to the countertop and surrounding areas. Furthermore, a securely installed sink will prevent any leaks or water damage, ensuring a longer lifespan for your kitchen.
Step-by-Step Guide to Installing Kitchen Sink Brackets
 Step 1: Measure and Mark
Before installing the brackets, it is essential to measure and mark the exact placement of the sink on the countertop. Use a measuring tape to determine the distance between the sink and the edge of the countertop on all sides. Then, mark these measurements with a pencil to ensure accurate placement of the brackets.
Step 2: Pre-drill Holes
Using a drill and the appropriate drill bit, pre-drill holes into the countertop at the marked locations. These holes will serve as the anchor points for the brackets. It is crucial to use the correct size drill bit to ensure a secure fit for the brackets.
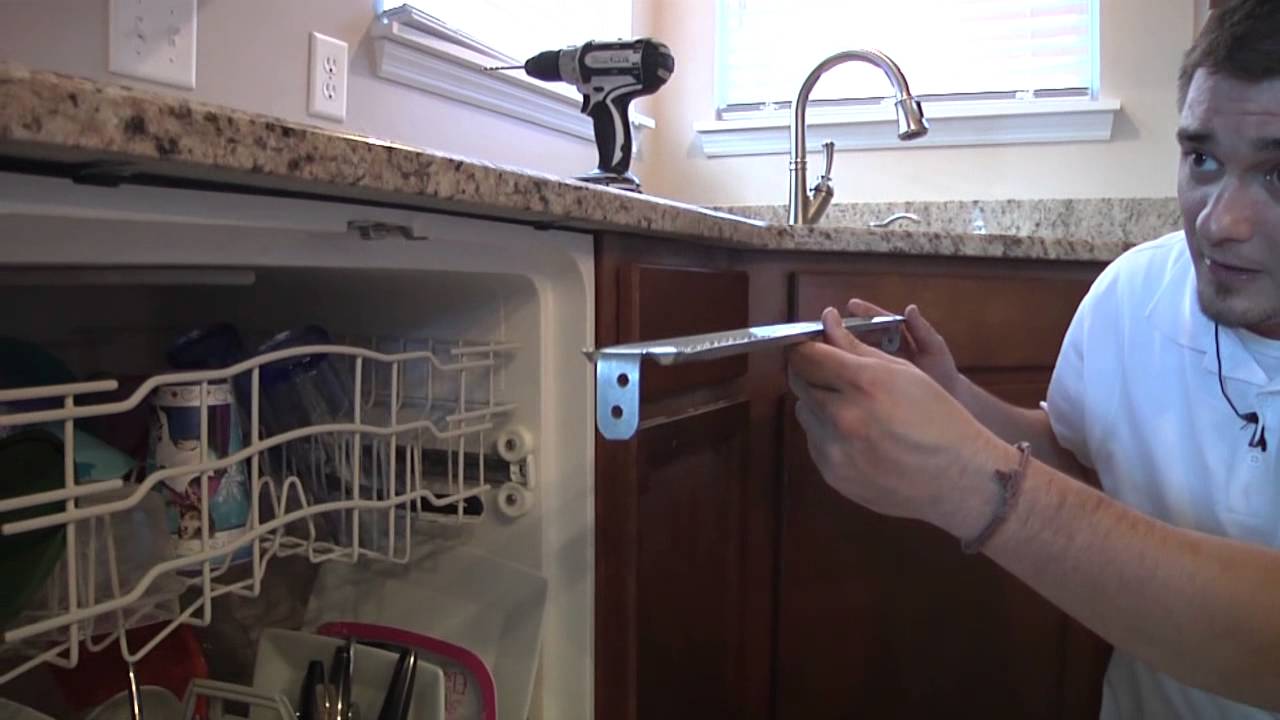
Step 3: Attach Brackets to the Sink
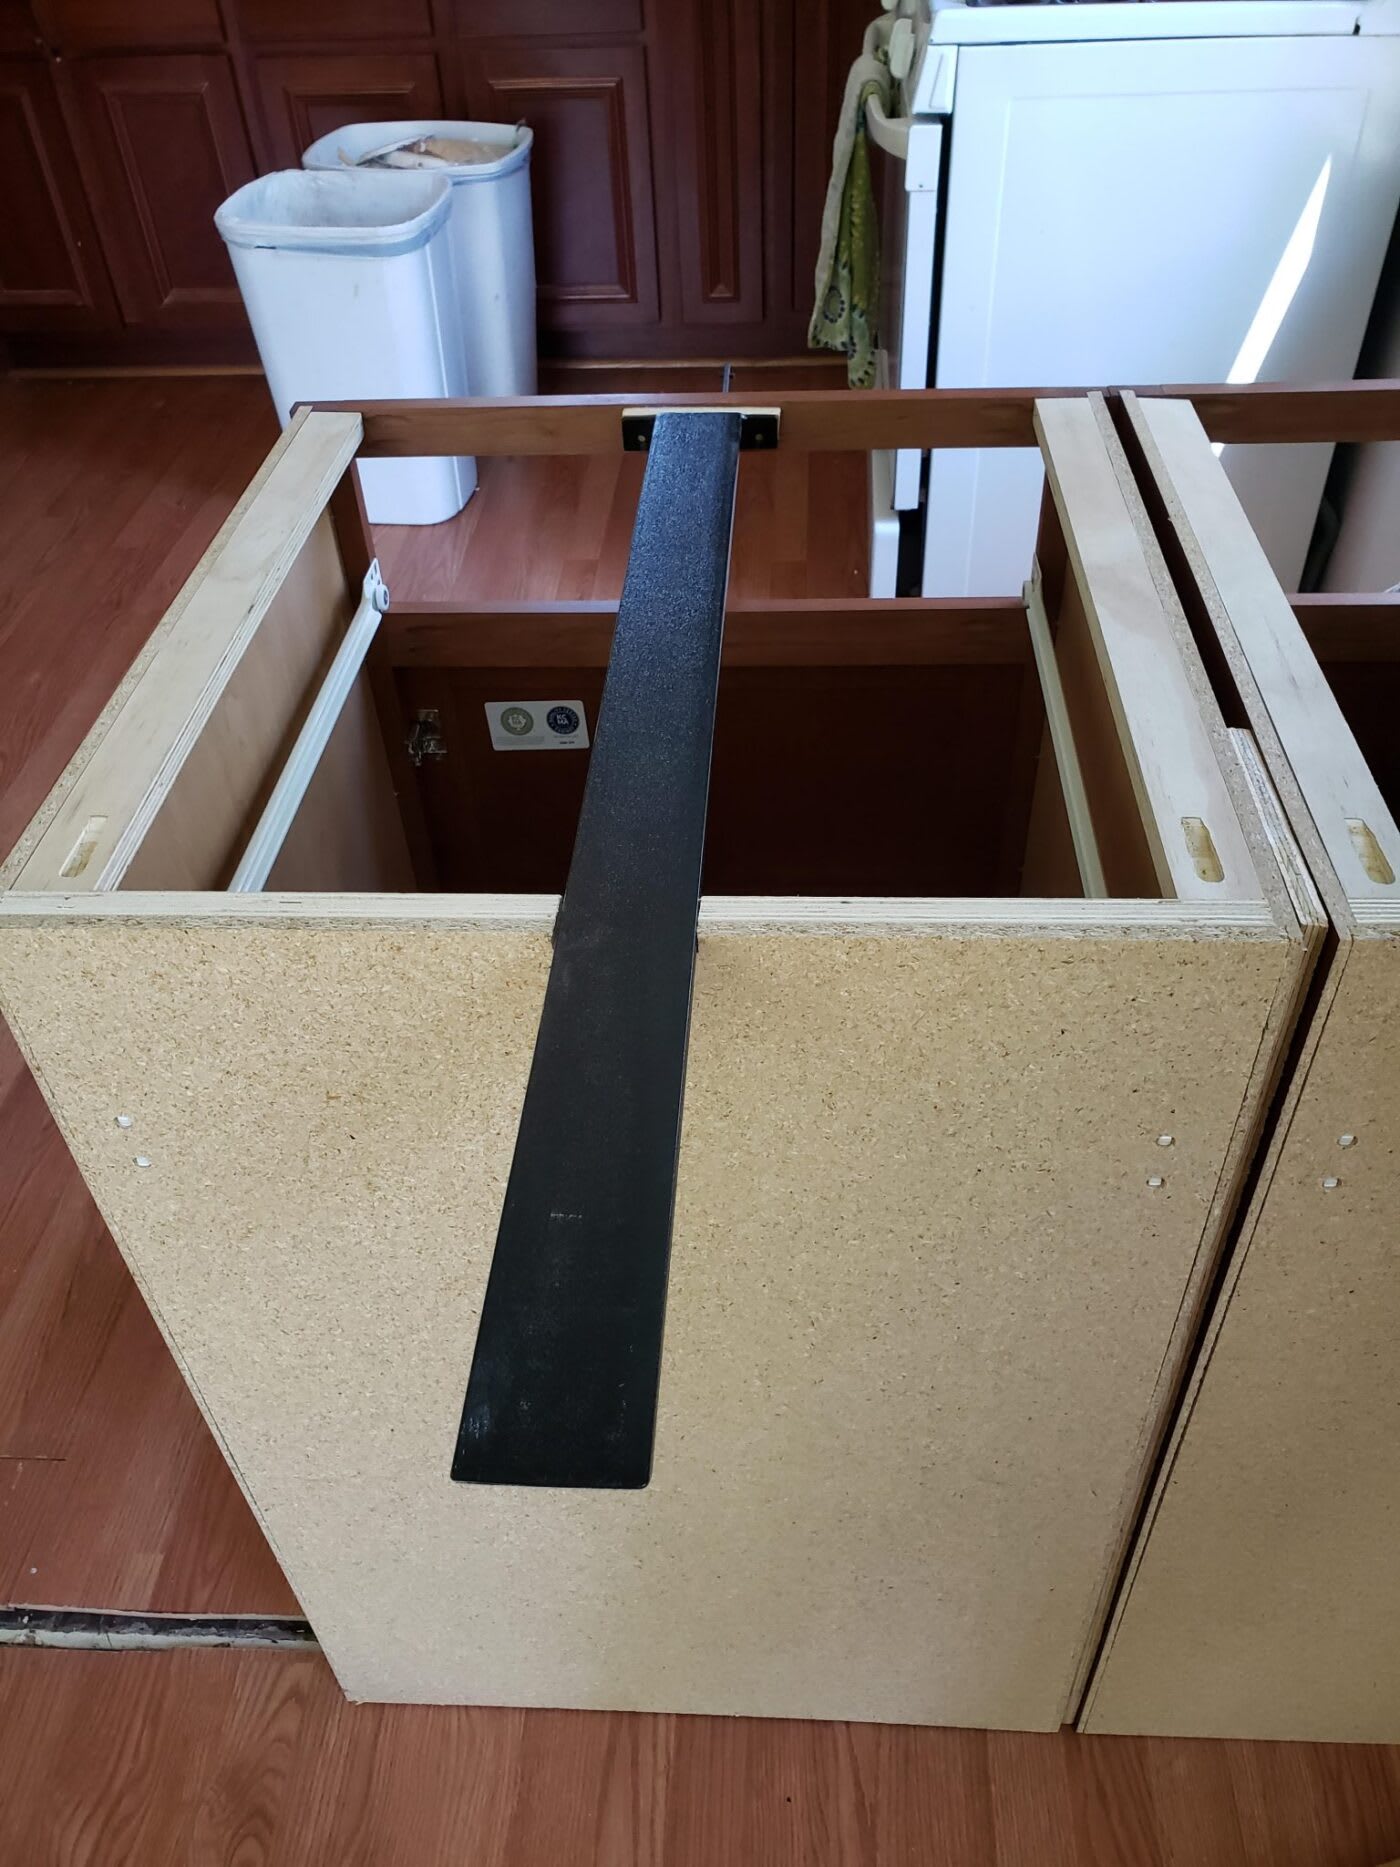
Next, attach the brackets to the underside of the sink using the provided screws. Make sure to align the brackets with the pre-drilled holes and tighten the screws securely.
Step 4: Place Sink on Countertop
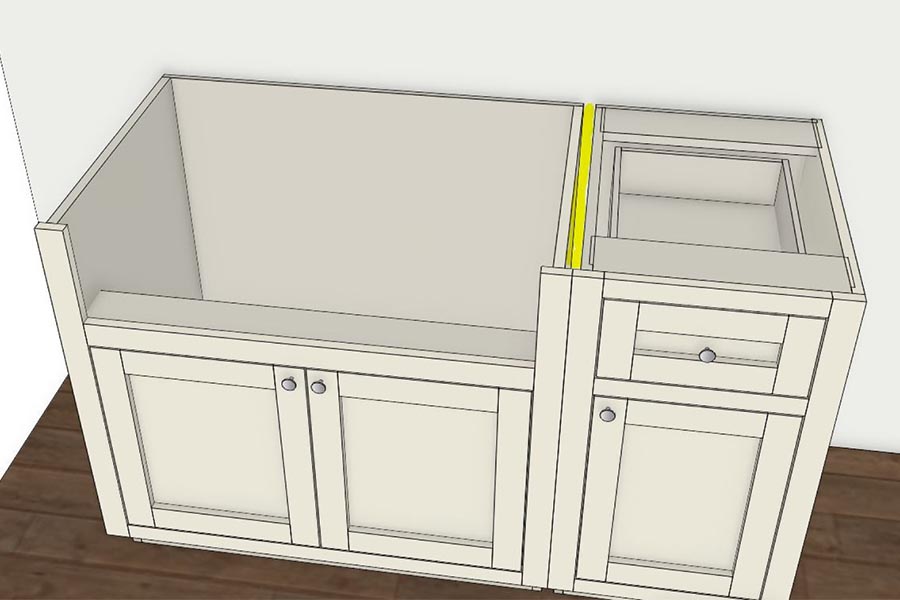
Carefully lift the sink and place it on the countertop, making sure to align it with the pre-drilled holes and the markings made in Step 1.
Step 5: Secure Brackets to Countertop
Using screws and a screwdriver or drill, secure the brackets to the countertop by inserting them through the pre-drilled holes. Make sure to tighten the screws firmly to ensure the sink is securely attached to the countertop.
Step 1: Measure and Mark
Before installing the brackets, it is essential to measure and mark the exact placement of the sink on the countertop. Use a measuring tape to determine the distance between the sink and the edge of the countertop on all sides. Then, mark these measurements with a pencil to ensure accurate placement of the brackets.
Step 2: Pre-drill Holes
Using a drill and the appropriate drill bit, pre-drill holes into the countertop at the marked locations. These holes will serve as the anchor points for the brackets. It is crucial to use the correct size drill bit to ensure a secure fit for the brackets.
Step 3: Attach Brackets to the Sink
Next, attach the brackets to the underside of the sink using the provided screws. Make sure to align the brackets with the pre-drilled holes and tighten the screws securely.
Step 4: Place Sink on Countertop
Carefully lift the sink and place it on the countertop, making sure to align it with the pre-drilled holes and the markings made in Step 1.
Step 5: Secure Brackets to Countertop
Using screws and a screwdriver or drill, secure the brackets to the countertop by inserting them through the pre-drilled holes. Make sure to tighten the screws firmly to ensure the sink is securely attached to the countertop.
In Conclusion
 Installing kitchen sink brackets is a crucial step in the design and construction of a functional and durable kitchen. By following this step-by-step guide, you can ensure a secure and stable installation of your kitchen sink, providing peace of mind and a long-lasting kitchen design. Remember to always use high-quality brackets and follow the manufacturer's instructions for the best results.