Installing a kitchen sink rough-in may seem like a daunting task, but with the right tools and knowledge, it can be a simple and straightforward process. A rough-in refers to the basic plumbing and layout of pipes before the fixtures, such as the sink, are installed. In this guide, we will walk you through the steps of installing a kitchen sink rough-in, so you can have a solid foundation for your new sink.1. Kitchen Sink Rough-In Installation Guide


1. Kitchen Sink Rough-In Installation Guide


The first step in installing a kitchen sink rough-in is to gather all the necessary tools and materials. You will need a tape measure, level, hacksaw, wrench, and plumber's putty. You will also need the sink, drain, and water supply lines. Make sure to choose a sink that fits your kitchen layout and personal style.2. How to Install a Kitchen Sink Rough-In


2. How to Install a Kitchen Sink Rough-In


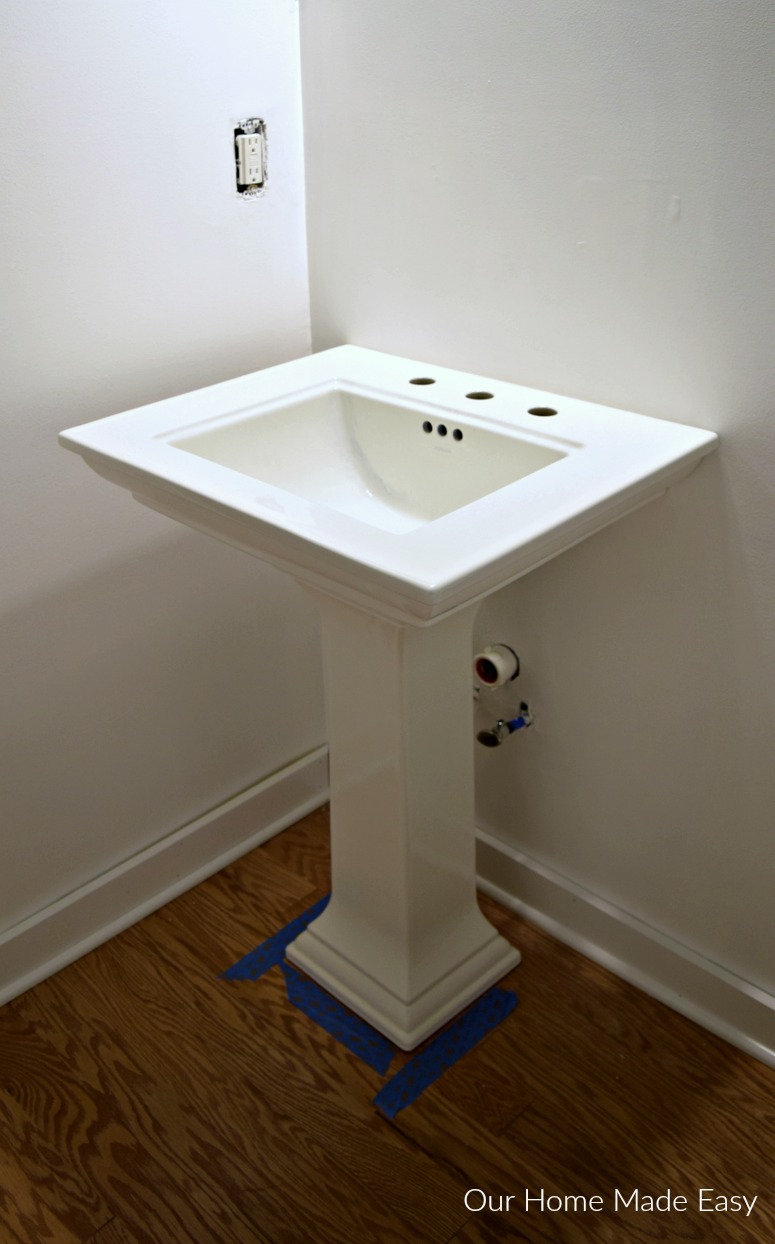
Before you begin installation, it is important to turn off the water supply to your kitchen. Once that is done, measure and mark the location of the sink on your countertop. Use a level to ensure your sink will be installed evenly. Next, you will need to cut a hole in the countertop for the sink to fit into. Make sure to follow the manufacturer's instructions for the specific sink you have chosen. Once the hole is cut, you can begin installing the drain. Apply plumber's putty around the drain flange and insert it into the sink hole from underneath the countertop. Secure it in place with the provided hardware. Now it's time to connect the water supply lines. Use a wrench to tighten the connections and make sure they are secure. Once everything is in place, turn the water supply back on and check for any leaks.3. Step-by-Step Guide for Installing a Kitchen Sink Rough-In


3. Step-by-Step Guide for Installing a Kitchen Sink Rough-In


When installing a kitchen sink rough-in, it is important to follow the local building codes and regulations. These codes ensure the proper placement and installation of your sink for safety and functionality. It is also important to choose the right size and type of sink for your kitchen. Consider the size of your kitchen and the amount of counter space you have available.4. Kitchen Sink Rough-In: What You Need to Know


4. Kitchen Sink Rough-In: What You Need to Know


Installing a kitchen sink rough-in can be a DIY project, but it is important to have some basic plumbing knowledge and experience. If you are unsure about any steps or encounter any issues, it is best to consult a professional plumber. A simple mistake during installation can lead to costly damages and repairs in the future.5. DIY Kitchen Sink Rough-In Installation


5. DIY Kitchen Sink Rough-In Installation


To ensure a successful installation, here are a few tips to keep in mind:6. Tips for Installing a Kitchen Sink Rough-In


6. Tips for Installing a Kitchen Sink Rough-In


Despite following all the necessary steps, there are some common mistakes that can occur during a kitchen sink rough-in installation:7. Common Mistakes to Avoid When Installing a Kitchen Sink Rough-In


7. Common Mistakes to Avoid When Installing a Kitchen Sink Rough-In


Here is a list of the tools and materials you will need for a successful kitchen sink rough-in installation:8. Tools and Materials Needed for a Kitchen Sink Rough-In Installation

8. Tools and Materials Needed for a Kitchen Sink Rough-In Installation
/how-to-install-a-sink-drain-2718789-hero-24e898006ed94c9593a2a268b57989a3.jpg)

Before you begin installation, it is important to measure and mark the location of your sink on the countertop. Follow these steps for accurate measurements:9. How to Measure and Mark for a Kitchen Sink Rough-In


9. How to Measure and Mark for a Kitchen Sink Rough-In


If you encounter any issues during your kitchen sink rough-in installation, here are some troubleshooting tips:10. Troubleshooting Common Issues with Kitchen Sink Rough-In Installations


10. Troubleshooting Common Issues with Kitchen Sink Rough-In Installations


Why Properly Installing a Rough In for Your Kitchen Sink is Essential in House Design

The Importance of a Proper Rough In for Your Kitchen Sink
:no_upscale()/cdn.vox-cdn.com/uploads/chorus_asset/file/19495086/drain_0.jpg) When it comes to designing a kitchen, the sink is often considered the focal point. It is where dishes are washed, food is prepared, and often serves as a gathering spot for family and friends. Therefore, it is crucial to ensure that the installation of the sink is done correctly, starting with the rough in.
Installing a rough in for your kitchen sink is a crucial step in the house design process, as it sets the foundation for a functional and efficient kitchen.
When it comes to designing a kitchen, the sink is often considered the focal point. It is where dishes are washed, food is prepared, and often serves as a gathering spot for family and friends. Therefore, it is crucial to ensure that the installation of the sink is done correctly, starting with the rough in.
Installing a rough in for your kitchen sink is a crucial step in the house design process, as it sets the foundation for a functional and efficient kitchen.
What is a Rough In for a Kitchen Sink?
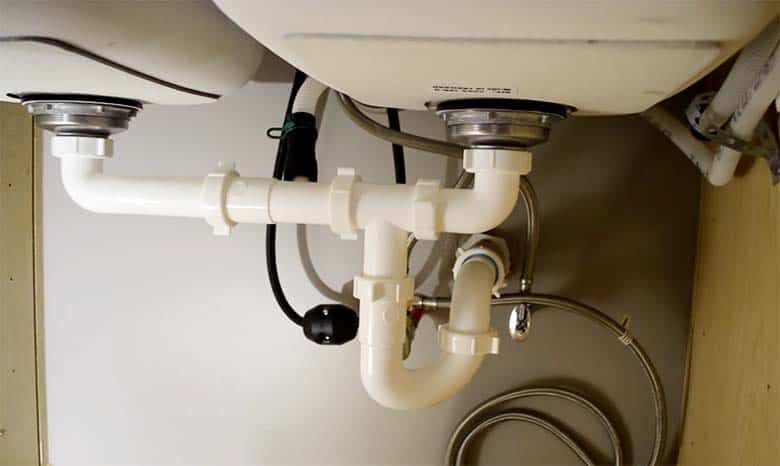
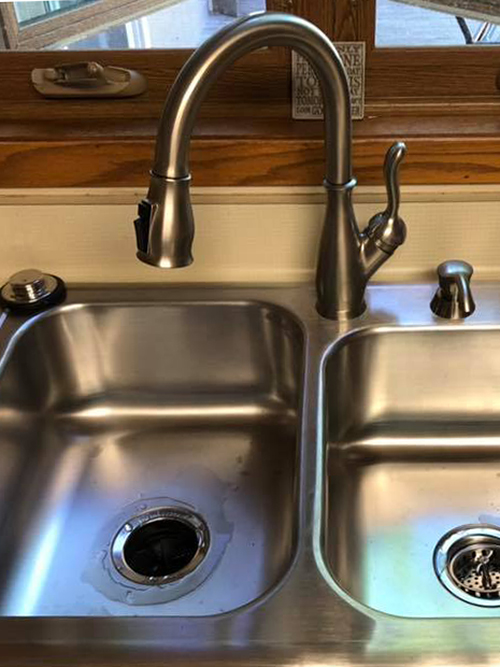
 A rough in for a kitchen sink is the installation of the supply and drain lines that will connect to the sink. This typically includes the hot and cold water supply lines, the drain pipe, and any necessary vent pipes.
It is important to have a professional plumber handle this task to ensure that the pipes are installed correctly and to code, preventing any future plumbing issues.
A rough in for a kitchen sink is the installation of the supply and drain lines that will connect to the sink. This typically includes the hot and cold water supply lines, the drain pipe, and any necessary vent pipes.
It is important to have a professional plumber handle this task to ensure that the pipes are installed correctly and to code, preventing any future plumbing issues.
The Benefits of Properly Installing a Rough In for Your Kitchen Sink
How to Install a Rough In for Your Kitchen Sink
:max_bytes(150000):strip_icc()/how-to-install-a-sink-drain-2718789-hero-24e898006ed94c9593a2a268b57989a3.jpg) It is important to have a professional plumber handle the installation of a rough in for your kitchen sink. They will have the necessary skills and knowledge to ensure that the pipes are installed correctly and to code. However, if you are a DIY enthusiast and want to attempt the installation yourself, here are the basic steps:
1. Measure and mark the location for the sink and the rough in.
2. Shut off the water supply to the kitchen.
3. Cut a hole in the wall or floor for the rough in pipes.
4. Install the hot and cold water supply lines and connect them to the existing plumbing.
5. Install the drain pipe and connect it to the main sewer line.
6. Test the pipes for any leaks or issues.
7. Once everything is secure and functioning correctly, cover the pipes with drywall or flooring.
In conclusion,
properly installing a rough in for your kitchen sink is essential in house design, as it sets the foundation for a functional and efficient kitchen.
By hiring a professional plumber or following the proper steps, you can ensure that your kitchen sink is installed correctly and will provide years of use without any issues.
It is important to have a professional plumber handle the installation of a rough in for your kitchen sink. They will have the necessary skills and knowledge to ensure that the pipes are installed correctly and to code. However, if you are a DIY enthusiast and want to attempt the installation yourself, here are the basic steps:
1. Measure and mark the location for the sink and the rough in.
2. Shut off the water supply to the kitchen.
3. Cut a hole in the wall or floor for the rough in pipes.
4. Install the hot and cold water supply lines and connect them to the existing plumbing.
5. Install the drain pipe and connect it to the main sewer line.
6. Test the pipes for any leaks or issues.
7. Once everything is secure and functioning correctly, cover the pipes with drywall or flooring.
In conclusion,
properly installing a rough in for your kitchen sink is essential in house design, as it sets the foundation for a functional and efficient kitchen.
By hiring a professional plumber or following the proper steps, you can ensure that your kitchen sink is installed correctly and will provide years of use without any issues.