Installing a panel under a kitchen sink may seem like a daunting task, but with the right tools and knowledge, it can be done easily and efficiently. Whether you're looking to add a touch of style to your kitchen or need extra storage space, installing a panel under your sink is a great way to achieve both. In this guide, we'll take you through the step-by-step process of installing a panel under your kitchen sink.1. How to Install a Panel Under a Kitchen Sink


1. How to Install a Panel Under a Kitchen Sink

:no_upscale()/cdn.vox-cdn.com/uploads/chorus_asset/file/19495086/drain_0.jpg)


The first step in installing a panel under a kitchen sink is to measure the space where the panel will be installed. Make sure to take accurate measurements and account for any pipes or obstacles that may be in the way. Next, gather all the necessary tools and materials, including a panel of your choice, a saw, screws, and a drill. Once you have everything you need, follow these steps: Step 1: Cut the panel to fit the measured space. Use a saw to make any necessary cuts, ensuring a perfect fit. Step 2: Sand down any rough edges on the panel to prevent splinters and create a smooth finish. Step 3: Place the panel in the desired location under the sink. Make sure it is level and secure before moving on to the next step. Step 4: Use a drill to attach the panel to the bottom of the sink cabinet. Make sure to use screws that are appropriate for the type of panel and cabinet material you are working with. Step 5: Once the panel is securely attached, you can add any finishing touches such as paint or decorative elements.2. Step-by-Step Guide for Installing a Panel Under a Kitchen Sink


2. Step-by-Step Guide for Installing a Panel Under a Kitchen Sink


If you're a fan of DIY projects, installing a panel under your kitchen sink is a great way to put your skills to the test. With a little bit of time and effort, you can achieve a professional-looking installation that will add value to your kitchen. Make sure to follow the steps outlined in this guide and don't be afraid to get creative with your design!3. DIY: Installing a Panel Under a Kitchen Sink


3. DIY: Installing a Panel Under a Kitchen Sink


Installing a panel under a kitchen sink may seem like a simple task, but there are a few things to keep in mind to ensure a successful installation. Here are some tips to help you along the way: Tip 1: Measure twice, cut once. Taking accurate measurements is crucial for a proper fit. Tip 2: Use a level to make sure the panel is straight before securing it in place. Tip 3: Choose a panel that is moisture-resistant, as it will be in close proximity to water and other liquids. Tip 4: Don't be afraid to seek professional help if you are unsure or uncomfortable with any step of the installation process.4. Tips for Installing a Panel Under a Kitchen Sink


4. Tips for Installing a Panel Under a Kitchen Sink


Before diving into the installation process, there are a few things you should know about installing a panel under a kitchen sink: Fact 1: The panel can be made from a variety of materials, including wood, plastic, or metal, depending on your preferences and budget. Fact 2: Installing a panel under your sink can provide additional storage space for items such as cleaning supplies, trash bags, or extra kitchen tools. Fact 3: It is important to choose a panel that is the right size and shape for your specific sink and cabinet.5. What You Need to Know Before Installing a Panel Under a Kitchen Sink


5. What You Need to Know Before Installing a Panel Under a Kitchen Sink


:max_bytes(150000):strip_icc()/how-to-lay-laminate-flooring-1822250-01-0b84ff37785a4f8b94ab8bd30c300bfb.jpg)


Adding a panel under your kitchen sink may not seem like a necessary task, but it can actually provide many benefits. Here are some reasons why installing a panel under your sink is important: Benefit 1: It can improve the overall appearance of your kitchen by covering up unsightly pipes and clutter. Benefit 2: A panel can provide additional support for the sink, preventing any potential damage or wear over time. Benefit 3: It can add value to your home, making it more attractive to potential buyers in the future.6. The Importance of Installing a Panel Under a Kitchen Sink


6. The Importance of Installing a Panel Under a Kitchen Sink

While installing a panel under a kitchen sink may seem like a straightforward task, there are some common mistakes that can easily be avoided. Here are a few things to watch out for: Mistake 1: Not taking accurate measurements, resulting in a panel that doesn't fit properly. Mistake 2: Using the wrong type of screws or not securing the panel properly, leading to a loose or unstable installation. Mistake 3: Forgetting to account for any pipes or obstacles when measuring, causing difficulties during the installation process.7. Common Mistakes to Avoid When Installing a Panel Under a Kitchen Sink


7. Common Mistakes to Avoid When Installing a Panel Under a Kitchen Sink


)


To install a panel under your kitchen sink, you will need the following tools and materials: Tools: Saw, drill, level, measuring tape, sandpaper. Materials: Panel of your choice, screws appropriate for your cabinet material, paint or decorative elements (optional).8. Tools and Materials Needed for Installing a Panel Under a Kitchen Sink


8. Tools and Materials Needed for Installing a Panel Under a Kitchen Sink


Measuring and cutting the panel for your kitchen sink may seem like a simple task, but it is important to do it correctly for a successful installation. Here are some tips for measuring and cutting a panel: Step 1: Measure the space where the panel will be installed, taking into account any pipes or obstacles. Step 2: Use a saw to make any necessary cuts, ensuring a perfect fit. Step 3: Sand down any rough edges for a smooth finish.9. How to Properly Measure and Cut a Panel for Under a Kitchen Sink

9. How to Properly Measure and Cut a Panel for Under a Kitchen Sink


While installing a panel under your kitchen sink should be a fairly straightforward process, there may be some issues that arise along the way. Here are some common problems you may encounter and how to troubleshoot them: Issue 1: The panel is not level. Use a level to adjust and make sure it is straight before securing it in place. Issue 2: The panel is not fitting properly. Double-check your measurements and make any necessary adjustments before moving on with the installation. Issue 3: The panel is not secure. Use the appropriate screws and make sure to tighten them properly for a stable installation. Now that you have a comprehensive guide on how to install a panel under a kitchen sink, you can confidently tackle this project on your own. Remember to take accurate measurements, use the right tools and materials, and don't be afraid to seek help if needed. With a little bit of effort, you can achieve a beautiful and functional addition to your kitchen. Happy installing!10. Troubleshooting Common Issues When Installing a Panel Under a Kitchen Sink


10. Troubleshooting Common Issues When Installing a Panel Under a Kitchen Sink


Why Installing a Panel Under Your Kitchen Sink is a Clever Design Choice

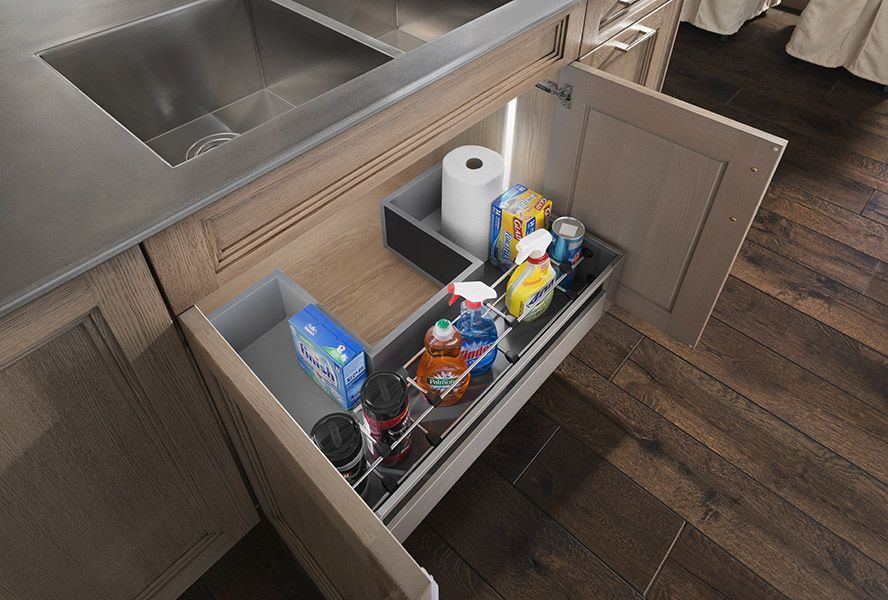
Efficient Use of Space
 When designing a kitchen, every inch of space counts.
Installing a panel under your kitchen sink
allows you to make the most out of the often overlooked area beneath the sink. This space can be utilized to store cleaning supplies, dishwashing detergent, and other essential items, freeing up valuable counter or cabinet space. With a panel installed, you can easily access these items without having to rummage through a cluttered cabinet or drawer.
When designing a kitchen, every inch of space counts.
Installing a panel under your kitchen sink
allows you to make the most out of the often overlooked area beneath the sink. This space can be utilized to store cleaning supplies, dishwashing detergent, and other essential items, freeing up valuable counter or cabinet space. With a panel installed, you can easily access these items without having to rummage through a cluttered cabinet or drawer.
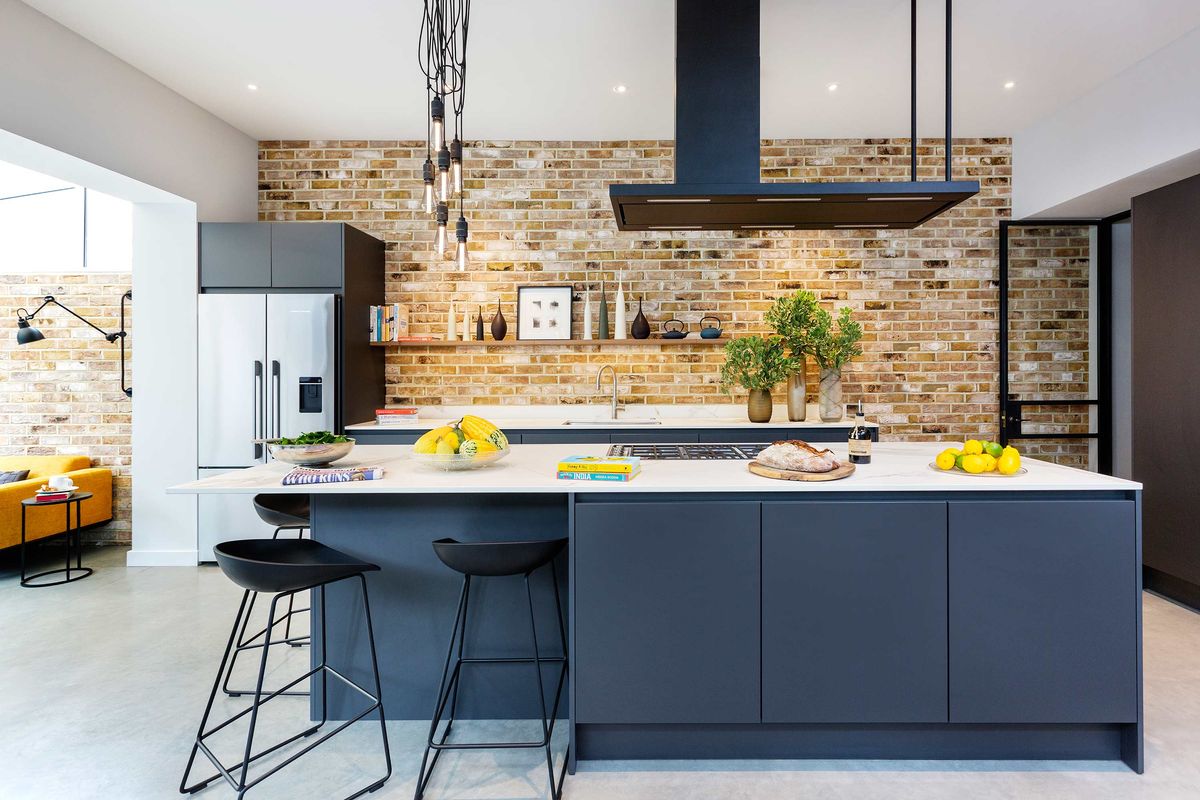
Organized and Clean Look
 A panel under the kitchen sink not only helps with storage, but it also adds to the overall aesthetic of your kitchen.
Installing a panel
creates a clean and streamlined look, hiding any unsightly pipes or plumbing fixtures. This can be especially beneficial if you have an open-concept kitchen where the sink area is visible from other parts of the house. With a panel in place, you can maintain a tidy and cohesive look in your kitchen.
A panel under the kitchen sink not only helps with storage, but it also adds to the overall aesthetic of your kitchen.
Installing a panel
creates a clean and streamlined look, hiding any unsightly pipes or plumbing fixtures. This can be especially beneficial if you have an open-concept kitchen where the sink area is visible from other parts of the house. With a panel in place, you can maintain a tidy and cohesive look in your kitchen.
Protects Against Water Damage
 One of the main benefits of installing a panel under your kitchen sink is that it helps protect against water damage. The panel acts as a barrier, preventing any leaks or spills from reaching the cabinets or flooring. This can save you from costly repairs and also helps maintain the longevity of your kitchen. Make sure to
choose a panel that is water-resistant
and properly seal any gaps to ensure maximum protection.
One of the main benefits of installing a panel under your kitchen sink is that it helps protect against water damage. The panel acts as a barrier, preventing any leaks or spills from reaching the cabinets or flooring. This can save you from costly repairs and also helps maintain the longevity of your kitchen. Make sure to
choose a panel that is water-resistant
and properly seal any gaps to ensure maximum protection.
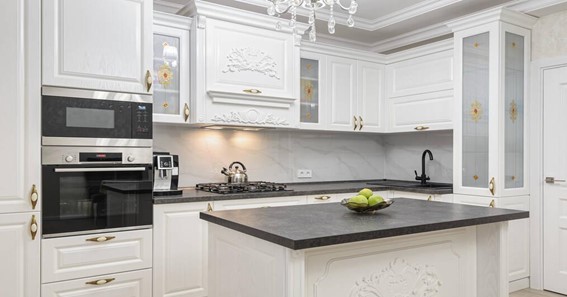
Easy Installation
 You might be thinking that
installing a panel under your kitchen sink
is a complicated and time-consuming task, but it's actually quite simple. Most panels come with step-by-step instructions and can be easily installed with basic tools. You can also hire a professional to do the job for you if you're not comfortable with DIY projects. With just a few hours of work, you can have a functional and stylish panel in place.
You might be thinking that
installing a panel under your kitchen sink
is a complicated and time-consuming task, but it's actually quite simple. Most panels come with step-by-step instructions and can be easily installed with basic tools. You can also hire a professional to do the job for you if you're not comfortable with DIY projects. With just a few hours of work, you can have a functional and stylish panel in place.
Final Thoughts
 Installing a panel under your kitchen sink
is a smart design choice that offers a multitude of benefits. It maximizes space, adds to the aesthetic of your kitchen, protects against water damage, and is easy to install. Consider adding a panel to your kitchen if you want to make the most out of your space and create a more organized and visually appealing kitchen.
Installing a panel under your kitchen sink
is a smart design choice that offers a multitude of benefits. It maximizes space, adds to the aesthetic of your kitchen, protects against water damage, and is easy to install. Consider adding a panel to your kitchen if you want to make the most out of your space and create a more organized and visually appealing kitchen.