Are you looking to update your kitchen and need to remove your old Delta sink faucet? Or perhaps you're experiencing a leak or other issue with your faucet and need to replace it. Whatever the reason may be, removing a Delta kitchen sink faucet may seem like a daunting task, but with the right tools and knowledge, it can be done easily and efficiently. In this guide, we will walk you through the step-by-step process of removing a Delta kitchen sink faucet and provide expert tips and tricks along the way.Delta Kitchen Sink Faucet Removal


Delta Kitchen Sink Faucet Removal

/cleaning-the-aerator-from-deposits--the-girl-hand-washes-a-dirty-limestone-aerator-with-water-1126244919-72868100964f42d5aa564a928371fea5.jpg)
The first step in removing your Delta kitchen sink faucet is to turn off the water supply. This can typically be done by turning the shut-off valves located under the sink clockwise. If your shut-off valves are not working or do not exist, you will need to turn off the main water supply to your home. Next, turn on the faucet to release any remaining water pressure. It's also a good idea to place a towel or bucket under the sink to catch any excess water that may drip out.How to Remove a Delta Kitchen Sink Faucet


How to Remove a Delta Kitchen Sink Faucet


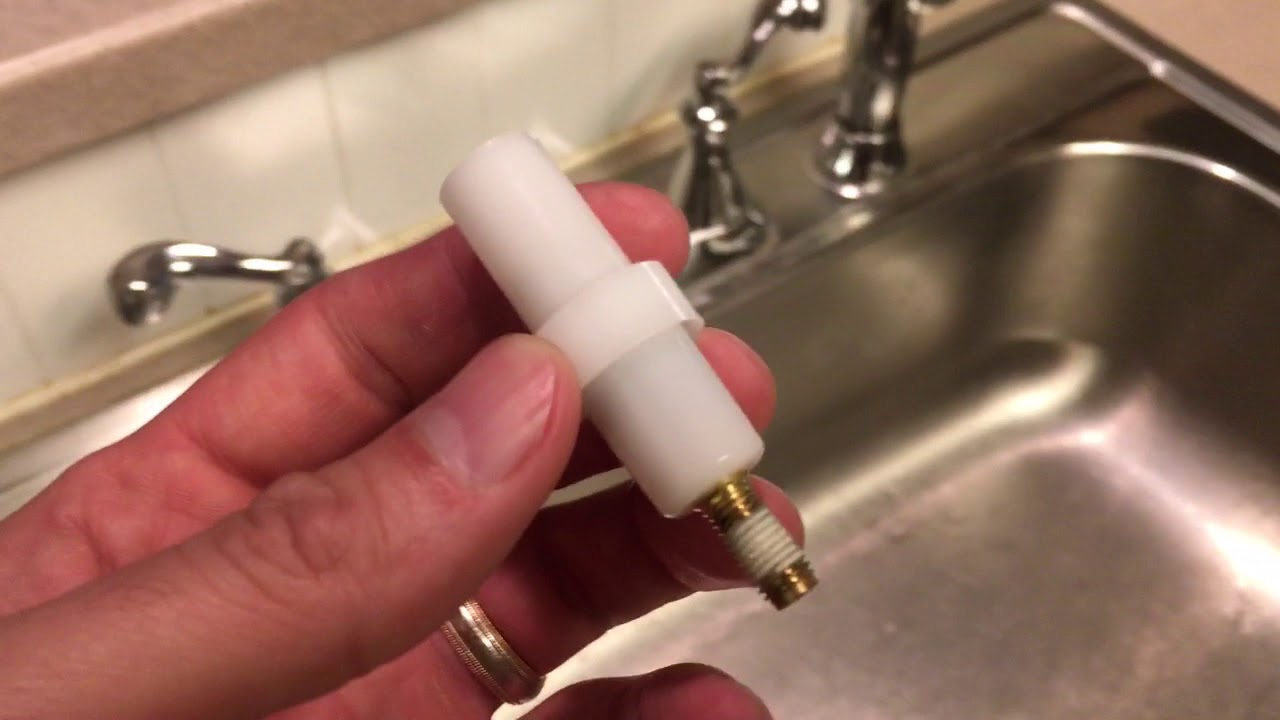
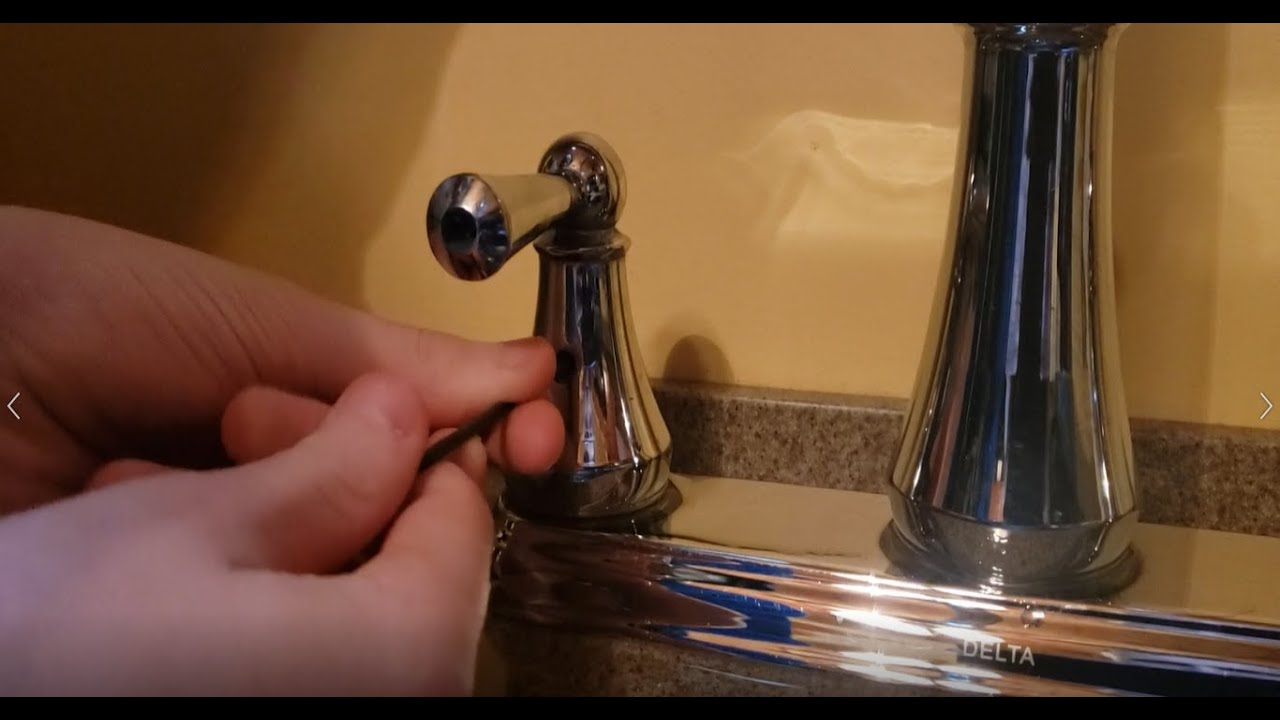
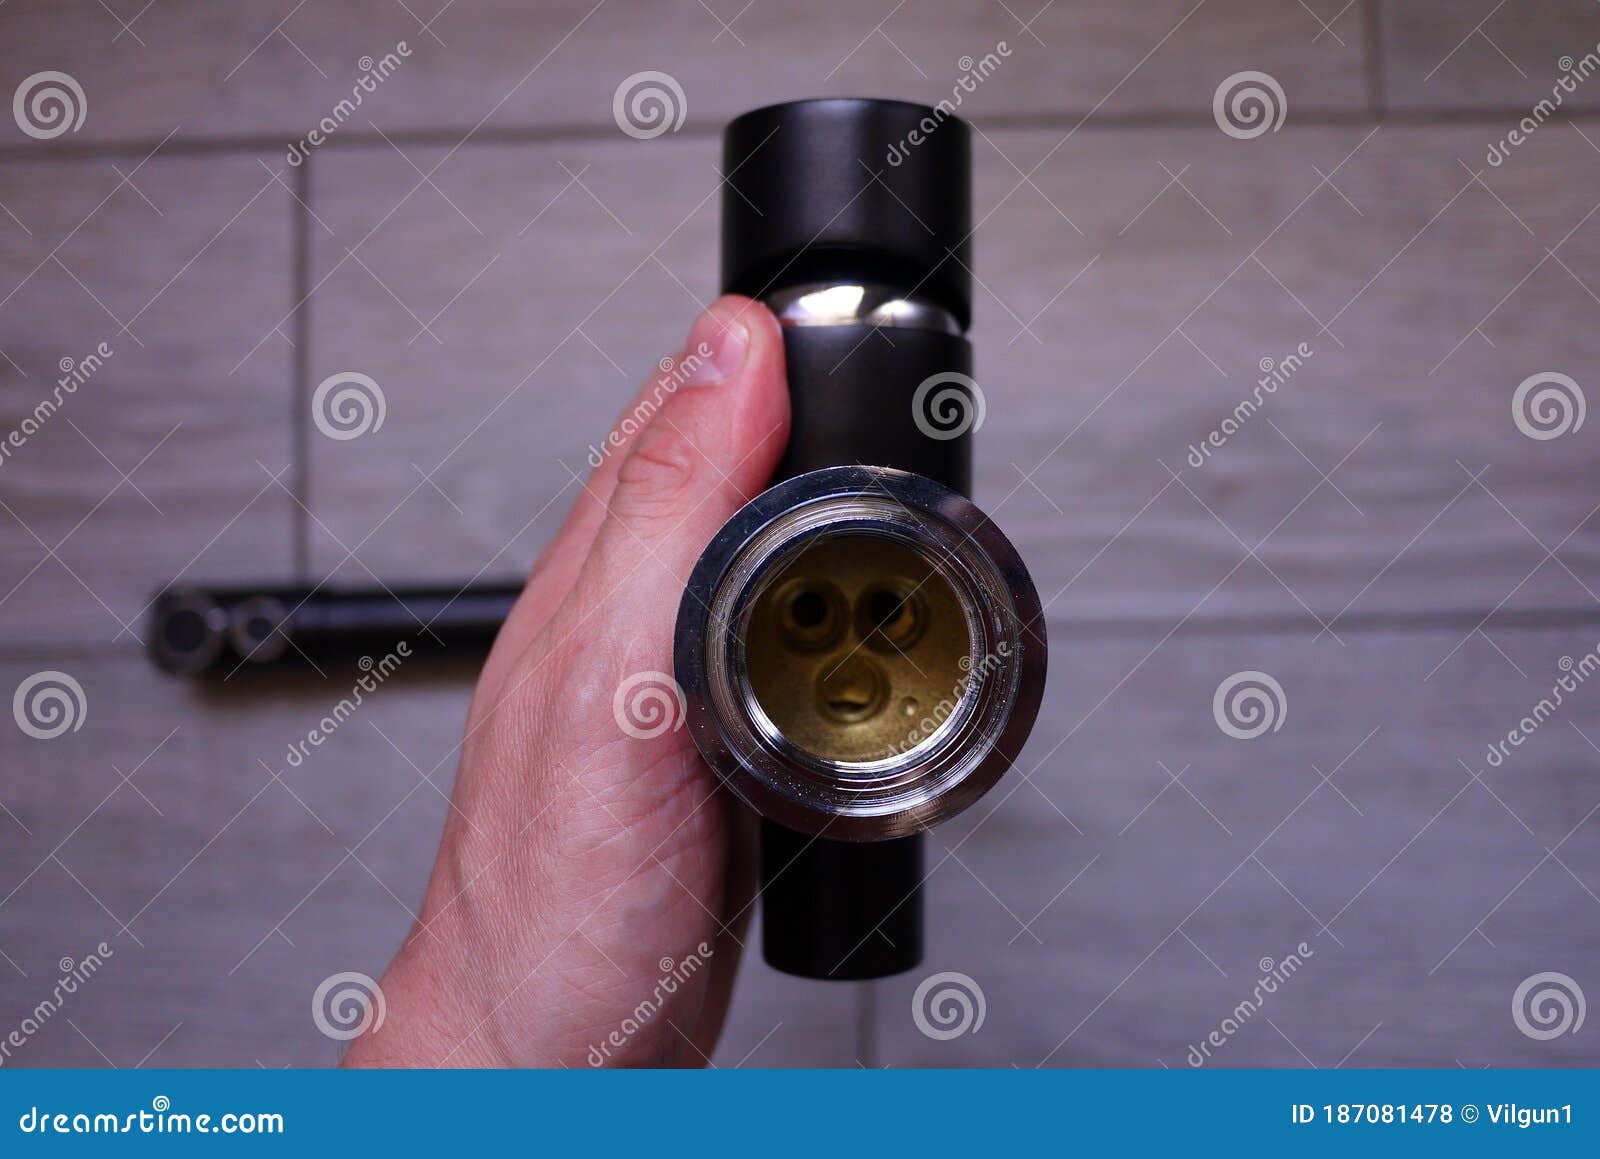
1. Begin by unscrewing the aerator from the end of the faucet using pliers or a wrench. This will allow any remaining water to drain out of the faucet. 2. Next, remove the handle of the faucet by locating the setscrew and using an Allen wrench to loosen and remove it. 3. Once the handle is removed, you will see a bonnet nut that holds the faucet in place. Use adjustable pliers to loosen and remove this nut. 4. With the bonnet nut removed, you can now lift the faucet up and off the sink. If it is stuck, you can use a faucet puller tool to help remove it. 5. Underneath the faucet, you will see the mounting nuts that hold the faucet in place. Using a basin wrench, loosen and remove these nuts. 6. Once the mounting nuts are removed, you can lift the faucet and any remaining components, such as the spout or sprayer, off of the sink.Step-by-Step Guide for Removing a Delta Kitchen Sink Faucet


Step-by-Step Guide for Removing a Delta Kitchen Sink Faucet


- When removing the aerator, be sure to wrap a cloth around it to avoid scratching or damaging the finish. - If the handle is difficult to remove, try using a handle puller tool to help loosen it. - If the faucet is stuck to the sink, you can spray some WD-40 or other lubricant around the base to help loosen it. - It's always a good idea to have a second person to help lift and remove the faucet, as it can be heavy and awkward to handle on your own.Removing a Delta Kitchen Sink Faucet: Tips and Tricks


Removing a Delta Kitchen Sink Faucet: Tips and Tricks
:max_bytes(150000):strip_icc()/utility-sink-faucet-2718831-hero-85feab9ab9fc4c8498483e418fd8c82c.jpg)


- Pliers or wrench - Allen wrench - Adjustable pliers - Faucet puller (optional) - Basin wrenchTools You'll Need for Removing a Delta Kitchen Sink Faucet

Tools You'll Need for Removing a Delta Kitchen Sink Faucet


:max_bytes(150000):strip_icc()/removing-a-faucet-aerator-2718836-02-9280a2c1a07f448c9d4f1f1511f84446.jpg)

Problem: The faucet is stuck and will not come off the sink. Solution: Try using a faucet puller tool to help loosen and remove the faucet. Problem: The handle is difficult to remove. Solution: Use a handle puller tool to help loosen and remove the handle. Problem: The faucet is leaking or has other issues that require replacement. Solution: Follow the steps outlined in this guide to remove the old faucet and replace it with a new one.Common Problems and Solutions for Removing a Delta Kitchen Sink Faucet

Common Problems and Solutions for Removing a Delta Kitchen Sink Faucet
If you prefer visual instruction, check out this helpful video tutorial on removing a Delta kitchen sink faucet:Video Tutorial: Removing a Delta Kitchen Sink Faucet

Video Tutorial: Removing a Delta Kitchen Sink Faucet

"When removing a Delta kitchen sink faucet, it's important to have the right tools and take your time. Don't force any components and be sure to turn off the water supply before beginning the removal process. If you encounter any issues, don't hesitate to seek help from a professional plumber." - John Smith, Licensed PlumberExpert Advice on Removing a Delta Kitchen Sink Faucet
Expert Advice on Removing a Delta Kitchen Sink Faucet

Dos: - Do turn off the water supply and release any remaining water pressure before beginning the removal process. - Do use the correct tools and take your time to avoid damaging the faucet or other components. - Do seek help from a professional plumber if you encounter any issues. Don'ts: - Don't force any components or use excessive pressure when trying to remove the faucet or other parts. - Don't forget to turn off the water supply before beginning the removal process. - Don't attempt to remove the faucet on your own if you are not confident in your abilities.Removing a Delta Kitchen Sink Faucet: Dos and Don'ts

Removing a Delta Kitchen Sink Faucet: Dos and Don'ts


Once you have successfully removed the old Delta kitchen sink faucet, you can now install a new one or make any necessary repairs. Be sure to clean the area thoroughly before installing the new faucet, and follow the manufacturer's instructions for installation. With the right tools and knowledge, removing a Delta kitchen sink faucet can be a simple and stress-free process.Final Steps for Removing a Delta Kitchen Sink Faucet
Final Steps for Removing a Delta Kitchen Sink Faucet

Introduction to House Design: How to Remove a Delta Kitchen Sink Faucet

Why Removing a Delta Kitchen Sink Faucet is Important for House Design
 When it comes to designing and renovating a house, every detail matters. This includes the fixtures and appliances in the kitchen, such as the faucet. The type of faucet you choose can greatly impact the overall look and functionality of your kitchen. If you have a Delta kitchen sink faucet that you want to replace, it's important to know how to properly remove it without causing any damage. In this article, we will guide you through the steps on how to remove a Delta kitchen sink faucet and help you achieve the perfect house design.
The Step-by-Step Guide to Removing a Delta Kitchen Sink Faucet
 Step 1: Gather Your Tools
Before you begin the process of removing your Delta kitchen sink faucet, make sure you have all the necessary tools on hand. This includes an adjustable wrench, pliers, a basin wrench, and a screwdriver. It's also important to have a bucket or towel nearby to catch any water that may come out during the removal process.
Step 2: Shut Off the Water Supply
Before you start working on the faucet, turn off the water supply to prevent any leaks or water damage. The shut-off valves are typically located under the sink, and you can turn them clockwise to shut off the water flow.
Step 3: Disconnect the Water Supply Lines
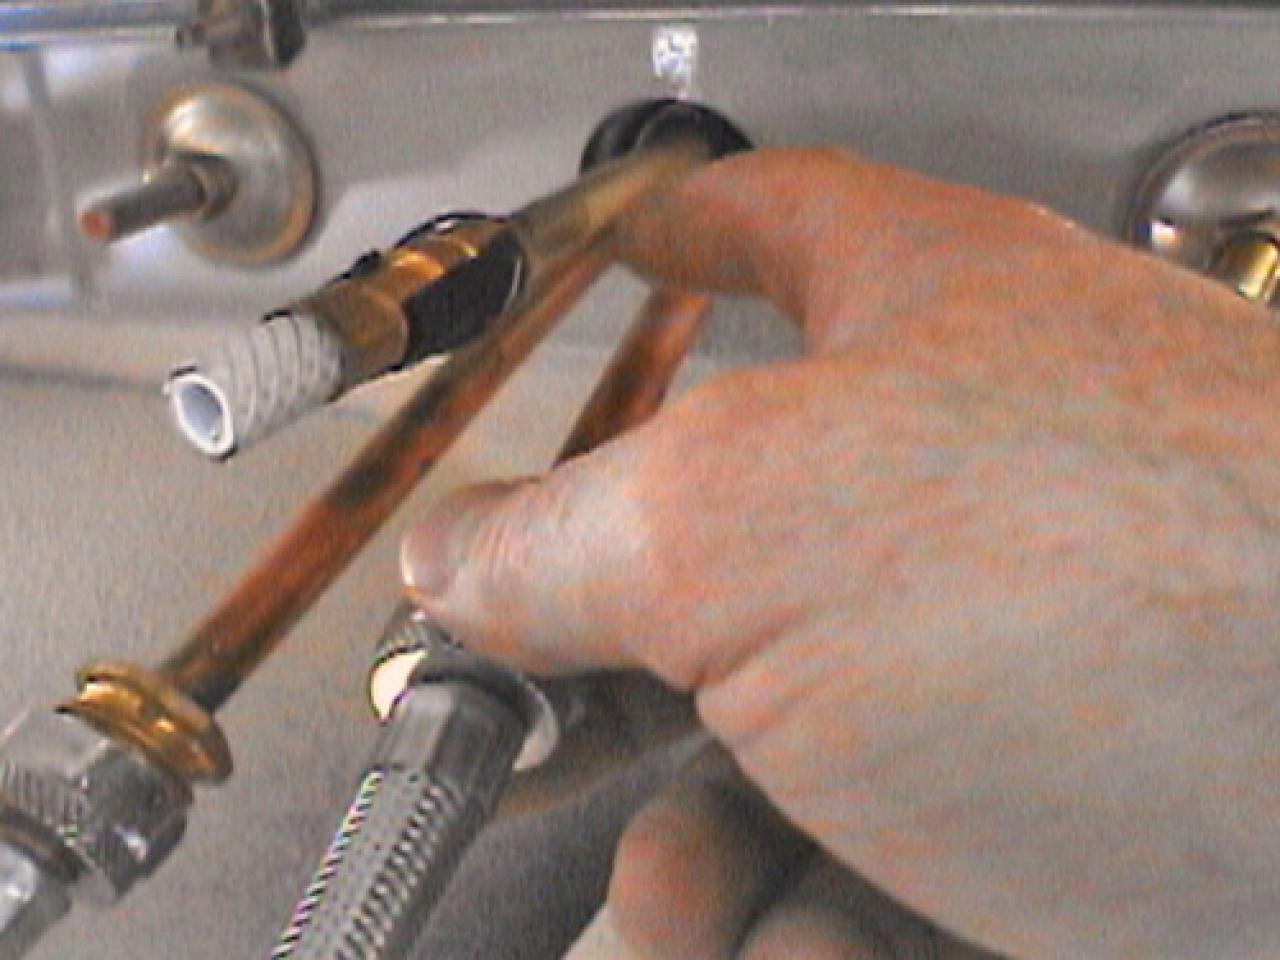
Using pliers, loosen the nuts that connect the water supply lines to the faucet. Once they are loose, you can remove the lines from the faucet.
Step 4: Remove the Faucet Handle
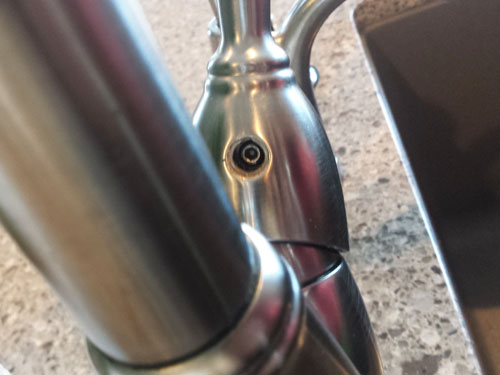
Using a screwdriver, remove the screw that holds the faucet handle in place. Once the screw is removed, you should be able to easily lift off the handle and expose the valve.
Step 5: Remove the Mounting Nut
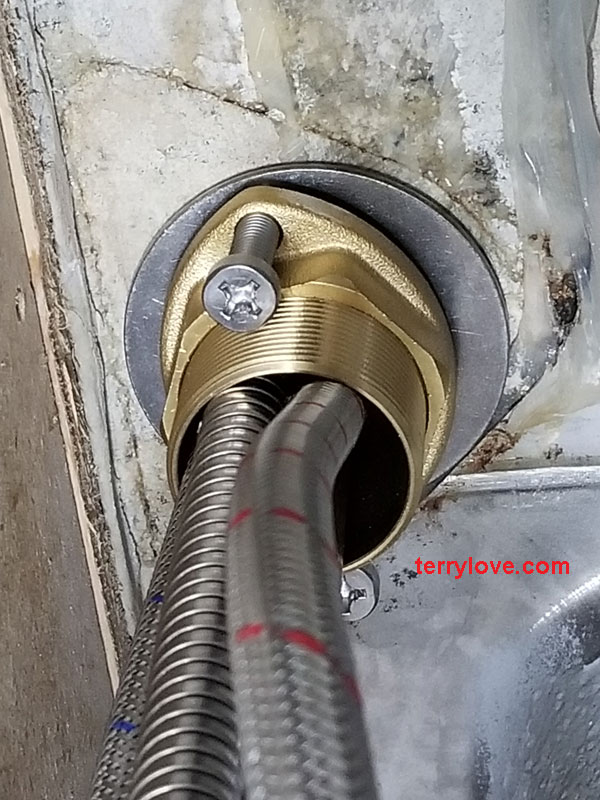
Using a basin wrench, loosen and remove the mounting nut that holds the faucet in place. This may take some effort, but be patient and carefully turn the wrench until the nut comes loose.
Step 6: Lift Off the Faucet
Once the mounting nut is removed, you can gently lift off the faucet from the sink. Make sure to support the faucet with one hand while you lift it off to prevent any damage to the sink or surrounding area.
Step 1: Gather Your Tools
Before you begin the process of removing your Delta kitchen sink faucet, make sure you have all the necessary tools on hand. This includes an adjustable wrench, pliers, a basin wrench, and a screwdriver. It's also important to have a bucket or towel nearby to catch any water that may come out during the removal process.
Step 2: Shut Off the Water Supply
Before you start working on the faucet, turn off the water supply to prevent any leaks or water damage. The shut-off valves are typically located under the sink, and you can turn them clockwise to shut off the water flow.
Step 3: Disconnect the Water Supply Lines
Using pliers, loosen the nuts that connect the water supply lines to the faucet. Once they are loose, you can remove the lines from the faucet.
Step 4: Remove the Faucet Handle
Using a screwdriver, remove the screw that holds the faucet handle in place. Once the screw is removed, you should be able to easily lift off the handle and expose the valve.
Step 5: Remove the Mounting Nut
Using a basin wrench, loosen and remove the mounting nut that holds the faucet in place. This may take some effort, but be patient and carefully turn the wrench until the nut comes loose.
Step 6: Lift Off the Faucet
Once the mounting nut is removed, you can gently lift off the faucet from the sink. Make sure to support the faucet with one hand while you lift it off to prevent any damage to the sink or surrounding area.
Conclusion
 Removing a Delta kitchen sink faucet may seem like a daunting task, but with the right tools and techniques, it can be done smoothly and efficiently. By following these steps, you can easily remove your old faucet and make way for a new one that better fits your house design. Remember to always turn off the water supply before starting any work and to be careful when handling the faucet to avoid any damage. With these tips, you can achieve the perfect house design with a new and improved kitchen sink faucet.