Removing a bathroom sink drain pipe may seem like a daunting task, but with the right tools and techniques, it can be a simple DIY project. Whether you're dealing with a clogged drain or just need to replace the pipes, follow these steps to remove your bathroom sink drain pipe without calling a plumber.How to Remove a Bathroom Sink Drain Pipe


How to Remove a Bathroom Sink Drain Pipe


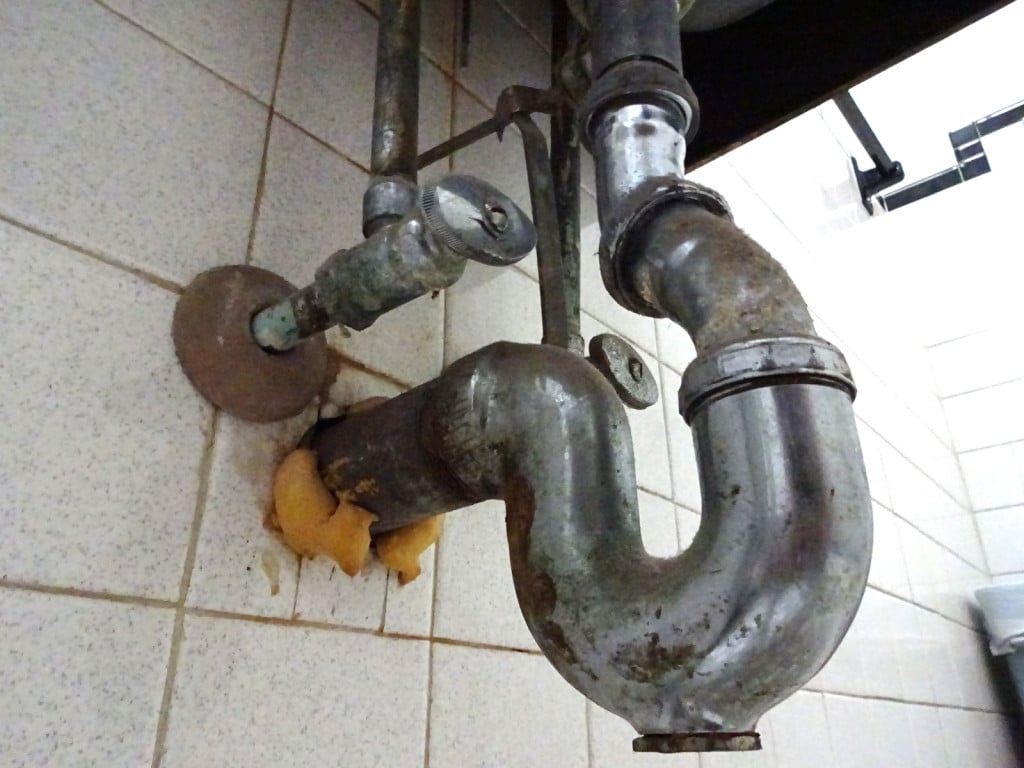
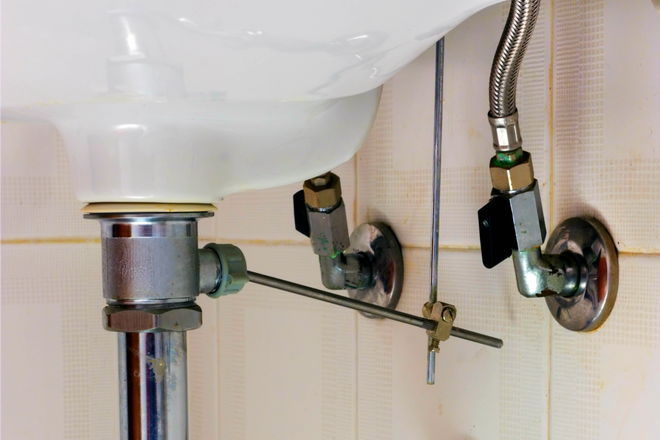
Before you begin, make sure to turn off the water supply to your sink and gather all the necessary tools. You will need a pair of pliers, a pipe wrench, a bucket, and a putty knife. Step 1: Remove the P-Trap The P-trap is the curved pipe located beneath your sink that connects to the drain pipe. Using your pipe wrench, loosen the slip nuts on both ends of the P-trap and remove it from the pipes. Be sure to have a bucket handy to catch any water that may spill out. Step 2: Loosen the Drain Pipe Next, use your pliers to loosen the slip nut that connects the drain pipe to the bottom of the sink. This is the pipe that runs from the bottom of the sink to the P-trap. Once the nut is loosened, you should be able to pull the drain pipe out of the sink. Step 3: Remove the Pop-Up Assembly Underneath your sink, you will find a rod that connects to the pop-up assembly. Loosen the nut on the rod and pull it out. Then, remove the pop-up assembly by unscrewing it from the drain pipe. Step 4: Clear Any Clogs If you're removing the drain pipe due to a clog, now is a good time to clear it. Use a plunger or a drain snake to remove any debris or buildup that may be causing the clog. Step 5: Remove the Old Putty Before installing a new drain pipe, you will need to remove any old putty or caulk that may be stuck to the sink or the pipes. Use a putty knife to scrape off the old putty and clean the area with a damp cloth.Removing a Bathroom Sink Drain Pipe: A Step-by-Step Guide


Removing a Bathroom Sink Drain Pipe: A Step-by-Step Guide


If you're attempting to remove your bathroom sink drain pipe without a plumber, it's important to follow these tips to ensure a successful and safe DIY project. Tip 1: Use the Right Tools Having the right tools is crucial for any DIY project. Make sure to have a pipe wrench, pliers, and a putty knife on hand to make the process easier. Tip 2: Have a Bucket Handy When removing any pipes, it's important to have a bucket nearby to catch any water that may spill out. This will prevent a mess and make cleanup easier. Tip 3: Be Gentle with Older Pipes If you have an older home, the pipes may be more fragile. Be gentle when loosening and removing the pipes to avoid any damage.DIY: Removing a Bathroom Sink Drain Pipe

DIY: Removing a Bathroom Sink Drain Pipe


Calling a plumber can be expensive, but with the right knowledge and tools, you can remove your bathroom sink drain pipe by yourself. However, there are some common mistakes you should avoid to prevent any additional problems. Mistake 1: Using Too Much Force It can be tempting to use excessive force when trying to remove a stubborn pipe, but this can lead to damage to your sink or the pipes. Be patient and use the right tools to avoid any unnecessary damage. Mistake 2: Forgetting to Turn Off the Water Before removing any pipes, make sure to turn off the water supply to your sink. Forgetting to do so can result in a flooded bathroom.Removing a Bathroom Sink Drain Pipe Without a Plumber


Removing a Bathroom Sink Drain Pipe Without a Plumber


If you're in a hurry and need to quickly remove your bathroom sink drain pipe, you can use chemicals to dissolve any clogs. However, use these chemicals with caution and make sure to follow the instructions on the label. Step 1: Choose the Right Chemicals There are many drain cleaners on the market, but make sure to choose one that is safe for your specific pipes. Read the label to ensure it won't cause any damage. Step 2: Follow the Instructions Each chemical will have its own set of instructions, so make sure to read and follow them carefully. Wear gloves and eye protection when handling any chemicals. Step 3: Rinse with Water After the recommended amount of time, rinse the chemical down the drain with hot water. This should help dissolve any clogs and make it easier to remove the drain pipe.Quick and Easy Bathroom Sink Drain Pipe Removal
Quick and Easy Bathroom Sink Drain Pipe Removal


Here are the essential tools you will need to successfully remove your bathroom sink drain pipe: - Pipe wrench - Pliers - Bucket - Putty knife - Chemical drain cleaner (optional)Tools You Need for Removing a Bathroom Sink Drain Pipe

Removing a Clogged Bathroom Sink Drain Pipe


Follow these tips to ensure a safe and successful removal of your bathroom sink drain pipe: - Wear gloves and eye protection when handling chemicals - Have a bucket handy to catch any water that may spill out - Turn off the water supply before attempting to remove any pipes - Be gentle when loosening and removing pipes to avoid damageTips for Removing a Bathroom Sink Drain Pipe Safely


Tools You Need for Removing a Bathroom Sink Drain Pipe

:max_bytes(150000):strip_icc()/bathroom-sink-drain-installation-2718843-02-61e5ecbee1e949be8d8f45ac4f5a6797.jpg)


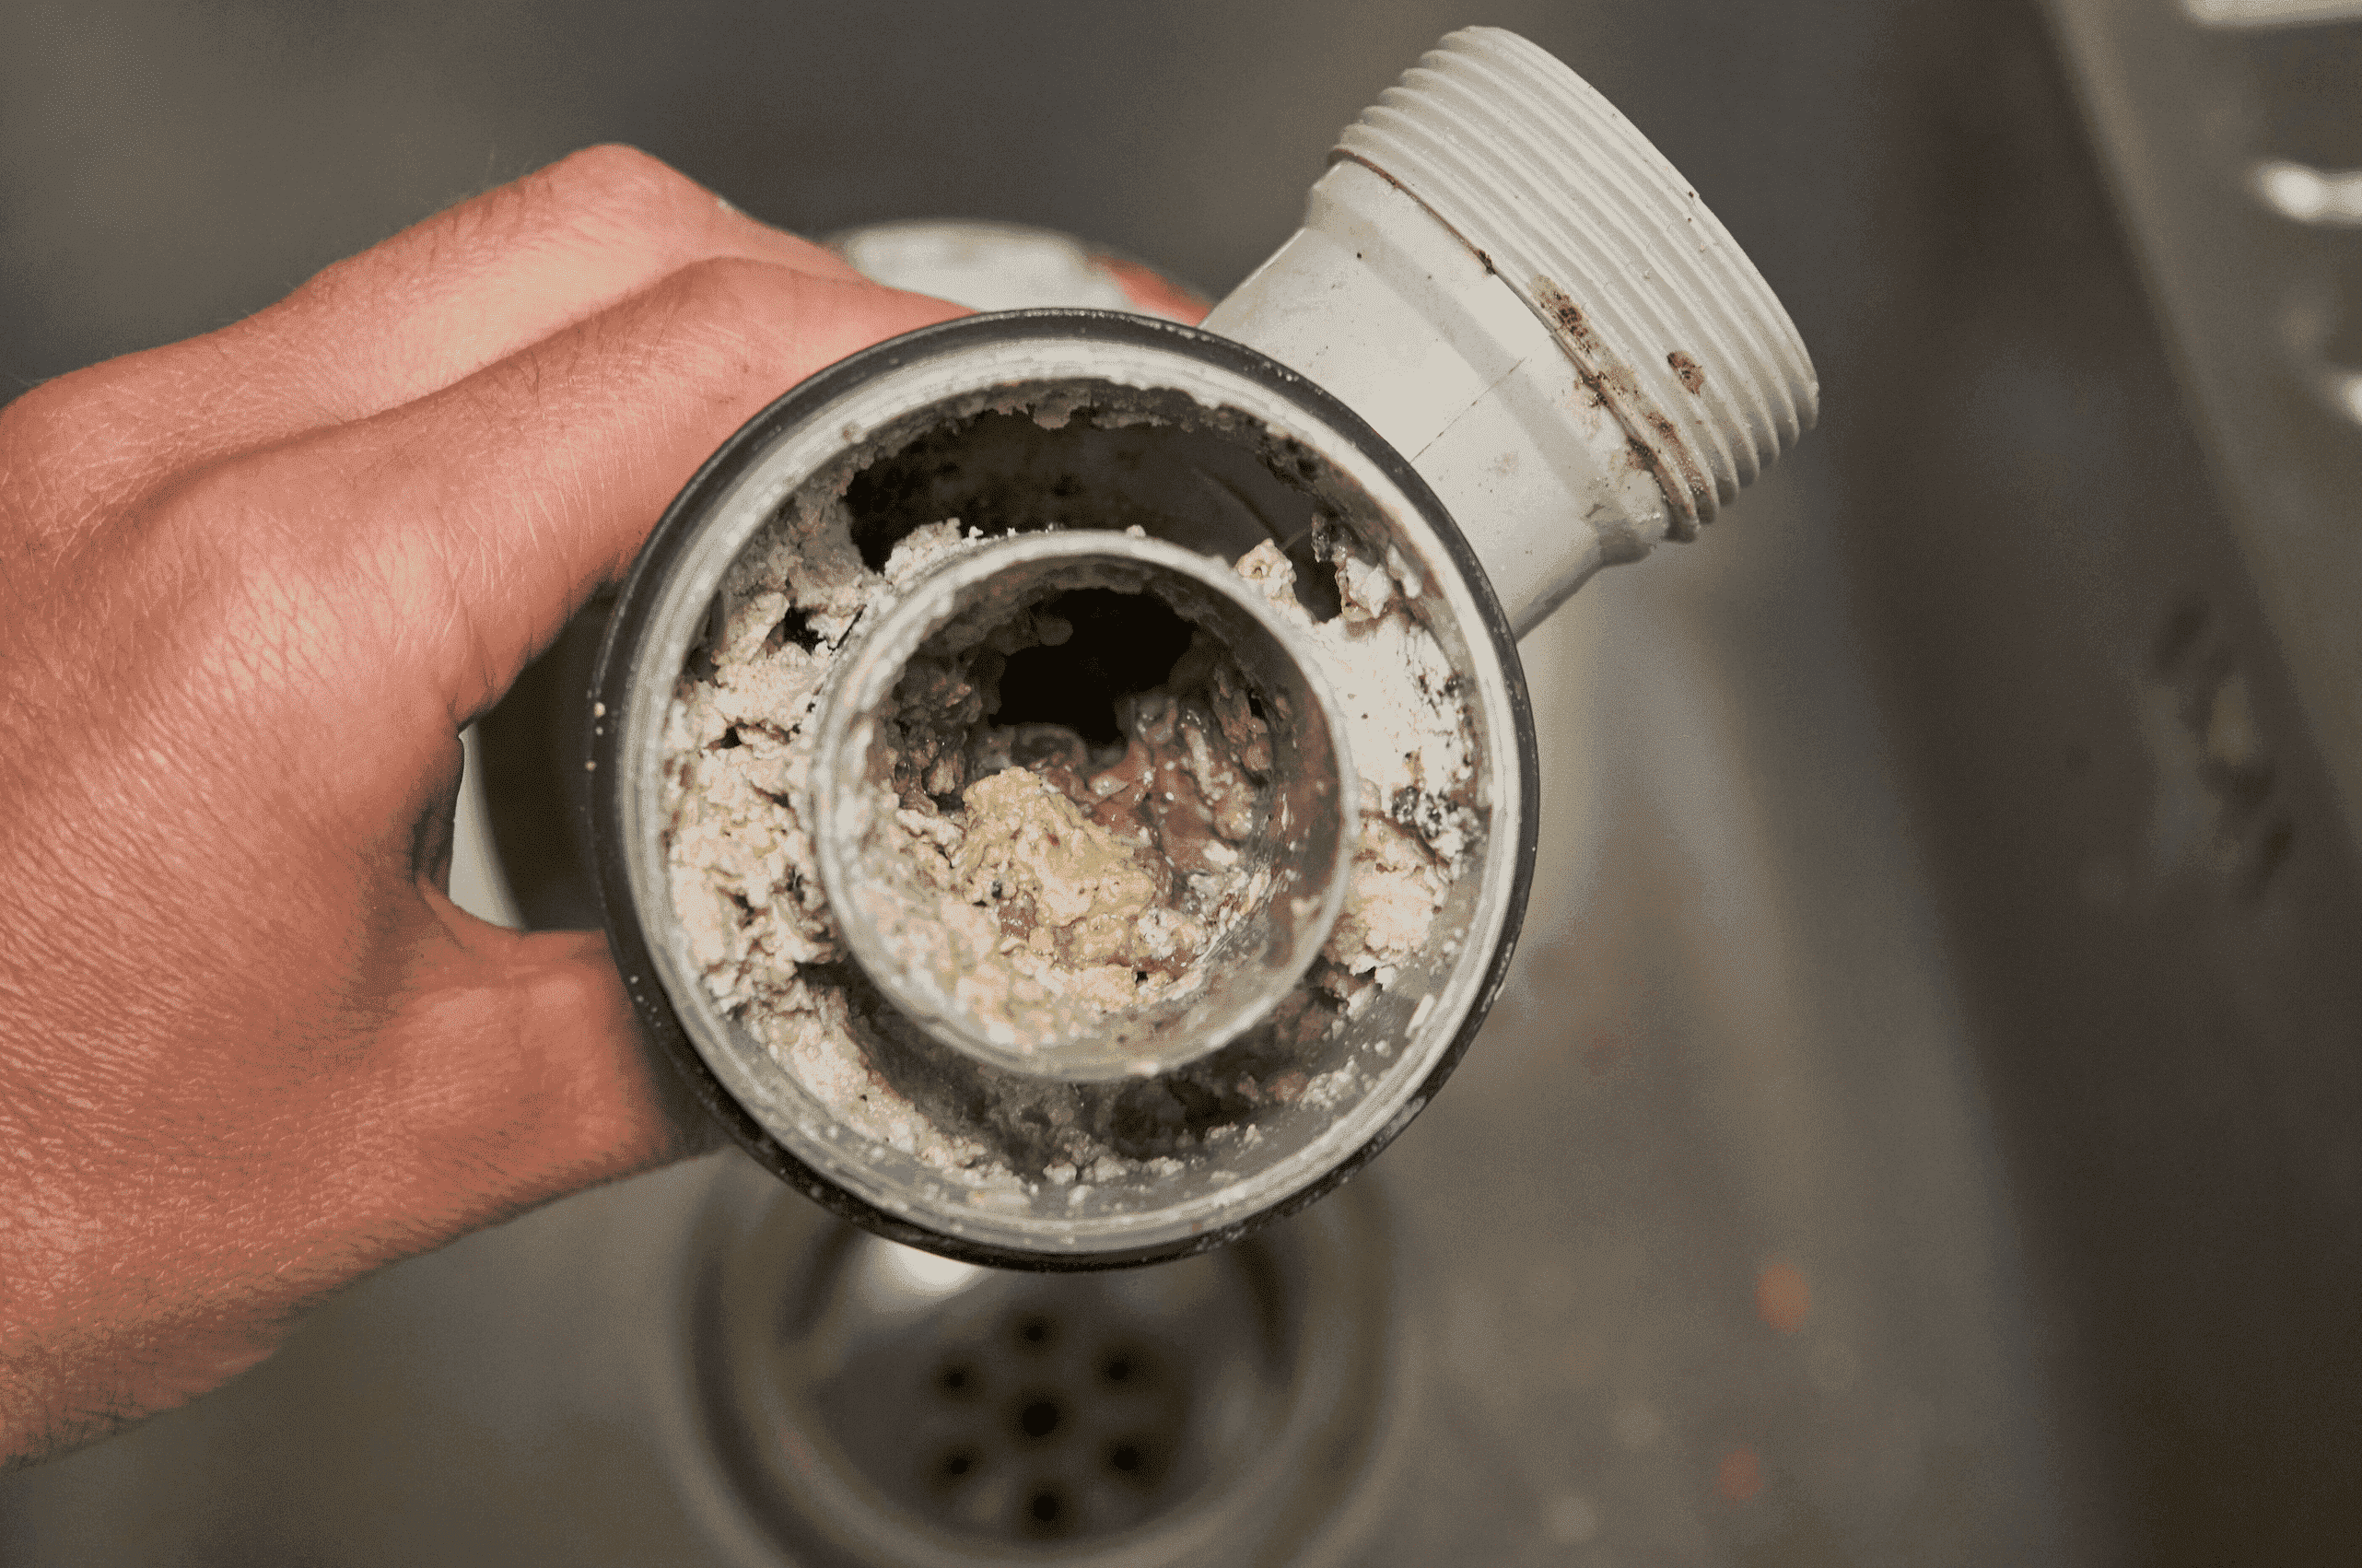
If your bathroom sink drain pipe is clogged, removing it may seem like a daunting task. However, by following these steps and using the right tools, you can easily remove the clog and have your sink draining properly again. Step 1: Try a Plunger If the clog is not too severe, a plunger may be enough to clear it. Make sure to cover the overflow drain with a wet cloth and plunge the sink drain vigorously. Step 2: Use a Drain Snake If the plunger doesn't work, a drain snake may be able to reach and remove the clog. Insert the snake into the drain and twist it to break up the clog. Step 3: Remove the P-Trap If the clog is still not cleared, remove the P-trap and manually remove the clog. Make sure to have a bucket handy to catch any water that spills out.Removing a Clogged Bathroom Sink Drain Pipe
Tips for Removing a Bathroom Sink Drain Pipe Safely


Removing a bathroom sink drain pipe may seem like a daunting task, but with the right tools and knowledge, it can be a simple DIY project. By following these steps and tips, you can successfully remove your bathroom sink drain pipe without the need for a plumber. Remember to be patient and take your time to avoid any mistakes or damage. Happy DIY-ing!Conclusion
Removing a Bathroom Sink Drain Pipe: Common Mistakes to Avoid

Why Remove a Bathroom Sink Drain Pipe?

The Importance of Proper Drainage in a Bathroom Sink
 When it comes to house design, the functionality of each room plays a crucial role. This is especially true for the bathroom, as it is one of the most frequently used spaces in a home. One of the key components in a functional bathroom is the sink, and more specifically, the drain pipe. The drain pipe is responsible for carrying water and waste away from the sink, ensuring proper drainage and preventing any potential plumbing issues. Over time, however, the drain pipe may become clogged or damaged, hindering its ability to perform its job effectively. This is why it is important to know how to remove a bathroom sink drain pipe.
Proper Maintenance for Longevity
Regular maintenance of your bathroom sink drain pipe is essential for its longevity. This not only helps prevent clogs and leaks, but it also ensures that the pipe is functioning at its best. However, despite proper maintenance, there may come a time when the drain pipe needs to be removed. This could be due to a clog that cannot be cleared or a damaged pipe that needs to be replaced. In these cases, it is important to have the knowledge and skills to remove the drain pipe safely and efficiently.
Tools and Materials Needed
Before attempting to remove the bathroom sink drain pipe, it is important to gather all the necessary tools and materials. This includes a pipe wrench, pliers, a bucket, and a new drain pipe. It is also essential to have a basic understanding of plumbing and the layout of your sink's drain system. If you are unsure, it is best to consult a professional plumber to avoid any potential damage or complications.
The Removal Process
To remove the bathroom sink drain pipe, start by placing the bucket under the sink to catch any water that may spill out. Then, using the pipe wrench, loosen the slip nuts that connect the drain pipe to the sink and the wall. Once the nuts are loosened, carefully remove the drain pipe from the sink and the wall. If there is a clog, you can try to clear it using a plumbing snake or a plunger. If the pipe is damaged, it will need to be replaced with a new one. After clearing the clog or replacing the pipe, reattach the drain pipe to the sink and the wall, making sure the slip nuts are tightened properly.
Final Thoughts
Removing a bathroom sink drain pipe may seem like a daunting task, but with the right tools and knowledge, it can be done effectively. Regular maintenance and proper removal techniques can ensure the longevity and functionality of your bathroom sink drain pipe. However, if you are unsure or uncomfortable with removing the pipe yourself, it is always best to seek the help of a professional plumber. With a well-maintained and properly functioning drain pipe, you can have peace of mind knowing that your bathroom sink will continue to serve its purpose efficiently.
When it comes to house design, the functionality of each room plays a crucial role. This is especially true for the bathroom, as it is one of the most frequently used spaces in a home. One of the key components in a functional bathroom is the sink, and more specifically, the drain pipe. The drain pipe is responsible for carrying water and waste away from the sink, ensuring proper drainage and preventing any potential plumbing issues. Over time, however, the drain pipe may become clogged or damaged, hindering its ability to perform its job effectively. This is why it is important to know how to remove a bathroom sink drain pipe.
Proper Maintenance for Longevity
Regular maintenance of your bathroom sink drain pipe is essential for its longevity. This not only helps prevent clogs and leaks, but it also ensures that the pipe is functioning at its best. However, despite proper maintenance, there may come a time when the drain pipe needs to be removed. This could be due to a clog that cannot be cleared or a damaged pipe that needs to be replaced. In these cases, it is important to have the knowledge and skills to remove the drain pipe safely and efficiently.
Tools and Materials Needed
Before attempting to remove the bathroom sink drain pipe, it is important to gather all the necessary tools and materials. This includes a pipe wrench, pliers, a bucket, and a new drain pipe. It is also essential to have a basic understanding of plumbing and the layout of your sink's drain system. If you are unsure, it is best to consult a professional plumber to avoid any potential damage or complications.
The Removal Process
To remove the bathroom sink drain pipe, start by placing the bucket under the sink to catch any water that may spill out. Then, using the pipe wrench, loosen the slip nuts that connect the drain pipe to the sink and the wall. Once the nuts are loosened, carefully remove the drain pipe from the sink and the wall. If there is a clog, you can try to clear it using a plumbing snake or a plunger. If the pipe is damaged, it will need to be replaced with a new one. After clearing the clog or replacing the pipe, reattach the drain pipe to the sink and the wall, making sure the slip nuts are tightened properly.
Final Thoughts
Removing a bathroom sink drain pipe may seem like a daunting task, but with the right tools and knowledge, it can be done effectively. Regular maintenance and proper removal techniques can ensure the longevity and functionality of your bathroom sink drain pipe. However, if you are unsure or uncomfortable with removing the pipe yourself, it is always best to seek the help of a professional plumber. With a well-maintained and properly functioning drain pipe, you can have peace of mind knowing that your bathroom sink will continue to serve its purpose efficiently.