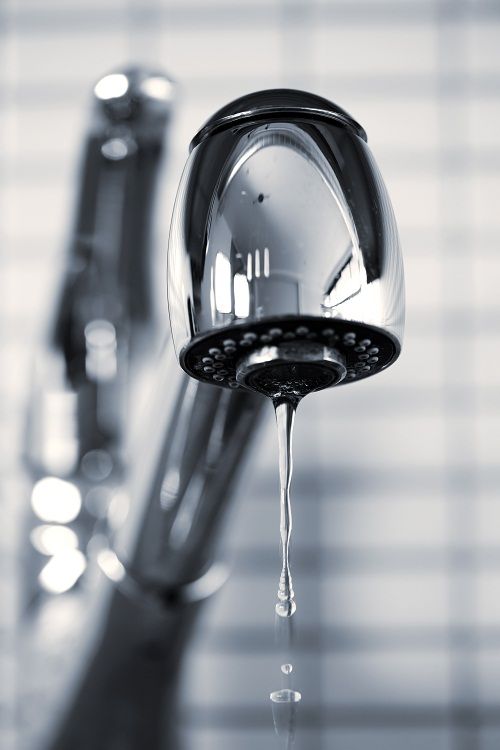
If you have a one-handle bathroom sink faucet that has been leaking, you're not alone. This is a common issue that many homeowners face and it can be a frustrating problem to deal with. Fortunately, fixing a leaky faucet with one handle is a relatively simple task that can be done with just a few tools and some basic knowledge. Here's a step-by-step guide on how to get your faucet working like new again.1. How to Fix a Leaky Faucet with One Handle


1. How to Fix a Leaky Faucet with One Handle
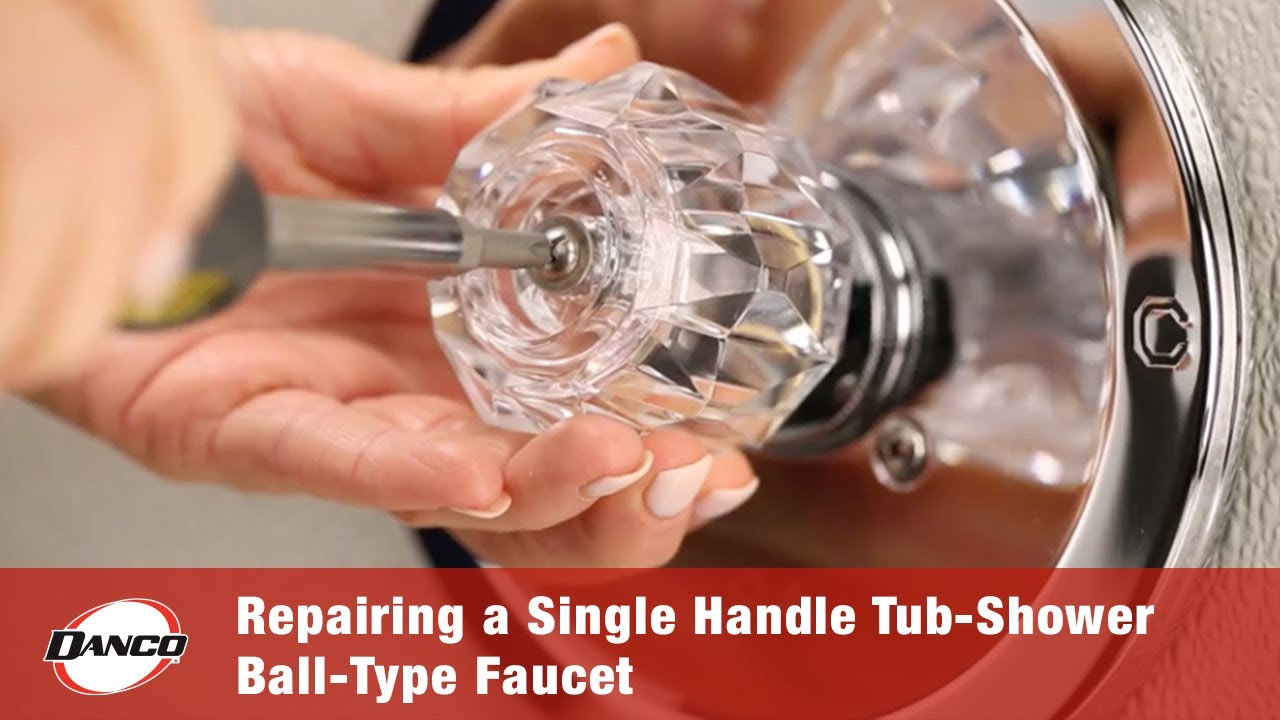


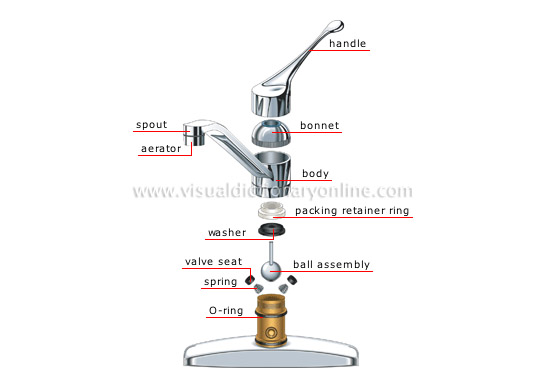
Before diving into repairs, it's important to first identify the type of faucet you have. A ball-type faucet is one of the most common types found in bathrooms, and it can be identified by the single handle on top of the spout. If you have a ball-type faucet that is leaking, there are a few troubleshooting steps you can take to narrow down the cause. These include checking the water pressure, inspecting the handle and spout for damage, and examining the O-ring and other internal parts.2. Troubleshooting a Leaking Ball-Type Faucet
.jpg)


2. Troubleshooting a Leaking Ball-Type Faucet


:max_bytes(150000):strip_icc()/repair-a-leaking-ball-faucet-1824868-05-cbd5bf6248d347b1aeea89f670a7f2d4.jpg)

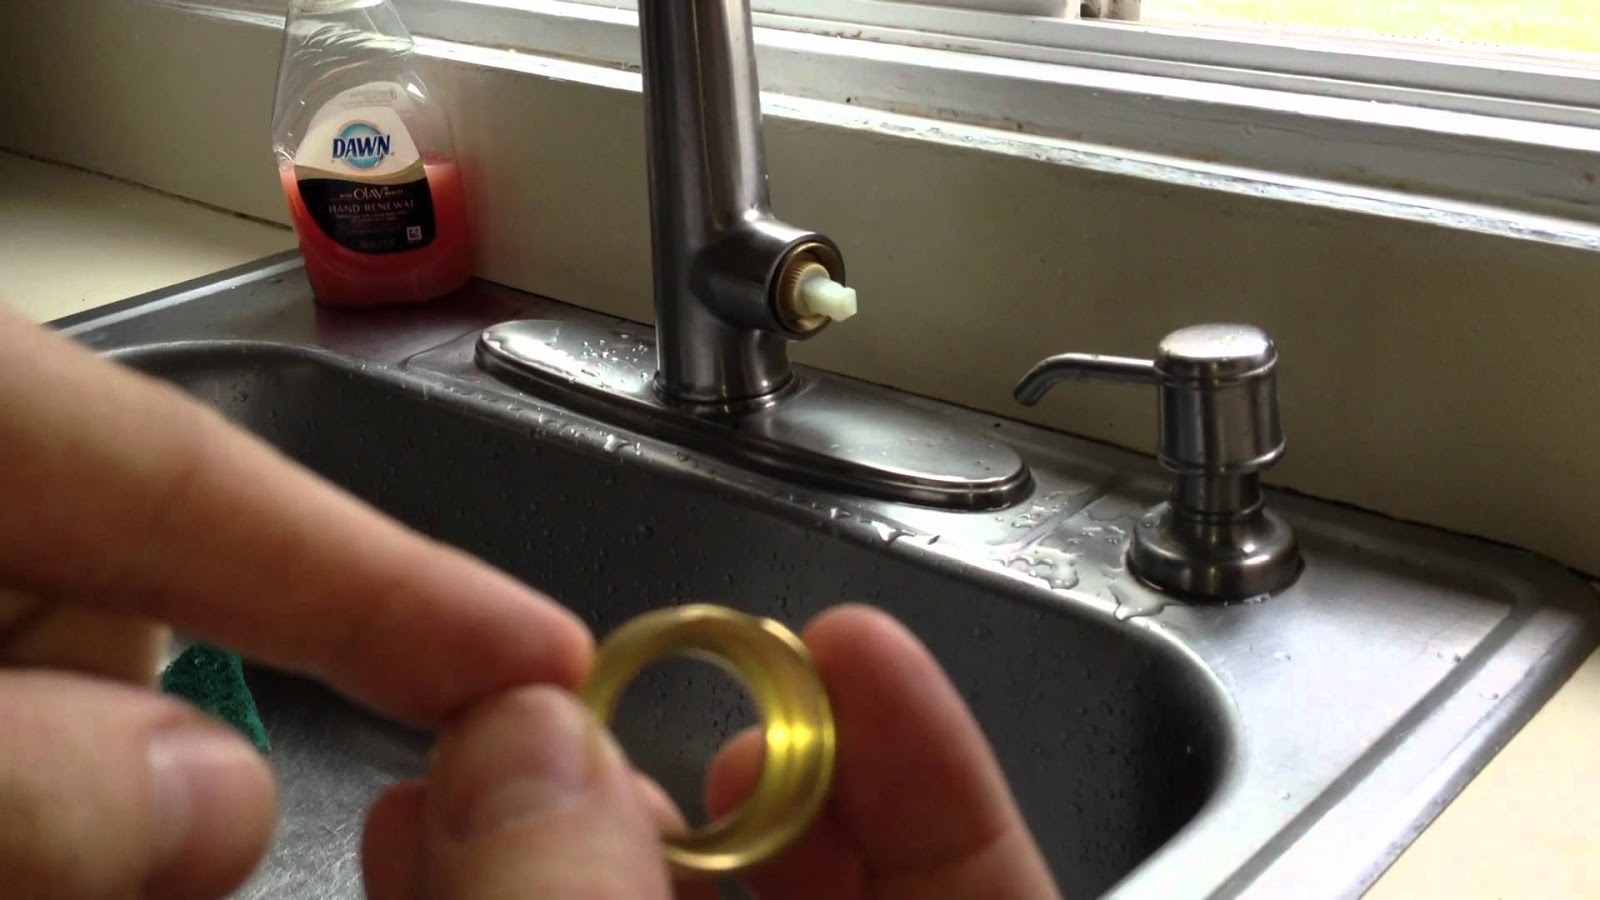
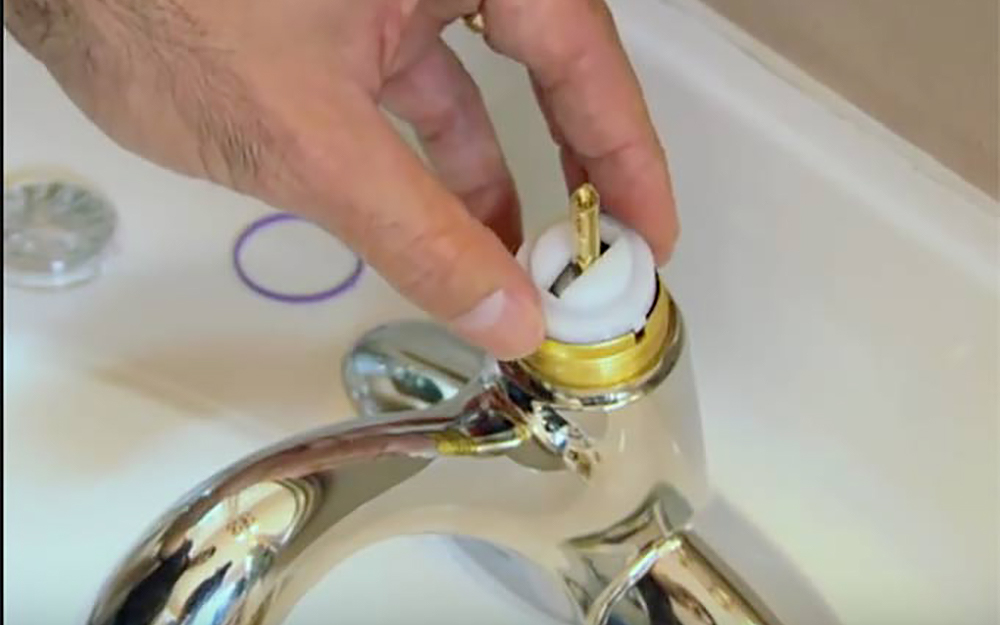
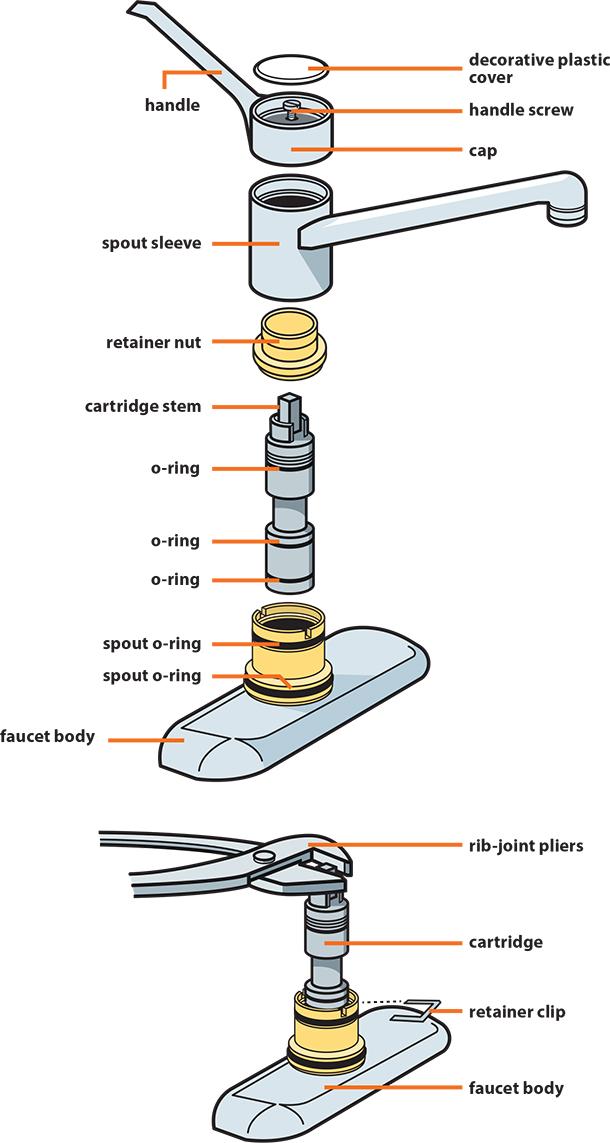
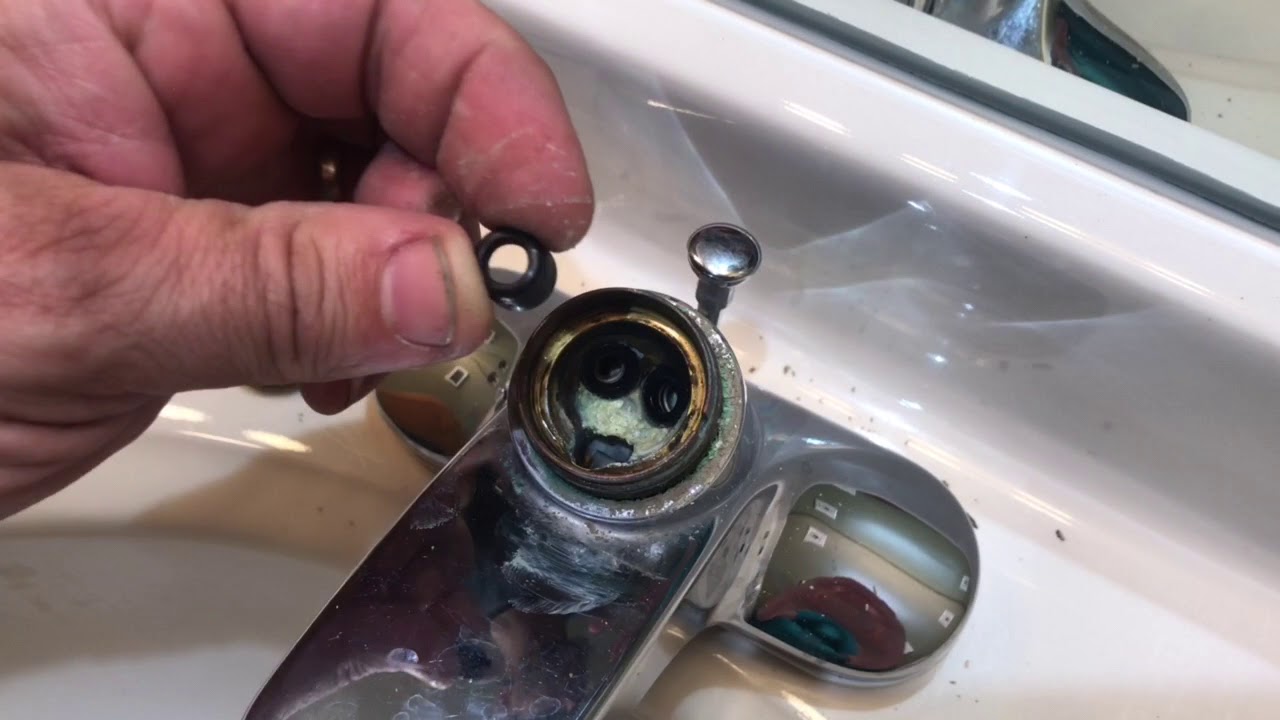
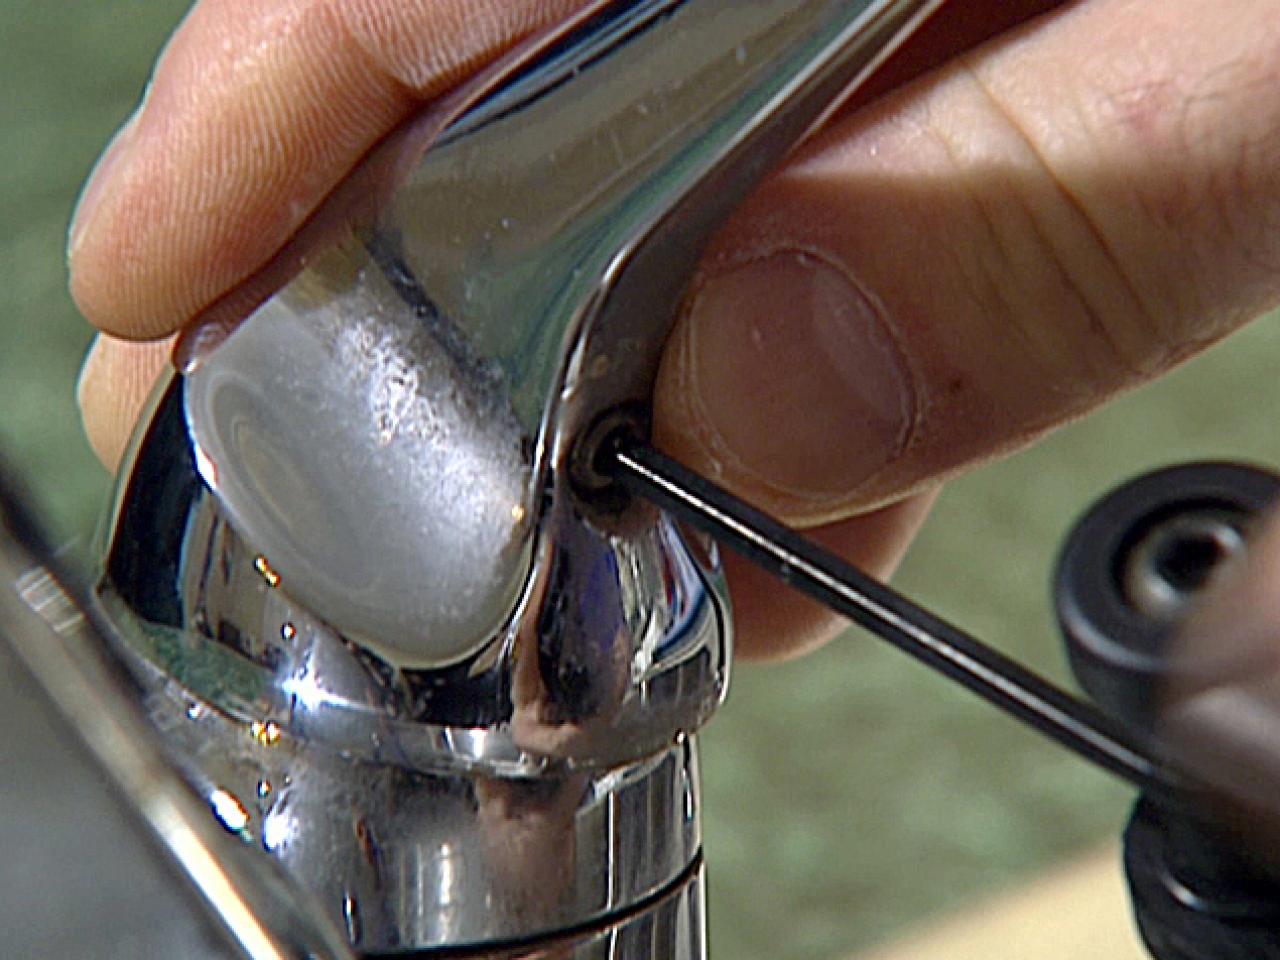
If the troubleshooting steps didn't solve the issue, it's time to move on to repairs. The most likely culprit of a leaking ball-type faucet is a worn-out O-ring, which can easily be replaced. Begin by turning off the water supply to the faucet and removing the handle. Then, locate the O-ring and take it to a hardware store to find a replacement. Once you have the new O-ring, reassemble the faucet and test it out. If the leak persists, there may be a more serious issue at hand and it's best to call a professional plumber.3. Repairing a Leaky Ball-Type Faucet
3. Repairing a Leaky Ball-Type Faucet
:max_bytes(150000):strip_icc()/repair-a-leaking-ball-faucet-1824868-06-a9ad70825a0f45c6a0366d431c683f5e.jpg)
:max_bytes(150000):strip_icc()/repair-a-leaking-ball-faucet-1824868-11-86693ac589964c6bb7589d2d421be94a.jpg)
:max_bytes(150000):strip_icc()/repair-a-leaking-ball-faucet-1824868-04-87f268ac501e4a738ecc0e280f684567.jpg)
:max_bytes(150000):strip_icc()/repair-a-leaking-ball-faucet-1824868-10-7cc2291663994658b0076e5723417218.jpg)
:max_bytes(150000):strip_icc()/repair-a-leaking-ball-faucet-1824868-03-ebab46b31ccb4a8a95bd997bf4e835be.jpg)
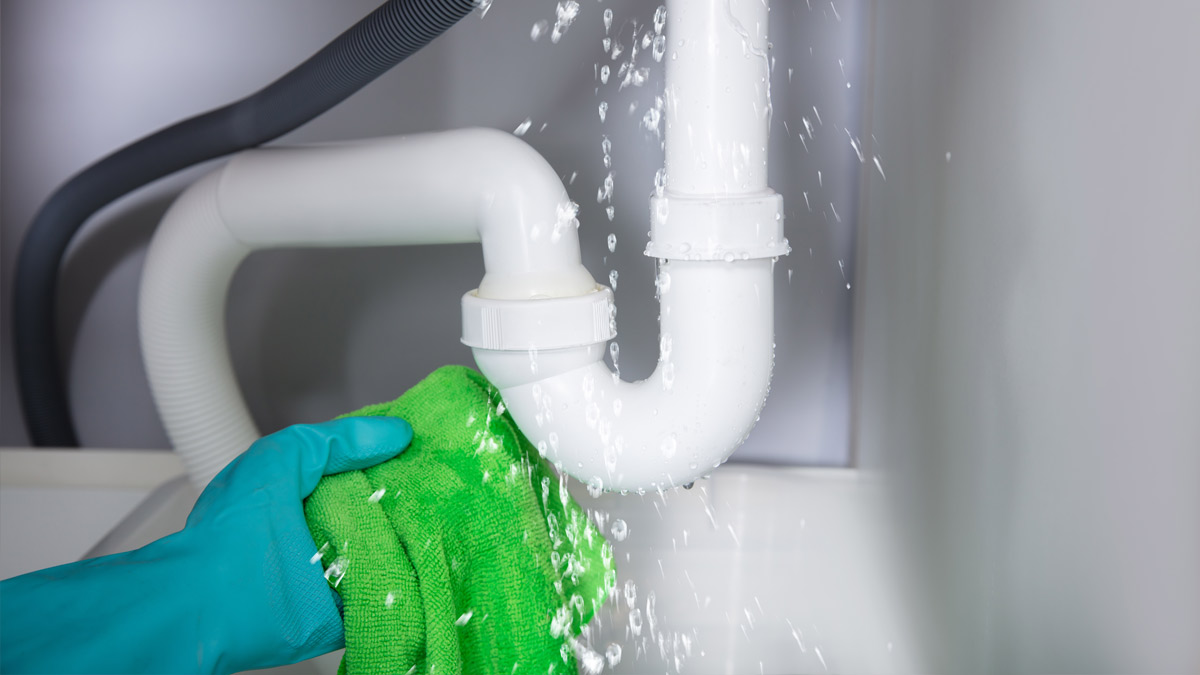
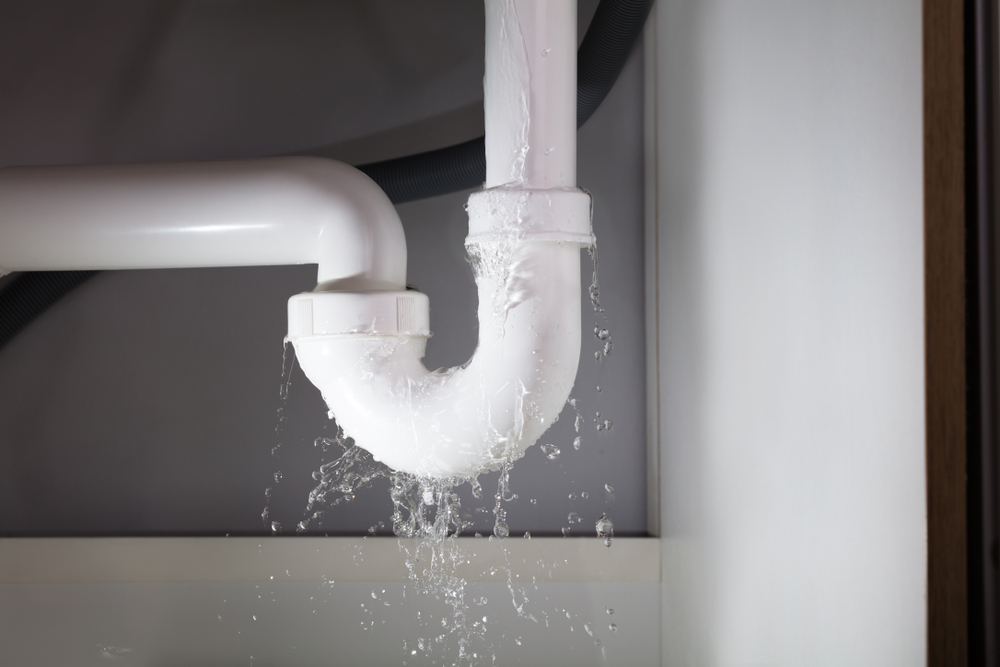
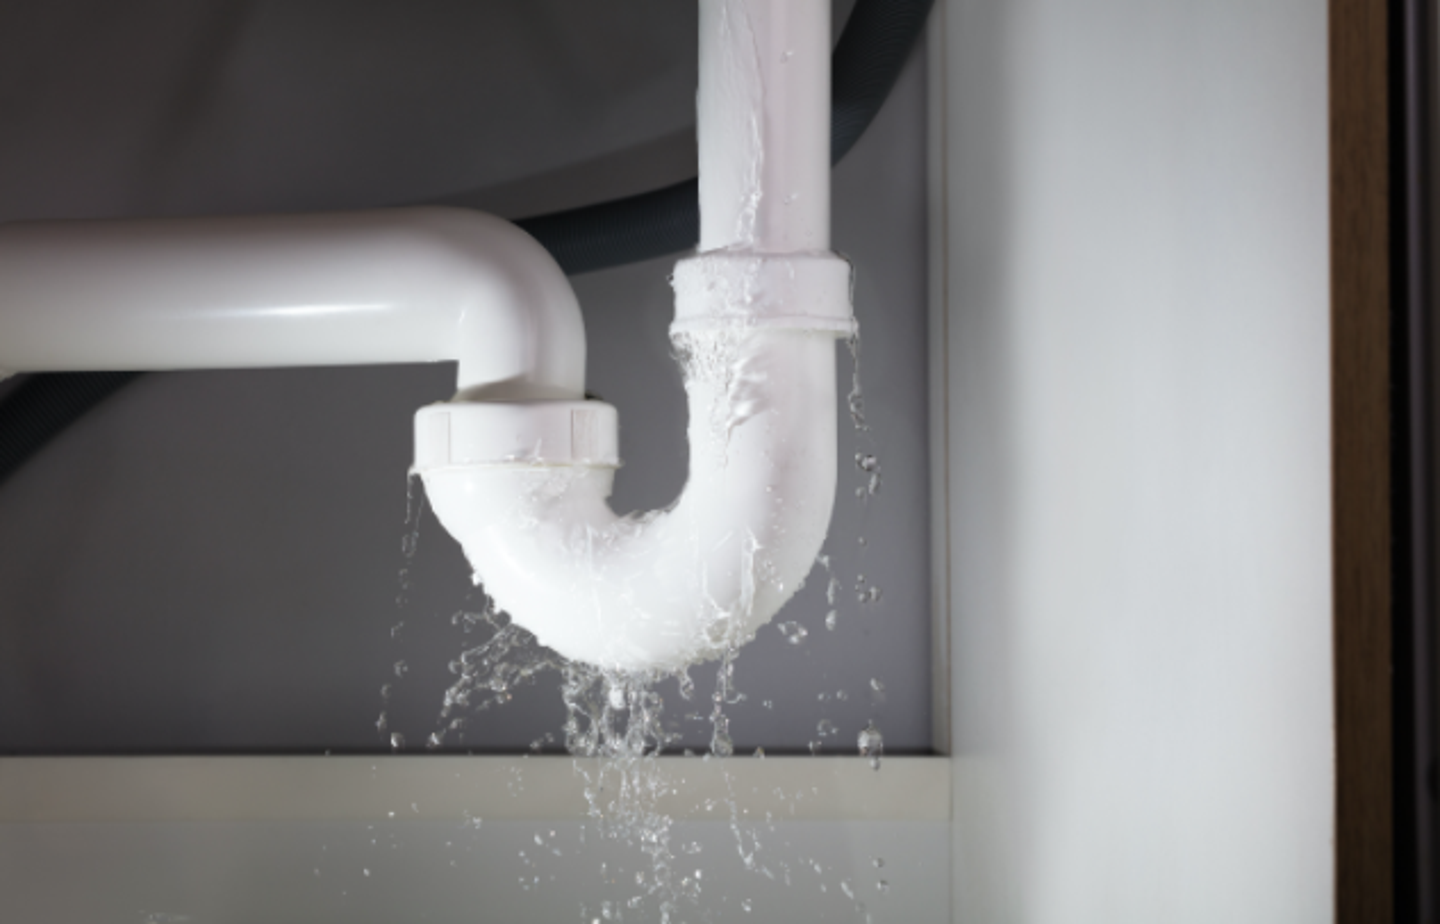
Aside from a faulty faucet, there are a few other common causes of a leaking bathroom sink. One possibility is a loose or damaged connection between the faucet and the sink. This can often be remedied by simply tightening the connections or replacing any worn-out parts. Another cause could be a cracked or damaged sink, which would require a replacement. It's also important to check the drain and pipes under the sink for any leaks or damage.4. Common Causes of a Leaking Bathroom Sink


4. Common Causes of a Leaking Bathroom Sink


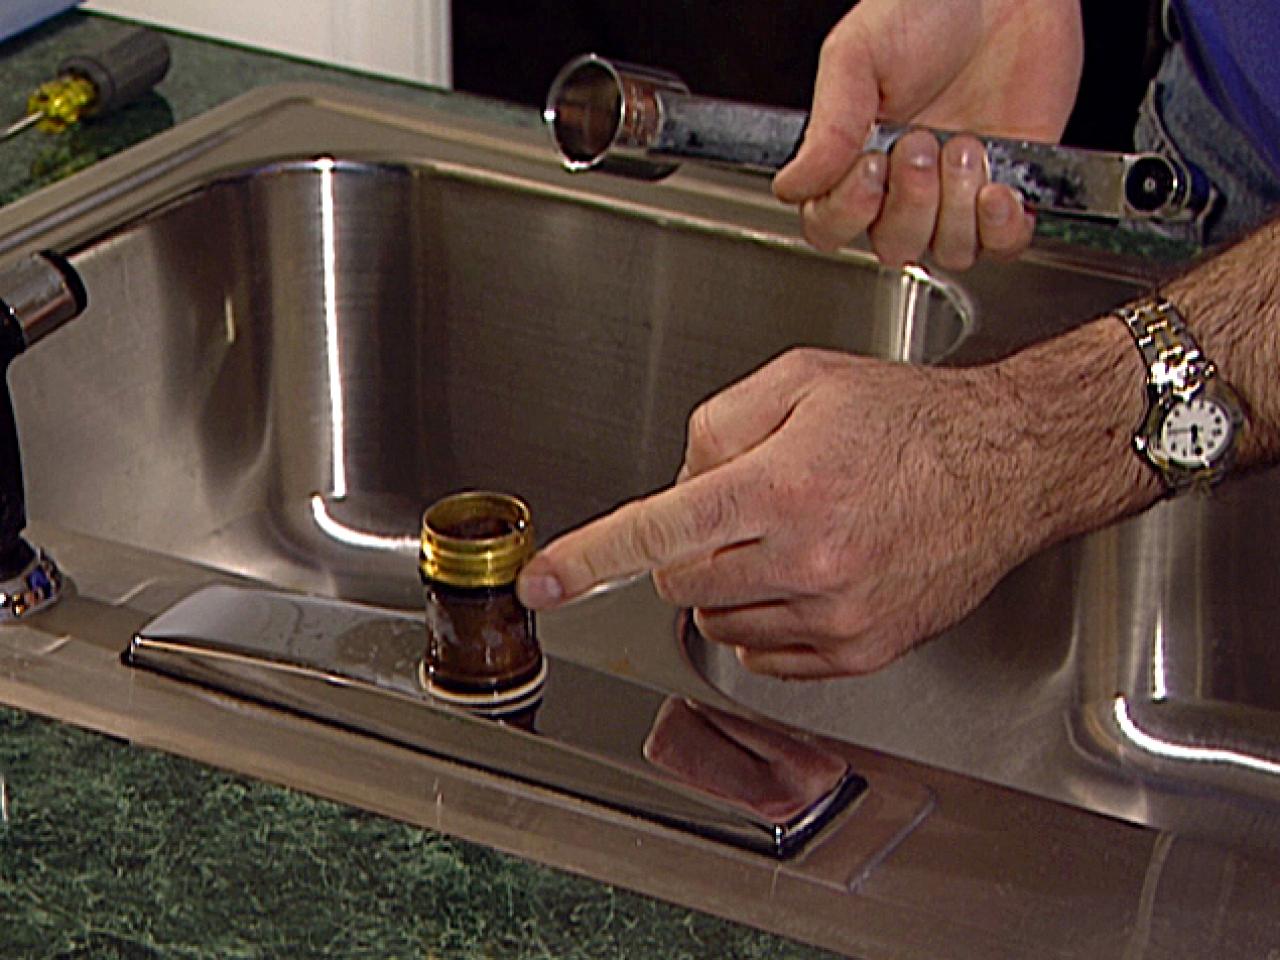
If your ball-type faucet handle is damaged beyond repair, you may need to replace it. This process involves removing the old handle and replacing it with a new one. Begin by turning off the water supply and removing the handle. Then, take the handle to a hardware store to find a matching replacement. Install the new handle by following the manufacturer's instructions and test the faucet to ensure it is working properly.5. How to Replace a Ball-Type Faucet Handle


5. How to Replace a Ball-Type Faucet Handle


Now that you know how to troubleshoot and repair a leaking ball-type faucet, it's time to put that knowledge into action. Follow the steps outlined above to fix your leaky faucet and enjoy a fully functioning bathroom sink once again. Remember to always turn off the water supply before attempting any repairs and to seek professional help if needed.6. Fixing a Leaking Bathroom Sink with a Ball-Type Faucet


6. Fixing a Leaking Bathroom Sink with a Ball-Type Faucet


If you prefer a more detailed guide, here is a step-by-step breakdown of how to fix a leaky bathroom sink with a ball-type faucet: Step 1: Turn off the water supply to the faucet. Step 2: Remove the handle and inspect it for any damage. Step 3: Check the O-ring and other internal parts for wear and tear. Step 4: If the O-ring is damaged, take it to a hardware store to find a replacement. Step 5: Reassemble the faucet and test it to see if the leak has been fixed. Step 6: If the leak persists, check for loose or damaged connections between the faucet and the sink. Step 7: Tighten any loose connections or replace any worn-out parts. Step 8: If the sink itself is damaged, it may need to be replaced. Step 9: Check the drain and pipes under the sink for any leaks or damage. Step 10: If all else fails, seek the help of a professional plumber.7. Step-by-Step Guide to Fixing a Leaky Bathroom Sink


7. Step-by-Step Guide to Fixing a Leaky Bathroom Sink


If you're a handy homeowner, you may prefer to tackle the issue yourself rather than calling a plumber. In addition to the steps outlined above, there are a few DIY solutions you can try to fix a leaking ball-type faucet. These include using plumber's putty or silicone caulk to seal any gaps or cracks, using a faucet repair kit, or using a pipe sealant on any loose connections.8. DIY Solutions for a Leaking Ball-Type Faucet


8. DIY Solutions for a Leaking Ball-Type Faucet
Here are a few additional troubleshooting tips to keep in mind when dealing with a leaking bathroom sink: Tip 1: Check the water pressure to make sure it's not too high, which can cause leaks. Tip 2: Inspect the aerator for any clogs or buildup, which can also cause leaks. Tip 3: If the faucet is still leaking after replacing the O-ring, check for any damaged or worn-out seats and springs. Tip 4: Regularly clean and maintain your bathroom sink to prevent future leaks.9. Troubleshooting Tips for a Leaking Bathroom Sink


9. Troubleshooting Tips for a Leaking Bathroom Sink


By now, you should have a good understanding of how to identify and fix a leaking ball-type faucet in your bathroom sink. Remember to turn off the water supply before attempting any repairs and to seek professional help if needed. With a little bit of knowledge and the right tools, you can easily fix a leaky faucet and save yourself time and money in the process.10. How to Identify and Fix a Leaking Ball-Type Faucet


10. How to Identify and Fix a Leaking Ball-Type Faucet
How to Fix a Leaking Bathroom Sink Handle

Common Causes of a Leaking Bathroom Sink Handle
 The bathroom sink is an essential part of any house design, and a leaking handle can be a frustrating and inconvenient problem. The constant drip of water not only wastes water and adds to your utility bill, but it can also cause damage to your sink and surrounding areas if left unrepaired. The most common cause of a leaking bathroom sink handle is a faulty ball valve. The ball valve is a crucial component that controls the flow of water in your sink, and when it malfunctions, it can result in a leak. Other reasons for a leaking handle include worn out O-rings, loose connections, and a worn out or damaged cartridge.
How to Fix a Leaking Bathroom Sink Handle
 If you have identified that the cause of your leaking handle is a faulty ball valve, you can follow these steps to fix it:
Step 1: Turn off the Water Supply
Before you begin any repairs, it is essential to turn off the water supply to your sink. You can do this by shutting off the main water supply valve or by turning off the individual shut-off valves located under the sink.
Step 2: Disassemble the Handle
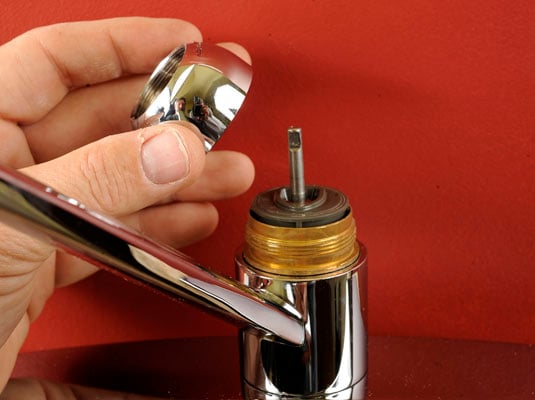
Next, you will need to disassemble the handle to access the ball valve. This may involve removing the handle's decorative cap, unscrewing the handle, and removing any retaining clips or screws.
Step 3: Replace the Ball Valve
Once you have access to the ball valve, carefully remove it and replace it with a new one. You can find replacement ball valves at your local hardware store or online. Make sure to match the size and type of your old ball valve to the new one.
Step 4: Check and Replace Other Components
While you have the handle disassembled, it is a good idea to check the condition of other components such as O-rings, cartridges, and seals. If you notice any wear or damage, replace these parts as well.
Step 5: Reassemble and Test
After replacing the ball valve and any other necessary components, reassemble the handle and turn the water supply back on. Test the handle to ensure that the leak has been fixed. If there is still a leak, you may need to call a professional plumber for further assistance.
If you have identified that the cause of your leaking handle is a faulty ball valve, you can follow these steps to fix it:
Step 1: Turn off the Water Supply
Before you begin any repairs, it is essential to turn off the water supply to your sink. You can do this by shutting off the main water supply valve or by turning off the individual shut-off valves located under the sink.
Step 2: Disassemble the Handle
Next, you will need to disassemble the handle to access the ball valve. This may involve removing the handle's decorative cap, unscrewing the handle, and removing any retaining clips or screws.
Step 3: Replace the Ball Valve
Once you have access to the ball valve, carefully remove it and replace it with a new one. You can find replacement ball valves at your local hardware store or online. Make sure to match the size and type of your old ball valve to the new one.
Step 4: Check and Replace Other Components
While you have the handle disassembled, it is a good idea to check the condition of other components such as O-rings, cartridges, and seals. If you notice any wear or damage, replace these parts as well.
Step 5: Reassemble and Test
After replacing the ball valve and any other necessary components, reassemble the handle and turn the water supply back on. Test the handle to ensure that the leak has been fixed. If there is still a leak, you may need to call a professional plumber for further assistance.
Preventing Future Leaks
 To prevent future leaks in your bathroom sink handle, it is essential to conduct regular maintenance and inspections. Check for any loose connections, worn out parts, and address any issues immediately. Also, be mindful of how you use your sink and handle to avoid putting unnecessary strain on the ball valve and other components.
In conclusion, a leaking bathroom sink handle can be a frustrating issue to deal with, but with the right knowledge and steps, it can be easily fixed. By following these steps and conducting regular maintenance, you can keep your bathroom sink handle in good working condition and avoid any future leaks.
To prevent future leaks in your bathroom sink handle, it is essential to conduct regular maintenance and inspections. Check for any loose connections, worn out parts, and address any issues immediately. Also, be mindful of how you use your sink and handle to avoid putting unnecessary strain on the ball valve and other components.
In conclusion, a leaking bathroom sink handle can be a frustrating issue to deal with, but with the right knowledge and steps, it can be easily fixed. By following these steps and conducting regular maintenance, you can keep your bathroom sink handle in good working condition and avoid any future leaks.