If you're experiencing issues with your kitchen sink sprayer, it may be time to replace it. Fortunately, this is a relatively simple DIY project that can save you time and money. In this guide, we'll walk you through the steps of replacing a kitchen sink sprayer so you can have a fully functioning sink in no time.How to Replace a Kitchen Sink Sprayer


How to Replace a Kitchen Sink Sprayer
/25089301983_c5145fe85d_o-58418ef15f9b5851e5f392b5.jpg)

:max_bytes(150000):strip_icc()/installing-a-kitchen-sink-sprayer-2718817-hero-2b7047468d594da6be2494ba0eebb480.jpg)


/sink-with-running-water-1033950126-25ffe2e2b2d0412083668d9cd791085e.jpg)


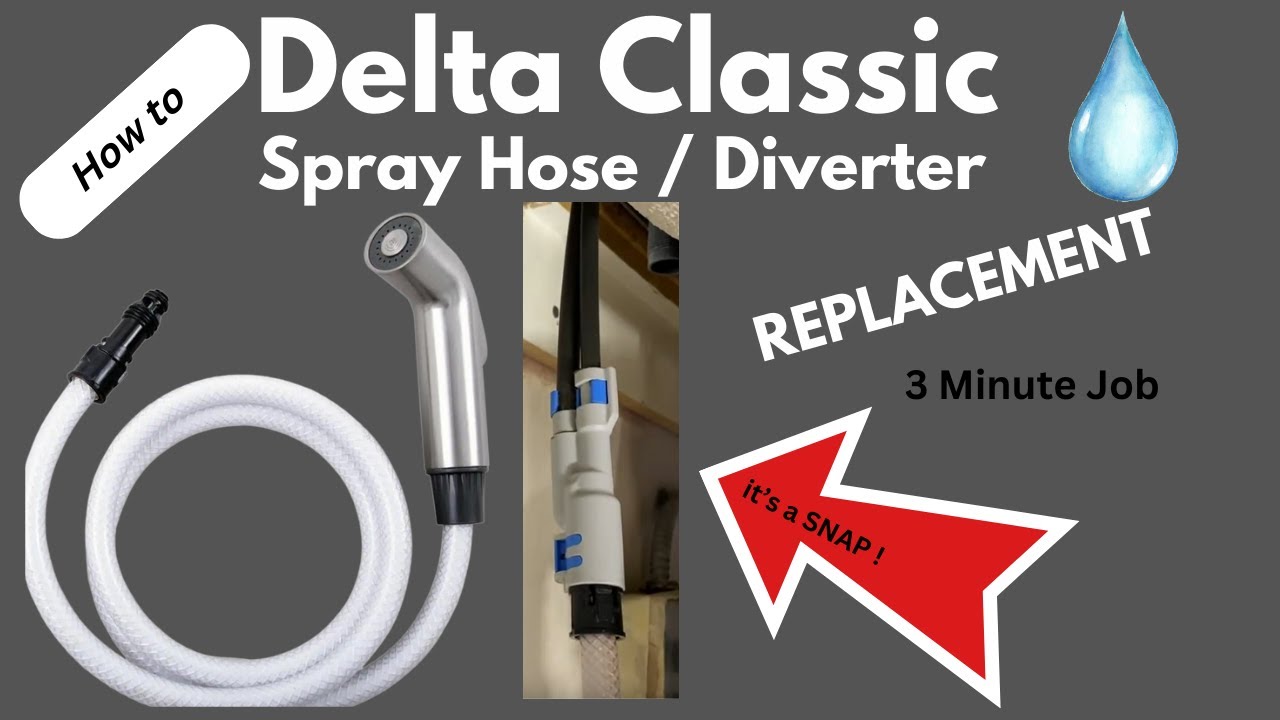
Replacing a kitchen sink sprayer can be done in just 6 easy steps. Before you begin, make sure you have all the necessary tools and materials, including a replacement sprayer and nozzle, pliers, and plumber's tape.Replacing a Kitchen Sink Sprayer: 6 Steps


Replacing a Kitchen Sink Sprayer: 6 Steps


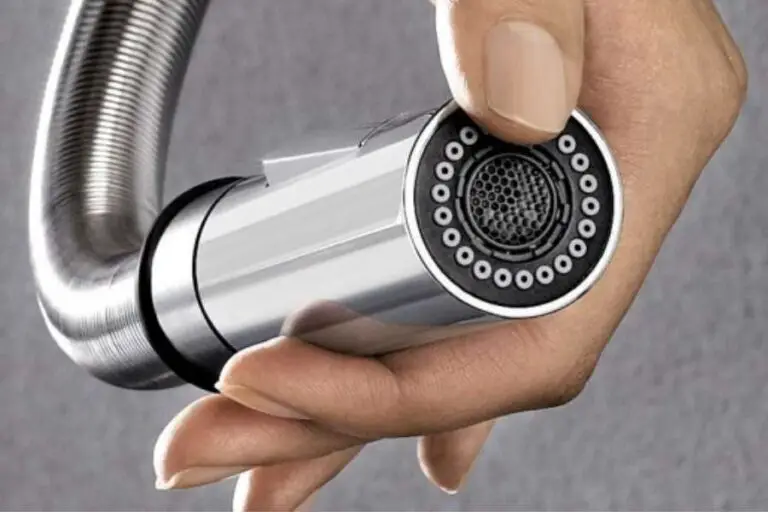
If the issue with your sprayer is just with the nozzle, you may be able to replace just that part instead of the entire sprayer. To do this, you'll first need to unscrew the old nozzle from the hose and then screw on the new one. Make sure to use plumber's tape to ensure a tight and leak-free seal.How to Replace a Kitchen Sink Sprayer Nozzle

How to Replace a Kitchen Sink Sprayer Nozzle


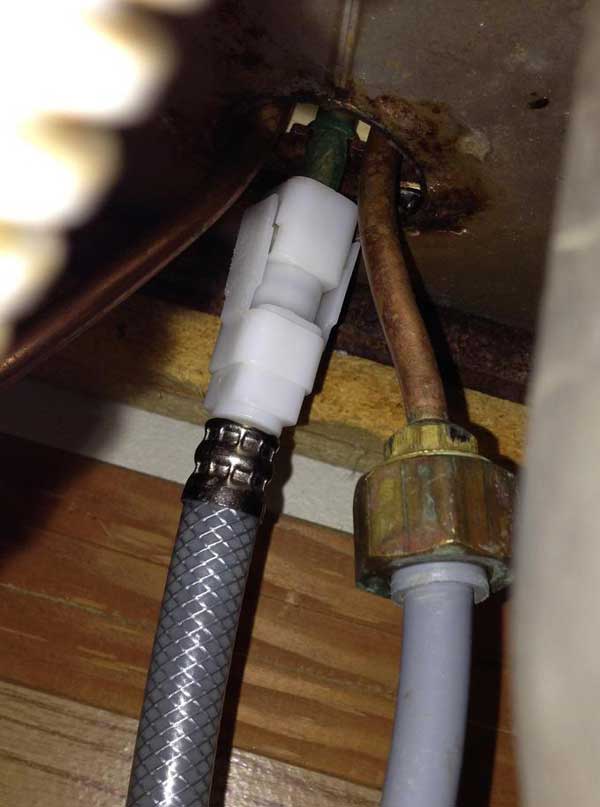
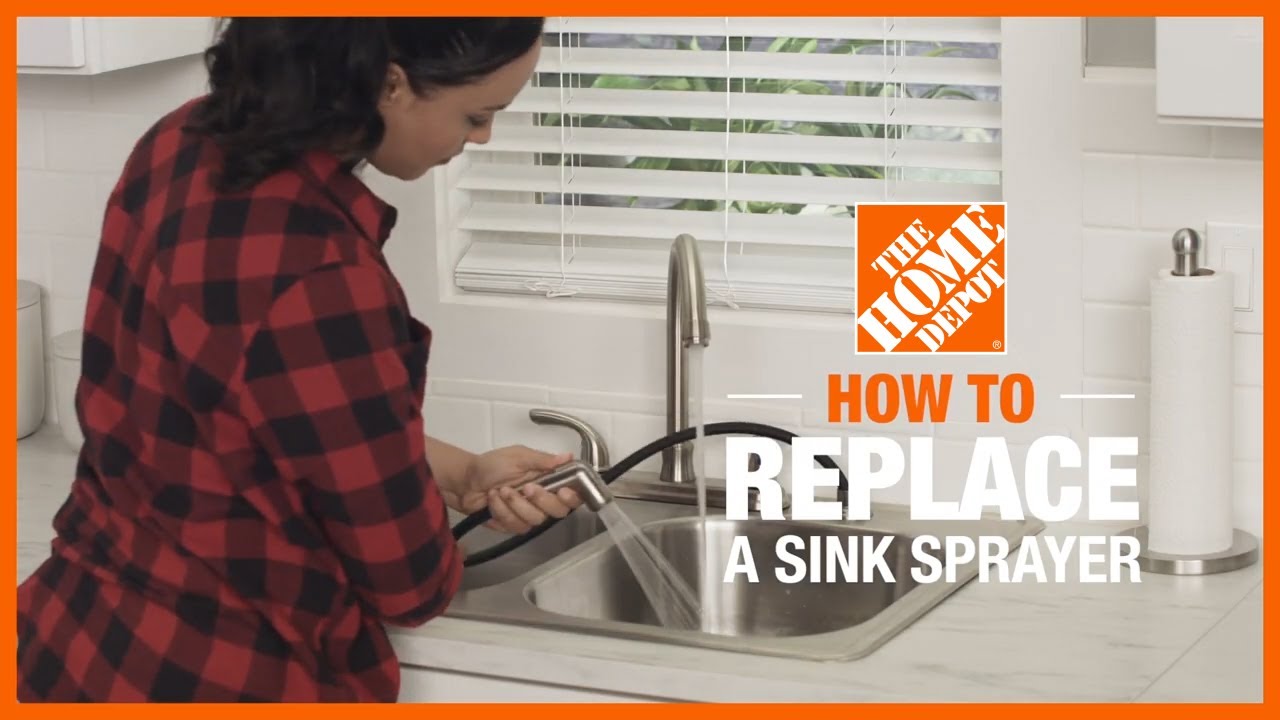
If the issue is with the sprayer head, you'll need to replace the entire sprayer. Start by turning off the water supply to your sink. Then, use pliers to loosen and remove the old sprayer head from the hose. Once removed, attach the new sprayer head and tighten with pliers. Turn the water supply back on and test the new sprayer.Replacing a Kitchen Sink Sprayer Head


Replacing a Kitchen Sink Sprayer Head


Replacing a kitchen sink sprayer is a DIY project that can save you time and money. With just a few simple steps, you can have a fully functioning sprayer in no time. Plus, you'll have the satisfaction of fixing it yourself instead of hiring a professional.DIY: Replacing a Kitchen Sink Sprayer


DIY: Replacing a Kitchen Sink Sprayer
:max_bytes(150000):strip_icc()/installing-a-kitchen-sink-sprayer-2718817-05-36c4e6f6c5f34c7abed7277ee47c70c2.jpg)
:max_bytes(150000):strip_icc()/installing-a-kitchen-sink-sprayer-2718817-07-362bee47568f48bab7f3bdff600e4092.jpg)

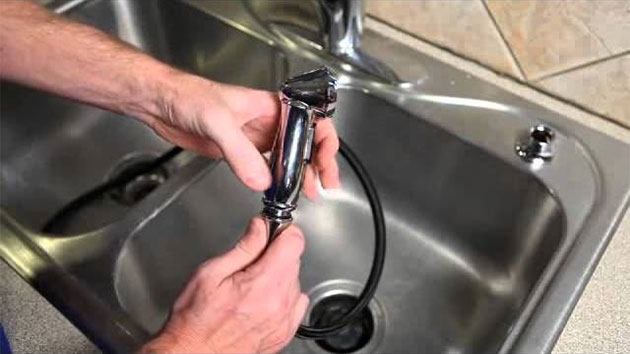
To replace a kitchen sink sprayer, follow these easy steps: 1. Turn off the water supply to your sink 2. Unscrew the old sprayer head from the hose 3. Attach the new sprayer head using pliers 4. Turn the water supply back on and test the new sprayer 5. If the issue is with the nozzle, unscrew the old one and screw on the new one 6. Use plumber's tape to ensure a tight sealStep-by-Step Guide to Replacing a Kitchen Sink Sprayer


Step-by-Step Guide to Replacing a Kitchen Sink Sprayer


If you're new to DIY projects, replacing a kitchen sink sprayer is a great place to start. It's a relatively simple task that can be completed in just a few steps. Plus, you'll learn valuable skills that can be applied to other home repairs in the future.Replacing a Kitchen Sink Sprayer: A Beginner's Guide


Replacing a Kitchen Sink Sprayer: A Beginner's Guide


When replacing a kitchen sink sprayer, there are a few common mistakes that can easily be avoided. These include not turning off the water supply, not using plumber's tape, and not tightening the connections properly. Make sure to follow the steps carefully and double-check your work to avoid any issues.Replacing a Kitchen Sink Sprayer: Common Mistakes to Avoid


Replacing a Kitchen Sink Sprayer: Common Mistakes to Avoid


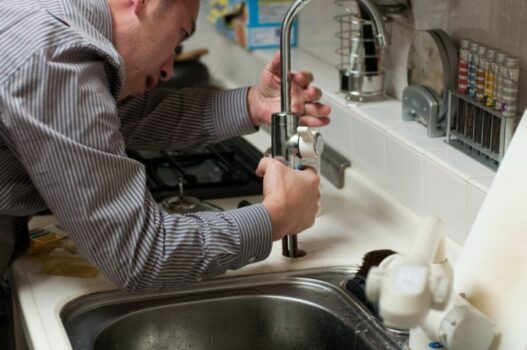
Before you begin replacing your kitchen sink sprayer, make sure you have all the necessary tools and materials. These may include a replacement sprayer and nozzle, pliers, plumber's tape, and a wrench. Having everything you need beforehand will make the process much smoother and more efficient.Tools and Materials Needed for Replacing a Kitchen Sink Sprayer


Tools and Materials Needed for Replacing a Kitchen Sink Sprayer


When choosing a replacement kitchen sink sprayer, there are a few things to consider. Make sure to choose a sprayer that is compatible with your sink and has the features you desire, such as a high-pressure spray or multiple settings. You may also want to consider the material and finish to match your existing fixtures.Tips for Choosing the Right Replacement Kitchen Sink Sprayer


Tips for Choosing the Right Replacement Kitchen Sink Sprayer


Why Replacing the Sprayer in Your Kitchen Sink is Important

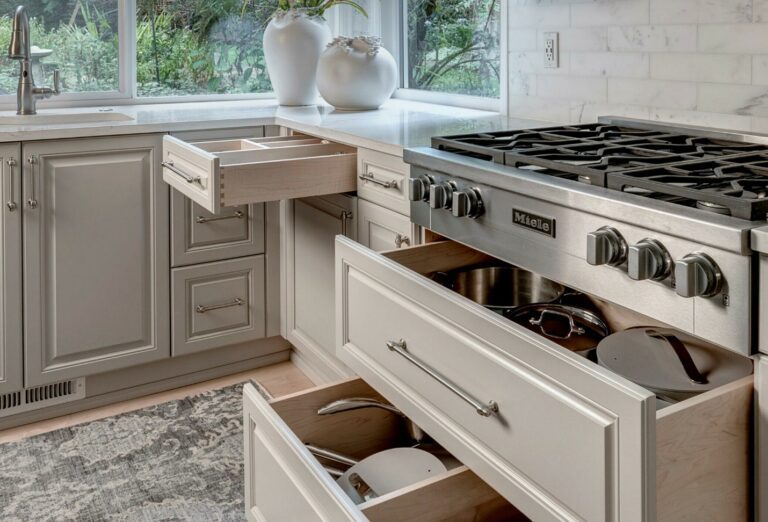
The Importance of a Functional Kitchen Sink
 A kitchen sink is an essential part of any household. It is where we wash our hands, prepare food, and clean dishes. A well-functioning kitchen sink makes these tasks much easier and more efficient. One of the key components of a kitchen sink is the sprayer, which helps with tasks such as washing dishes and filling pots. However, over time, the sprayer may start to show signs of wear and tear, or it may simply stop working altogether. This is when it becomes necessary to
replace the sprayer
in your kitchen sink.
A kitchen sink is an essential part of any household. It is where we wash our hands, prepare food, and clean dishes. A well-functioning kitchen sink makes these tasks much easier and more efficient. One of the key components of a kitchen sink is the sprayer, which helps with tasks such as washing dishes and filling pots. However, over time, the sprayer may start to show signs of wear and tear, or it may simply stop working altogether. This is when it becomes necessary to
replace the sprayer
in your kitchen sink.
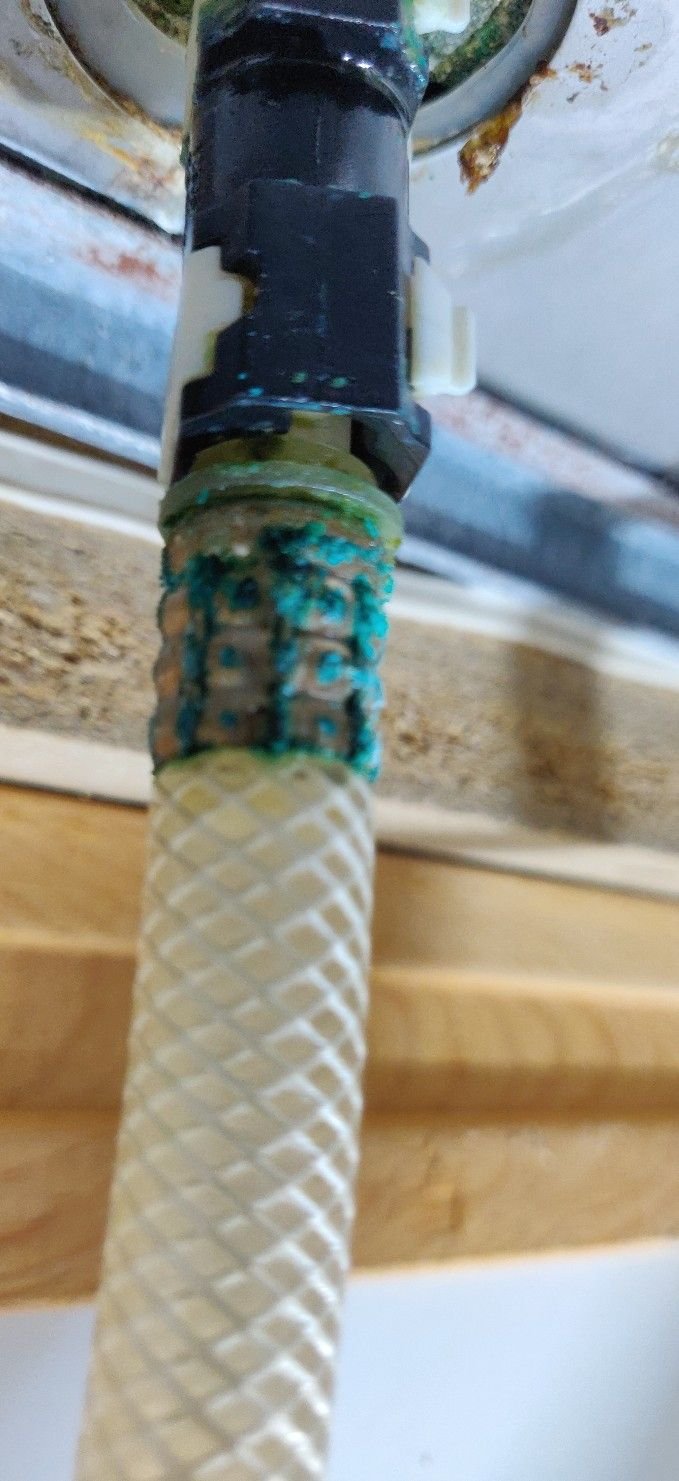
Signs that Your Sprayer Needs to be Replaced
 There are a few tell-tale signs that indicate your kitchen sink's sprayer needs to be replaced. The most obvious one is if it stops working completely. This could be due to a faulty valve, clogged nozzle, or worn-out components. Another sign is if the sprayer becomes difficult to use, such as not being able to switch between spray and stream modes or if the water pressure is significantly reduced. You may also notice leaks around the sprayer, which can cause water damage to your sink and countertop. If you notice any of these signs, it's time to
replace the sprayer
in your kitchen sink.
There are a few tell-tale signs that indicate your kitchen sink's sprayer needs to be replaced. The most obvious one is if it stops working completely. This could be due to a faulty valve, clogged nozzle, or worn-out components. Another sign is if the sprayer becomes difficult to use, such as not being able to switch between spray and stream modes or if the water pressure is significantly reduced. You may also notice leaks around the sprayer, which can cause water damage to your sink and countertop. If you notice any of these signs, it's time to
replace the sprayer
in your kitchen sink.
The Benefits of Replacing Your Kitchen Sink Sprayer
 Replacing the sprayer in your kitchen sink can bring a host of benefits, making your kitchen tasks much easier and more efficient. A new sprayer will have better water pressure, making it easier to wash dishes and fill pots. It also allows for smoother switching between spray and stream modes, giving you more control over the water flow. Additionally, a new sprayer will reduce the chances of leaks, preventing any potential water damage to your sink and countertop.
Replacing the sprayer
also gives your kitchen sink a fresh new look, enhancing the overall aesthetic of your kitchen.
Replacing the sprayer in your kitchen sink can bring a host of benefits, making your kitchen tasks much easier and more efficient. A new sprayer will have better water pressure, making it easier to wash dishes and fill pots. It also allows for smoother switching between spray and stream modes, giving you more control over the water flow. Additionally, a new sprayer will reduce the chances of leaks, preventing any potential water damage to your sink and countertop.
Replacing the sprayer
also gives your kitchen sink a fresh new look, enhancing the overall aesthetic of your kitchen.
Conclusion
 In conclusion, a functional kitchen sink is crucial for any household, and the sprayer plays a significant role in its functionality. If you notice any signs of wear and tear or if your sprayer has stopped working altogether, it's time to
replace
it. Not only will this improve the efficiency of your kitchen tasks, but it will also prevent any potential damage to your sink and give it a fresh new look. So, don't hesitate to
replace the sprayer
in your kitchen sink when necessary.
In conclusion, a functional kitchen sink is crucial for any household, and the sprayer plays a significant role in its functionality. If you notice any signs of wear and tear or if your sprayer has stopped working altogether, it's time to
replace
it. Not only will this improve the efficiency of your kitchen tasks, but it will also prevent any potential damage to your sink and give it a fresh new look. So, don't hesitate to
replace the sprayer
in your kitchen sink when necessary.