Caulk is a commonly used sealant for kitchen sinks, but over time it can become discolored, cracked, or moldy. When this happens, it's important to remove the old caulk and replace it with fresh caulk to keep your sink looking clean and well-maintained. In this article, we'll discuss the top 10 methods for removing caulk from a kitchen sink and provide expert tips to help you achieve a professional-looking result.How to Remove Caulk from a Kitchen Sink


How to Remove Caulk from a Kitchen Sink


:max_bytes(150000):strip_icc()/how-to-remove-old-caulk-1824827-01-3d0370c59e124dbbaa6560c68bab111c.jpg)

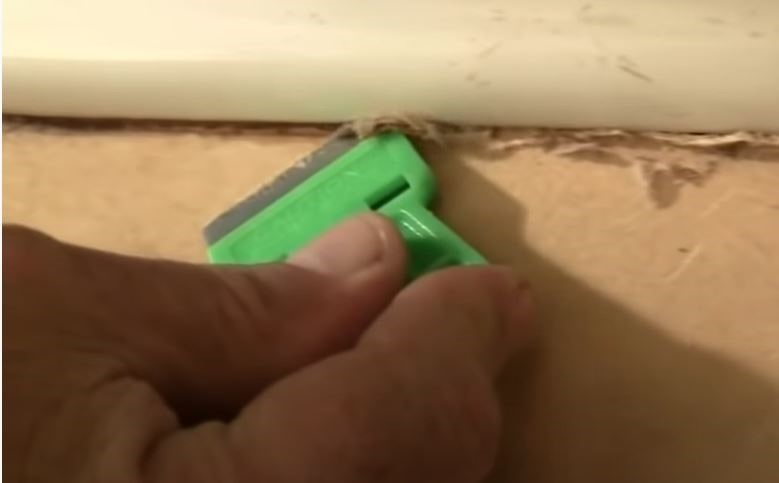
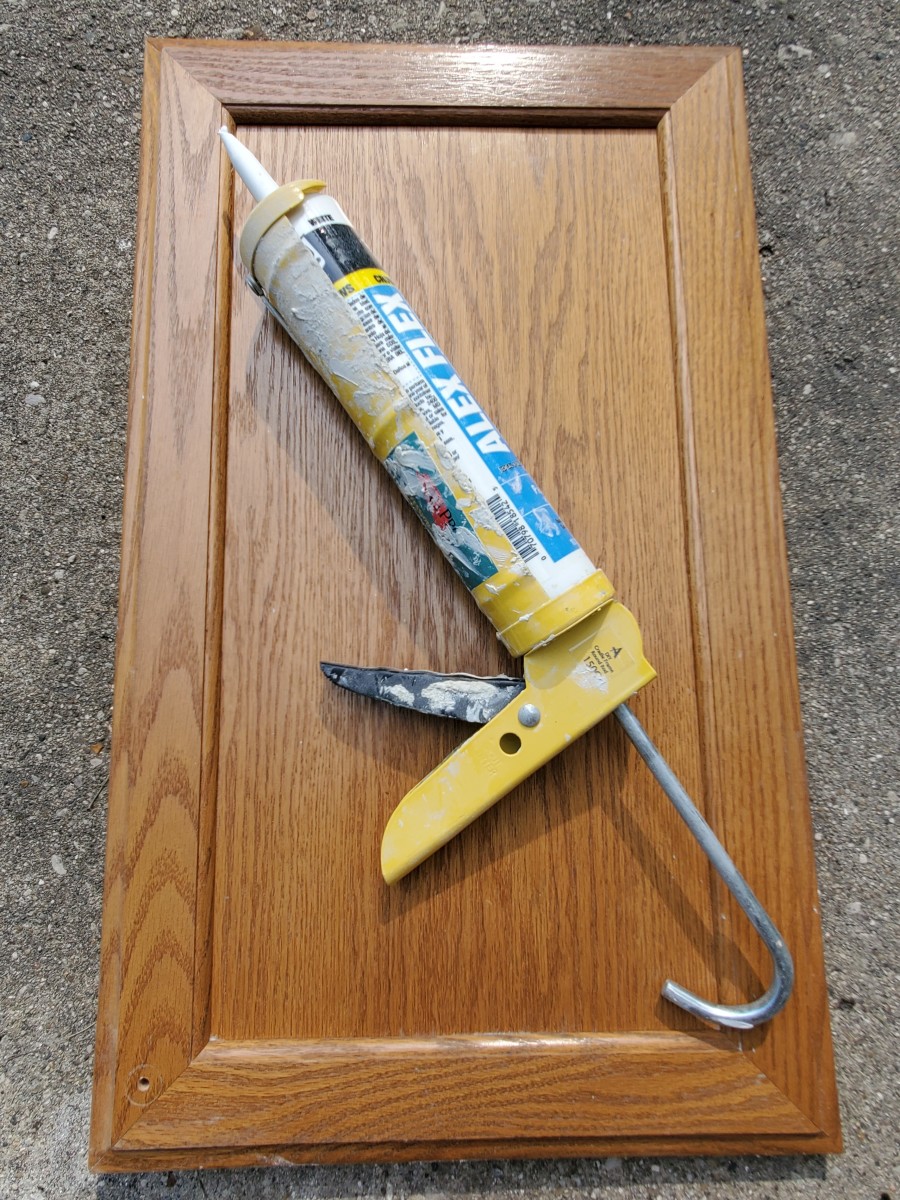
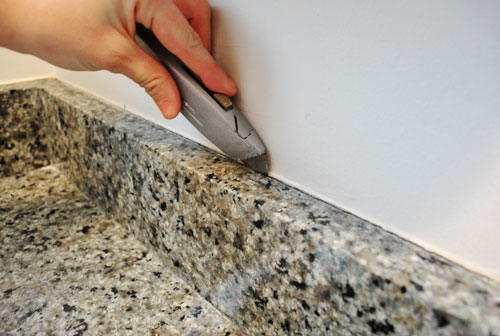
Before you begin the process of removing caulk from your kitchen sink, it's important to gather all the necessary tools and materials. You will need a utility knife, caulk remover, caulk scraper, rubbing alcohol, and a clean cloth. Once you have these items, follow these steps: Step 1: Use the utility knife to score the caulk along the edges of the sink. This will help loosen the caulk and make it easier to remove. Step 2: Apply caulk remover to the caulk and let it sit for the recommended amount of time listed on the product's instructions. This will soften the caulk, making it easier to scrape off. Step 3: Use a caulk scraper to gently remove the caulk from the edges of the sink. Be careful not to scratch the surface of the sink. Step 4: Once the caulk has been removed, use rubbing alcohol and a clean cloth to wipe down the edges of the sink. This will help remove any leftover residue and prepare the surface for new caulk.Removing Caulk from a Kitchen Sink: A Step-by-Step Guide


Removing Caulk from a Kitchen Sink: A Step-by-Step Guide


If the above method doesn't work for you, don't worry. There are other effective ways to remove caulk from a kitchen sink. Here are some alternative methods you can try: Mechanical Removal: This method involves using a caulk removal tool or a razor blade to scrape away the caulk. It requires a bit more effort and precision, but it can be an effective way to remove stubborn caulk. Heat Gun: A heat gun can be used to soften the caulk and make it easier to scrape off. However, be cautious when using a heat gun as it can damage the surface of the sink if held too close. Chemical Solvents: There are also chemical solvents specifically designed to remove caulk. Be sure to follow the instructions carefully and use in a well-ventilated area.Best Methods for Removing Caulk from a Kitchen Sink


Best Methods for Removing Caulk from a Kitchen Sink


If you prefer a more natural approach, there are several DIY methods for removing caulk from a kitchen sink. These methods may take a bit longer, but they are safe and effective. Here are a few DIY options to try: Vinegar and Baking Soda: Mix equal parts vinegar and baking soda to create a paste. Apply the paste to the caulk and let it sit for a few hours. Then, use a caulk scraper to remove the caulk. Lemon Juice and Salt: Create a mixture of lemon juice and salt and apply it to the caulk. Let it sit for a few hours before using a caulk scraper to remove the caulk. Boiling Water: Boil a pot of water and carefully pour it over the caulk. Let it sit for a few minutes before using a caulk scraper to remove the softened caulk.DIY: Removing Caulk from a Kitchen Sink


DIY: Removing Caulk from a Kitchen Sink


Removing old caulk can be a messy and time-consuming process, but these tips and tricks can make it easier for you: Use Protective Gear: When working with caulk remover or chemical solvents, be sure to wear protective gloves and eyewear to avoid any potential skin or eye irritation. Work in Sections: Instead of trying to remove all the caulk at once, work in small sections. This will prevent the caulk from drying out and make it easier to remove. Be Patient: Removing caulk takes time and effort, so it's important to be patient and not rush the process. Take breaks as needed to avoid frustration and fatigue.Removing Old Caulk from a Kitchen Sink: Tips and Tricks


Removing Old Caulk from a Kitchen Sink: Tips and Tricks
:max_bytes(150000):strip_icc()/how-to-remove-old-caulk-1824827-01-3d0370c59e124dbbaa6560c68bab111c.jpg)


When it comes to removing caulk from a kitchen sink, there is no one-size-fits-all solution. The most effective method will depend on the type of caulk used and the condition of the caulk. Some methods may work better than others, so it's important to try different methods until you find one that works for you.Effective Ways to Remove Caulk from a Kitchen Sink


Effective Ways to Remove Caulk from a Kitchen Sink
While removing caulk from a kitchen sink may seem like a simple task, there are some common mistakes that can lead to unsatisfactory results. Here are a few mistakes to avoid: Not Prepping the Area: Before removing caulk, be sure to clean the area and remove any debris or residue. This will help the new caulk adhere better and create a neater finish. Using the Wrong Tools: Using the wrong tools can cause damage to the sink or make the caulk removal process more difficult. Always use caulk-specific tools or DIY alternatives to ensure a safe and effective removal. Skipping the Finishing Touches: After removing the caulk, be sure to clean the area and apply a new layer of caulk to seal the edges of the sink. This will give your sink a professional and finished look.Removing Caulk from a Kitchen Sink: Common Mistakes to Avoid


Removing Caulk from a Kitchen Sink: Common Mistakes to Avoid


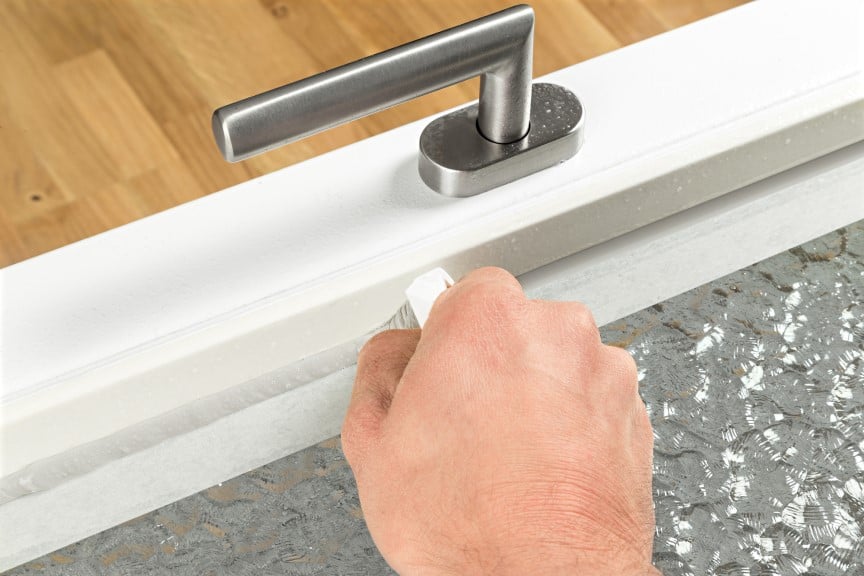
As mentioned earlier, there are several tools and materials you'll need to successfully remove caulk from your kitchen sink. Here's a list of the essential items: Caulk Remover or Chemical Solvent - to soften the caulk Utility Knife - to score the caulk Caulk Scraper - to remove the caulk Rubbing Alcohol - to clean the area Clean Cloth - to wipe away residueTools You'll Need for Removing Caulk from a Kitchen Sink


Tools You'll Need for Removing Caulk from a Kitchen Sink


If you're not confident with the above methods, or if you're dealing with particularly stubborn caulk, you may want to consider hiring a professional to remove the caulk for you. They will have the necessary tools and expertise to achieve a clean and flawless result.Removing Caulk from a Kitchen Sink: Alternative Methods


Removing Caulk from a Kitchen Sink: Alternative Methods
:max_bytes(150000):strip_icc()/caulk-removal-tool-56ec7f1b3df78ce5f83535fe.jpg)

Here are some final expert tips to help you get the best results when removing caulk from your kitchen sink: Use a Hairdryer: If you're using a heat gun to soften the caulk, be sure to keep the heat gun at least six inches away from the surface of the sink. Alternatively, you can use a hairdryer on its lowest setting for a safer and more controlled heat source. Test Before Applying: Before using any chemical solvents or DIY mixtures, test them on a small, inconspicuous area of the sink to ensure they won't cause any damage. Be Careful with the Utility Knife: When scoring the caulk, be careful not to cut too deep as you may damage the sink. Use a light touch and gradually increase pressure if needed.Expert Tips for Removing Caulk from a Kitchen Sink


Expert Tips for Removing Caulk from a Kitchen Sink

Why Removing Caulk from Your Kitchen Sink is Important for House Design

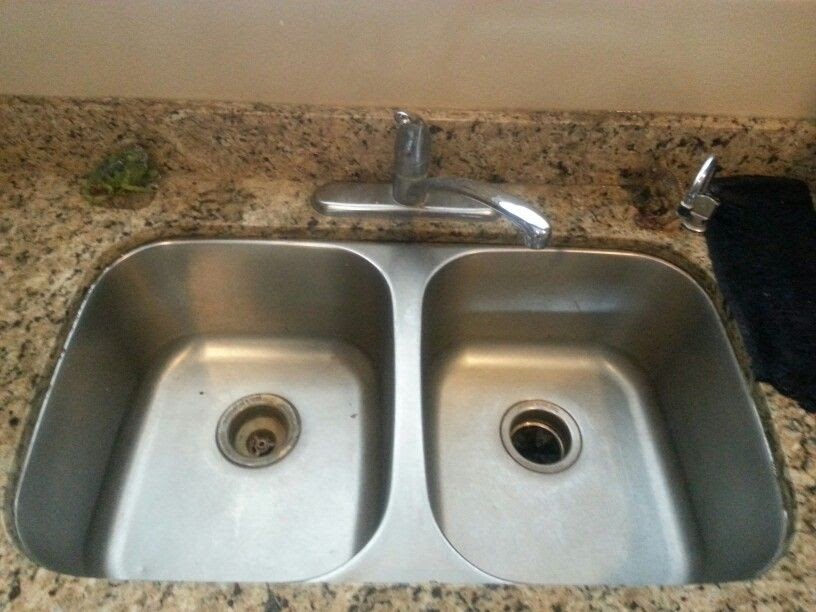
The Importance of a Clean and Well-Maintained Kitchen Sink
/caulk-removal-tool-56ec7f1b3df78ce5f83535fe.jpg) A kitchen sink is an essential part of any household, and it sees a lot of use on a daily basis. It is where we wash our dishes, prepare food, and clean our hands, making it a high traffic area in any home. Over time, the caulk around the edges of your kitchen sink can become dirty, discolored, and even moldy. This not only looks unsightly but can also lead to potential health hazards and damage to your kitchen. Therefore, it is crucial to regularly
remove caulk
from your kitchen sink to maintain a clean and hygienic environment in your home.
A kitchen sink is an essential part of any household, and it sees a lot of use on a daily basis. It is where we wash our dishes, prepare food, and clean our hands, making it a high traffic area in any home. Over time, the caulk around the edges of your kitchen sink can become dirty, discolored, and even moldy. This not only looks unsightly but can also lead to potential health hazards and damage to your kitchen. Therefore, it is crucial to regularly
remove caulk
from your kitchen sink to maintain a clean and hygienic environment in your home.
How Removing Caulk Can Improve Your Kitchen's Aesthetic
 Caulk is used to seal the gap between your kitchen sink and the countertop, preventing water and other substances from seeping in. However, over time, caulk can become stained and discolored due to exposure to water, food, and cleaning products. This can make your kitchen sink look old, dirty, and unkempt, even if it is regularly cleaned. By
removing caulk
and replacing it with a fresh layer, you can instantly improve the overall aesthetic of your kitchen. This simple task can make your sink look clean, modern, and well-maintained, enhancing the overall design of your kitchen.
Caulk is used to seal the gap between your kitchen sink and the countertop, preventing water and other substances from seeping in. However, over time, caulk can become stained and discolored due to exposure to water, food, and cleaning products. This can make your kitchen sink look old, dirty, and unkempt, even if it is regularly cleaned. By
removing caulk
and replacing it with a fresh layer, you can instantly improve the overall aesthetic of your kitchen. This simple task can make your sink look clean, modern, and well-maintained, enhancing the overall design of your kitchen.
The Role of Removing Caulk in Preventing Damage to Your Kitchen
 Old and damaged caulk can also lead to potential damage to your kitchen. When caulk starts to crack or peel, it allows water to seep into the gap between your sink and countertop. Over time, this can cause water damage to your cabinets, countertops, and even the structure of your kitchen. Additionally, mold and mildew can grow in the moist environment, leading to potential health hazards for you and your family. By regularly
removing caulk
and replacing it, you can prevent any potential damage to your kitchen and maintain a safe and healthy living environment.
Old and damaged caulk can also lead to potential damage to your kitchen. When caulk starts to crack or peel, it allows water to seep into the gap between your sink and countertop. Over time, this can cause water damage to your cabinets, countertops, and even the structure of your kitchen. Additionally, mold and mildew can grow in the moist environment, leading to potential health hazards for you and your family. By regularly
removing caulk
and replacing it, you can prevent any potential damage to your kitchen and maintain a safe and healthy living environment.
The Easy Steps to Remove Caulk from Your Kitchen Sink
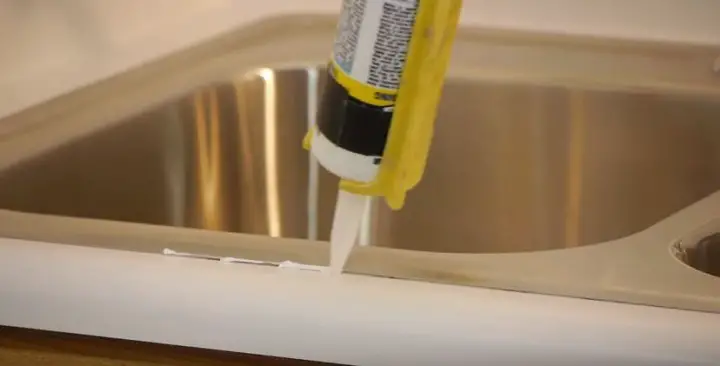
 Removing caulk from your kitchen sink may seem like a daunting task, but it can be done easily with the right tools and techniques. First, you will need to gather the necessary tools, including a caulk removal tool, a utility knife, and a caulk gun. Then, use the caulk removal tool to scrape off the old caulk from the edges of your sink. Next, use a utility knife to remove any remaining stubborn caulk. Once all the caulk is removed, clean the area thoroughly with a kitchen cleaner and let it dry completely. Finally, use a caulk gun to apply a fresh layer of caulk, smoothing it out with your finger or a caulk finishing tool. Voila, you now have a clean and well-maintained kitchen sink!
In conclusion,
removing caulk
from your kitchen sink is an important task that should not be overlooked in house design. It not only improves the aesthetic of your kitchen but also helps prevent potential damage and health hazards. By following the easy steps outlined above, you can easily remove old and damaged caulk and maintain a clean and hygienic kitchen for you and your family. So, don't wait any longer, grab your tools, and give your kitchen sink a much-needed makeover.
Removing caulk from your kitchen sink may seem like a daunting task, but it can be done easily with the right tools and techniques. First, you will need to gather the necessary tools, including a caulk removal tool, a utility knife, and a caulk gun. Then, use the caulk removal tool to scrape off the old caulk from the edges of your sink. Next, use a utility knife to remove any remaining stubborn caulk. Once all the caulk is removed, clean the area thoroughly with a kitchen cleaner and let it dry completely. Finally, use a caulk gun to apply a fresh layer of caulk, smoothing it out with your finger or a caulk finishing tool. Voila, you now have a clean and well-maintained kitchen sink!
In conclusion,
removing caulk
from your kitchen sink is an important task that should not be overlooked in house design. It not only improves the aesthetic of your kitchen but also helps prevent potential damage and health hazards. By following the easy steps outlined above, you can easily remove old and damaged caulk and maintain a clean and hygienic kitchen for you and your family. So, don't wait any longer, grab your tools, and give your kitchen sink a much-needed makeover.