If you’re planning on upgrading your kitchen, one of the most impactful changes you can make is installing a heavy sink. Not only does it add a touch of elegance to your space, but it also provides practical benefits such as durability and increased functionality. However, installing a heavy sink can be a daunting task for those who have never done it before. In this guide, we’ll take you through the steps of installing a heavy sink in your kitchen, providing expert tips and insights along the way.How to Install a Heavy Sink in Your Kitchen


How to Install a Heavy Sink in Your Kitchen


:no_upscale()/cdn.vox-cdn.com/uploads/chorus_asset/file/19495086/drain_0.jpg)


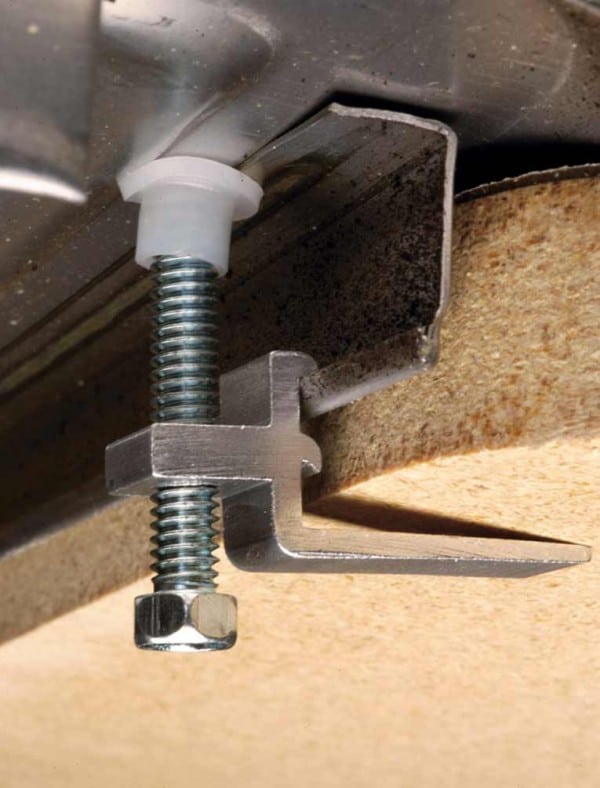
The first step to installing a heavy sink is to select the right one for your kitchen. Consider the size, material, and style that will best complement your space. Once you have your sink, follow these steps: Step 1: Prepare your tools and materials. You will need a drill, screwdriver, plumber’s putty, silicone sealant, and a wrench. Step 2: Turn off the water supply to your kitchen. This can usually be done by turning off the main water valve. Step 3: Remove the old sink and disconnect the plumbing. Use a wrench to loosen any nuts and bolts holding the sink in place. Step 4: Measure and mark the dimensions of the new sink on your countertop. Use a jigsaw to cut out the opening. Step 5: Apply plumber’s putty to the underside of the sink flange. This will help create a watertight seal. Step 6: Carefully place the sink into the opening and press it down to secure it in place. Step 7: Attach the mounting clips and tighten them with a screwdriver. Step 8: Reconnect the plumbing and turn the water supply back on. Step 9: Apply silicone sealant around the edges of the sink to prevent any leaks. Step 10: Let the sealant dry for at least 24 hours before using the sink.Installing a Heavy Sink: A Step-by-Step Guide


Installing a Heavy Sink: A Step-by-Step Guide


Installing a heavy sink may seem like a daunting task, but with the right tools and instructions, it can easily be done as a DIY project. Not only will you save money on labor costs, but you will also gain a sense of accomplishment from completing the project yourself. Just be sure to carefully follow the steps and take your time to avoid any mistakes.DIY: Installing a Heavy Sink in Your Kitchen


DIY: Installing a Heavy Sink in Your Kitchen


Before embarking on the installation process, there are a few important things to keep in mind: 1. Size and weight: Heavy sinks can vary in size and weight, so it’s crucial to measure and ensure that your countertop can support the sink. You may also need to reinforce the cabinet underneath the sink for added support. 2. Plumbing compatibility: Make sure the plumbing in your kitchen is compatible with the new sink. If necessary, you may need to make adjustments or hire a plumber. 3. Proper sealing: To prevent any water damage, it’s important to properly seal the sink with plumber’s putty and silicone sealant. 4. Safety precautions: When working with heavy sinks, it’s important to take safety precautions such as wearing gloves and using proper lifting techniques.What You Need to Know Before Installing a Heavy Sink in Your Kitchen


What You Need to Know Before Installing a Heavy Sink in Your Kitchen


:max_bytes(150000):strip_icc()/8_IMG_3767-56a4a2753df78cf772835b72.JPG)

:max_bytes(150000):strip_icc()/how-to-lay-laminate-flooring-1822250-01-0b84ff37785a4f8b94ab8bd30c300bfb.jpg)
To ensure a successful installation, here are some expert tips to keep in mind: 1. Use a template: Many heavy sinks come with a template that can be used to mark the dimensions on your countertop. This will ensure a precise cut and a perfect fit. 2. Don’t overtighten: When attaching the mounting clips, be careful not to overtighten them as this can cause damage to the sink or countertop. 3. Allow for proper drainage: Make sure the sink is sloping slightly towards the drain to allow for proper drainage. 4. Check for leaks: After the sink has been installed, check for any leaks by turning on the water and inspecting all connections and seals.Expert Tips for Installing a Heavy Sink in Your Kitchen


Expert Tips for Installing a Heavy Sink in Your Kitchen


Having the right tools can make all the difference when installing a heavy sink. Here are some essential tools you will need: 1. Jigsaw: This will be used to cut the opening in your countertop for the sink. 2. Wrench: You will need a wrench to loosen and tighten nuts and bolts. 3. Screwdriver: A screwdriver will be used to attach the mounting clips. 4. Drill: You may need a drill to create holes for the mounting clips.The Best Tools for Installing a Heavy Sink in Your Kitchen


The Best Tools for Installing a Heavy Sink in Your Kitchen


Although installing a heavy sink can be a relatively straightforward process, there are some common mistakes that can be easily avoided: 1. Not preparing the area: Before starting the installation, make sure to clear the area and have all necessary tools and materials ready. 2. Forgetting to turn off the water supply: It’s important to turn off the water supply before disconnecting any plumbing to avoid potential flooding. 3. Not following instructions: Be sure to carefully read and follow the instructions that come with your sink to ensure a proper installation. 4. Rushing the process: Installing a heavy sink takes time and precision, so be patient and take your time to avoid any mistakes.Common Mistakes to Avoid When Installing a Heavy Sink in Your Kitchen


Common Mistakes to Avoid When Installing a Heavy Sink in Your Kitchen


Before installing a heavy sink, it’s important to prepare your kitchen to ensure a smooth process. Here are some steps you can take: 1. Clear out the area: Remove any items from the countertop and cabinet underneath to provide ample space for the installation. 2. Protect your countertops: Cover your countertops with a protective layer to prevent any scratches or damage during the installation process. 3. Turn off the water supply: As mentioned previously, be sure to turn off the water supply before starting the installation. 4. Have all necessary tools and materials ready: This will save you time and make the installation process more efficient.How to Prepare Your Kitchen for a Heavy Sink Installation


How to Prepare Your Kitchen for a Heavy Sink Installation


/how-to-install-a-sink-drain-2718789-hero-24e898006ed94c9593a2a268b57989a3.jpg)

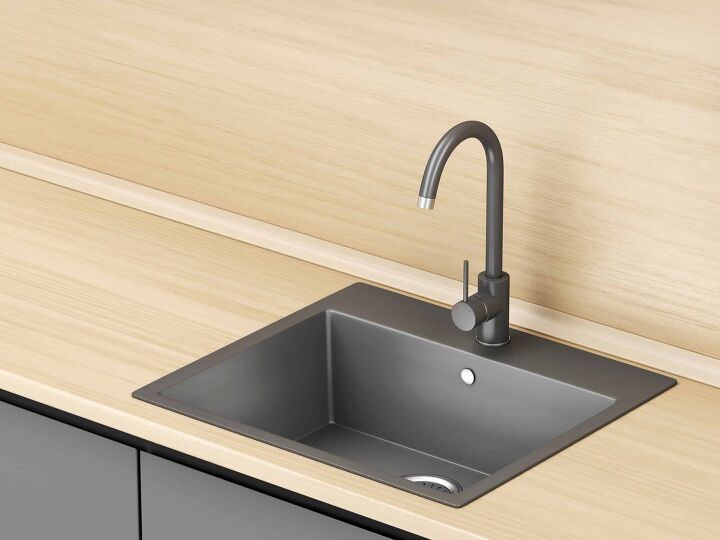
When selecting a heavy sink for your kitchen, it’s important to consider your needs and preferences. Do you want a stainless steel sink for a modern look, or a porcelain sink for a more traditional feel? Make sure to also take into account the size and weight of the sink to ensure it will fit and be supported by your countertop.Choosing the Right Heavy Sink for Your Kitchen


Choosing the Right Heavy Sink for Your Kitchen


Deciding whether to hire a professional or do it yourself is a personal choice that will depend on your skill level, budget, and time constraints. If you have experience with DIY projects and feel confident in your abilities, installing a heavy sink yourself can save you money. However, if you’re unsure or don’t have the necessary tools, hiring a professional can ensure a proper and efficient installation. In conclusion, installing a heavy sink in your kitchen is a great way to upgrade your space and add practical benefits. By following the steps and tips provided in this guide, you can successfully install a heavy sink and enjoy a beautiful and functional kitchen for years to come.Hiring a Professional vs. DIY: Installing a Heavy Sink in Your Kitchen


Hiring a Professional vs. DIY: Installing a Heavy Sink in Your Kitchen


Why a Heavy Sink is a Must-Have in Your Kitchen Design

The Importance of a Good Sink
 When it comes to designing a kitchen, the sink is often overlooked. Many homeowners focus on the aesthetics of their kitchen, such as the cabinets, countertops, and backsplash, but neglect to consider the functionality of their sink. However, a sink is an essential element in any kitchen, and choosing the right one can make a significant difference in your daily kitchen routine. That's where a heavy sink comes in.
The Advantages of a Heavy Sink
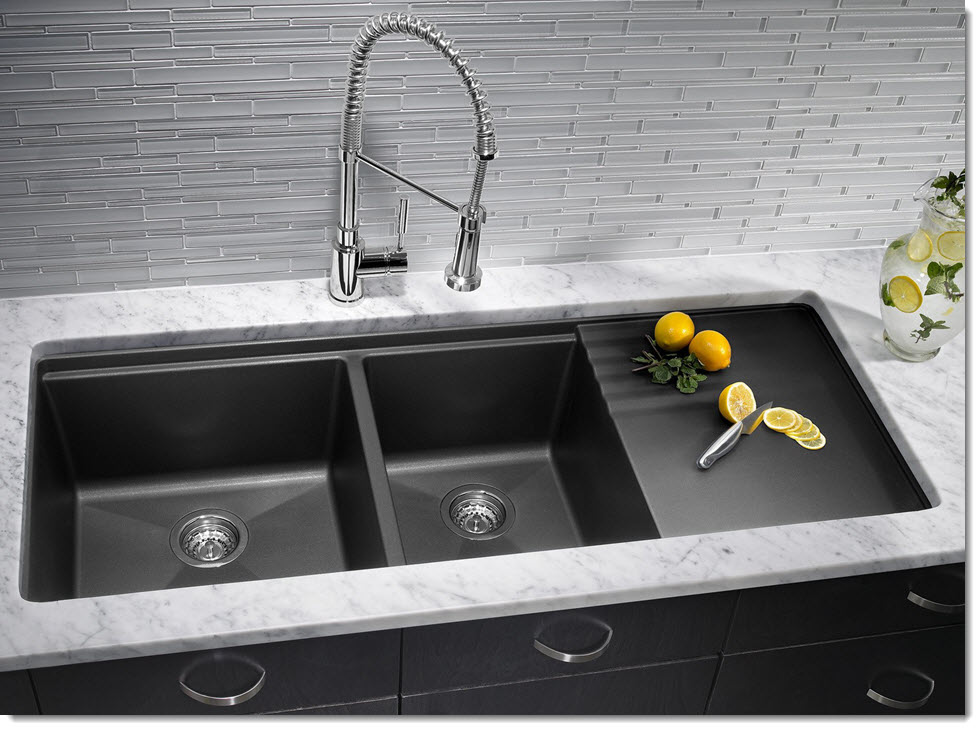
 A heavy sink, also known as a farmhouse or apron sink, has become increasingly popular in recent years. These sinks have a large, deep basin and are typically made of fireclay, cast iron, or stainless steel. The weight and durability of a heavy sink make it a practical and stylish addition to any kitchen. Here are some advantages of choosing a heavy sink for your kitchen design:
1. Durability:
As the name suggests, heavy sinks are built to last. Made of sturdy materials, they can withstand heavy daily use and resist scratches, stains, and chipping. This durability makes them an excellent long-term investment for your kitchen.
2. Functionality:
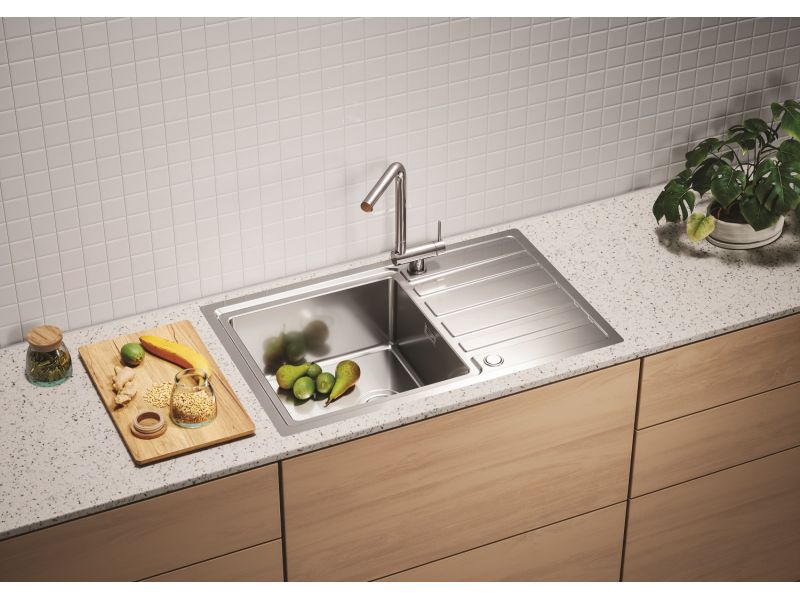
The large, deep basin of a heavy sink makes it perfect for tackling large dishes and pots. It also provides ample space for multitasking, such as washing dishes while food prepping. This functionality can save you time and make your kitchen tasks more efficient.
3. Style:
Heavy sinks come in a variety of styles, including classic, modern, and rustic designs. They can add a unique and eye-catching element to your kitchen, making it stand out from the typical undermount or top-mount sinks. Plus, their weight and size can give your kitchen a more substantial and high-end feel.
A heavy sink, also known as a farmhouse or apron sink, has become increasingly popular in recent years. These sinks have a large, deep basin and are typically made of fireclay, cast iron, or stainless steel. The weight and durability of a heavy sink make it a practical and stylish addition to any kitchen. Here are some advantages of choosing a heavy sink for your kitchen design:
1. Durability:
As the name suggests, heavy sinks are built to last. Made of sturdy materials, they can withstand heavy daily use and resist scratches, stains, and chipping. This durability makes them an excellent long-term investment for your kitchen.
2. Functionality:
The large, deep basin of a heavy sink makes it perfect for tackling large dishes and pots. It also provides ample space for multitasking, such as washing dishes while food prepping. This functionality can save you time and make your kitchen tasks more efficient.
3. Style:
Heavy sinks come in a variety of styles, including classic, modern, and rustic designs. They can add a unique and eye-catching element to your kitchen, making it stand out from the typical undermount or top-mount sinks. Plus, their weight and size can give your kitchen a more substantial and high-end feel.
Factors to Consider
 When choosing a heavy sink for your kitchen, there are a few things to keep in mind. Here are some factors to consider:
1. Size and Space:
Heavy sinks are larger and deeper than standard sinks, so make sure you have enough space in your kitchen to accommodate one. Also, consider the size of your cabinets and countertops to ensure a proper fit.
2. Material:
Fireclay, cast iron, and stainless steel are the most common materials used in heavy sinks. Each has its pros and cons, so be sure to research and choose one that fits your needs and budget.
3. Installation:
Heavy sinks can be installed in different ways, such as undermount, top-mount, or flush-mount. Be sure to consult with a professional to determine the best installation method for your sink and kitchen layout.
When choosing a heavy sink for your kitchen, there are a few things to keep in mind. Here are some factors to consider:
1. Size and Space:
Heavy sinks are larger and deeper than standard sinks, so make sure you have enough space in your kitchen to accommodate one. Also, consider the size of your cabinets and countertops to ensure a proper fit.
2. Material:
Fireclay, cast iron, and stainless steel are the most common materials used in heavy sinks. Each has its pros and cons, so be sure to research and choose one that fits your needs and budget.
3. Installation:
Heavy sinks can be installed in different ways, such as undermount, top-mount, or flush-mount. Be sure to consult with a professional to determine the best installation method for your sink and kitchen layout.
In Conclusion
.png) A heavy sink is more than just a stylish addition to your kitchen. It offers durability, functionality, and versatility, making it a must-have in any kitchen design. So, if you're in the process of designing or renovating your kitchen, consider a heavy sink for an upgrade that will not only enhance the look of your kitchen but also improve its functionality.
A heavy sink is more than just a stylish addition to your kitchen. It offers durability, functionality, and versatility, making it a must-have in any kitchen design. So, if you're in the process of designing or renovating your kitchen, consider a heavy sink for an upgrade that will not only enhance the look of your kitchen but also improve its functionality.
))/2796610.json)