If you notice water leaking from your kitchen sink, the culprit may be a faulty seal. The seal around your kitchen sink helps to prevent water from seeping into the cabinets or countertop below. Over time, this seal can wear out or become damaged, causing leaks and potential water damage. In this article, we will walk you through the steps of repairing a kitchen sink seal so you can save money and avoid a bigger plumbing disaster.How to Repair a Kitchen Sink Seal

How to Repair a Kitchen Sink Seal


Repairing a kitchen sink seal is a task that can easily be done yourself with the right tools and a little bit of know-how. By fixing the seal on your own, you can save money and also feel a sense of accomplishment. Plus, you won't have to wait for a plumber to come and fix the issue. With our step-by-step guide, you can tackle this project on your own and have your kitchen sink working like new in no time.DIY Kitchen Sink Seal Repair


DIY Kitchen Sink Seal Repair


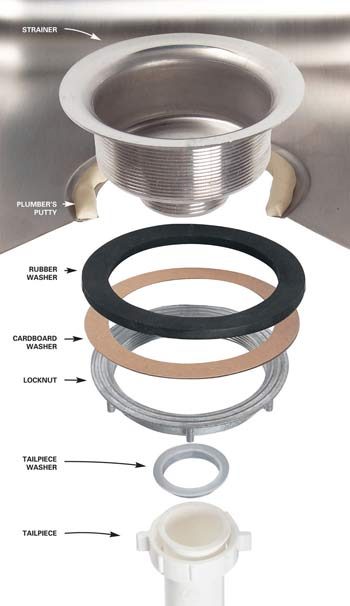
Before you begin repairing your kitchen sink seal, it's important to keep a few tips in mind to ensure a successful repair. First, make sure you have all the necessary tools and materials on hand. This includes a putty knife, plumber's putty, and a wrench. It's also a good idea to have a bucket or towel nearby to catch any excess water. Additionally, be sure to turn off the water supply to your sink before starting any repairs.Kitchen Sink Seal Repair Tips


Kitchen Sink Seal Repair Tips

The most common issue with a kitchen sink seal is a leak. This can be caused by a damaged seal or loose connections between the sink and the drain pipe. To fix a leaky seal, start by removing any old plumber's putty from around the edges of the sink and drain. Then, apply a new layer of putty around the edges and reattach the sink to the drain. Tighten any loose connections and wipe away any excess putty. Turn the water supply back on and check for any leaks.Fixing a Leaky Kitchen Sink Seal


Fixing a Leaky Kitchen Sink Seal


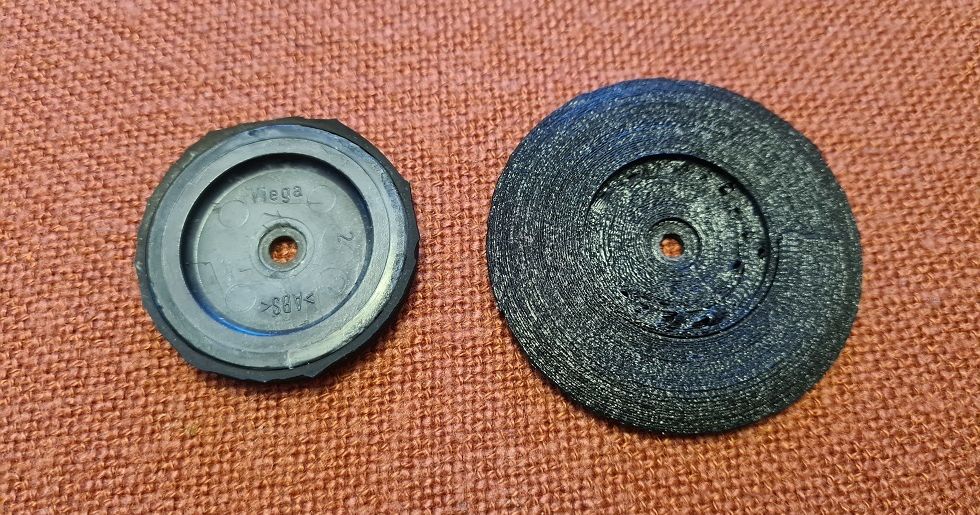
In some cases, the kitchen sink seal may be too damaged to be repaired. In this situation, it's best to replace the seal entirely. This involves removing the old seal and applying a new one in its place. To replace the seal, follow the same steps as fixing a leaky seal, but instead of reusing the old putty, apply a new layer of it before reattaching the sink to the drain.Kitchen Sink Seal Replacement

Kitchen Sink Seal Replacement


Aside from leaks, there are a few other common problems that can occur with a kitchen sink seal. These include mold growth, cracks in the seal, and a loose or unsecured sink. If you notice any of these issues, it's important to address them as soon as possible to prevent further damage. By regularly checking your sink seal and addressing any problems, you can avoid costly repairs in the future.Common Kitchen Sink Seal Problems


Common Kitchen Sink Seal Problems


To successfully repair a kitchen sink seal, you will need a few tools and materials. These include a putty knife, plumber's putty, a wrench, and a bucket or towel. It's also helpful to have a screwdriver on hand in case you need to tighten any connections. By having all the necessary tools, you can save time and avoid any unnecessary trips to the hardware store.Tools Needed for Kitchen Sink Seal Repair


Tools Needed for Kitchen Sink Seal Repair

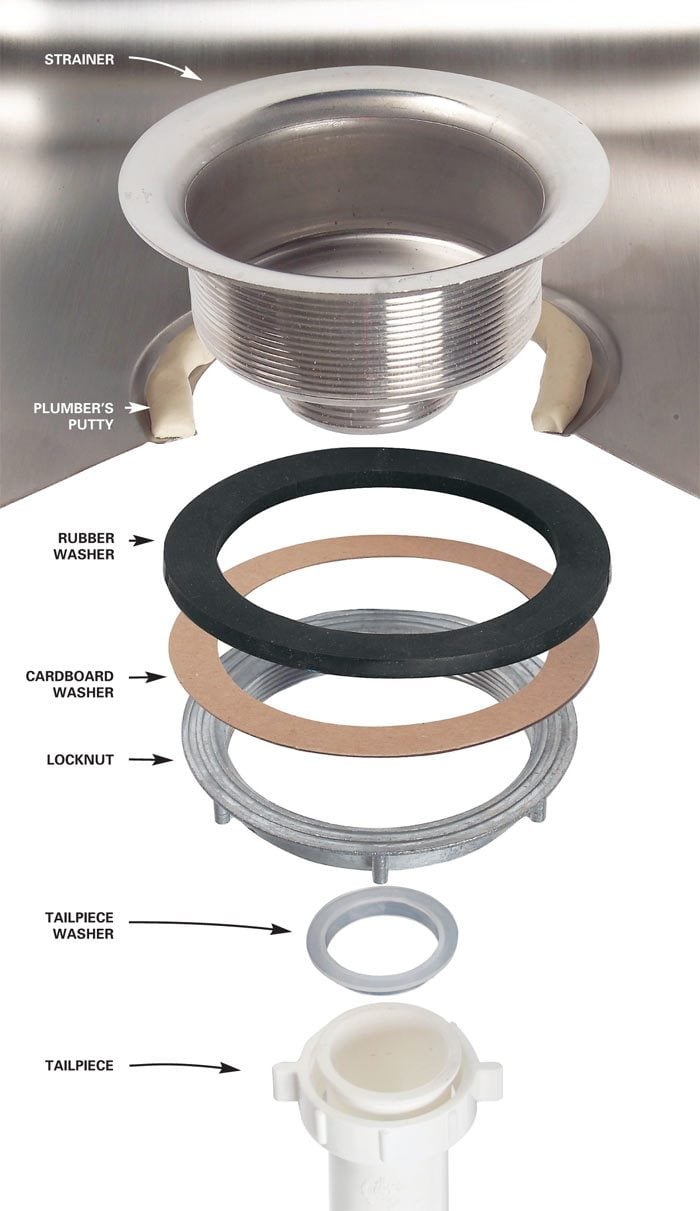
To help you with the repair process, we have put together a step-by-step guide for fixing a kitchen sink seal. Step 1: Turn off the water supply to your sink. Step 2: Use a putty knife to remove any old plumber's putty from around the edges of the sink and drain. Step 3: Apply a new layer of plumber's putty around the edges of the sink. Step 4: Reattach the sink to the drain and tighten any loose connections. Step 5: Wipe away any excess putty. Step 6: Turn the water supply back on and check for any leaks. If the seal is too damaged to be repaired, follow these additional steps for seal replacement: Step 7: Remove the old seal and clean the area around the sink and drain. Step 8: Apply a new layer of plumber's putty around the edges of the sink. Step 9: Reattach the sink to the drain and tighten any loose connections. Step 10: Wipe away any excess putty. Step 11: Turn the water supply back on and check for any leaks.Step-by-Step Kitchen Sink Seal Repair Guide

Step-by-Step Kitchen Sink Seal Repair Guide

:no_upscale()/cdn.vox-cdn.com/uploads/chorus_asset/file/19495086/drain_0.jpg)


When it comes to repairing a kitchen sink seal, it's important to use high-quality products to ensure a successful repair. Some recommended products include Oatey Plumbers Putty, Flex Shot Rubber Sealant, and Gorilla 100% Silicone Sealant. These products are durable, waterproof, and easy to work with, making them perfect for repairing a kitchen sink seal.Best Products for Kitchen Sink Seal Repair

Best Products for Kitchen Sink Seal Repair


If you are not comfortable with DIY repairs or if the issue seems too complex to tackle on your own, it's best to call a professional plumber. They have the expertise and tools necessary to properly repair or replace your kitchen sink seal. While it may cost more, hiring a professional can save you time and ensure the job is done correctly. With our guide and tips, you can easily repair your kitchen sink seal and avoid any potential water damage. Remember to regularly check your sink seal for any issues and address them promptly to prevent costly repairs in the future. By following these steps and using high-quality products, you can have your kitchen sink working like new in no time.Professional Kitchen Sink Seal Repair Services


Professional Kitchen Sink Seal Repair Services


How to Repair a Kitchen Sink Seal: A Complete Guide

The Importance of a Kitchen Sink Seal
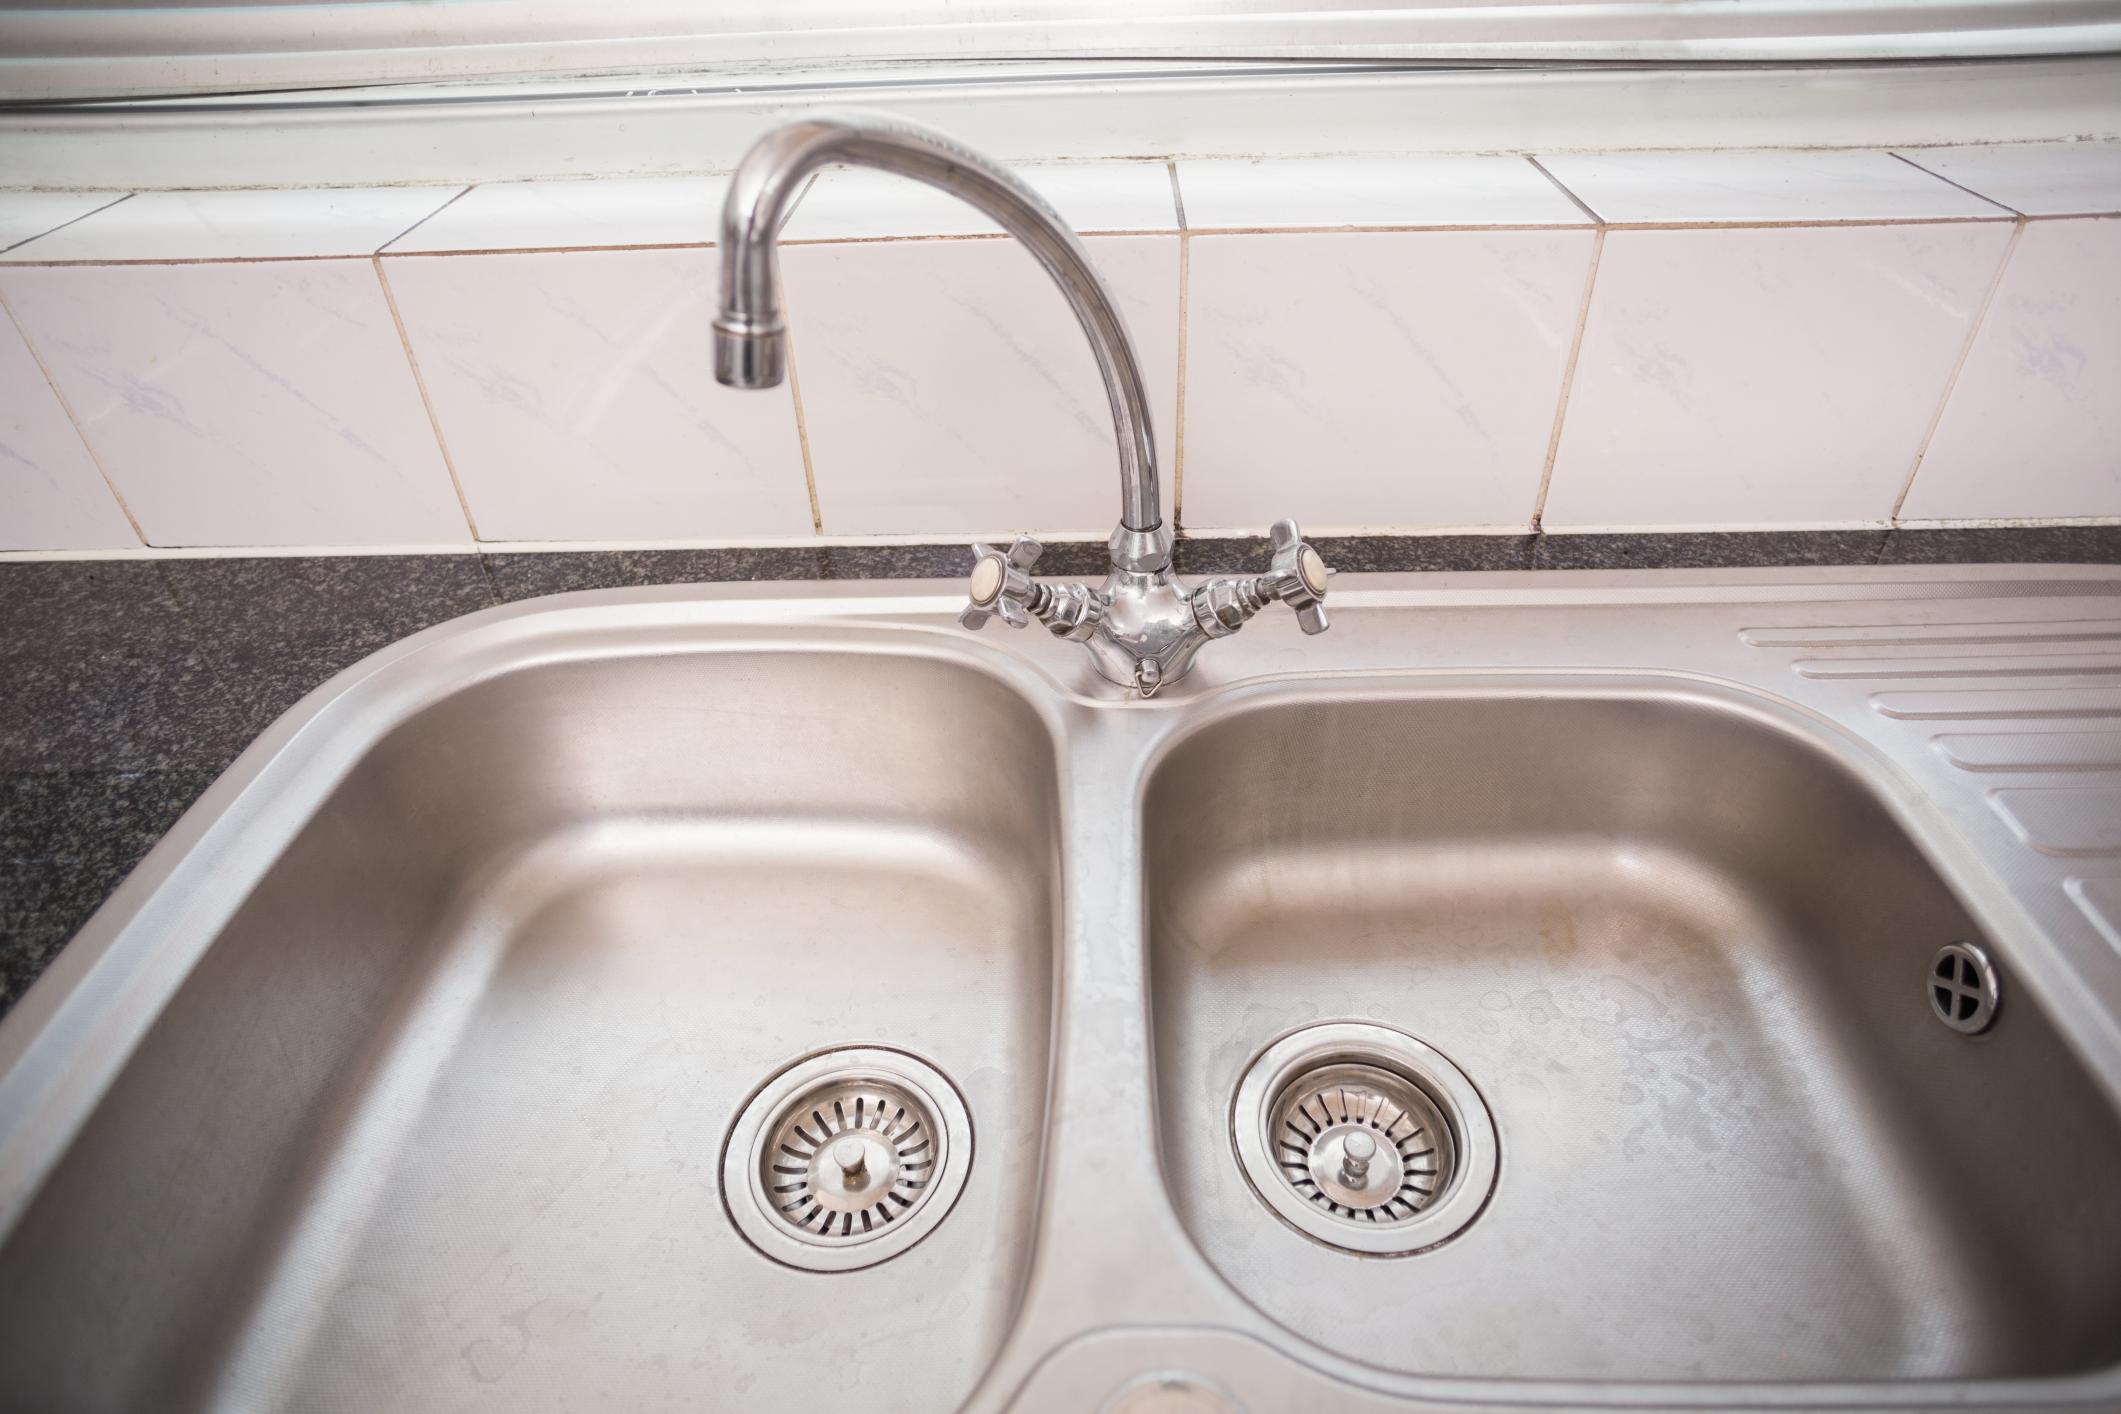
 The kitchen sink is a heavily used fixture in any household, and its seal is an essential component that keeps water and food particles from leaking into the cabinet below. Over time, the seal can become worn out or damaged, leading to leaks and potential water damage. It is important to regularly check and maintain your kitchen sink seal to ensure the longevity of your sink and prevent any costly repairs. In this article, we will guide you through the process of repairing a kitchen sink seal, so you can keep your kitchen in top shape.
How to Identify a Damaged Kitchen Sink Seal
 Before you can begin the repair process, it is important to identify if your kitchen sink seal is damaged. The first sign of a damaged seal is water leakage. If you notice water pooling around your sink or dripping from underneath, it is likely that your seal needs to be replaced. Another sign is a musty smell coming from the cabinet below your sink, indicating that water has been leaking for some time.
Steps to Repair a Kitchen Sink Seal
 Kitchen sink seal repair
may seem like a daunting task, but it can be easily done with the right tools and techniques. Follow these steps to repair your kitchen sink seal:
Step 1:
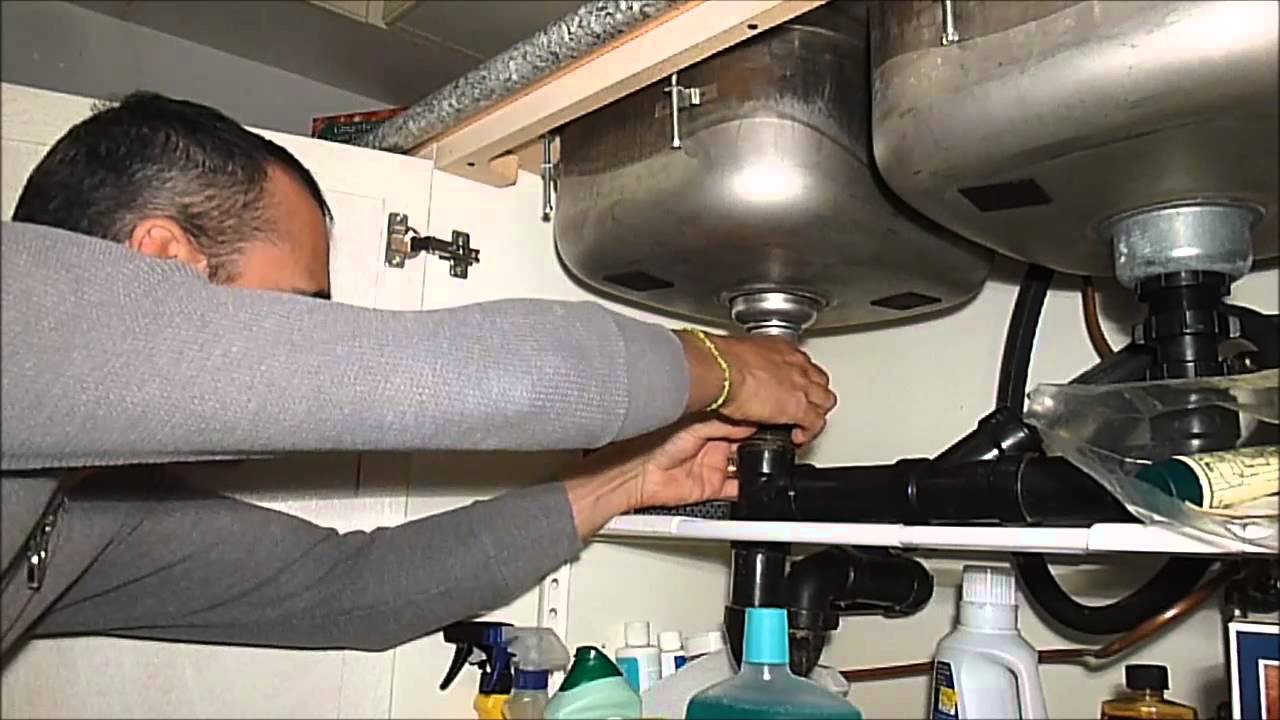
Turn off the water supply to your sink. This can usually be done by turning off the shut-off valves located under the sink.
Step 2:
Remove any items from under the sink and place a bucket or towel under the drain to catch any water.
Step 3:
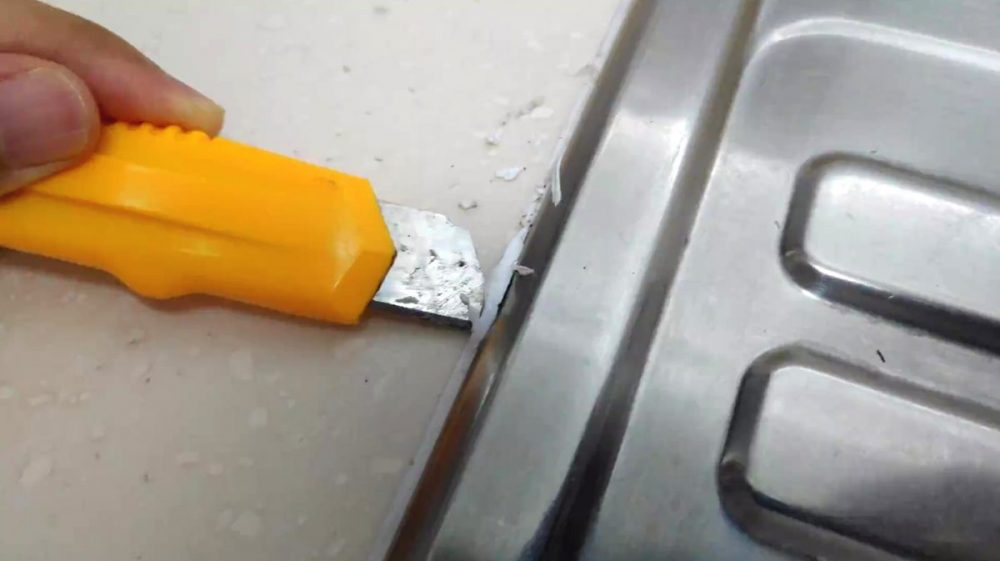
Use a putty knife to scrape off the old sealant around the edges of the sink. Make sure to remove all the old sealant to ensure a proper seal.
Step 4:
Clean the area around the sink thoroughly with a degreaser to remove any buildup of grime and dirt.
Step 5:
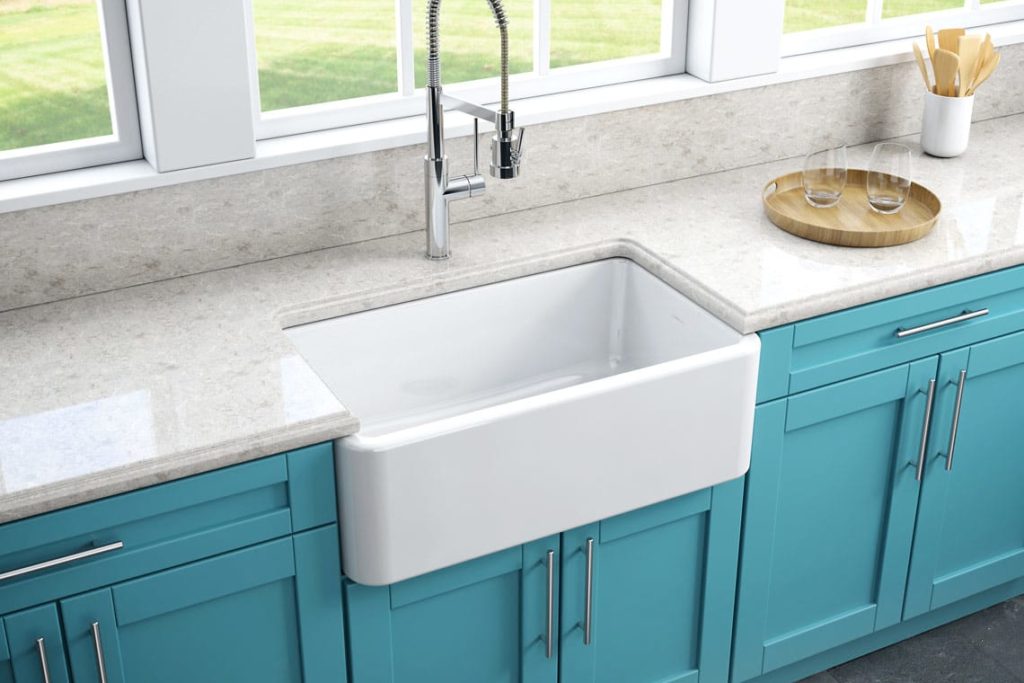
Apply a
silicone-based sealant
around the edges of the sink, making sure to cover any gaps or cracks.
Step 6:
Use your finger or a caulking tool to smooth out the sealant and create an airtight seal.
Step 7:
Allow the sealant to dry for at least 24 hours before using the sink again.
Kitchen sink seal repair
may seem like a daunting task, but it can be easily done with the right tools and techniques. Follow these steps to repair your kitchen sink seal:
Step 1:
Turn off the water supply to your sink. This can usually be done by turning off the shut-off valves located under the sink.
Step 2:
Remove any items from under the sink and place a bucket or towel under the drain to catch any water.
Step 3:
Use a putty knife to scrape off the old sealant around the edges of the sink. Make sure to remove all the old sealant to ensure a proper seal.
Step 4:
Clean the area around the sink thoroughly with a degreaser to remove any buildup of grime and dirt.
Step 5:
Apply a
silicone-based sealant
around the edges of the sink, making sure to cover any gaps or cracks.
Step 6:
Use your finger or a caulking tool to smooth out the sealant and create an airtight seal.
Step 7:
Allow the sealant to dry for at least 24 hours before using the sink again.
Maintaining Your Kitchen Sink Seal
 Regular maintenance of your kitchen sink seal can prevent future damage and extend its lifespan. Here are some tips to maintain your kitchen sink seal:
- Wipe down the seal regularly with a mild cleaner to prevent the buildup of grime and dirt.
- Avoid using abrasive cleaners that can damage the sealant.
- Check for leaks and signs of damage regularly, and repair any issues promptly.
Regular maintenance of your kitchen sink seal can prevent future damage and extend its lifespan. Here are some tips to maintain your kitchen sink seal:
- Wipe down the seal regularly with a mild cleaner to prevent the buildup of grime and dirt.
- Avoid using abrasive cleaners that can damage the sealant.
- Check for leaks and signs of damage regularly, and repair any issues promptly.
In Conclusion
 A damaged kitchen sink seal can lead to costly repairs and water damage. By following these simple steps, you can easily repair your
kitchen sink seal
and keep your kitchen functioning properly. Remember to regularly maintain your seal to prevent any future issues. With proper care, your kitchen sink and seal will last for years to come.
A damaged kitchen sink seal can lead to costly repairs and water damage. By following these simple steps, you can easily repair your
kitchen sink seal
and keep your kitchen functioning properly. Remember to regularly maintain your seal to prevent any future issues. With proper care, your kitchen sink and seal will last for years to come.


