If you're looking to install a new kitchen sink drain, one of the best methods to use is with plumber's putty. This versatile and durable substance is essential for securing your sink drain in place and preventing leaks. In this guide, we'll walk you through the step-by-step process of installing a kitchen sink drain using plumber's putty, as well as provide some helpful tips and tricks to ensure a successful installation.How to Install a Kitchen Sink Drain Using Plumber's Putty


How to Install a Kitchen Sink Drain Using Plumber's Putty

:max_bytes(150000):strip_icc()/how-to-install-a-sink-drain-2718789-hero-24e898006ed94c9593a2a268b57989a3.jpg)


/how-to-install-a-sink-drain-2718789-hero-b5b99f72b5a24bb2ae8364e60539cece.jpg)

Before beginning the installation process, make sure you have all the necessary tools and materials. This includes plumber's putty, a plunger, a wrench, a screwdriver, and a bucket for catching water. Once you have everything, follow these steps: Step 1: Clear out the area under your sink and place the bucket directly under the drain. This will catch any excess water during the installation process. Step 2: Remove the old drain and any remaining putty or debris from the sink's opening. Use a plunger to push out any remaining water in the drain. Step 3: Take a small amount of plumber's putty and roll it into a thin rope. Place the rope around the bottom edge of the drain opening. Step 4: Carefully insert the drain into the opening, making sure the plumber's putty is evenly distributed around the edge. Step 5: From underneath the sink, secure the drain in place with the mounting ring and screws. Use a wrench to tighten the screws until the drain is firmly in place. Step 6: Wipe away any excess putty from around the drain opening with a damp cloth. Step 7: Connect the drain pipe to the bottom of the sink and tighten it with a wrench. Step 8: Turn on the water and check for any leaks. If there are no leaks, your kitchen sink drain installation is complete!Step-by-Step Guide for Installing a Kitchen Sink Drain with Plumber's Putty


Step-by-Step Guide for Installing a Kitchen Sink Drain with Plumber's Putty


Installing a kitchen sink drain using plumber's putty is a DIY-friendly project that can save you time and money. With just a few tools and materials, you can easily complete this task on your own. By following the steps outlined above, you'll have a secure and leak-free kitchen sink drain in no time.DIY Kitchen Sink Drain Installation with Plumber's Putty


DIY Kitchen Sink Drain Installation with Plumber's Putty


Plumber's putty is a versatile and durable substance that has been a go-to for plumbers and DIY enthusiasts alike for many years. Its adhesive properties make it perfect for securing sink drains and preventing leaks. With plumber's putty, you can have peace of mind knowing that your kitchen sink drain will stay in place and function properly.Plumber's Putty: The Key to a Secure Kitchen Sink Drain Installation

Plumber's Putty: The Key to a Secure Kitchen Sink Drain Installation

In addition to plumber's putty, there are a few other tools and materials that are necessary for a successful kitchen sink drain installation. These include a plunger, a wrench, a screwdriver, and a bucket for catching water. Having these items on hand will make the installation process much smoother and easier.Essential Tools and Materials for Installing a Kitchen Sink Drain with Plumber's Putty


Essential Tools and Materials for Installing a Kitchen Sink Drain with Plumber's Putty

Here are a few tips and tricks to keep in mind when installing a kitchen sink drain with plumber's putty: Tip 1: Make sure to thoroughly clean the drain opening and remove any old putty or debris before applying the new putty. Tip 2: Use a plunger to push out any excess water in the drain before beginning the installation process. Tip 3: When applying the putty, make sure it is evenly distributed around the edge of the drain opening to ensure a secure seal. Tip 4: Use a damp cloth to wipe away any excess putty from around the drain opening to give it a clean and finished look.Tips and Tricks for a Successful Kitchen Sink Drain Installation Using Plumber's Putty

Tips and Tricks for a Successful Kitchen Sink Drain Installation Using Plumber's Putty


While installing a kitchen sink drain with plumber's putty is a straightforward process, there are a few common mistakes that can lead to issues down the line. These include not properly cleaning the drain opening, using too much or too little putty, and not securing the drain tightly enough. By paying attention to these potential pitfalls, you can ensure a successful installation.Common Mistakes to Avoid When Installing a Kitchen Sink Drain with Plumber's Putty


Common Mistakes to Avoid When Installing a Kitchen Sink Drain with Plumber's Putty


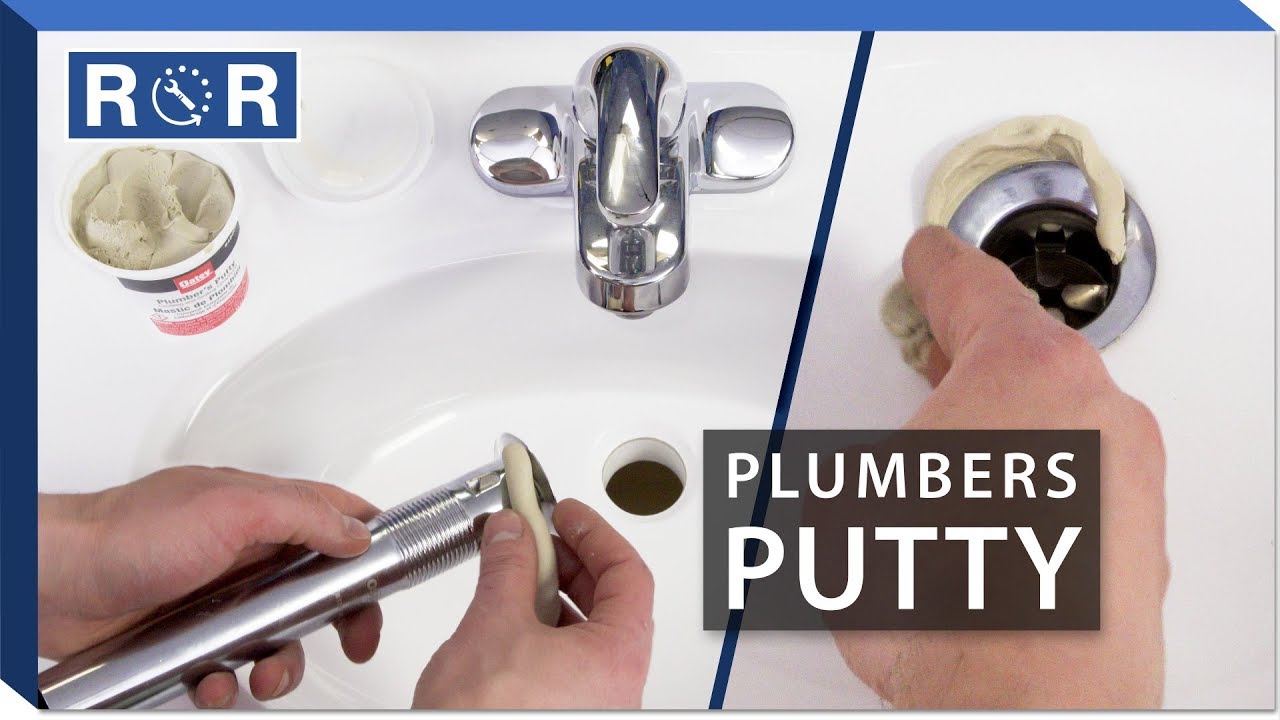
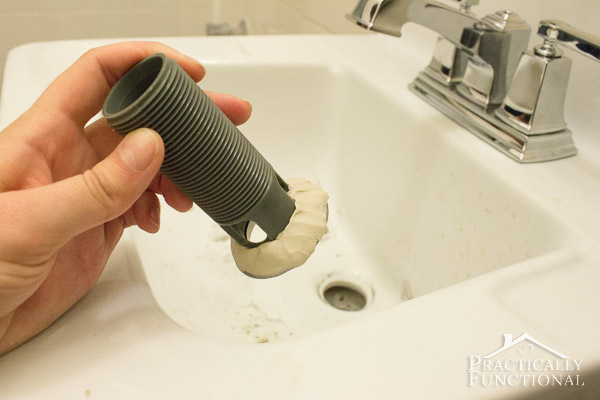
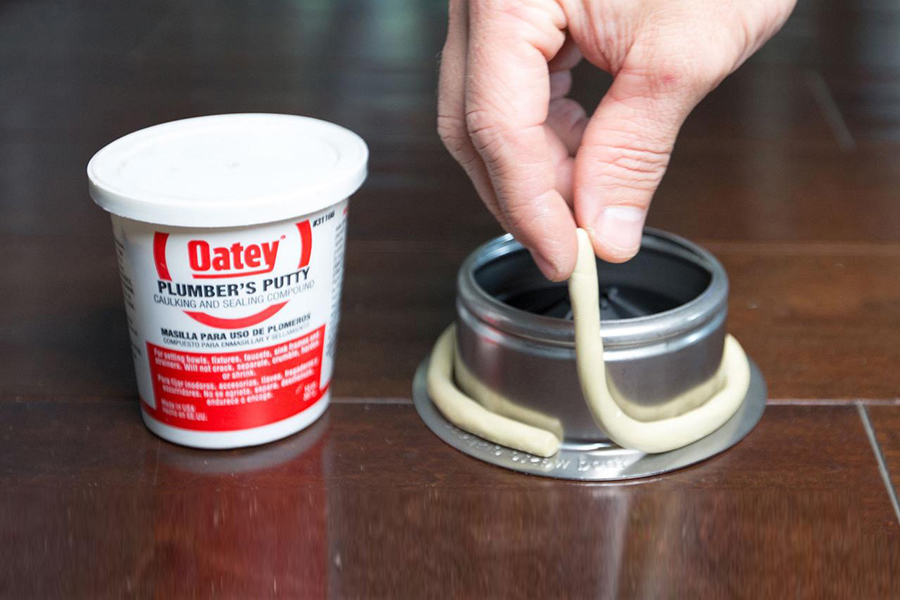
Applying plumber's putty may seem like a simple task, but it's important to do it correctly to ensure a leak-free installation. Here's how to properly apply plumber's putty for a secure seal: Step 1: Take a small amount of putty and roll it into a thin rope. Step 2: Place the putty around the bottom edge of the drain opening, making sure it is evenly distributed. Step 3: Carefully insert the drain into the opening, pressing down to secure it in place. Step 4: From underneath the sink, tighten the drain in place with the mounting ring and screws. Step 5: Wipe away any excess putty with a damp cloth.How to Properly Apply Plumber's Putty for a Leak-Free Kitchen Sink Drain Installation


How to Properly Apply Plumber's Putty for a Leak-Free Kitchen Sink Drain Installation


When it comes to choosing the right plumber's putty for your kitchen sink drain installation, it's important to opt for a high-quality and reliable brand. Look for putty that is specifically designed for sink drains and is waterproof and mold-resistant. It's also a good idea to read reviews and ask for recommendations from professionals or experienced DIYers.Expert Advice on Choosing the Right Plumber's Putty for Your Kitchen Sink Drain Installation


Expert Advice on Choosing the Right Plumber's Putty for Your Kitchen Sink Drain Installation


If you encounter any issues during your kitchen sink drain installation with plumber's putty, here are a few troubleshooting tips: Issue 1: Leaks around the drain opening. Solution: Remove the drain and clean the area thoroughly, then reapply the putty and secure the drain tightly. Issue 2: Drain is not secured in place. Solution: Tighten the screws on the mounting ring until the drain is securely in place. Issue 3: Excess putty around the drain opening. Solution: Use a damp cloth to wipe away any excess putty for a clean finish. In conclusion, installing a kitchen sink drain using plumber's putty is a simple and cost-effective method that can be done by anyone. By following the steps outlined in this guide and using the tips and tricks provided, you can have a secure and leak-free sink drain in your kitchen in no time. Remember to use high-quality plumber's putty and consult with experts if you encounter any issues during the installation process.Troubleshooting Tips for a Kitchen Sink Drain Installation Using Plumber's Putty


Troubleshooting Tips for a Kitchen Sink Drain Installation Using Plumber's Putty

Kitchen Sink Drain Installation: A Step-by-Step Guide Using Plumber's Putty
/how-to-install-a-sink-drain-2718789-hero-24e898006ed94c9593a2a268b57989a3.jpg)
Why Use Plumber's Putty?
 When installing a new kitchen sink or replacing an old one, it is important to properly seal the drain to prevent any leaks or water damage. There are various methods and products available for this task, but one of the most commonly used is plumber's putty. This pliable and waterproof material is ideal for creating a tight and long-lasting seal around the drain and can be easily applied by both professionals and DIY enthusiasts. In this article, we will walk you through the process of installing a kitchen sink drain using plumber's putty, so you can confidently tackle this project in your own home.
Gather Your Materials
 Before beginning the installation process, make sure you have all the necessary materials and tools. In addition to plumber's putty, you will also need a putty knife, a pair of pliers, a wrench, and a new drain assembly. It is important to choose a high-quality and durable drain assembly to ensure a secure and leak-free seal. Depending on your sink and plumbing setup, you may also need additional supplies such as plumber's tape, silicone sealant, and a hacksaw.
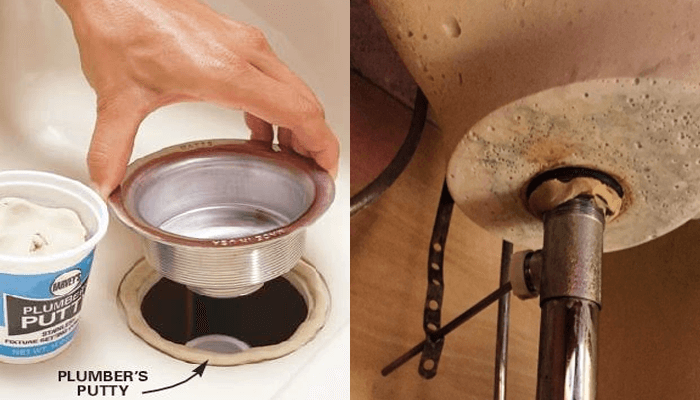
Prepare the Sink and Drain Assembly
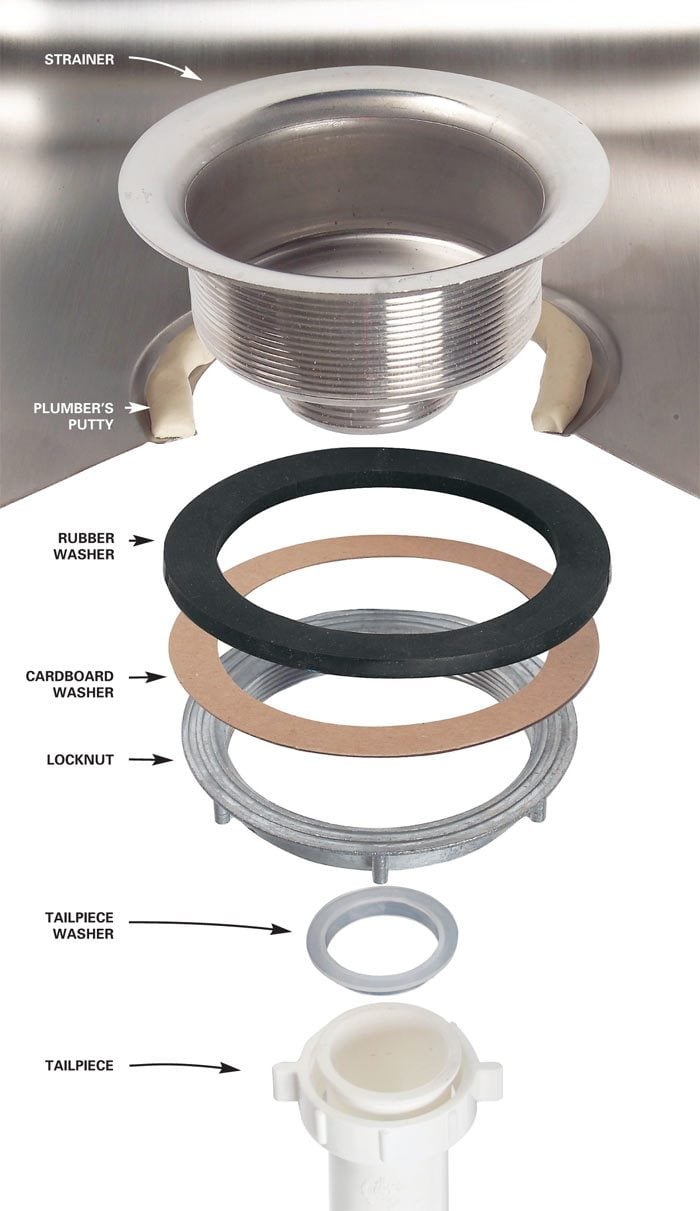
 To start, you will need to remove the old drain assembly from your sink, if applicable. Use the pliers to loosen and remove the old drain from the bottom of the sink, and then clean the area thoroughly with a mild detergent and water. Next, prepare the new drain assembly by applying a thin layer of plumber's putty around the underside of the strainer basket. Make sure the putty is evenly distributed and extends to all edges of the basket.
Install the Drain Assembly
 Once the putty is in place, carefully insert the strainer basket into the sink drain hole and press down firmly. On the underside of the sink, place the rubber gasket and then the cardboard friction ring over the strainer basket. Finally, secure the drain assembly in place by tightening the locknut with a wrench. Wipe away any excess putty that may have squeezed out from under the strainer basket.
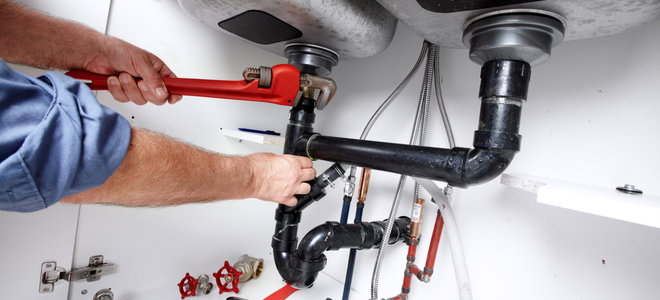
Connect the Drain Pipe
 Next, connect the drain pipe to the drain assembly using plumber's putty and plumber's tape for added security. Apply a thin layer of putty around the threads of the tailpiece and then wrap plumber's tape in a clockwise direction around the threads. This will create a tight seal and prevent any leaks. Screw the tailpiece into the drain assembly and tighten with a wrench. If necessary, use a hacksaw to trim the tailpiece to fit your specific sink and plumbing setup.
Test for Leaks
 Once the drain assembly and pipe are securely in place, turn on the water and let it run for a few minutes. Check for any signs of leakage around the drain and pipe connections. If you notice any leaks, tighten the connections or add more putty and plumber's tape as needed. Once you are satisfied with the tightness and security of the drain, wipe away any excess putty and enjoy your newly installed kitchen sink!
In Conclusion
 Installing a kitchen sink drain using plumber's putty is a straightforward and effective method for creating a watertight seal. By following these steps and using high-quality materials, you can ensure a successful and long-lasting installation. Remember to always test for leaks before considering the project complete and don't hesitate to seek professional help if needed. With a little bit of effort and the right materials, you can have a functional and beautiful kitchen sink in no time.