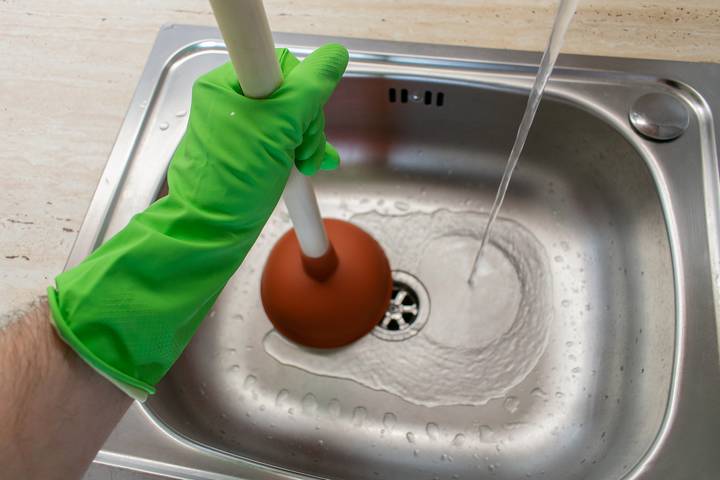
Installing a kitchen sink drain may seem like a daunting task, but with the right tools and a little bit of know-how, it can be a simple and satisfying DIY project. In this article, we will focus on installing a plastic kitchen sink drain, which is a popular and budget-friendly option. So if you're ready to upgrade your kitchen sink, follow our step-by-step guide and get ready to impress your friends and family with your handy skills!How to Install a Kitchen Sink Drain


How to Install a Kitchen Sink Drain


:max_bytes(150000):strip_icc()/how-to-install-a-sink-drain-2718789-hero-24e898006ed94c9593a2a268b57989a3.jpg)


If you're replacing an old kitchen sink drain with a new plastic one, the first step is to remove the old drain. Use a wrench to loosen the locknut and remove the drain from the bottom of the sink. Make sure to also remove any old putty or silicone from around the drain hole. Next, measure the diameter of the drain hole in your sink and purchase a plastic kitchen sink drain kit that matches that size. The kit usually comes with all the necessary components such as the drain, strainer, and locknut.How to Install a Plastic Kitchen Sink Drain


How to Install a Plastic Kitchen Sink Drain


Step 1: Place the rubber gasket on the bottom of the drain and insert it into the drain hole in the sink. Step 2: From underneath the sink, screw on the locknut and tighten it with a wrench. Step 3: Apply a thin layer of plumber's putty around the edges of the strainer and insert it into the drain hole on top of the sink. Step 4: Place the rubber gasket and cardboard friction ring over the strainer and secure them with the locknut. Step 5: From the top of the sink, screw the plastic nut onto the strainer and tighten it with a wrench. Step 6: Attach the tailpiece to the bottom of the strainer and secure it in place with a slip nut and washer. Step 7: Connect the P-trap to the tailpiece and the drainpipe with slip nuts and washers. Step 8: Finally, turn on the water and check for any leaks. If everything looks good, your plastic kitchen sink drain is now installed!Step-by-Step Guide to Installing a Plastic Kitchen Sink Drain


Step-by-Step Guide to Installing a Plastic Kitchen Sink Drain


Installing a plastic kitchen sink drain is a relatively easy and affordable DIY project. With the right tools and a little bit of patience, you can save money and add a personal touch to your kitchen. Plus, there's a sense of satisfaction that comes with completing a project on your own.DIY: Installing a Plastic Kitchen Sink Drain


DIY: Installing a Plastic Kitchen Sink Drain


To successfully install a plastic kitchen sink drain, you will need the following tools and materials: - Wrench - Plumber's putty - Plastic kitchen sink drain kit - Slip nuts and washers - P-trapTools and Materials Needed for Installing a Plastic Kitchen Sink Drain


Tools and Materials Needed for Installing a Plastic Kitchen Sink Drain


Here are some helpful tips to keep in mind when installing a plastic kitchen sink drain: - Make sure to measure the diameter of your drain hole before purchasing a plastic drain kit. - Apply a thin layer of plumber's putty around the edges of the strainer to create a watertight seal. - Tighten the locknuts with a wrench to ensure a secure fit. - Double-check for any leaks before finishing the installation.Tips for Installing a Plastic Kitchen Sink Drain

Tips for Installing a Plastic Kitchen Sink Drain


Although installing a plastic kitchen sink drain may seem straightforward, there are some common mistakes that can easily be avoided: - Forgetting to remove old putty or silicone from the drain hole can prevent a proper seal. - Not tightening the locknuts enough can lead to leaks. - Using too much putty can create a messy and unprofessional look.Common Mistakes to Avoid When Installing a Plastic Kitchen Sink Drain


Common Mistakes to Avoid When Installing a Plastic Kitchen Sink Drain


If you're a visual learner, there are many helpful video tutorials available online that can guide you through the process of installing a plastic kitchen sink drain. Make sure to watch a few different videos to get a better understanding of the steps involved.Video Tutorial: Installing a Plastic Kitchen Sink Drain


Video Tutorial: Installing a Plastic Kitchen Sink Drain

If you already have a kitchen sink drain in place but want to upgrade to a plastic one, the process is similar to installing a new one. However, you will need to remove the old drain first. Follow the steps mentioned above and make sure to properly dispose of the old drain.How to Replace a Kitchen Sink Drain with a Plastic One


How to Replace a Kitchen Sink Drain with a Plastic One


Even with careful installation, there may be some common issues that can arise when installing a plastic kitchen sink drain. These can include leaks, improper fit, and difficulty tightening the locknuts. If you encounter any of these issues, refer to our tips and make sure to double-check your work before calling a professional. In conclusion, installing a plastic kitchen sink drain is a relatively simple and budget-friendly DIY project. With the right tools, materials, and a little bit of patience, you can have a new and improved kitchen sink in no time. So roll up your sleeves and get ready to impress with your handiwork!Troubleshooting: Common Issues When Installing a Plastic Kitchen Sink Drain

Troubleshooting: Common Issues When Installing a Plastic Kitchen Sink Drain


Why Choose a Plastic Kitchen Sink Drain?

Benefits of Plastic Kitchen Sink Drains
 When it comes to kitchen sink drains, there are many options available in the market. However, one material that has gained popularity in recent years is plastic. Plastic kitchen sink drains offer a range of benefits that make them a popular choice among homeowners and interior designers alike.
1. Durability:
One of the main advantages of plastic kitchen sink drains is their durability. They are made from high-quality, strong plastic material that can withstand daily use and the wear and tear of a busy kitchen. Plastic drains are also resistant to rust and corrosion, making them a long-lasting option for your kitchen.
2. Easy to Install:
Another benefit of plastic kitchen sink drains is that they are easy to install. Unlike other materials such as metal or stone, plastic is lightweight and can be easily cut and adjusted to fit your specific sink size and shape. This makes installation a quick and hassle-free process, saving you time and money on professional installation services.
3. Cost-Effective:
Plastic kitchen sink drains are also a cost-effective option. They are typically more affordable than other materials, making them a great choice for those on a budget. Additionally, since they are easy to install, you can also save on installation costs. This makes plastic drains a practical and budget-friendly choice for any kitchen renovation.
When it comes to kitchen sink drains, there are many options available in the market. However, one material that has gained popularity in recent years is plastic. Plastic kitchen sink drains offer a range of benefits that make them a popular choice among homeowners and interior designers alike.
1. Durability:
One of the main advantages of plastic kitchen sink drains is their durability. They are made from high-quality, strong plastic material that can withstand daily use and the wear and tear of a busy kitchen. Plastic drains are also resistant to rust and corrosion, making them a long-lasting option for your kitchen.
2. Easy to Install:
Another benefit of plastic kitchen sink drains is that they are easy to install. Unlike other materials such as metal or stone, plastic is lightweight and can be easily cut and adjusted to fit your specific sink size and shape. This makes installation a quick and hassle-free process, saving you time and money on professional installation services.
3. Cost-Effective:
Plastic kitchen sink drains are also a cost-effective option. They are typically more affordable than other materials, making them a great choice for those on a budget. Additionally, since they are easy to install, you can also save on installation costs. This makes plastic drains a practical and budget-friendly choice for any kitchen renovation.
How to Install a Plastic Kitchen Sink Drain
/how-to-install-a-sink-drain-2718789-hero-b5b99f72b5a24bb2ae8364e60539cece.jpg) Now that you know the benefits of plastic kitchen sink drains, let's take a look at how to install them. Here are the basic steps to follow:
1. Gather Materials:
Before you begin the installation process, make sure you have all the necessary materials on hand. This includes the plastic drain, plumber's putty, a wrench, and plumber's tape.
2. Prepare the Sink:
Start by preparing the sink for installation. This involves cleaning the area where the drain will be installed and ensuring it is free of any debris or old putty.
3. Apply Plumber's Putty:
Take a small amount of plumber's putty and roll it into a thin rope. Place the putty around the bottom edge of the drain, then push it into the sink opening.
4. Secure the Drain:
Once the drain is in place, use the plumber's wrench to tighten the locknut underneath the sink. This will secure the drain in place and prevent any leaks.
5. Apply Plumber's Tape:
Wrap plumber's tape around the threads of the drain pipe to create a tight seal.
6. Connect to the Plumbing:
Finally, connect the drain pipe to the plumbing below the sink using the appropriate fittings. Make sure everything is tightly secured to avoid any leaks.
In conclusion, plastic kitchen sink drains are a durable, easy to install, and cost-effective option for any kitchen design. With the right tools and materials, you can easily install a plastic drain in your kitchen sink and enjoy its benefits for years to come.
Now that you know the benefits of plastic kitchen sink drains, let's take a look at how to install them. Here are the basic steps to follow:
1. Gather Materials:
Before you begin the installation process, make sure you have all the necessary materials on hand. This includes the plastic drain, plumber's putty, a wrench, and plumber's tape.
2. Prepare the Sink:
Start by preparing the sink for installation. This involves cleaning the area where the drain will be installed and ensuring it is free of any debris or old putty.
3. Apply Plumber's Putty:
Take a small amount of plumber's putty and roll it into a thin rope. Place the putty around the bottom edge of the drain, then push it into the sink opening.
4. Secure the Drain:
Once the drain is in place, use the plumber's wrench to tighten the locknut underneath the sink. This will secure the drain in place and prevent any leaks.
5. Apply Plumber's Tape:
Wrap plumber's tape around the threads of the drain pipe to create a tight seal.
6. Connect to the Plumbing:
Finally, connect the drain pipe to the plumbing below the sink using the appropriate fittings. Make sure everything is tightly secured to avoid any leaks.
In conclusion, plastic kitchen sink drains are a durable, easy to install, and cost-effective option for any kitchen design. With the right tools and materials, you can easily install a plastic drain in your kitchen sink and enjoy its benefits for years to come.


/Chandelier_0635-0b1c24a8045f4a2cbdf083d80ef0f658.jpg)
:max_bytes(150000):strip_icc()/cleaning-bathroom-sink-GettyImages-dv1449036-566b487a3df78ce16163bfba.jpg)