Installing clips on a kitchen sink may seem like a daunting task, but with the right tools and knowledge, it can be a quick and easy process. Whether you're replacing old clips or installing them for the first time, this step-by-step guide will walk you through the process and provide helpful tips and tricks along the way.How to Install Clips on a Kitchen Sink


How to Install Clips on a Kitchen Sink

:max_bytes(150000):strip_icc()/replacing-existing-surface-mounted-sink-1824896-06-d8eb6b67fe4f451b90c415551f75ad0f.jpg)

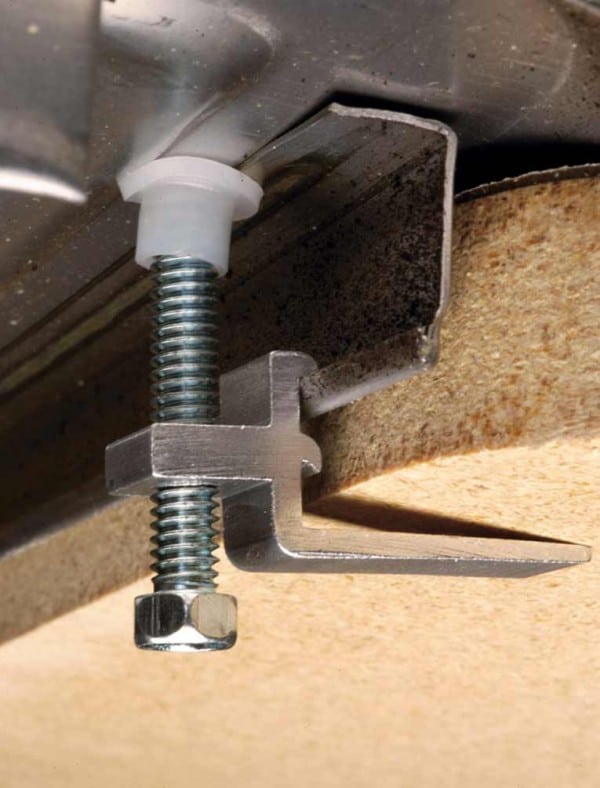
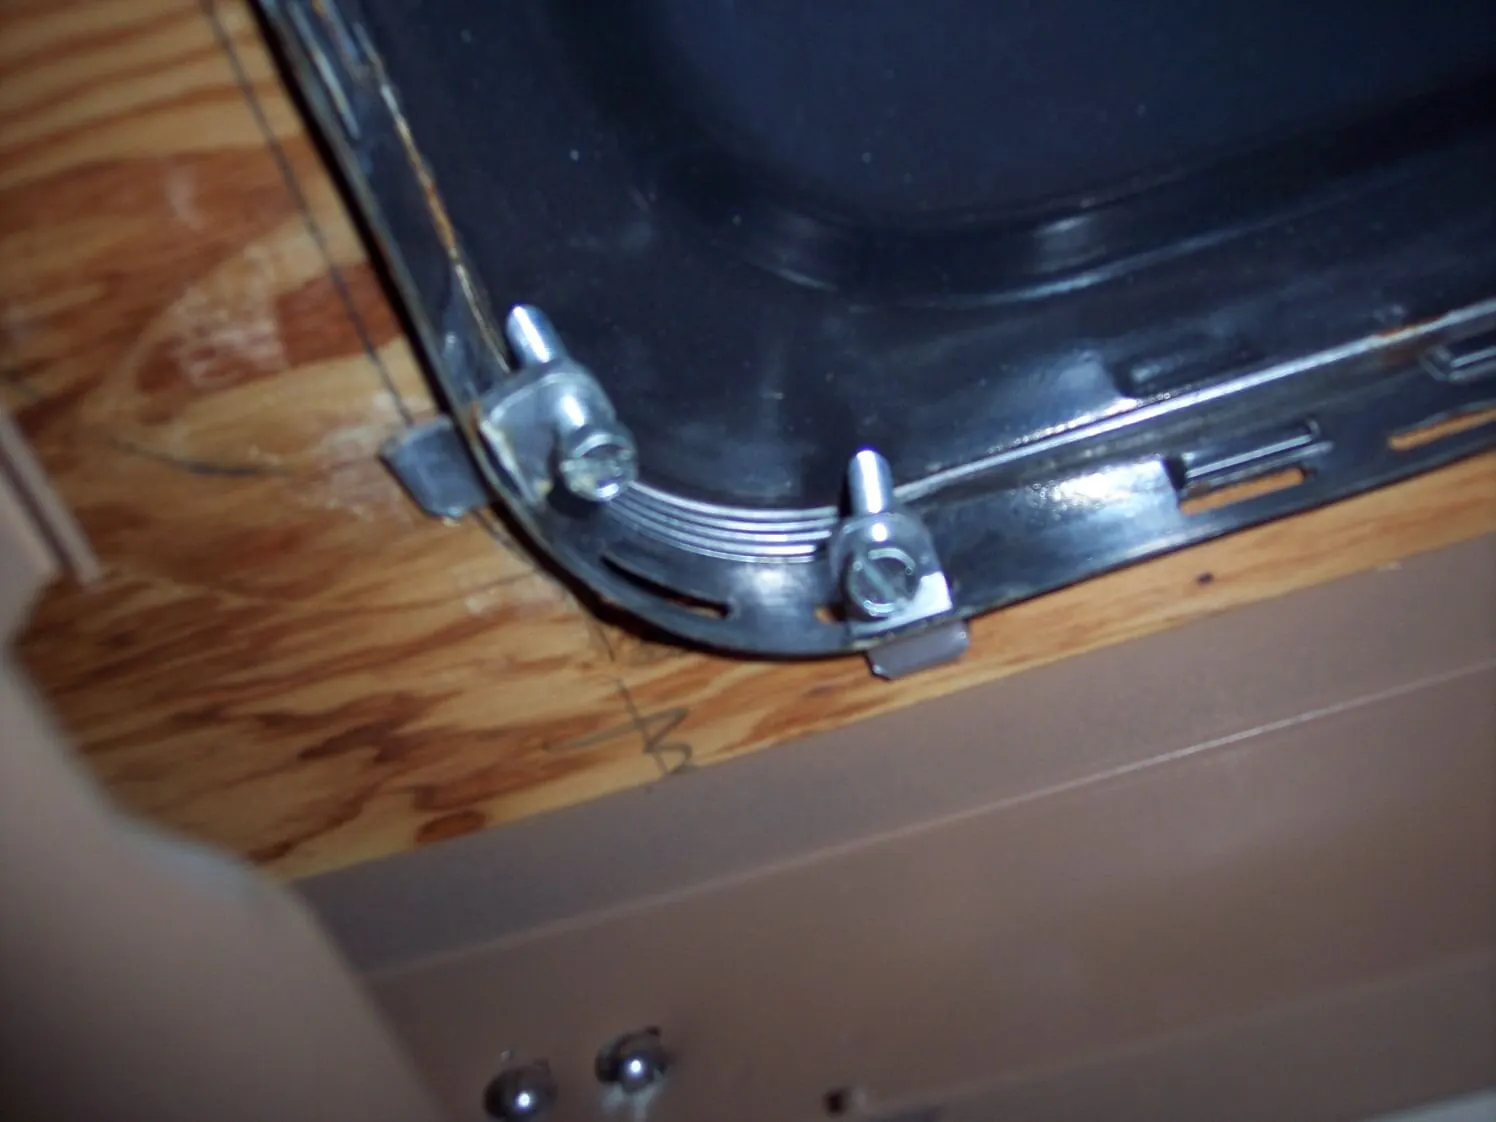
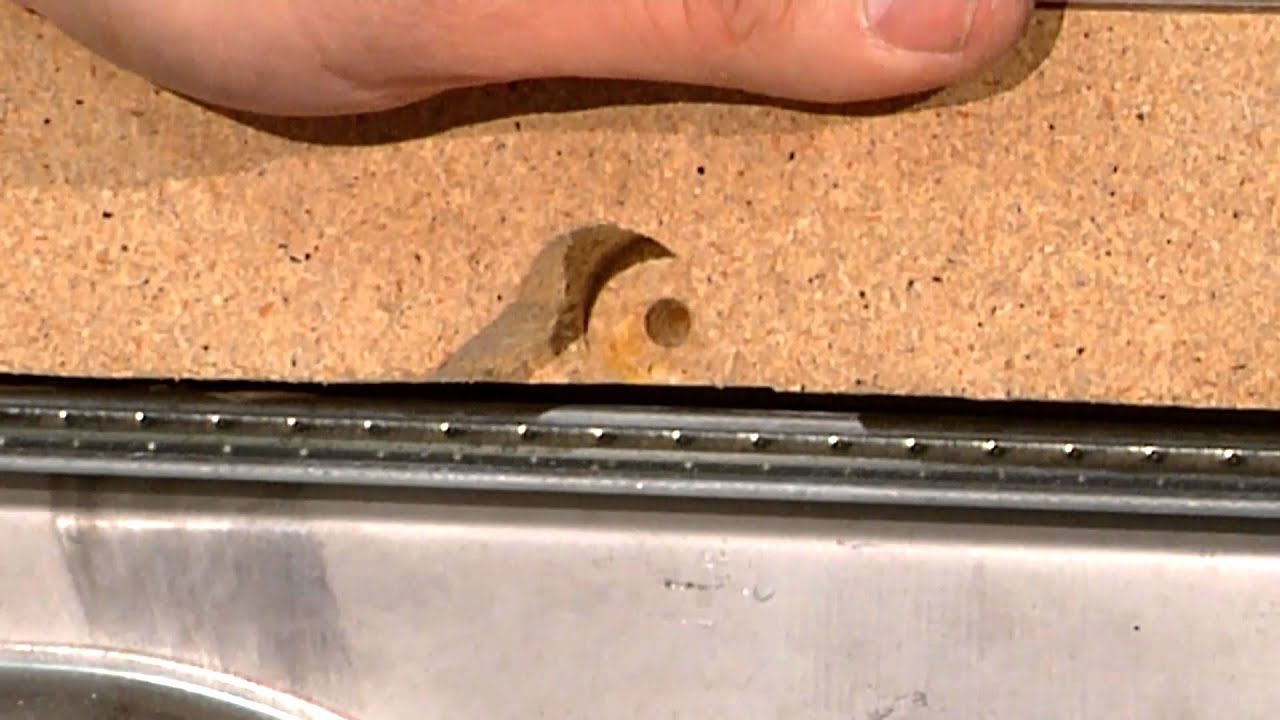
Step 1: Gather Your Tools and Materials Before you begin, make sure you have all the necessary tools and materials on hand. You will need a screwdriver, a wrench, plumber's putty, and the clips themselves. It's also a good idea to have a bucket or towel nearby in case of any accidental water spills. Step 2: Clean the Sink and Drain Before installing the clips, it's important to clean the sink and drain thoroughly. This will ensure a secure fit for the clips and prevent any potential leaks. Use a mild cleaning solution and a sponge to wipe down the sink, and remove any debris from the drain. Step 3: Apply Plumber's Putty Using your hands, roll out a small piece of plumber's putty and apply it around the edges of the sink opening. This will create a watertight seal between the sink and the clips. Step 4: Position the Clips Place the clips on the underside of the sink, aligning them with the openings. Make sure they are evenly spaced and positioned correctly before moving on to the next step. Step 5: Secure the Clips Using a wrench, tighten the screws on each clip until they are snug against the sink. Be careful not to overtighten, as this can cause damage to the sink or clips. Step 6: Check for Leaks Once the clips are secured, turn on the water and check for any leaks. If you notice any, tighten the clips a little more until the leaks stop.Installing Clips on a Kitchen Sink: A Step-by-Step Guide


Installing Clips on a Kitchen Sink: A Step-by-Step Guide


If you're a DIY enthusiast, installing clips on a kitchen sink can be a rewarding project. However, it's important to follow these tips to ensure a successful installation: Tip 1: Make sure to read the instructions that come with the clips before beginning the installation. This will ensure you have all the necessary tools and materials and understand the steps involved. Tip 2: Don't rush the installation process. Take your time to ensure the clips are positioned correctly and properly secured. Tip 3: If you're installing new clips on an old sink, make sure to clean the sink thoroughly and remove any old putty or debris before beginning. Tip 4: Consider enlisting the help of a friend or family member to hold the sink in place while you secure the clips.DIY: Installing Clips on a Kitchen Sink


DIY: Installing Clips on a Kitchen Sink


For those looking for a quick and easy guide to installing clips on a kitchen sink, follow these steps: Step 1: Clean the sink and drain. Step 2: Apply plumber's putty around the edges of the sink opening. Step 3: Position the clips on the underside of the sink. Step 4: Secure the clips with a wrench. Step 5: Check for leaks and tighten the clips if necessary.Quick and Easy Guide to Installing Clips on a Kitchen Sink


Quick and Easy Guide to Installing Clips on a Kitchen Sink

Here are a few additional tips and tricks to keep in mind when installing clips on a kitchen sink: Tip 1: If you're having trouble getting the clips to stay in place, use a small amount of plumber's putty to hold them in place while you secure them. Tip 2: If you're replacing old clips, make sure to clean the sink and clips thoroughly before installing the new ones. Tip 3: If you're having trouble getting the clips to tighten, use a screwdriver to hold the screw in place while you turn the wrench.Installing Clips on a Kitchen Sink: Tips and Tricks


Installing Clips on a Kitchen Sink: Tips and Tricks
If you're a visual learner, watch this step-by-step tutorial for installing clips on a kitchen sink:Step-by-Step Tutorial for Installing Clips on a Kitchen Sink


Step-by-Step Tutorial for Installing Clips on a Kitchen Sink


Properly installing clips on a kitchen sink is crucial for ensuring a secure and leak-free sink. If the clips are not installed correctly, the sink may become loose and cause leaks, leading to potential water damage and costly repairs. Taking the time to properly install the clips will save you time and money in the long run.The Importance of Properly Installing Clips on a Kitchen Sink

The Importance of Properly Installing Clips on a Kitchen Sink
While installing clips on a kitchen sink may seem straightforward, there are a few common mistakes that can be easily avoided: Mistake 1: Not cleaning the sink and clips properly before installation. Mistake 2: Overtightening the clips, which can cause damage to the sink or clips. Mistake 3: Not using enough plumber's putty, which can lead to leaks.Common Mistakes to Avoid When Installing Clips on a Kitchen Sink


Common Mistakes to Avoid When Installing Clips on a Kitchen Sink


Here is a list of the tools and materials you will need for installing clips on a kitchen sink: Screwdriver Wrench Plumber's Putty Bucket or towelTools and Materials Needed for Installing Clips on a Kitchen Sink


Tools and Materials Needed for Installing Clips on a Kitchen Sink
If you're still unsure about installing clips on a kitchen sink, don't hesitate to seek advice from an expert. You can consult with a plumber or even ask for tips and advice from your local hardware store. They may even offer classes or workshops on DIY home repairs, including installing clips on a kitchen sink. Now that you have a better understanding of how to install clips on a kitchen sink, you can confidently tackle this project on your own. Remember to take your time and follow the instructions closely to ensure a successful installation. Your newly secured sink will thank you for it!Expert Advice on Installing Clips on a Kitchen Sink


Expert Advice on Installing Clips on a Kitchen Sink
Additional Benefits of Installing Clips on Your Kitchen Sink

Prevents Water Wastage
 One of the main benefits of installing clips on your kitchen sink is that it helps prevent water wastage. Without clips, it can be easy for the faucet to move around and cause water to spill over the sides of the sink. This not only leads to a messy kitchen, but it also wastes a significant amount of water. By securing the faucet with clips, you can ensure that the water flows directly into the sink, reducing wastage and saving on your water bill.
Keeps Your Sink Clean and Tidy
 Another advantage of using clips on your kitchen sink is that it helps keep your sink clean and tidy. When the faucet is constantly moving around, it can create splashes and spills, making it difficult to keep the sink area clean. By securing the faucet with clips, you eliminate this problem and make it easier to maintain a clean and hygienic kitchen. Additionally, clips can also prevent dirt, debris, and food particles from getting trapped in hard-to-reach areas around the sink, making cleaning even more effortless.
Compact and Sleek Design
 Many people are hesitant to install clips on their kitchen sink as they fear it may take away from the overall aesthetic of their kitchen. However, with modern designs and materials, clips can actually enhance the look of your sink. Clips are now available in a variety of sizes, shapes, and finishes, allowing you to choose one that complements your kitchen's design. They are also compact and sleek, making them barely noticeable and ensuring they do not distract from the overall look of your kitchen.
Easy to Install and Cost-Effective
 Installing clips on your kitchen sink is a simple and cost-effective solution. Most clips come with easy-to-follow instructions and can be installed without the help of a professional. This means you can save on installation costs and have your clips in place in no time. Additionally, clips are relatively inexpensive, making them an affordable option for anyone looking to improve their kitchen's functionality.
In conclusion, installing clips on your kitchen sink not only helps secure your faucet but also offers several additional benefits. It prevents water wastage, keeps your sink clean and tidy, has a compact and sleek design, and is easy to install and cost-effective. With all these advantages, it is clear that clips are a must-have for any kitchen. So, why wait? Upgrade your kitchen sink with clips today and enjoy a more efficient and stylish space.
Installing clips on your kitchen sink is a simple and cost-effective solution. Most clips come with easy-to-follow instructions and can be installed without the help of a professional. This means you can save on installation costs and have your clips in place in no time. Additionally, clips are relatively inexpensive, making them an affordable option for anyone looking to improve their kitchen's functionality.
In conclusion, installing clips on your kitchen sink not only helps secure your faucet but also offers several additional benefits. It prevents water wastage, keeps your sink clean and tidy, has a compact and sleek design, and is easy to install and cost-effective. With all these advantages, it is clear that clips are a must-have for any kitchen. So, why wait? Upgrade your kitchen sink with clips today and enjoy a more efficient and stylish space.


/how-to-install-a-sink-drain-2718789-hero-24e898006ed94c9593a2a268b57989a3.jpg)
