Installing a new kitchen sink can seem like a daunting task, but with the right tools and knowledge, it can be a simple and rewarding DIY project. Whether you're replacing an old sink or completely renovating your kitchen, learning how to hook up a new kitchen sink is an essential skill for any homeowner. In this guide, we'll walk you through the steps of installing a new kitchen sink and provide tips for a successful installation.How to Hook Up a New Kitchen Sink


How to Hook Up a New Kitchen Sink


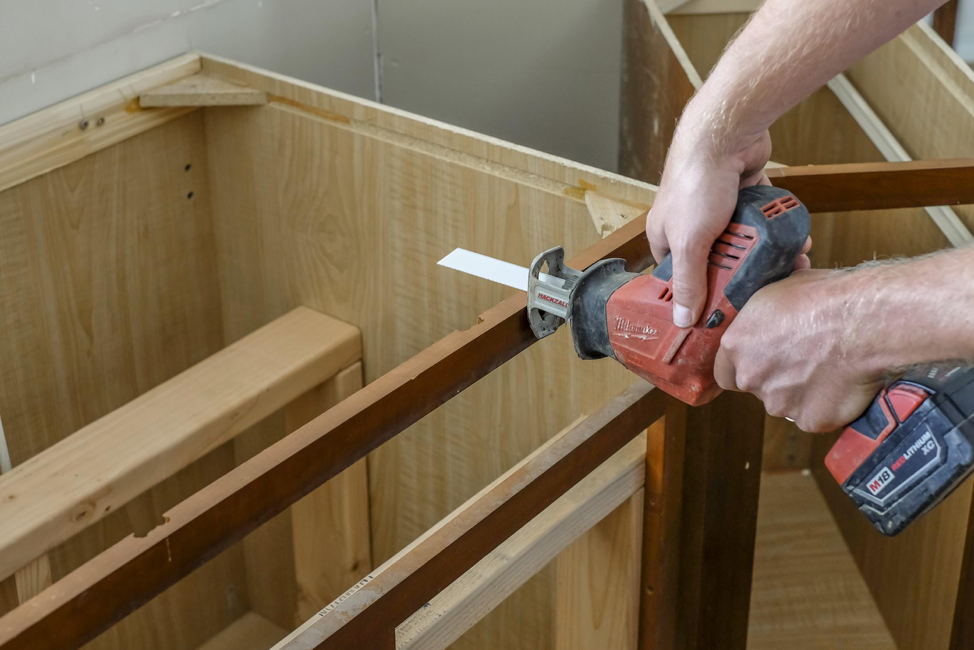
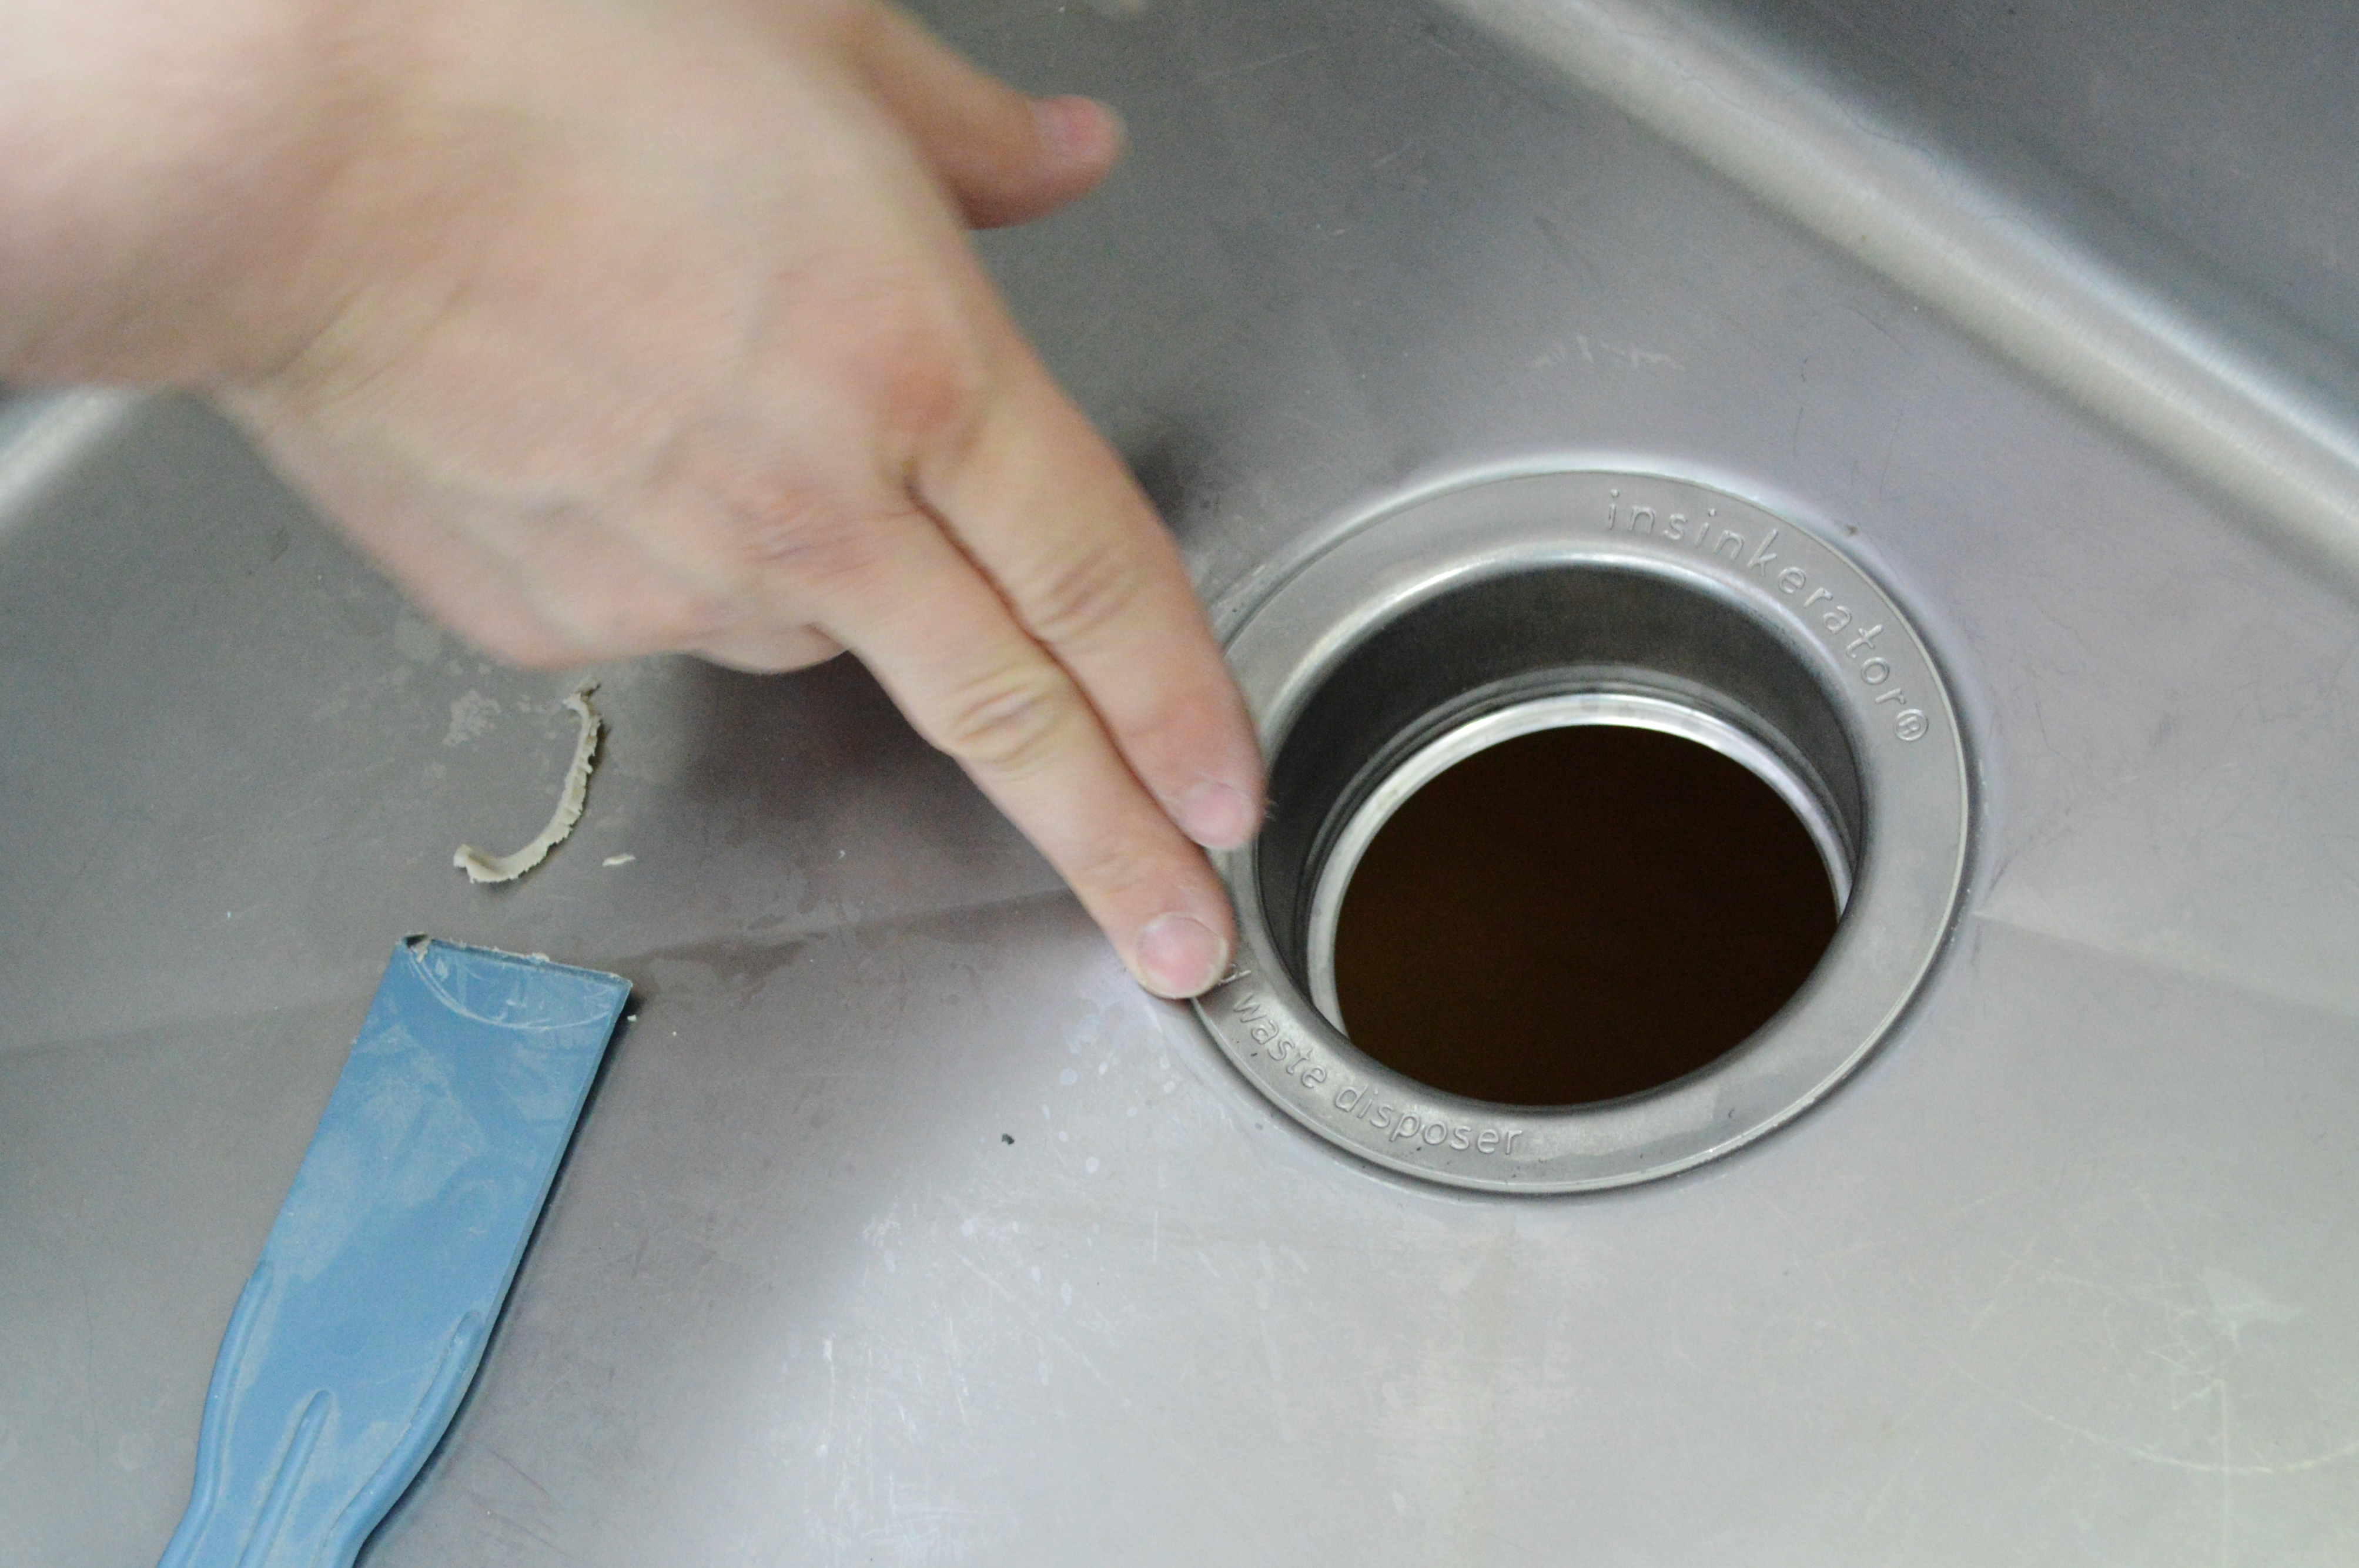
Before you begin, make sure you have all the necessary tools and materials for the job. This includes a new kitchen sink, faucet, drain, garbage disposal (if desired), plumber's putty, silicone caulk, and a variety of plumbing tools. Once you have everything you need, follow these steps for installing your new kitchen sink: Step 1: Prepare the area: Before you start installing your new sink, make sure the area is clean and free of any debris. Remove the old sink and disconnect any plumbing or electrical connections. Step 2: Measure and cut the hole: Measure the dimensions of your new sink and mark them on the countertop. Use a jigsaw to carefully cut out the hole for the sink, following the marked lines. Step 3: Install the faucet: If your sink does not come with a pre-installed faucet, now is the time to install it. Follow the manufacturer's instructions for installation, making sure to use plumbers' tape on all connections. Step 4: Attach the drain: Attach the drain to the bottom of the sink and tighten the connections. Apply a thin layer of plumber's putty around the edges of the drain to create a watertight seal. Step 5: Connect the water supply lines: Using the appropriate plumbing tools, connect the water supply lines to the faucet. Make sure all connections are tight to prevent any leaks. Step 6: Install the garbage disposal (optional): If you're installing a garbage disposal, follow the manufacturer's instructions for installation. Make sure to connect the power and plumbing connections properly. Step 7: Place the sink in the hole: Carefully place the sink into the hole in the countertop, making sure it is level. If necessary, use shims to adjust the level of the sink. Step 8: Secure the sink: Once the sink is in place, use clips or brackets to secure it to the countertop. This will prevent the sink from shifting or moving once it is in use. Step 9: Connect the plumbing: Using the appropriate plumbing tools, connect the drain and water supply lines to the sink. Make sure all connections are tight to prevent any leaks. Step 10: Seal the edges: Apply a thin bead of silicone caulk around the edges of the sink to create a watertight seal. Smooth out the caulk with your finger or a caulk smoothing tool for a clean finish.Steps for Installing a Kitchen Sink


Steps for Installing a Kitchen Sink


Now that you know the basic steps for installing a kitchen sink, let's dive into some DIY tips to make the process even easier. Tip 1: Measure twice, cut once: Before cutting the hole for your sink, double-check your measurements to ensure a perfect fit. This will save you time and frustration in the long run. Tip 2: Use a template: Many sinks come with a template for cutting the hole in the countertop. If yours does not, you can create one by tracing the outline of the sink onto a piece of cardboard or paper. Tip 3: Don't overtighten connections: When connecting plumbing, it's important not to overtighten connections. This can cause damage to the pipes or fittings and may result in leaks. Tip 4: Use a garbage disposal splash guard: If you're installing a garbage disposal, consider using a splash guard to prevent food and debris from splashing out of the sink.DIY Kitchen Sink Installation Guide


DIY Kitchen Sink Installation Guide


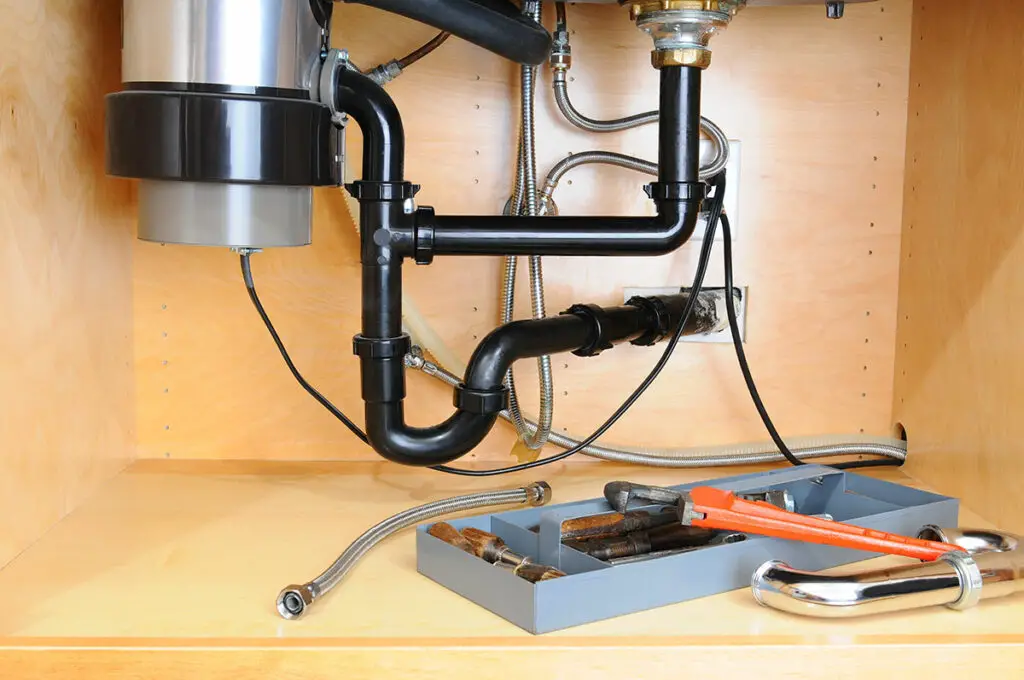
To complete a successful kitchen sink installation, you will need a variety of tools. These may include: Adjustable wrench Plumbers' tape Plumbers' putty Jigsaw Screwdriver Caulk gun Caulk smoothing toolTools Needed for Installing a Kitchen Sink


Tools Needed for Installing a Kitchen Sink

/how-to-install-a-sink-drain-2718789-hero-b5b99f72b5a24bb2ae8364e60539cece.jpg)


Here are a few more tips to keep in mind when installing a new kitchen sink: Tip 1: Choose the right sink for your space: Consider the size and layout of your kitchen when choosing a sink. A larger sink may be more practical for a busy kitchen, while a smaller sink may be more suitable for a smaller space. Tip 2: Don't forget to turn off the water: Before starting any plumbing work, always remember to turn off the water supply to prevent any accidents or flooding. Tip 3: Make sure to follow the manufacturer's instructions: Every sink and faucet may have different installation instructions, so always refer to the instructions provided by the manufacturer for best results.Tips for Installing a Kitchen Sink


Tips for Installing a Kitchen Sink


Even with the right tools and knowledge, there are a few common mistakes to avoid when installing a kitchen sink: Mistake 1: Forgetting to seal the sink: It's important to properly seal the edges of the sink to prevent leaks and water damage. Mistake 2: Overlooking the garbage disposal: If you're installing a garbage disposal, make sure to connect all the necessary plumbing and electrical connections. Mistake 3: Forgetting to level the sink: A level sink is essential for proper drainage and preventing leaks. Make sure to use shims if necessary to level the sink before securing it in place.Common Mistakes to Avoid When Installing a Kitchen Sink


Common Mistakes to Avoid When Installing a Kitchen Sink


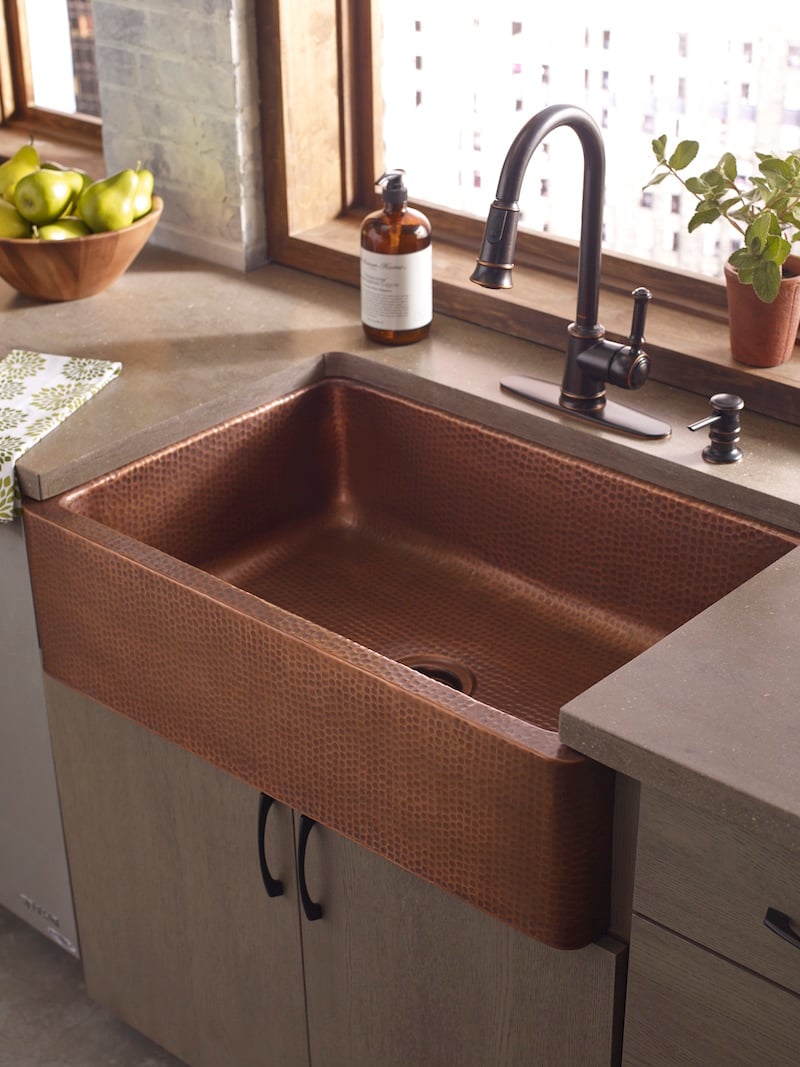
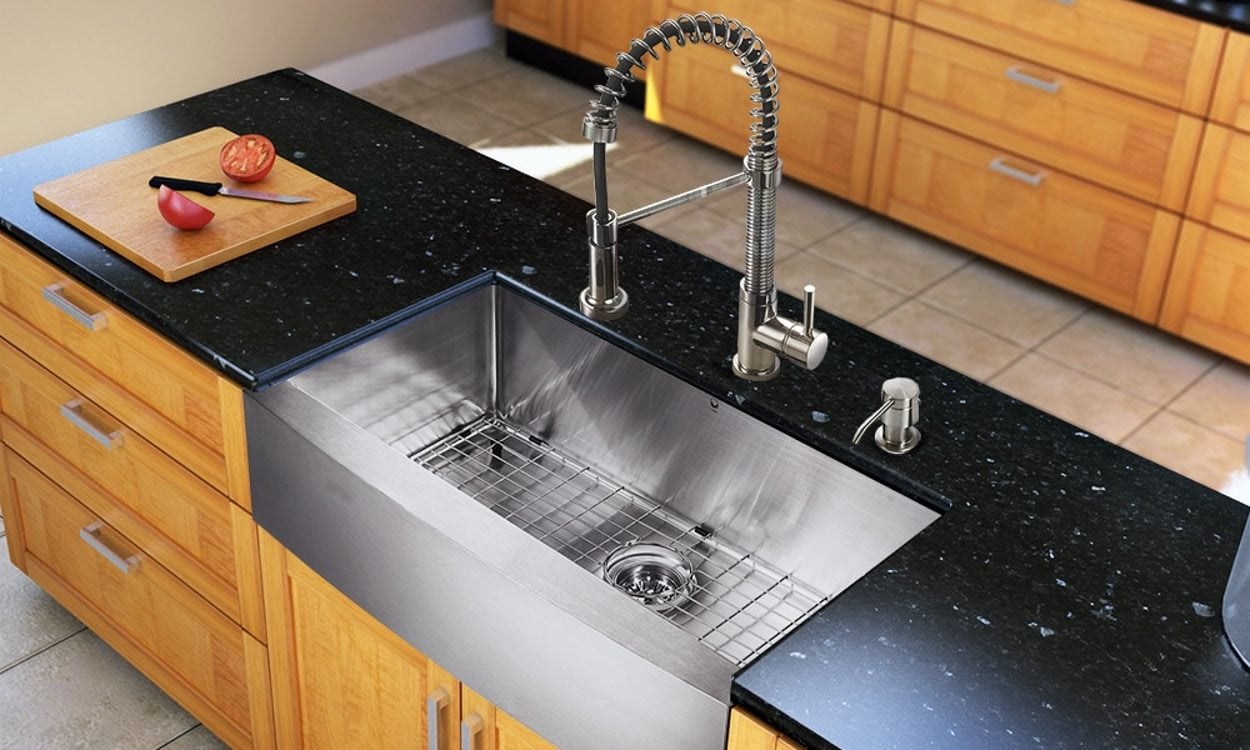
When it comes to selecting a kitchen sink, there are many options to choose from. Some popular choices include: Stainless steel sinks Porcelain sinks Granite composite sinks Copper sinks Cast iron sinks Consider the style, durability, and maintenance of each type of sink before making your decision.Choosing the Right Kitchen Sink for Your Space


Choosing the Right Kitchen Sink for Your Space


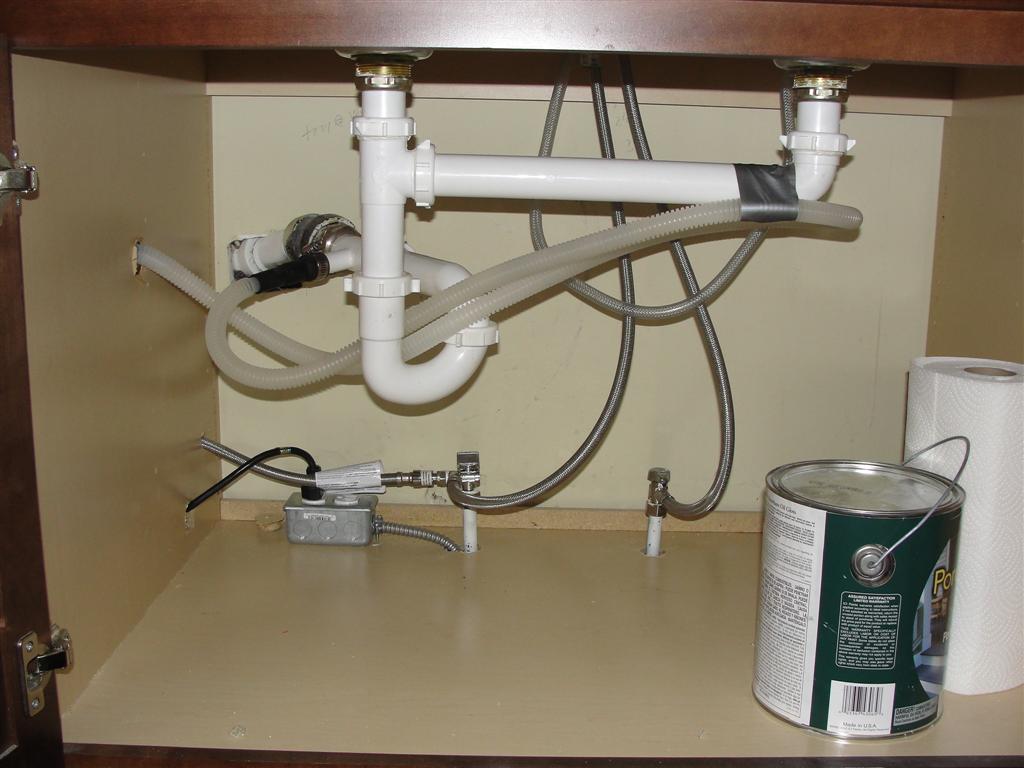
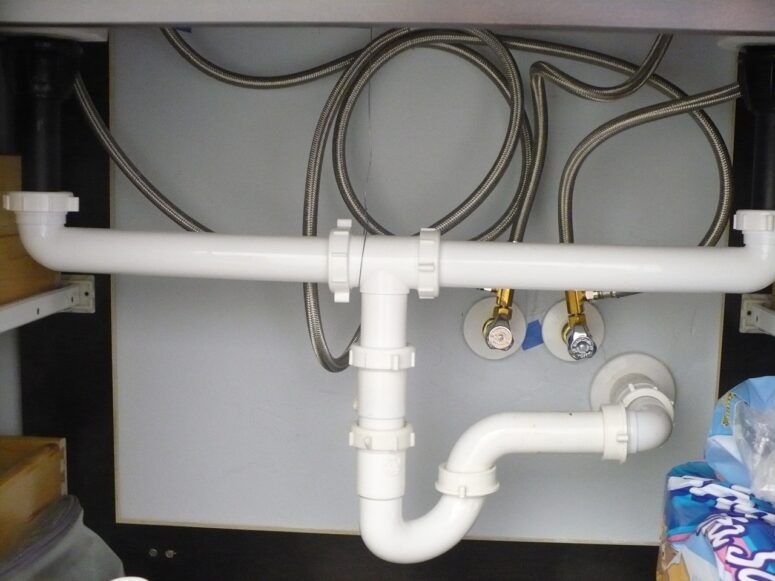
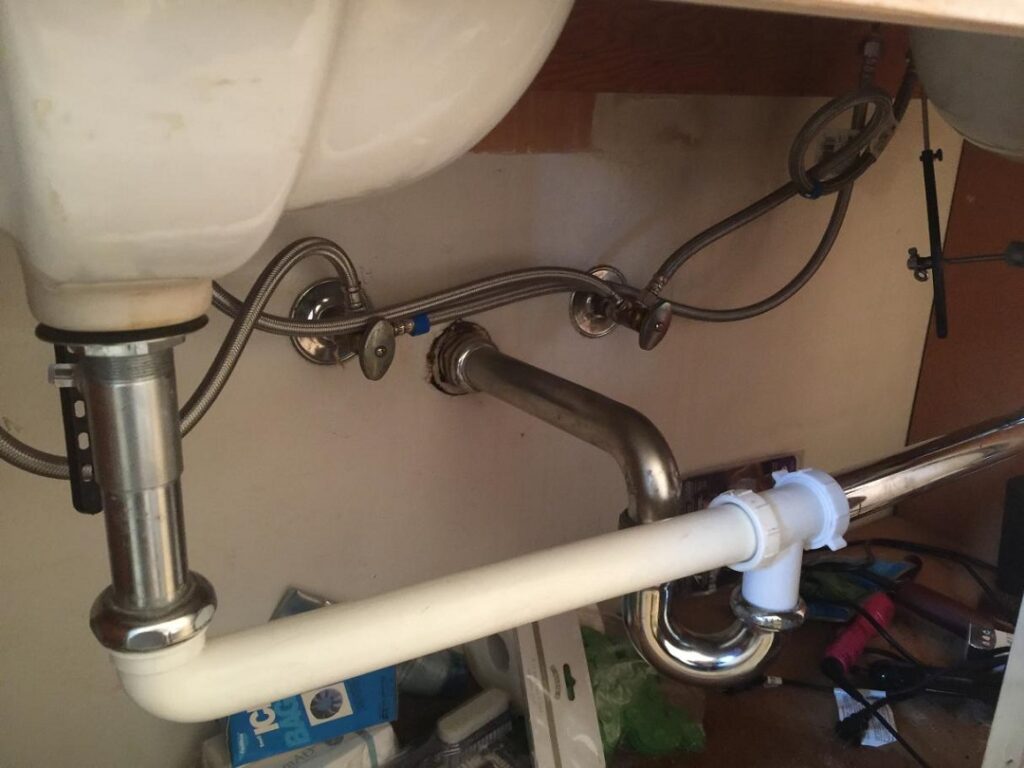
Connecting the plumbing for a new kitchen sink may seem intimidating, but with the right tools and knowledge, it can be a straightforward process. Make sure to carefully follow the manufacturer's instructions for best results.Connecting Plumbing for a New Kitchen Sink


Connecting Plumbing for a New Kitchen Sink


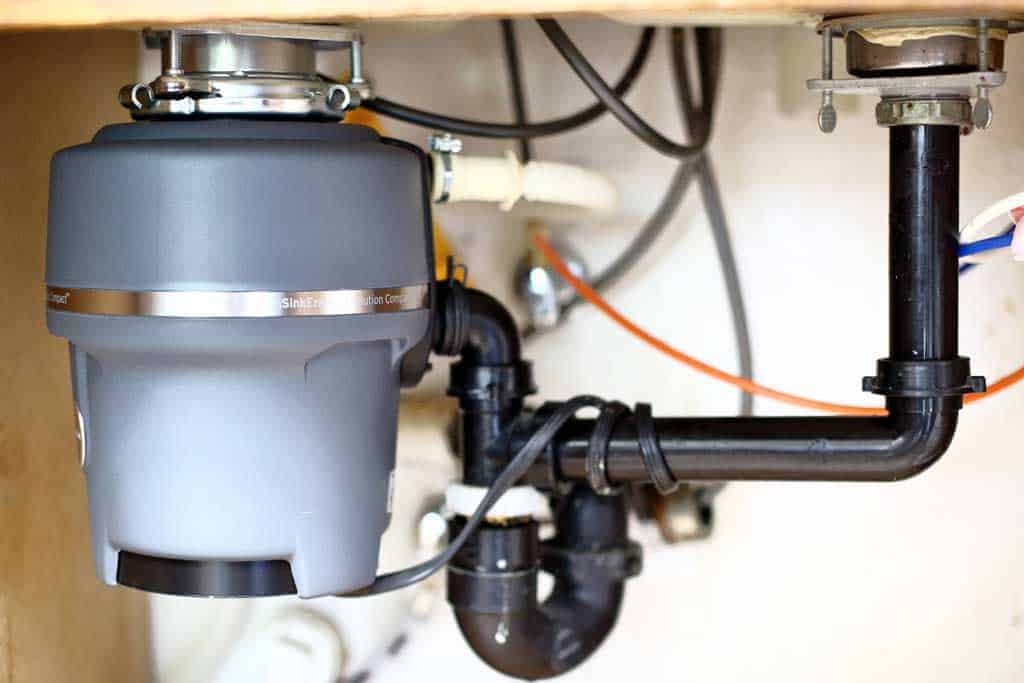
If you're considering adding a garbage disposal to your new kitchen sink, it's important to follow the manufacturer's instructions for installation and use. Make sure to connect all the necessary plumbing and electrical connections properly.Installing a Garbage Disposal with Your New Kitchen Sink


Installing a Garbage Disposal with Your New Kitchen Sink


:max_bytes(150000):strip_icc()/garbage-disposal-buying-guide-2718864-hero-205069e72e6a4575b3131db47a6ace26.jpg)


Properly sealing your kitchen sink is essential for preventing leaks and water damage. Follow these steps for a leak-free installation: Step 1: Clean the edges of the sink: Before applying any sealant, make sure the edges of the sink are clean and free of debris. Step 2: Apply plumber's putty: Roll a small amount of plumber's putty into a rope and apply it around the edges of the sink where it will meet the countertop. Step 3: Smooth out the putty: Use your finger or a putty knife to smooth out the putty and create a tight seal. Step 4: Apply silicone caulk: Using a caulk gun, apply a thin bead of silicone caulk around the edges of the sink. Smooth out the caulk with your finger or a caulk smoothing tool for a clean finish. By following these steps, you can ensure that your new kitchen sink is properly sealed and ready to use. Installing a new kitchen sink may seem like a daunting task, but with the right tools and knowledge, it can be a rewarding DIY project. By following these steps and tips, you can successfully hook up a new kitchen sink and enjoy a functional and stylish addition to your kitchen. Remember to always follow safety precautions and refer to the manufacturer's instructions for best results. Happy installing!How to Seal a Kitchen Sink for a Leak-Free Installation

How to Seal a Kitchen Sink for a Leak-Free Installation


Installing a New Kitchen Sink: Tips and Tricks

Why Upgrade Your Kitchen Sink?
 When it comes to designing a house, the kitchen is often referred to as the heart of the home. It's where meals are prepared, memories are made, and conversations are shared. That's why it's important to have a functional and visually appealing kitchen. One way to achieve this is by upgrading your kitchen sink.
Kitchen sinks
not only serve a practical purpose but also add to the overall aesthetic of your kitchen. Whether you're
renovating
your kitchen or simply looking for a change, installing a new kitchen sink can completely transform the look and feel of your space.
When it comes to designing a house, the kitchen is often referred to as the heart of the home. It's where meals are prepared, memories are made, and conversations are shared. That's why it's important to have a functional and visually appealing kitchen. One way to achieve this is by upgrading your kitchen sink.
Kitchen sinks
not only serve a practical purpose but also add to the overall aesthetic of your kitchen. Whether you're
renovating
your kitchen or simply looking for a change, installing a new kitchen sink can completely transform the look and feel of your space.
Choosing the Right Kitchen Sink
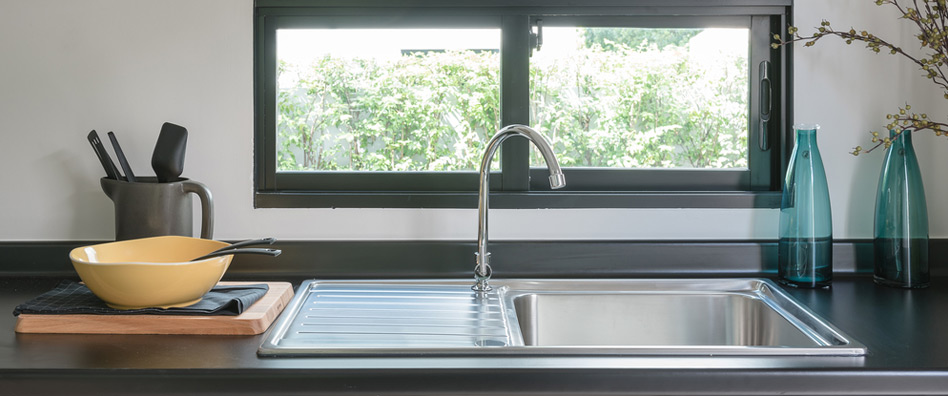
 Before you begin the installation process, it's important to choose the right kitchen sink for your needs. There are many factors to consider, such as size, material, and style.
Stainless steel
is a popular choice for its durability and affordability, while
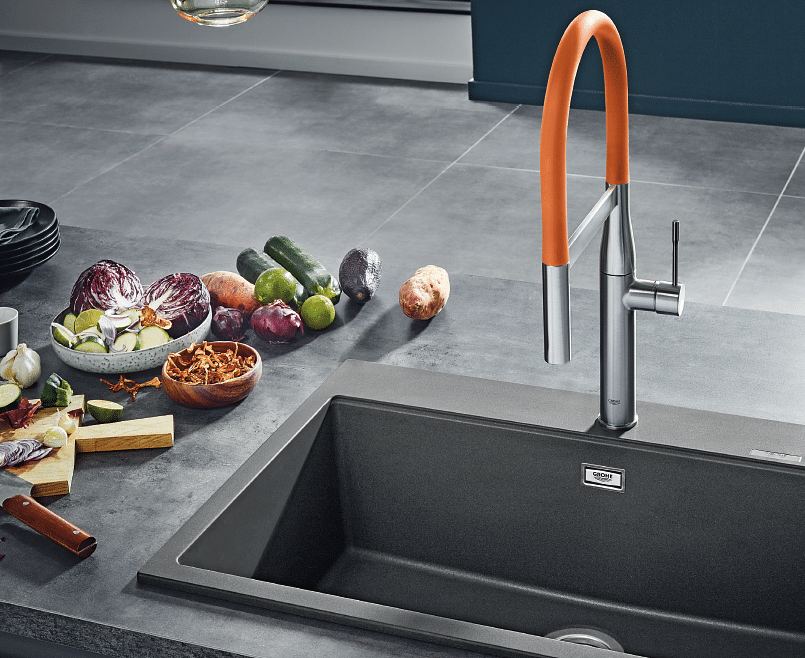
granite composite
offers a sleek and modern look. It's also important to consider the
configuration
of your sink, whether you want a single or
double basin
, and if you need additional features such as a
pull-down faucet
or
built-in soap dispenser
.
Before you begin the installation process, it's important to choose the right kitchen sink for your needs. There are many factors to consider, such as size, material, and style.
Stainless steel
is a popular choice for its durability and affordability, while
granite composite
offers a sleek and modern look. It's also important to consider the
configuration
of your sink, whether you want a single or
double basin
, and if you need additional features such as a
pull-down faucet
or
built-in soap dispenser
.
Tools Needed
 Before beginning the installation process, make sure you have all the necessary tools. This includes a
wrench
,
screwdriver
,
plumber's putty
, and
plumbers tape
. It's also important to read the manufacturer's instructions for any specific tools or materials needed for your chosen sink.
Before beginning the installation process, make sure you have all the necessary tools. This includes a
wrench
,
screwdriver
,
plumber's putty
, and
plumbers tape
. It's also important to read the manufacturer's instructions for any specific tools or materials needed for your chosen sink.
Step-by-Step Installation
 Now that you have your new sink and tools ready, it's time to install it. Follow these steps for a smooth and successful installation:
1. Turn off the water supply to your sink and disconnect any existing plumbing.
2. Measure and mark the position of your new sink on the countertop.
3. Use a jigsaw to cut out the necessary hole for your sink.
4. Apply plumber's putty to the bottom of the sink and carefully lower it into place.
5. Secure the sink in place with mounting clips or brackets, depending on the type of sink you have.
6. Connect the water supply lines and drain pipes.
7. Turn the water supply back on and check for any leaks.
8. Apply plumbers tape to the connections for added security.
9. Install any additional features, such as a faucet or soap dispenser.
10. Clean up any excess putty or debris and enjoy your new kitchen sink!
Now that you have your new sink and tools ready, it's time to install it. Follow these steps for a smooth and successful installation:
1. Turn off the water supply to your sink and disconnect any existing plumbing.
2. Measure and mark the position of your new sink on the countertop.
3. Use a jigsaw to cut out the necessary hole for your sink.
4. Apply plumber's putty to the bottom of the sink and carefully lower it into place.
5. Secure the sink in place with mounting clips or brackets, depending on the type of sink you have.
6. Connect the water supply lines and drain pipes.
7. Turn the water supply back on and check for any leaks.
8. Apply plumbers tape to the connections for added security.
9. Install any additional features, such as a faucet or soap dispenser.
10. Clean up any excess putty or debris and enjoy your new kitchen sink!
Final Thoughts
 Upgrading your kitchen sink may seem daunting, but with the right tools and knowledge, it can be a simple and rewarding project. Not only will a new kitchen sink improve the functionality of your kitchen, but it will also elevate its design. So go ahead and
hook up
that new kitchen sink and enjoy a fresh and updated space.
Upgrading your kitchen sink may seem daunting, but with the right tools and knowledge, it can be a simple and rewarding project. Not only will a new kitchen sink improve the functionality of your kitchen, but it will also elevate its design. So go ahead and
hook up
that new kitchen sink and enjoy a fresh and updated space.