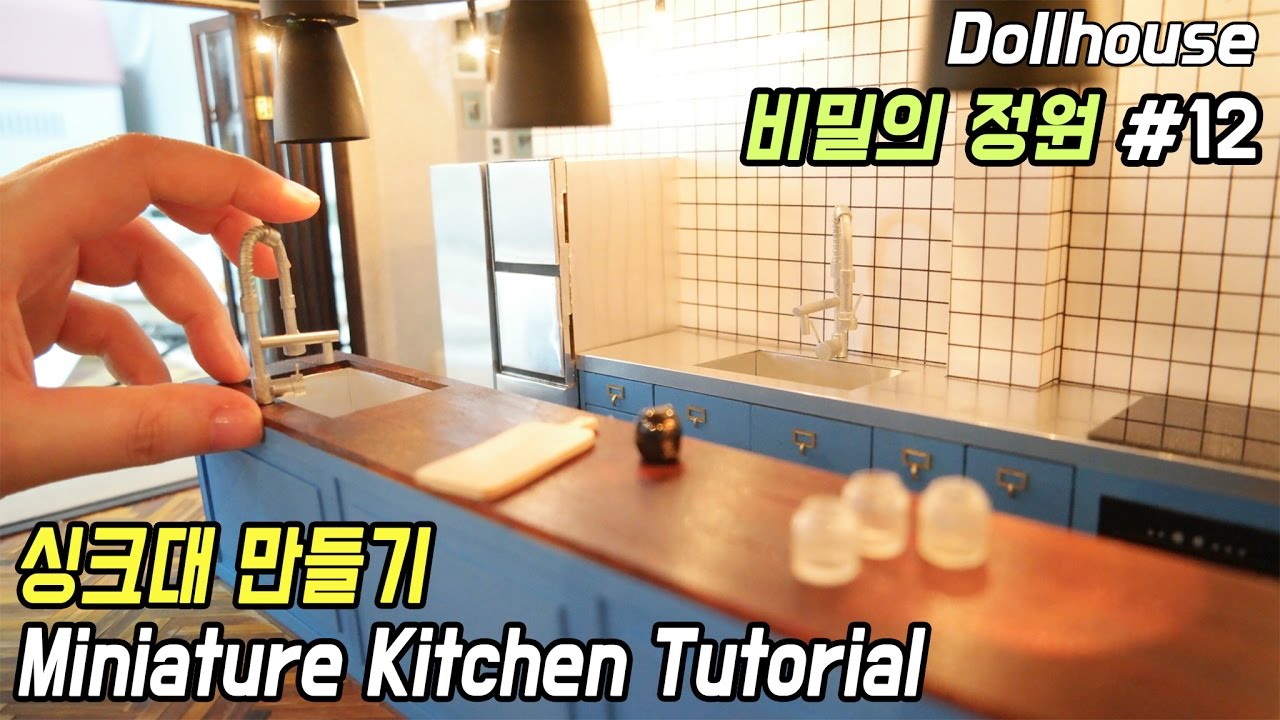
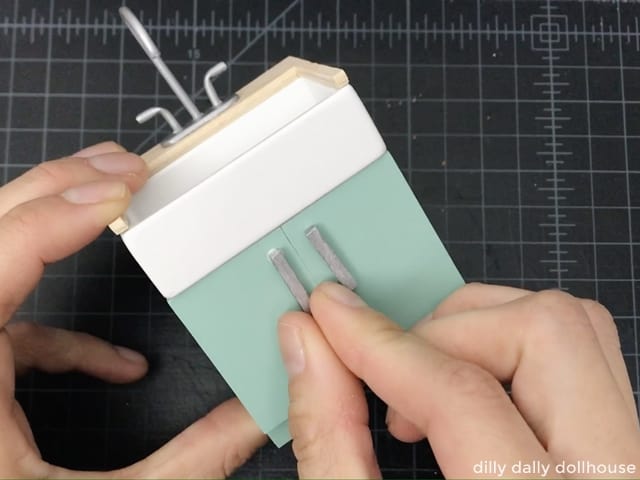
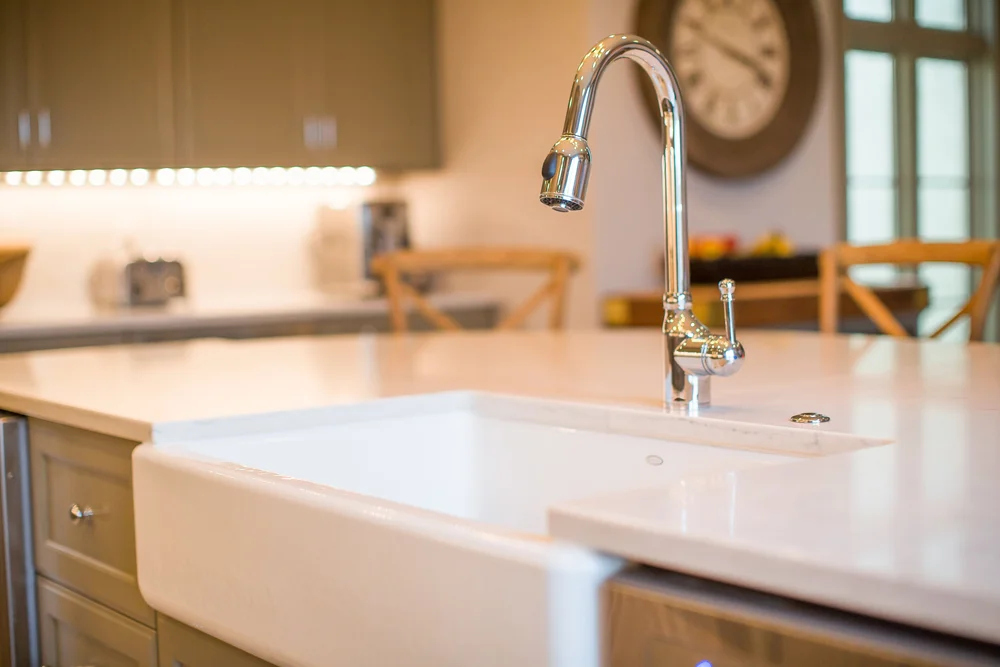
Are you tired of struggling with a large, clunky kitchen sink in your small living space? Look no further than this DIY project to create your very own mini kitchen sink. Not only will it save you space, but it will also add a touch of charm to your home. Let's get started! To begin, gather all of your materials. You will need a plastic storage container, a small sink basin, a faucet, hot glue, and any additional decorations you would like to add. Make sure the plastic container is big enough to fit the sink basin comfortably. Next, use hot glue to attach the sink basin to the bottom of the plastic container. Make sure it is centered and secure. Then, using a utility knife, carefully cut a hole in the lid of the plastic container for the faucet to fit through. Now it's time to attach the faucet. Simply insert it through the hole in the lid and secure it with hot glue. You can also add a small piece of plastic or cardboard underneath the lid to give the faucet more stability. Once the faucet is secure, it's time to add any additional decorations. You can use paint, stickers, or even small tiles to give your mini kitchen sink a personalized touch. Let your creativity flow! Finally, fill the sink basin with water and test out your new DIY mini kitchen sink. You can use it for washing dishes, preparing food, or even as a cute addition to your child's play kitchen. Enjoy your space-saving and functional creation!1. How to Build a DIY Mini Kitchen Sink


1. How to Build a DIY Mini Kitchen Sink


If you're looking for a fun and creative project, try making your own miniature kitchen sink. This tutorial will guide you through the process step by step, so let's get started! First, gather all of your materials. You will need a small plastic container, a sink basin, a faucet, hot glue, and any decorations you would like to add. Make sure the plastic container is the right size to fit the sink basin comfortably. Next, use hot glue to attach the sink basin to the bottom of the plastic container. Make sure it is centered and secure. Then, using a utility knife, carefully cut a hole in the lid of the plastic container for the faucet to fit through. Once the faucet is attached, it's time to add some decorations. You can use paint, stickers, or even small tiles to give your miniature kitchen sink a personalized touch. Get creative and have fun with it! Now, fill the sink basin with water and test out your new creation. You can use it for washing dishes, preparing food, or as a cute addition to your dollhouse or mini kitchen. The possibilities are endless with this adorable DIY project. Enjoy!2. Miniature Kitchen Sink DIY Tutorial


2. Miniature Kitchen Sink DIY Tutorial


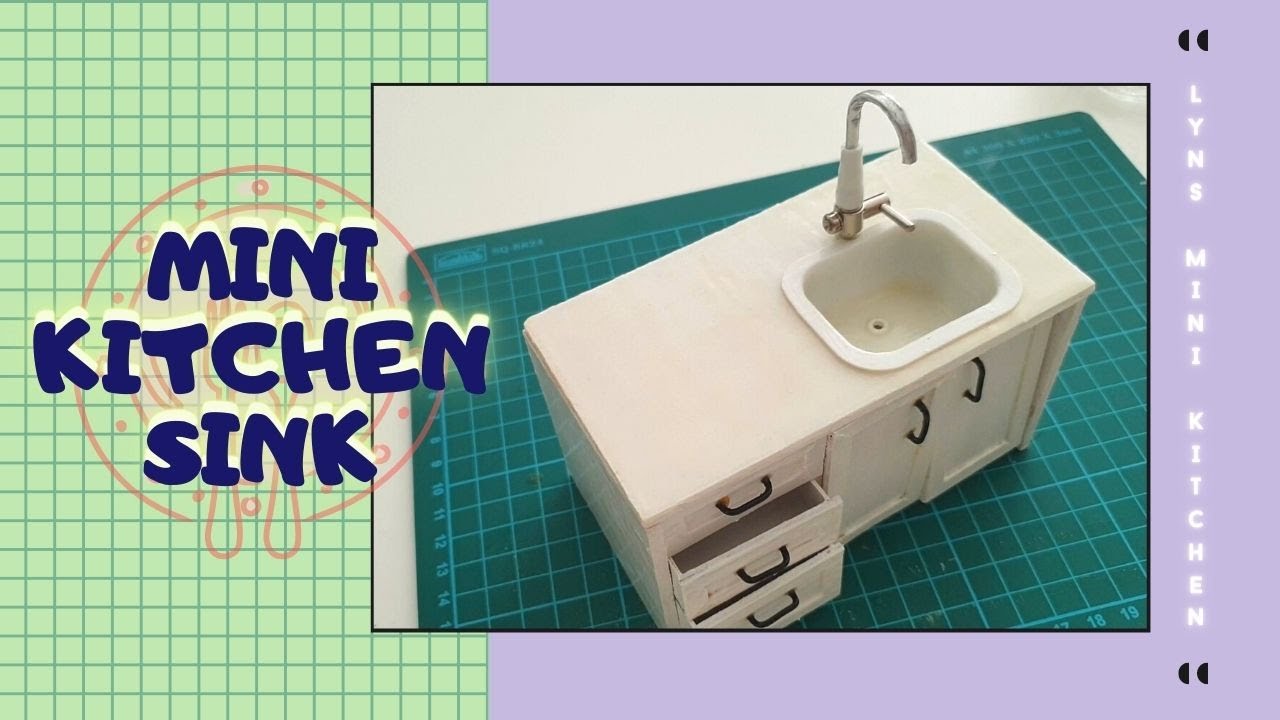
Do you love creating miniature scenes in your dollhouse? Add a touch of realism with this DIY dollhouse miniature kitchen sink. It's easy to make and will add a charming detail to your dollhouse kitchen. Start by gathering all of your materials. You will need a small plastic container, a sink basin, a faucet, hot glue, and any decorations you want to add. Make sure the plastic container is the right size to fit the sink basin comfortably. Next, use hot glue to attach the sink basin to the bottom of the plastic container. Make sure it is centered and secure. Then, using a utility knife, carefully cut a hole in the lid of the plastic container for the faucet to fit through. Now it's time to add some decorative touches. You can use paint, stickers, or even small tiles to give your miniature kitchen sink a realistic look. You can also use small pieces of plastic or cardboard to create a backsplash behind the sink. Lastly, fill the sink basin with water and test out your new dollhouse miniature kitchen sink. Your dolls will love having a functional and stylish sink in their kitchen. Have fun creating and customizing your miniature scene!3. DIY Dollhouse Miniature Kitchen Sink


3. DIY Dollhouse Miniature Kitchen Sink


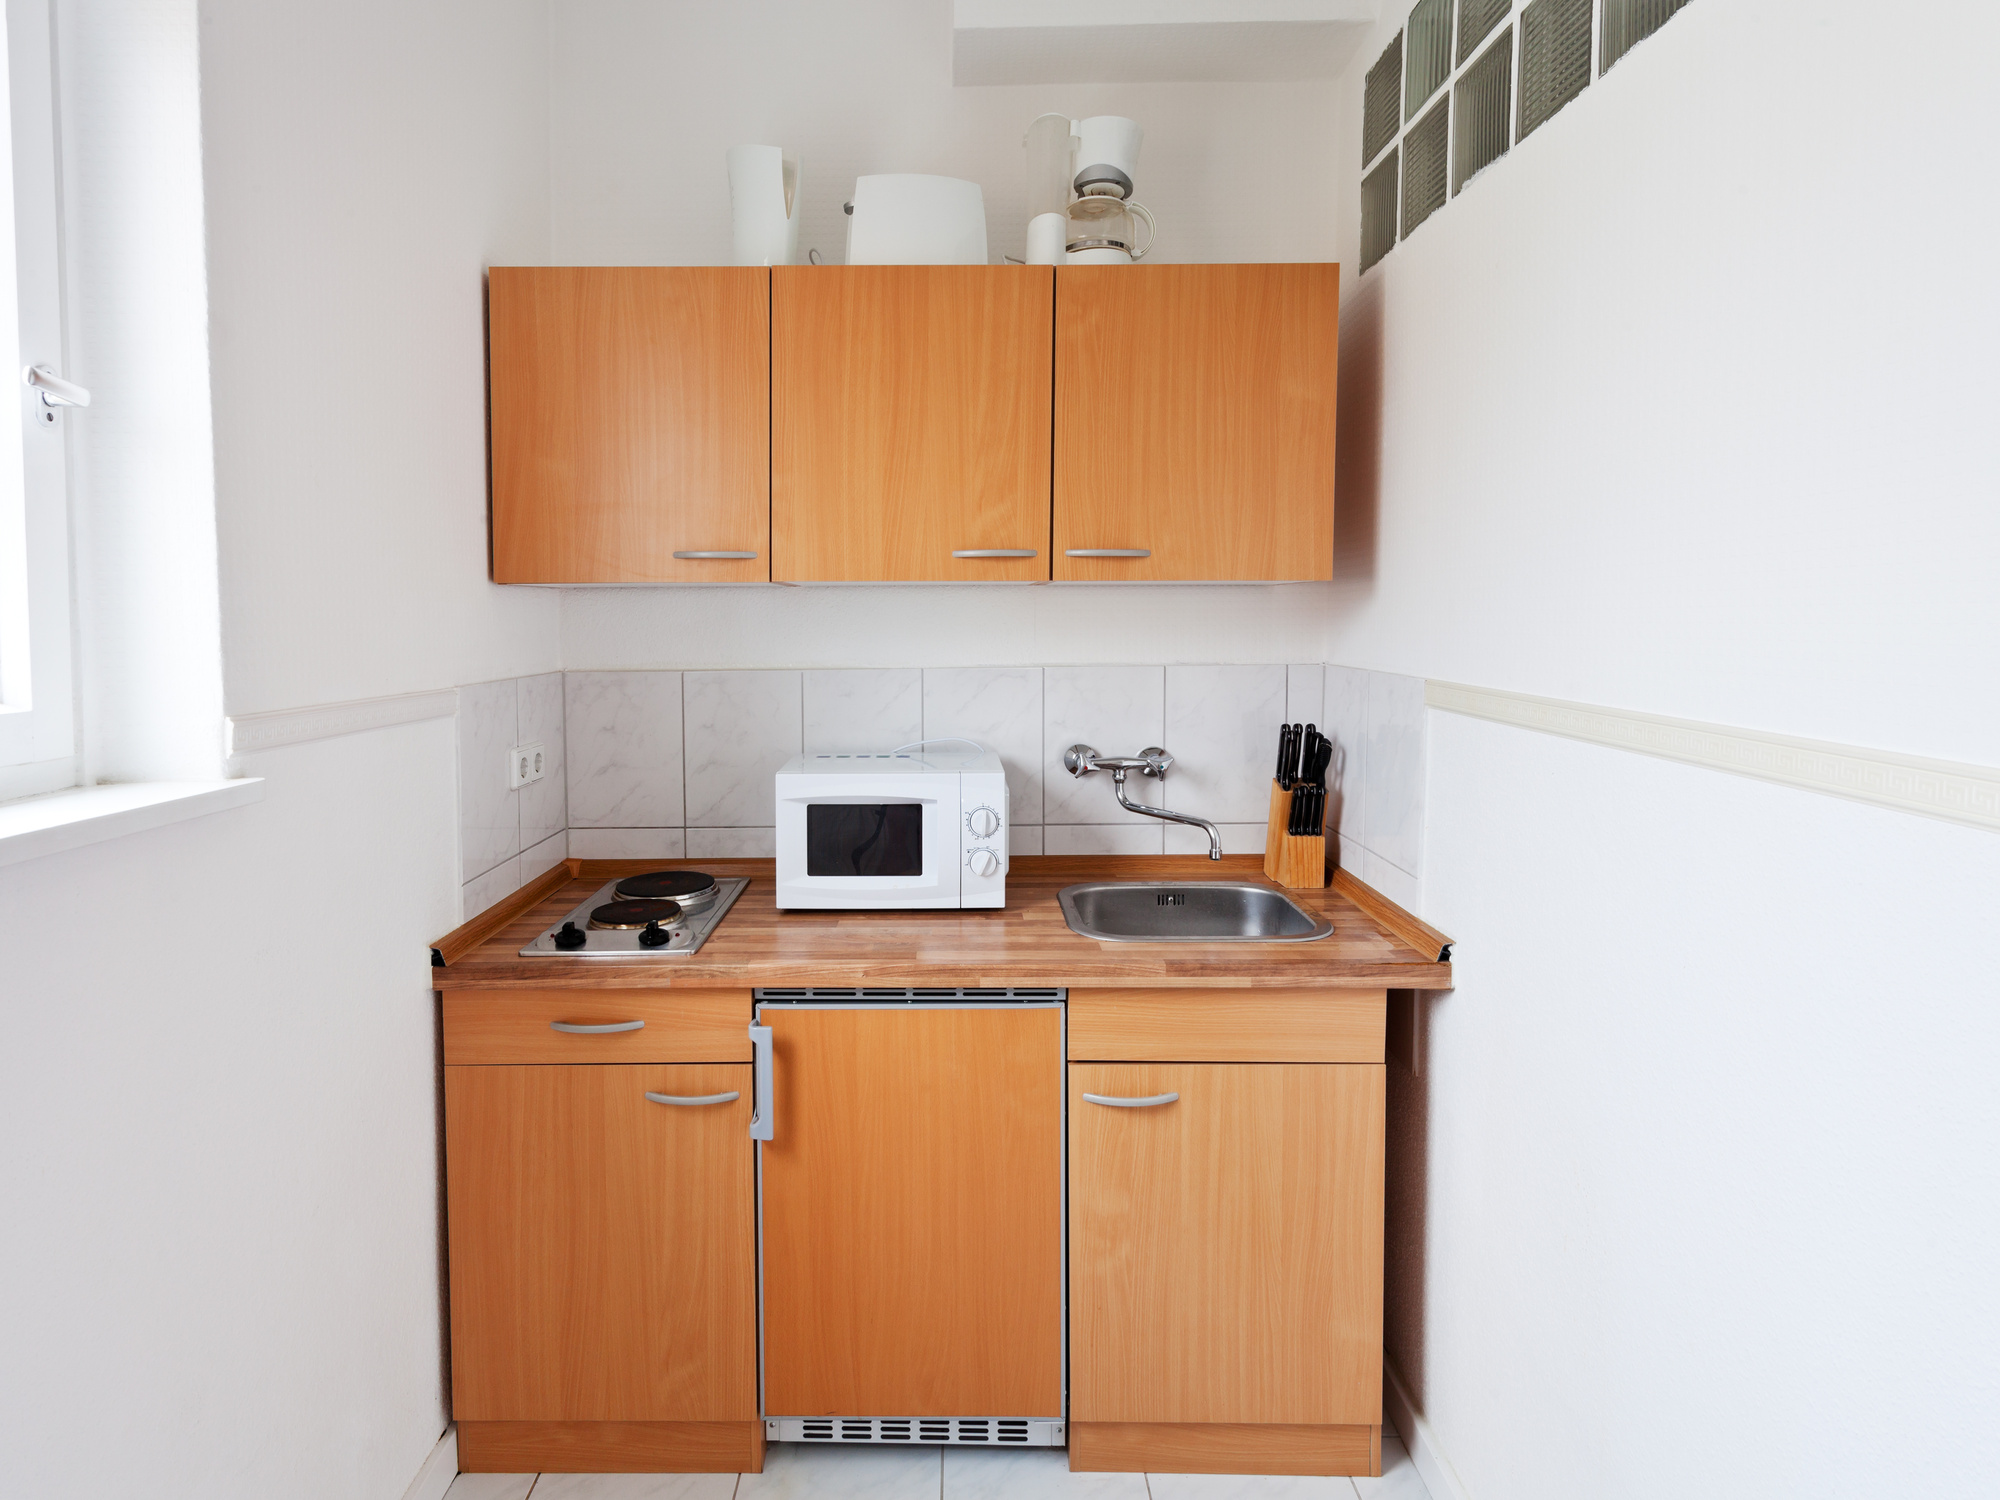
If you live in a small space, you know how important it is to make the most of every inch. This easy DIY mini kitchen sink is the perfect solution for those tight spaces. Not only is it functional, but it also adds a touch of personality to your home. To start, gather all of your materials. You will need a plastic storage container, a small sink basin, a faucet, hot glue, and any decorations you want to add. Make sure the plastic container is the right size to fit the sink basin comfortably. Next, use hot glue to attach the sink basin to the bottom of the plastic container. Make sure it is centered and secure. Then, using a utility knife, carefully cut a hole in the lid of the plastic container for the faucet to fit through. Add some personal touches by using paint, stickers, or small tiles to decorate your mini kitchen sink. You can also add a small piece of plastic or cardboard under the lid for extra stability for the faucet. Finally, fill the sink basin with water and test out your new DIY mini kitchen sink. You'll be amazed at how much space you can save with this simple yet functional project. Enjoy your new and improved kitchen!4. Easy DIY Mini Kitchen Sink for Small Spaces


4. Easy DIY Mini Kitchen Sink for Small Spaces


Looking for a way to repurpose old materials and make something new? Try this miniature kitchen sink DIY project using recycled materials. Not only is it a fun project, but it's also environmentally friendly. First, gather all of your materials. You will need a cardboard box, a small sink basin, a faucet, hot glue, and any decorations you want to add. Make sure the box is the right size to fit the sink basin comfortably. Next, use hot glue to attach the sink basin to the bottom of the cardboard box. Make sure it is centered and secure. Then, using a utility knife, carefully cut a hole in the top of the box for the faucet to fit through. Now it's time to add some decorative touches. You can use paint, stickers, or even small tiles to give your miniature kitchen sink a personalized look. You can also use small pieces of cardboard to create a backsplash behind the sink. Lastly, fill the sink basin with water and test out your new creation. You'll be amazed at how a simple cardboard box can be transformed into a functional and adorable miniature kitchen sink. Reduce, reuse, and recycle with this fun DIY project.5. Miniature Kitchen Sink DIY Using Recycled Materials


5. Miniature Kitchen Sink DIY Using Recycled Materials


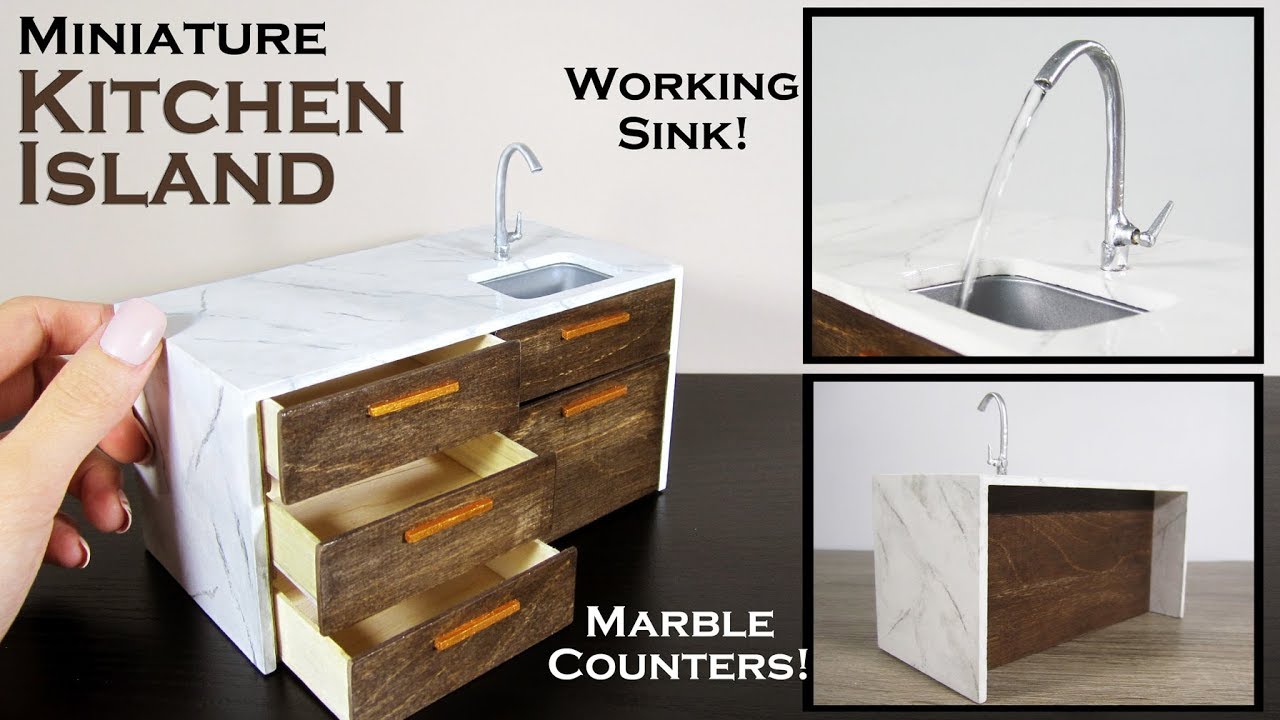
Take your DIY mini kitchen sink to the next level by adding a working faucet. This project may require a bit more time and effort, but the end result will be worth it. Follow these steps to create your very own miniature kitchen sink with a functioning faucet. First, gather all of your materials. You will need a small plastic container, a sink basin, a faucet, hot glue, a small water pump, and any decorations you want to add. Make sure the plastic container is the right size to fit the sink basin comfortably. Next, use hot glue to attach the sink basin to the bottom of the plastic container. Make sure it is centered and secure. Then, using a utility knife, carefully cut a hole in the lid of the plastic container for the faucet to fit through. Now it's time to install the water pump. Attach the pump to the bottom of the sink basin and run the tubing up through the hole in the lid. Secure the faucet on top of the tubing and use hot glue to hold it in place. Add some decorative touches to your mini kitchen sink using paint, stickers, or small tiles. Once everything is dry, fill the sink basin with water and turn on the pump to see your functioning faucet in action. Enjoy your new and impressive DIY creation!6. DIY Miniature Kitchen Sink with Working Faucet


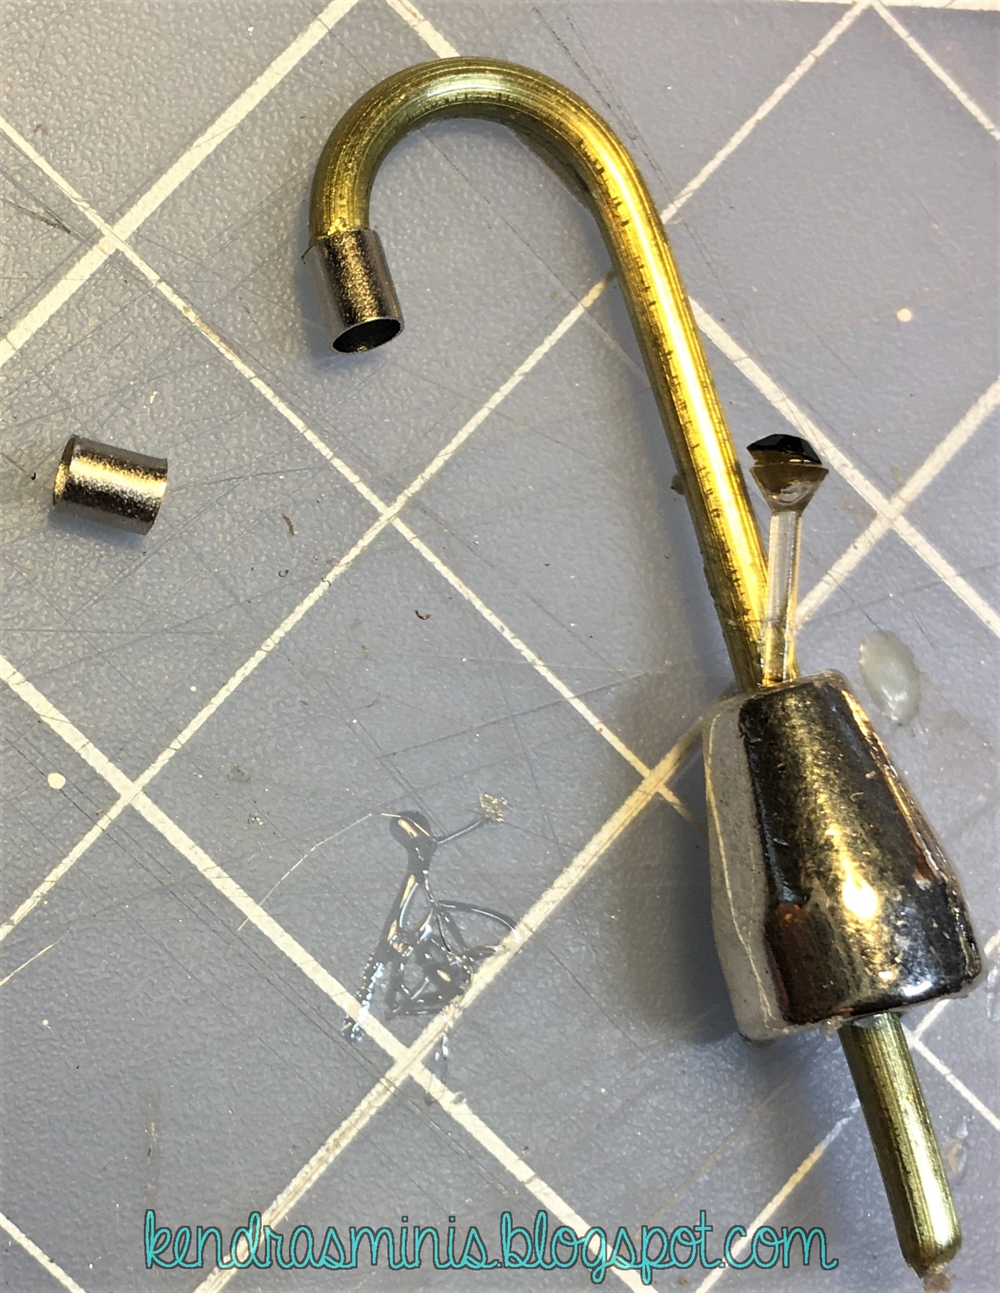
6. DIY Miniature Kitchen Sink with Working Faucet


Creating a mini kitchen sink doesn't have to break the bank. This budget-friendly DIY project will show you how to make a functional and stylish mini sink using affordable materials. Start by gathering all of your materials. You will need a plastic storage container, a small sink basin, a faucet, hot glue, and any decorations you want to add. Make sure the plastic container is the right size to fit the sink basin comfortably. Next, use hot glue to attach the sink basin to the bottom of the plastic container. Make sure it is centered and secure. Then, using a utility knife, carefully cut a hole in the lid of the plastic container for the faucet to fit through. Add some decorative touches using paint, stickers, or small tiles. You can also use household items like bottle caps, buttons, or jewelry to add some unique details. Get creative with your budget-friendly mini kitchen sink! Finally, fill the sink basin with water and test out your new creation. You'll be amazed at how a few simple materials can be transformed into a functional and charming mini kitchen sink. Don't let a tight budget stop you from creating something amazing.7. Budget-Friendly DIY Mini Kitchen Sink


7. Budget-Friendly DIY Mini Kitchen Sink
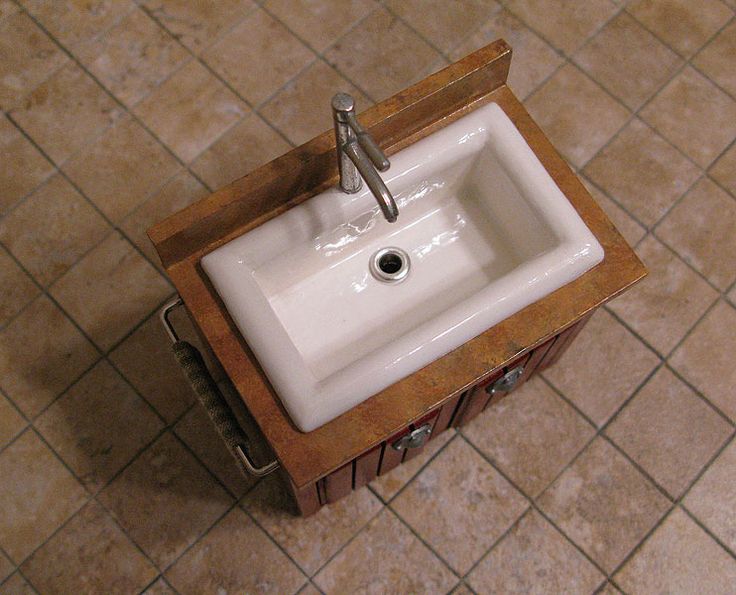
If you're feeling extra crafty, try making a miniature kitchen sink from scratch. This project will require some basic woodworking skills, but the end result will be a one-of-a-kind piece for your miniature scene. First, gather all of your materials. You will need wood boards, a sink basin, a faucet, a saw, sandpaper, wood glue, and any decorations you want to add. Measure and cut the wood boards to create a box for the sink basin to fit in. Next, use wood glue to attach the boards together and let it dry. Then, use a saw to cut a hole in the top of the box for the sink basin to fit in. Sand down any rough edges and paint or stain the box to your desired finish. Once the box is dry, use wood glue to attach the sink basin to the bottom. Then, use a utility knife to carefully cut a hole in the top for the faucet to fit through. You can also add decorative touches using paint, stickers, or small tiles. Finally, fill the sink basin with water and test out your new handmade miniature kitchen sink. Your hard work and creativity will surely pay off with this special and unique piece for your dollhouse or mini kitchen.8. How to Make a Miniature Kitchen Sink from Scratch


8. How to Make a Miniature Kitchen Sink from Scratch

Make your child's play kitchen even more realistic with this DIY mini kitchen sink. It's simple and safe enough for kids to help with and will add a fun and functional element to their playtime. Start by gathering all of your materials. You will need a small plastic container, a sink basin, a faucet, hot glue, and any decorations you want to add. Make sure the plastic container is the right size to fit the sink basin comfortably. Next, use hot glue to attach the sink basin to the bottom of the plastic container. Make sure it is centered and secure. Then, using a utility knife, carefully cut a hole in the lid of the plastic container for the faucet to fit through. Add some decorative touches using paint, stickers, or small tiles. You can also use fun and colorful materials like pom poms, pipe cleaners, or foam shapes to create a whimsical look. Fill the sink basin with water and let your child's imagination run wild with their new DIY mini kitchen sink. They can wash dishes, play with water, and have endless hours of fun with this cute and functional addition to their play kitchen.9. DIY Mini Kitchen Sink for Kids' Play Kitchen


9. DIY Mini Kitchen Sink for Kids' Play Kitchen


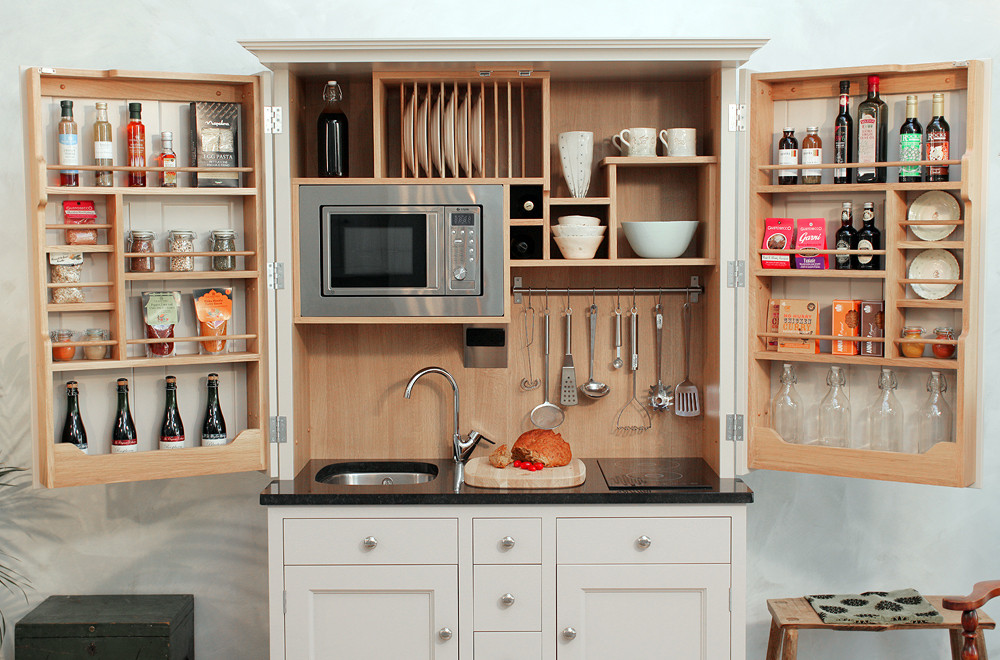
There are endless possibilities when it comes to creating your own DIY mini kitchen sink. Here are a few more creative ideas to inspire your next project: - Use a small colander or strainer as the sink basin for a unique and functional touch. - Add a small trash can next to the mini sink using a small plastic container and decorating it to match. - Use a small plastic or metal bowl as the sink basin for a different shape and style. - Add small hooks or magnets to the side of the mini sink for hanging dish towels or utensils. - Use a small plastic bottle cap as the faucet for a cute and budget-friendly option. Get creative and have fun with your DIY mini kitchen sink projects. With a little imagination and some basic materials, you can create a functional and charming addition to your home. Happy crafting!10. Creative DIY Mini Kitchen Sink Ideas


10. Creative DIY Mini Kitchen Sink Ideas


Creating a Functional and Stylish DIY Mini Kitchen Sink

Introduction to DIY Kitchen Sinks
 In today's fast-paced world, many people are looking for ways to simplify their lives and save money. One area where this is especially true is in home design. More and more homeowners are turning to do-it-yourself (DIY) projects to add unique and functional elements to their homes. One popular DIY project in the world of house design is creating a mini kitchen sink.
Why Choose a Mini Kitchen Sink?
 A mini kitchen sink is a smaller, more compact version of a traditional kitchen sink. It may be only a few feet wide and typically does not have a separate faucet. So why choose a mini kitchen sink over a standard one? There are several reasons why a mini kitchen sink can be a great addition to your home.
First and foremost, a mini kitchen sink is perfect for small spaces. If you live in a tiny apartment or have limited counter space, a mini kitchen sink is a practical and stylish solution. It can fit seamlessly into any small kitchen, adding functionality without taking up too much room.
Additionally, a mini kitchen sink can be a budget-friendly option. Traditional kitchen sinks can be expensive, and the cost of installation can add up. By creating your own mini kitchen sink, you can save money and still have a functional and stylish addition to your home.
A mini kitchen sink is a smaller, more compact version of a traditional kitchen sink. It may be only a few feet wide and typically does not have a separate faucet. So why choose a mini kitchen sink over a standard one? There are several reasons why a mini kitchen sink can be a great addition to your home.
First and foremost, a mini kitchen sink is perfect for small spaces. If you live in a tiny apartment or have limited counter space, a mini kitchen sink is a practical and stylish solution. It can fit seamlessly into any small kitchen, adding functionality without taking up too much room.
Additionally, a mini kitchen sink can be a budget-friendly option. Traditional kitchen sinks can be expensive, and the cost of installation can add up. By creating your own mini kitchen sink, you can save money and still have a functional and stylish addition to your home.
DIY Mini Kitchen Sink: The Basics
 Now that we've established the benefits of having a mini kitchen sink, let's dive into the process of creating your own DIY version. The first step is to gather all of the necessary materials. This includes a small sink, plumbing supplies, and tools such as a drill, measuring tape, and wrench.
Next, you'll need to find a suitable location for your mini kitchen sink. It's important to choose a spot that is close to existing plumbing and has enough space for the sink and any additional features you may want to add, such as a drying rack or soap dispenser.
Once you have your materials and location, it's time to start building! Follow the instructions that come with your sink and carefully install it according to the manufacturer's guidelines. If you're not confident in your DIY skills, consider enlisting the help of a friend or hiring a professional for assistance.
Now that we've established the benefits of having a mini kitchen sink, let's dive into the process of creating your own DIY version. The first step is to gather all of the necessary materials. This includes a small sink, plumbing supplies, and tools such as a drill, measuring tape, and wrench.
Next, you'll need to find a suitable location for your mini kitchen sink. It's important to choose a spot that is close to existing plumbing and has enough space for the sink and any additional features you may want to add, such as a drying rack or soap dispenser.
Once you have your materials and location, it's time to start building! Follow the instructions that come with your sink and carefully install it according to the manufacturer's guidelines. If you're not confident in your DIY skills, consider enlisting the help of a friend or hiring a professional for assistance.
Add Your Personal Touch
 One of the best things about DIY projects is the ability to add your own personal touch. Once your mini kitchen sink is installed, you can get creative and add unique features that suit your style and needs. Consider adding a backsplash, custom shelving, or even painting the sink itself to make it truly one-of-a-kind.
Conclusion
 In conclusion, a DIY mini kitchen sink is a practical and cost-effective addition to any home. With some basic materials and a little bit of effort, you can create a functional and stylish sink that fits perfectly in any small space. Get creative and make it your own – your mini kitchen sink is sure to be a standout feature in your home.