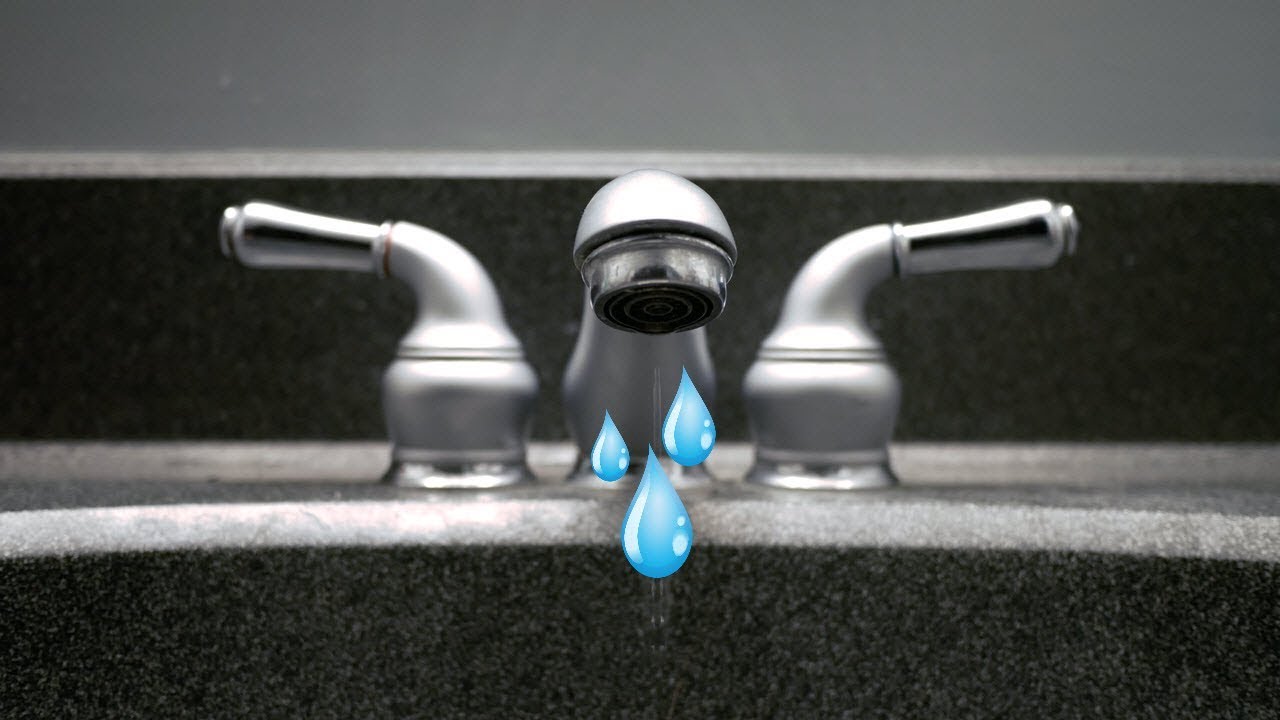
If you’re looking to update your bathroom or fix a leaky faucet, disassembling your bathroom sink faucet is a necessary step. However, it may seem like a daunting task, especially if you’ve never done it before. But fear not, with the right tools and a little know-how, you can easily disassemble your bathroom sink faucet like a pro.Disassemble Bathroom Sink Faucet


Disassemble Bathroom Sink Faucet


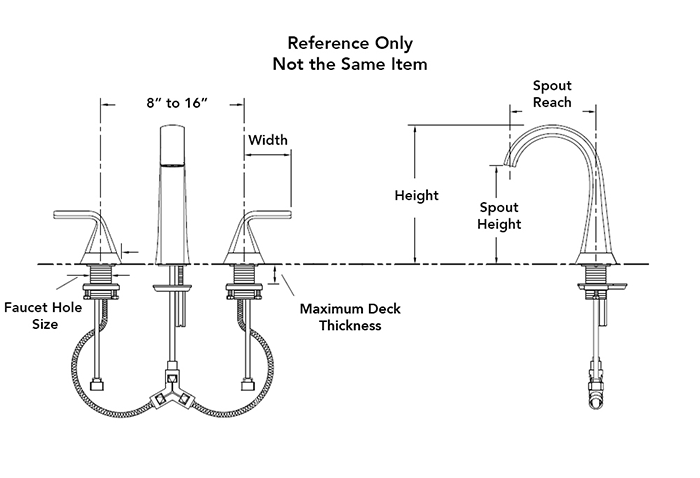
Before you begin, make sure to turn off the water supply to your faucet. This will prevent any water from spraying out while you’re disassembling the faucet. Now, let’s get started on how to disassemble a bathroom sink faucet. Step 1: Gather the necessary tools To disassemble a bathroom sink faucet, you will need a few tools:How to Disassemble a Bathroom Sink Faucet

How to Disassemble a Bathroom Sink Faucet

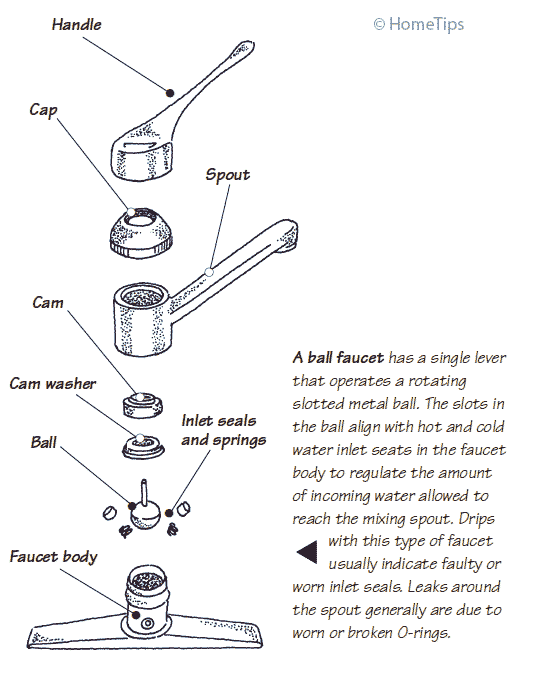
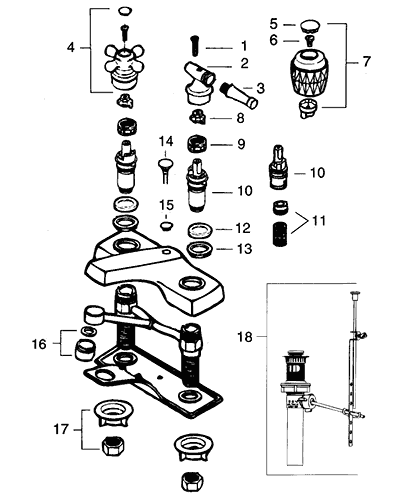
Step 1: Turn off the water supply As mentioned earlier, it’s important to turn off the water supply before starting any work on your faucet. Step 2: Remove the handle Remove the handle by unscrewing the set screw with your screwdriver. If the handle is stuck, use your pliers to carefully loosen it. Step 3: Remove the spout Using your adjustable wrench, loosen and remove the mounting nut underneath the spout. Slide the spout off the faucet. Step 4: Remove the cartridge Using your adjustable wrench, remove the cartridge from the faucet. If it’s stuck, use your pliers to carefully remove it. Step 5: Remove the aerator and clean it Unscrew the aerator using your pliers and clean any debris or buildup before reassembling the faucet.Step-by-Step Guide to Disassembling a Bathroom Sink Faucet


Step-by-Step Guide to Disassembling a Bathroom Sink Faucet


Disassembling a bathroom sink faucet can seem like a daunting task, but with the right tools and a little knowledge, it can be a simple DIY project. By following the steps outlined above, you can successfully remove your bathroom sink faucet and make any necessary repairs or updates.Removing a Bathroom Sink Faucet: A DIY Guide


Removing a Bathroom Sink Faucet: A DIY Guide


If you’re having trouble removing any parts of your faucet, try using a lubricant such as WD-40 to help loosen them. It’s also a good idea to clean and inspect the parts as you go to ensure everything is in good working condition.Disassembling a Bathroom Sink Faucet: Tips and Tricks


Disassembling a Bathroom Sink Faucet: Tips and Tricks


To successfully disassemble a bathroom sink faucet, you will need the following tools:Tools You’ll Need to Disassemble a Bathroom Sink Faucet


Tools You'll Need to Disassemble a Bathroom Sink Faucet


One common issue when disassembling a bathroom sink faucet is finding that some parts are stuck and difficult to remove. This can be solved by using a lubricant and carefully using pliers to loosen the stuck parts.Common Problems When Disassembling a Bathroom Sink Faucet


Common Problems When Disassembling a Bathroom Sink Faucet


Before you begin disassembling your bathroom sink faucet, make sure to turn off the water supply and protect your sink from any scratches or damage by placing a towel or cloth over it.Precautions to Take Before Disassembling a Bathroom Sink Faucet


Precautions to Take Before Disassembling a Bathroom Sink Faucet


Once you’ve made any necessary repairs or updates, reassembling your bathroom sink faucet is simply a matter of following the steps in reverse order. Make sure all parts are securely in place and turn the water supply back on to test your faucet.How to Reassemble a Bathroom Sink Faucet After Disassembly
How to Reassemble a Bathroom Sink Faucet After Disassembly


Hiring a professional plumber to disassemble your bathroom sink faucet can be costly, but it may be necessary for more complex issues. However, for simple repairs or updates, it can be easily done as a DIY project with the right tools and knowledge. In conclusion, disassembling a bathroom sink faucet may seem intimidating, but with the right tools and steps, it can be a simple and rewarding DIY project. Remember to take precautions, use the right tools, and carefully clean and inspect all parts to ensure a successful disassembly and reassembly of your faucet.Professional vs. DIY: Disassembling a Bathroom Sink Faucet


Professional vs. DIY: Disassembling a Bathroom Sink Faucet


:max_bytes(150000):strip_icc()/steam-cleaning-professional-vs-diy-2908776-hero-24ffd77737924bca908036dabcdcbbad.jpg)

Why Should You Disassemble Your Bathroom Sink Faucet?

Maintaining the Aesthetics of Your Bathroom
 One of the main reasons for disassembling your bathroom sink faucet is to maintain the overall aesthetics of your bathroom. Over time, faucets can become worn, dirty, and even rusted, which can greatly detract from the appearance of your bathroom. By regularly disassembling and cleaning your faucet, you can keep it looking shiny and new, adding to the overall appeal of your bathroom.
Preventing Costly Repairs
 Disassembling your bathroom sink faucet can also help prevent costly repairs down the line. When faucets are not cleaned and maintained regularly, they can develop leaks or other issues that may require professional assistance. By taking the time to disassemble and clean your faucet, you can catch any potential problems early on and address them before they become more serious and expensive to fix.
Improving Water Flow and Efficiency
 Over time, mineral deposits and debris can build up in your faucet, causing a decrease in water flow and efficiency. This can be especially frustrating when trying to wash your hands or brush your teeth. By disassembling your faucet and thoroughly cleaning it, you can improve the water flow and efficiency, making your daily bathroom routine more convenient and enjoyable.
Ensuring Hygiene and Sanitation
 Regularly disassembling and cleaning your bathroom sink faucet can also help ensure proper hygiene and sanitation in your bathroom. Faucets can harbor bacteria and germs, especially around the handles and spout, which can lead to the spread of illnesses. By regularly disassembling and cleaning your faucet, you can eliminate any potential health hazards and keep your bathroom clean and sanitary.
Enhancing the Longevity of Your Faucet
 Lastly, disassembling your bathroom sink faucet can help enhance its longevity. By regularly cleaning and maintaining your faucet, you can prevent any damage or wear and tear that may occur over time. This can save you money in the long run, as you won't have to replace your faucet as frequently.
In conclusion,
disassembling your bathroom sink faucet is a simple and effective way to maintain the aesthetics, prevent costly repairs, improve water flow and efficiency, ensure hygiene and sanitation, and enhance the longevity of your faucet. By taking the time to regularly clean and maintain your faucet, you can keep your bathroom looking and functioning at its best.
Lastly, disassembling your bathroom sink faucet can help enhance its longevity. By regularly cleaning and maintaining your faucet, you can prevent any damage or wear and tear that may occur over time. This can save you money in the long run, as you won't have to replace your faucet as frequently.
In conclusion,
disassembling your bathroom sink faucet is a simple and effective way to maintain the aesthetics, prevent costly repairs, improve water flow and efficiency, ensure hygiene and sanitation, and enhance the longevity of your faucet. By taking the time to regularly clean and maintain your faucet, you can keep your bathroom looking and functioning at its best.