Are you tired of dealing with a clogged kitchen sink? A properly installed strainer can help prevent food scraps and debris from entering your drain and causing blockages. In this guide, we will walk you through the correct way to install a strainer in your kitchen sink.How to Install a Kitchen Sink Strainer


How to Install a Kitchen Sink Strainer


The first step in installing a kitchen sink strainer is to remove the old one, if you have one. Use a strainer wrench to loosen the locknut and remove the old strainer basket. Then, thoroughly clean the area to prepare for the new installation.How to Install a Kitchen Sink Strainer Basket


How to Install a Kitchen Sink Strainer Basket


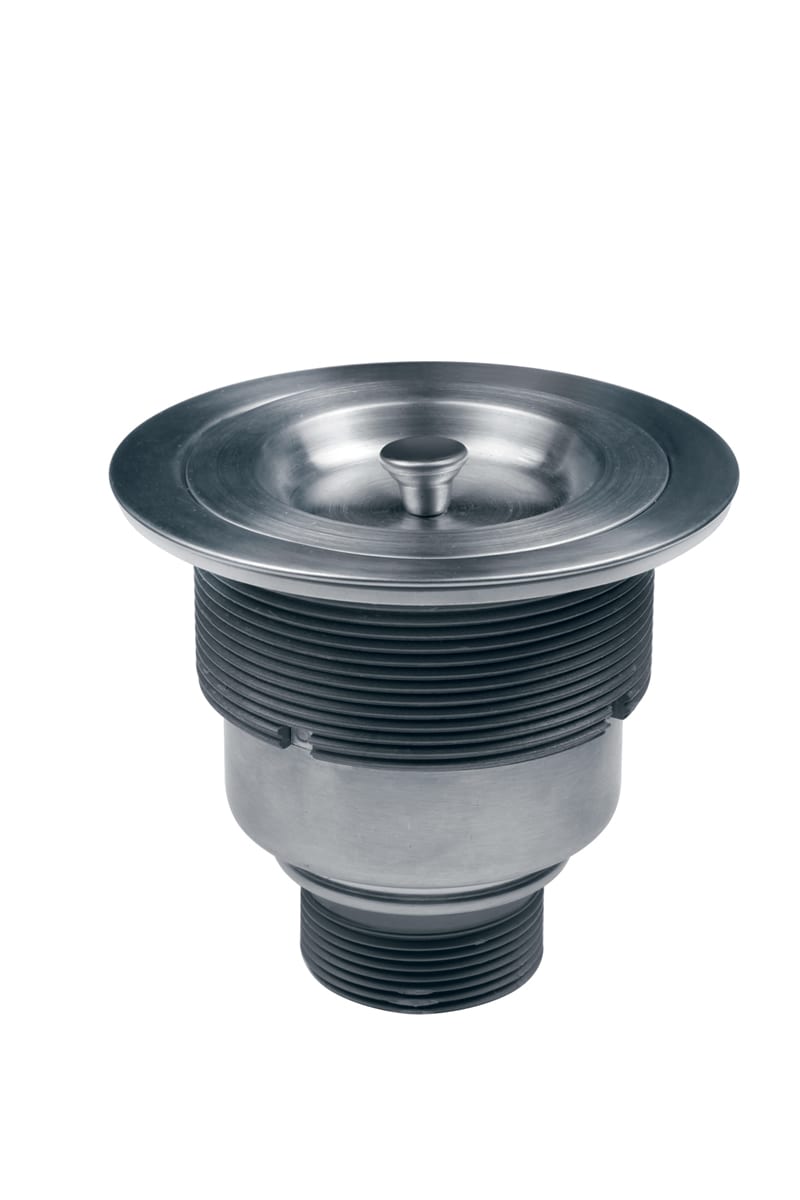
Next, you will need to assemble the new strainer. Start by placing the rubber gasket on the bottom of the strainer basket. Then, insert the strainer into the drain hole in your sink and secure it with the locknut. Use the strainer wrench to tighten the locknut and ensure a snug fit.How to Install a Kitchen Sink Strainer Assembly

How to Install a Kitchen Sink Strainer Assembly

/how-to-install-a-sink-drain-2718789-hero-b5b99f72b5a24bb2ae8364e60539cece.jpg)


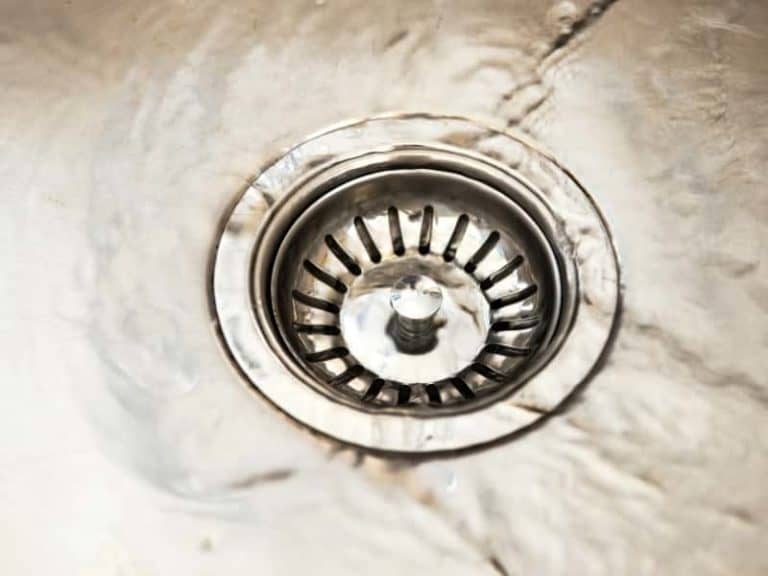
If your strainer comes with a plug, now is the time to install it. Simply screw the plug into the center of the strainer basket until it is secure. This will allow you to fill your sink with water without it draining out.How to Install a Kitchen Sink Strainer Plug

How to Install a Kitchen Sink Strainer Plug


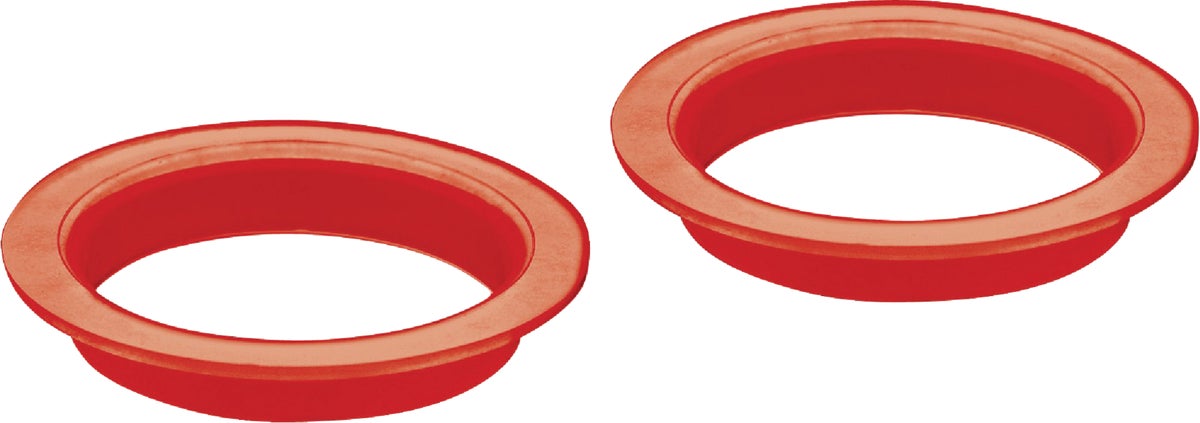
The gasket is an essential component of a kitchen sink strainer. It creates a tight seal between the strainer and the sink, preventing water and debris from escaping. Make sure that the gasket is placed between the strainer and the sink before tightening the locknut.How to Install a Kitchen Sink Strainer Gasket


How to Install a Kitchen Sink Strainer Gasket


The locknut is what holds the strainer in place and prevents it from moving around. Use a strainer wrench to tighten the locknut until it is snug. Avoid over-tightening, as this can cause damage to the sink or the strainer.How to Install a Kitchen Sink Strainer Locknut


How to Install a Kitchen Sink Strainer Locknut
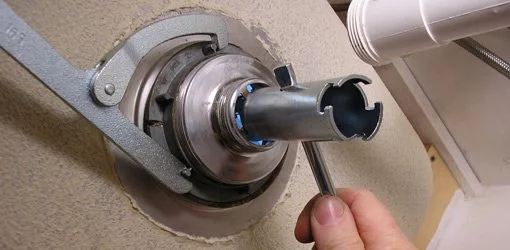

A strainer wrench is a specialized tool used for installing and removing strainers. It has a long handle and two adjustable jaws that securely grip the locknut for easy tightening or loosening. If you don't have a strainer wrench, you can use pliers or a regular wrench, but be careful not to scratch the sink or the strainer.How to Install a Kitchen Sink Strainer Wrench
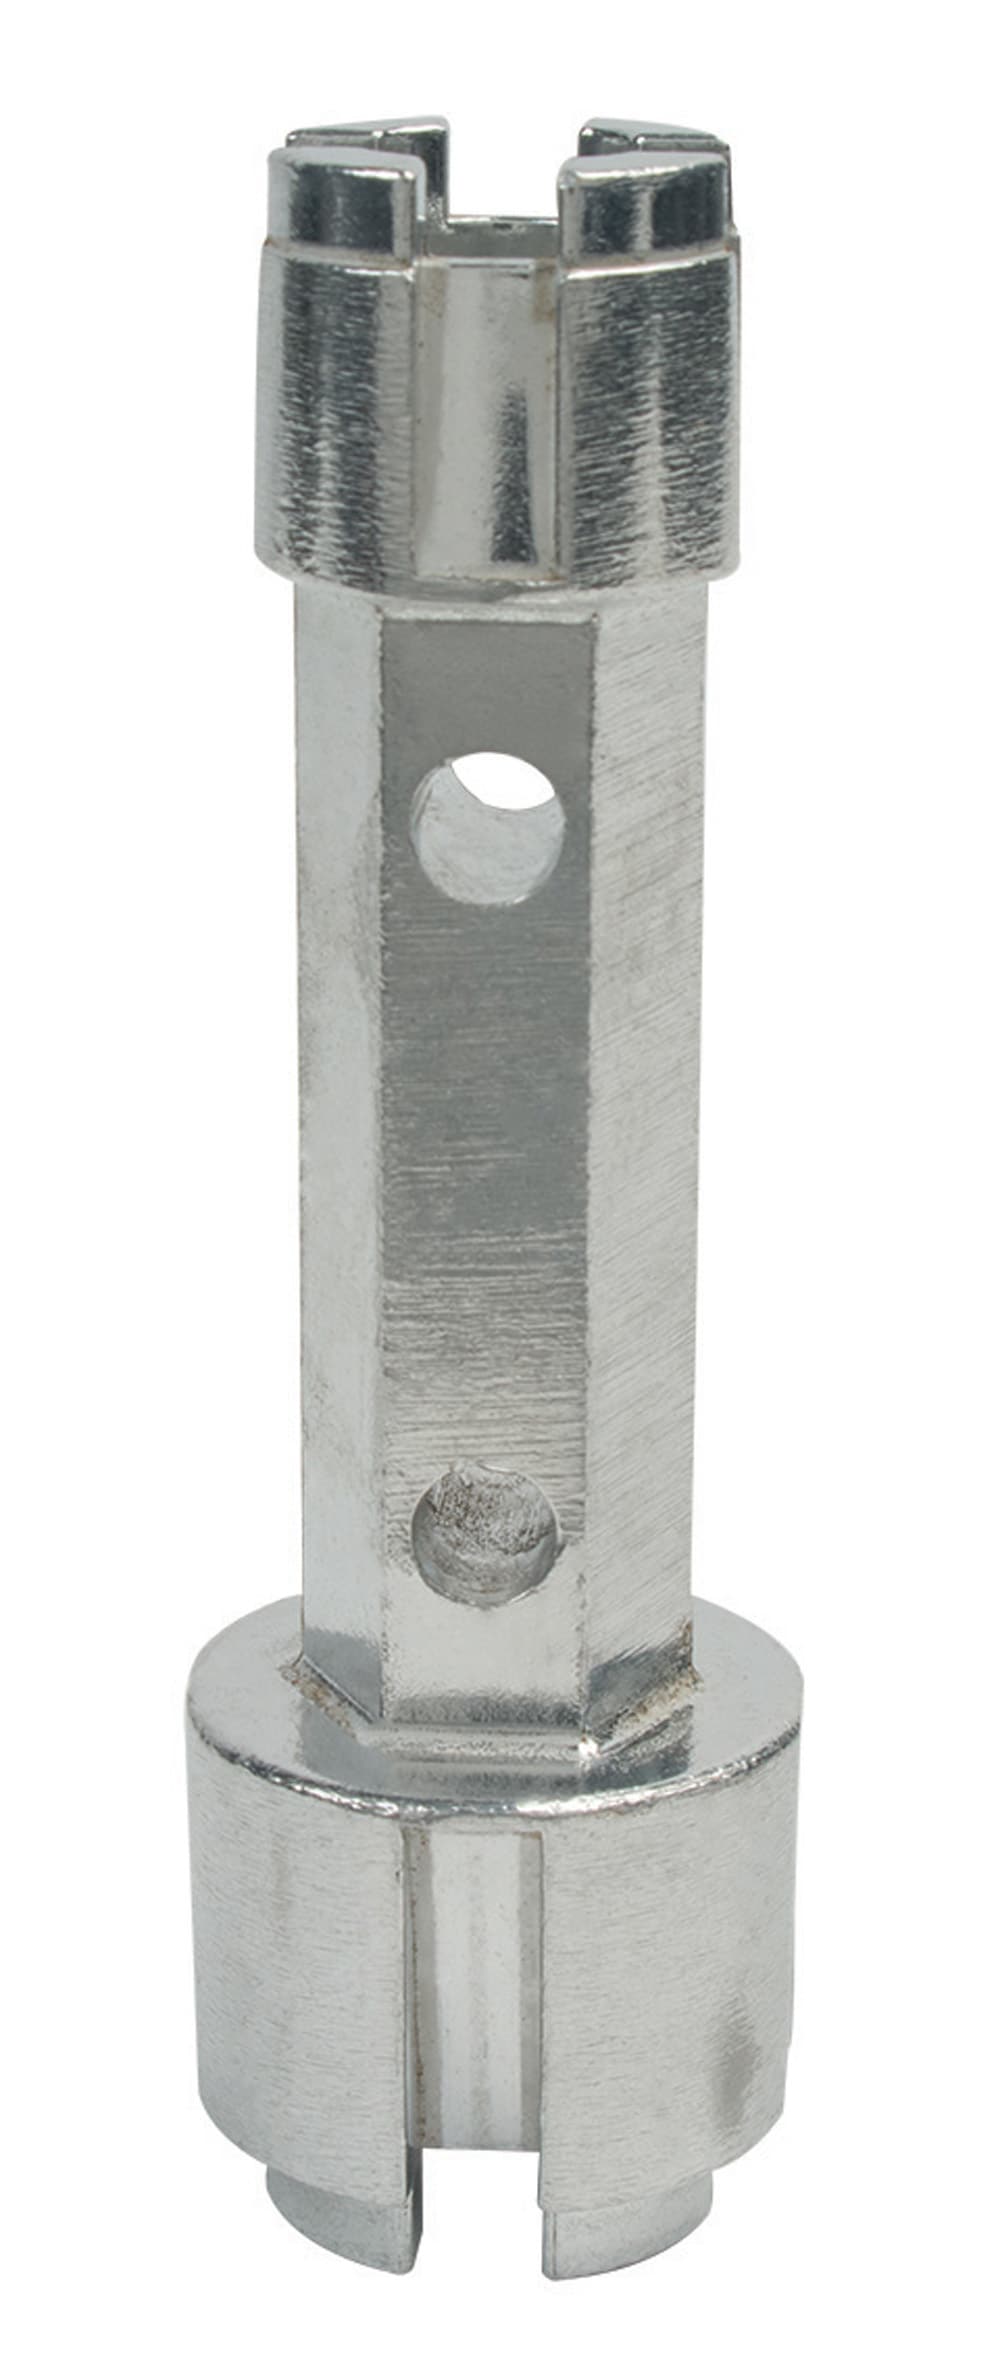

How to Install a Kitchen Sink Strainer Wrench


The strainer nut is what holds the strainer basket in place. It is usually made of plastic or metal and is located underneath the sink. Use a strainer wrench to tighten the nut until it is secure.How to Install a Kitchen Sink Strainer Nut


How to Install a Kitchen Sink Strainer Nut
The flange is the visible portion of the strainer that sits on top of the sink. It is often made of stainless steel, but can also be found in other materials like brass or plastic. To install the flange, simply place it on top of the strainer basket and press down firmly.How to Install a Kitchen Sink Strainer Flange

How to Install a Kitchen Sink Strainer Flange

The tailpiece is the pipe that connects the strainer basket to the drain pipe. It is usually made of plastic or metal and can be cut to fit your specific sink and plumbing setup. Make sure to use plumber's tape to ensure a leak-free connection. Congratulations, you have successfully installed a kitchen sink strainer! By following these steps, you can now enjoy a clog-free kitchen sink. Remember to regularly clean your strainer to keep it functioning properly and prevent any unpleasant odors. If you encounter any issues, don't hesitate to call a professional plumber for assistance.How to Install a Kitchen Sink Strainer Tailpiece


How to Install a Kitchen Sink Strainer Tailpiece

:max_bytes(150000):strip_icc()/how-to-install-a-sink-drain-2718789-04-5715d67f5b7d41429d42bf705bb70e2c.jpg)

Why Installing the Right Strainer in Your Kitchen Sink is Important

The Importance of a Good Kitchen Sink Strainer

When designing or renovating a kitchen, the sink may not be the most exciting aspect to think about, but it is one of the most frequently used and essential parts of any kitchen. A good kitchen sink strainer plays a significant role in maintaining the cleanliness and functionality of your sink. It is responsible for preventing food scraps, debris, and other small objects from clogging up your drain and causing bigger plumbing issues down the line.
Common Mistakes When Installing a Strainer

One of the most common mistakes when installing a kitchen sink strainer is not using the right one for your specific sink. Many people opt for cheaper strainers that do not fit or work well with their sink, resulting in constant clogs and frustration. Another mistake is not properly securing the strainer, which can lead to leaks and water damage.
Furthermore, some people overlook the importance of regularly cleaning and maintaining their strainer. Over time, food particles and grime can build up in the strainer, causing unpleasant odors and creating the perfect environment for bacteria to grow. This can also lead to a decrease in water flow, making washing dishes and other kitchen tasks more difficult and time-consuming.
The Correct Way to Install a Kitchen Sink Strainer

Now that we understand the importance of a good kitchen sink strainer and the common mistakes to avoid, let's discuss the correct way to install one. First and foremost, it is crucial to choose the right strainer size and type for your sink. Measure the diameter of your sink's drain and choose a strainer that matches it perfectly.
Next, make sure to clean and dry your sink thoroughly before installation. Apply a thin layer of plumber's putty to the underside of the strainer flange, then place it into the drain hole. Secure the strainer in place by tightening the mounting nut from underneath the sink. Make sure not to over-tighten, as this can cause damage to the sink or the strainer.
Lastly, regularly clean and maintain your strainer by removing any trapped food particles and debris. You can also use a mixture of baking soda and vinegar to keep it smelling fresh and prevent bacteria growth.
In Conclusion

Installing the correct strainer in your kitchen sink is a crucial step in maintaining a clean and functional kitchen. By avoiding common mistakes and following the correct installation process, you can ensure that your sink remains clog-free and in good working condition for years to come.
))/2796610.json)