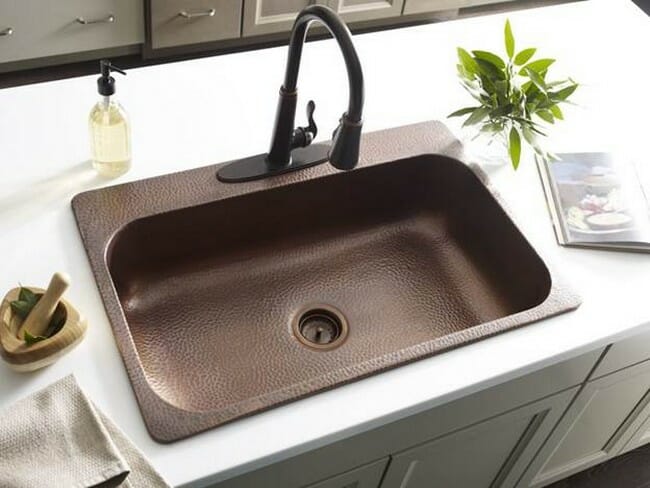
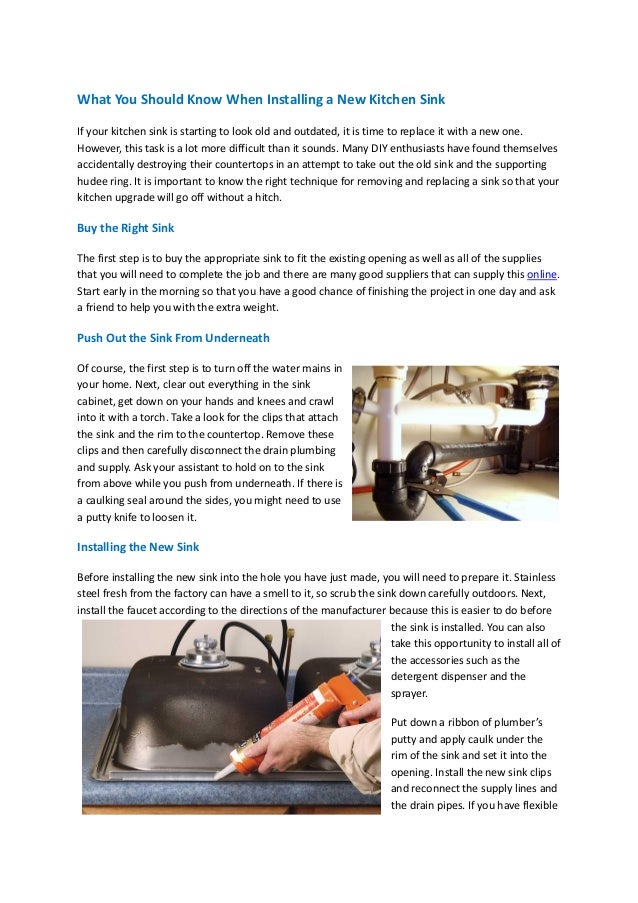
Installing kitchen sink clips is an essential step in securing your sink to the countertop and ensuring it stays in place for years to come. Whether you're replacing an old sink or installing a new one, knowing how to properly install the clips is crucial for a successful and sturdy sink installation. To help you out, we've put together a step-by-step guide on how to install kitchen sink clips, along with some helpful tips and best practices.How to Install Kitchen Sink Clips


How to Install Kitchen Sink Clips
:max_bytes(150000):strip_icc()/replacing-existing-surface-mounted-sink-1824896-06-d8eb6b67fe4f451b90c415551f75ad0f.jpg)


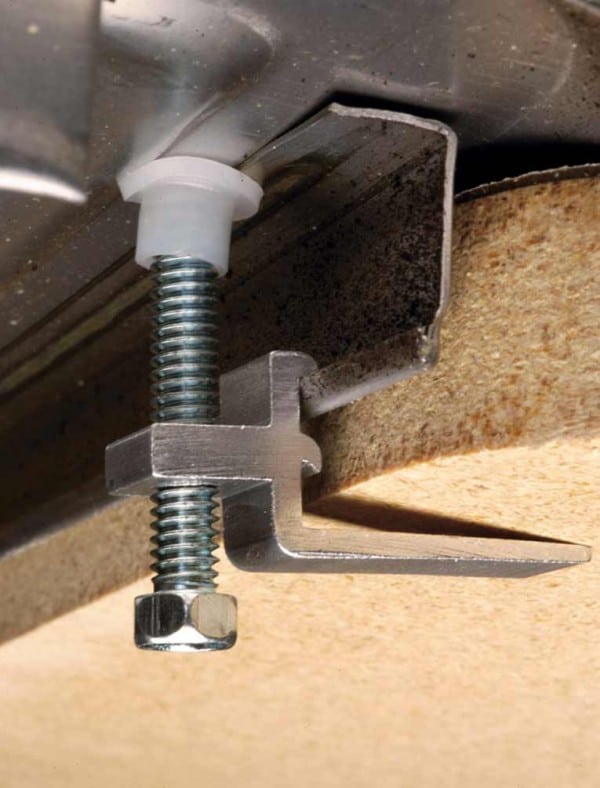
Undermount sinks are becoming increasingly popular for their sleek and modern look. However, these types of sinks require a different installation process compared to top-mounted sinks. When it comes to installing undermount kitchen sink clips, the process is quite similar, but there are a few extra steps to ensure a secure installation. First, make sure to measure and mark the placement of your sink clips on the underside of the countertop. Next, use a drill to create pilot holes for the screws. Then, attach the clips to the sink using screws, making sure they are aligned with the holes on the countertop. Finally, use a screwdriver to tighten the screws and secure the sink in place.How to Install Undermount Kitchen Sink Clips
How to Install Undermount Kitchen Sink Clips


Now, let's go through a step-by-step guide for installing kitchen sink clips:Step-by-Step Guide for Installing Kitchen Sink Clips


Step-by-Step Guide for Installing Kitchen Sink Clips


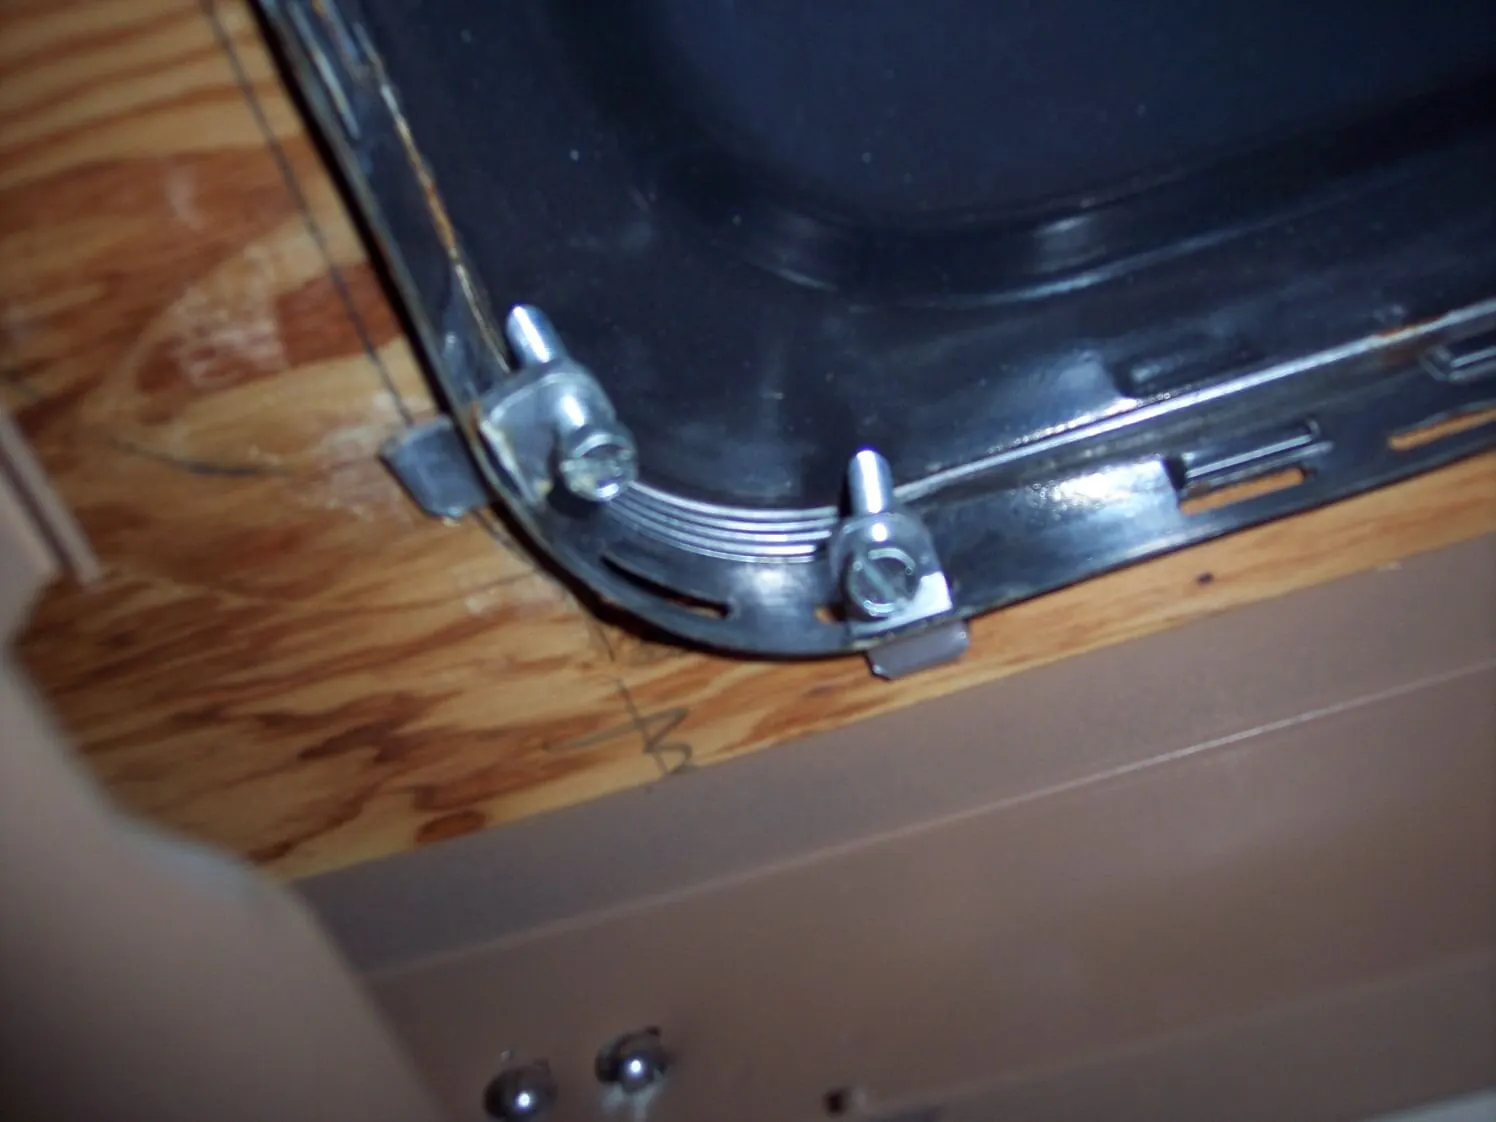
:no_upscale()/cdn.vox-cdn.com/uploads/chorus_asset/file/19495086/drain_0.jpg)
Installing kitchen sink clips can be a DIY project, but it's important to have some basic knowledge and skills before attempting it. If you're not confident in your abilities, it's best to hire a professional plumber to ensure a proper and secure installation. If you do decide to take on the project yourself, make sure to follow the manufacturer's instructions and have all the necessary tools on hand. It's also a good idea to watch some tutorial videos beforehand to get a better understanding of the process.DIY Kitchen Sink Clip Installation


DIY Kitchen Sink Clip Installation


Here are some best practices to keep in mind when installing kitchen sink clips:Best Practices for Installing Kitchen Sink Clips


Best Practices for Installing Kitchen Sink Clips


Here are the tools you'll need for a successful kitchen sink clip installation:Tools Needed for Installing Kitchen Sink Clips


Tools Needed for Installing Kitchen Sink Clips
Here are some common mistakes to avoid when installing kitchen sink clips:Common Mistakes to Avoid When Installing Kitchen Sink Clips


Common Mistakes to Avoid When Installing Kitchen Sink Clips


Here are some tips to keep in mind when installing kitchen sink clips:Tips for Properly Installing Kitchen Sink Clips


Tips for Properly Installing Kitchen Sink Clips


To ensure a sturdy installation, it's important to properly secure the kitchen sink clips. Here are some tips to help:How to Secure Kitchen Sink Clips for a Sturdy Installation

How to Secure Kitchen Sink Clips for a Sturdy Installation

In summary, installing kitchen sink clips is an important step in securing your sink and ensuring its longevity. Make sure to properly measure and mark the placement of the clips, use the right tools and materials, and follow best practices and tips for a successful installation. If you're not confident in your abilities, don't hesitate to hire a professional for a sturdy and secure sink installation.Installing Kitchen Sink Clips: What You Need to Know


Installing Kitchen Sink Clips: What You Need to Know


How to Properly Install Kitchen Sink Clips for a Sturdy and Functional Sink

Why Kitchen Sink Clips are Essential in House Design
 When it comes to designing the perfect kitchen, every detail counts. From the type of countertops to the color of the cabinets, every element plays a role in creating a functional and aesthetically pleasing space. One often overlooked but crucial aspect of kitchen design is the installation of
kitchen sink clips
. These small but mighty pieces are essential for securing your sink in place and preventing any potential damage or shifting. In this article, we will guide you through the steps of installing kitchen sink clips to ensure a sturdy and functional sink in your kitchen.
When it comes to designing the perfect kitchen, every detail counts. From the type of countertops to the color of the cabinets, every element plays a role in creating a functional and aesthetically pleasing space. One often overlooked but crucial aspect of kitchen design is the installation of
kitchen sink clips
. These small but mighty pieces are essential for securing your sink in place and preventing any potential damage or shifting. In this article, we will guide you through the steps of installing kitchen sink clips to ensure a sturdy and functional sink in your kitchen.
Step-by-Step Guide to Installing Kitchen Sink Clips
 Step 1: Gather Your Materials
Before you start the installation process, make sure you have all the necessary materials on hand. You will need a drill, screws, a screwdriver, a level, and of course, the
kitchen sink clips
. It is crucial to use the correct size and type of clips for your sink, so be sure to double-check before starting.
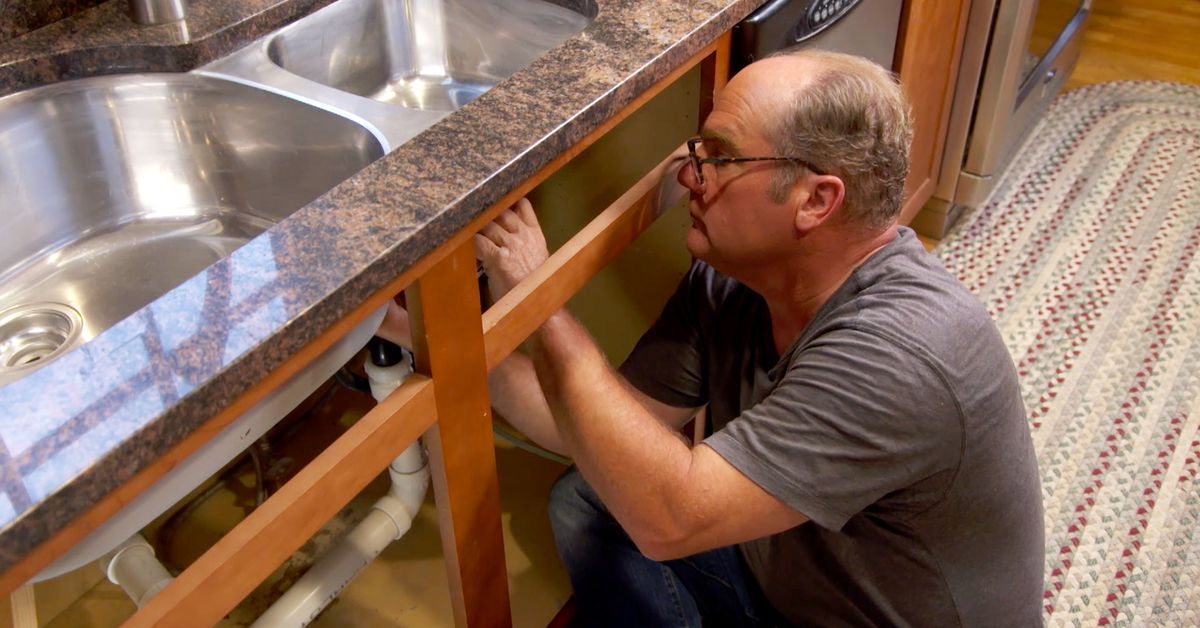
Step 2: Position the Sink
Place your sink into the designated space and use a level to ensure it is even. Once you have determined the correct position, use a pencil to mark where you will drill the holes for the clips. Be sure to mark all four corners of the sink.
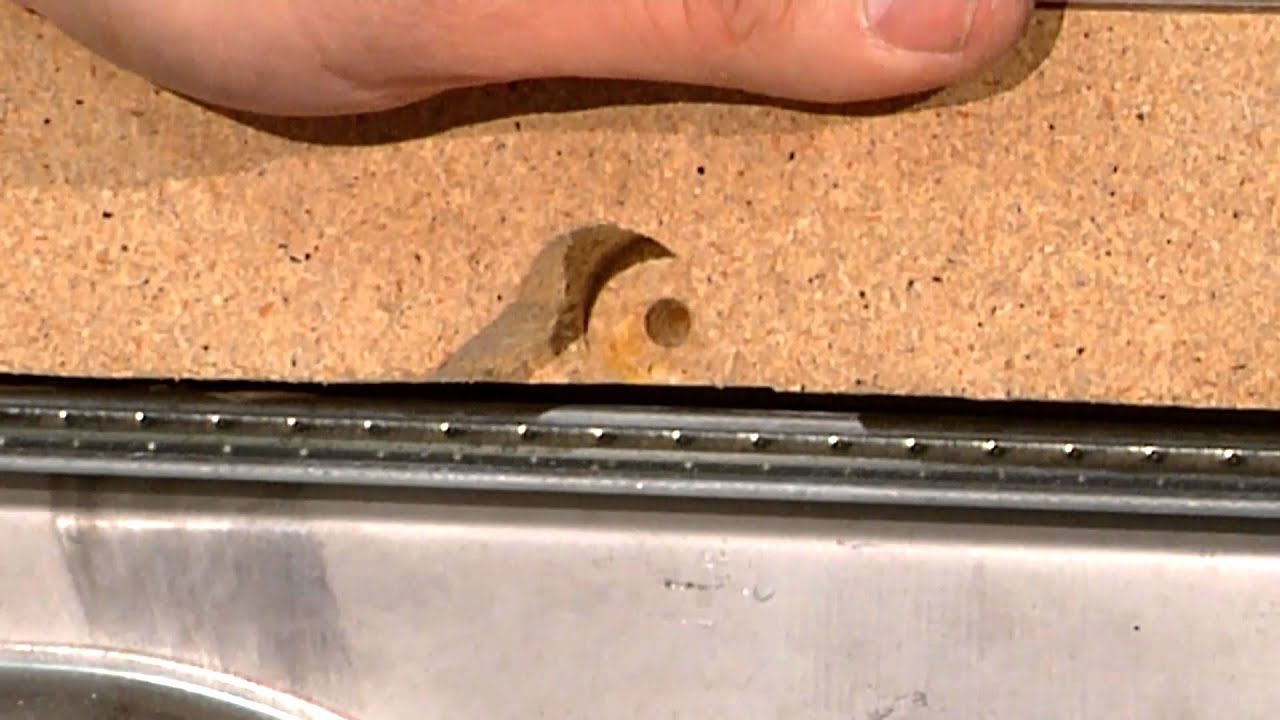
Step 3: Drill the Holes
Using a drill, create pilot holes on the marked spots. These holes will guide the screws into place and prevent any splitting or cracking of the countertop. Make sure the holes are slightly smaller than the screws to ensure a secure fit.
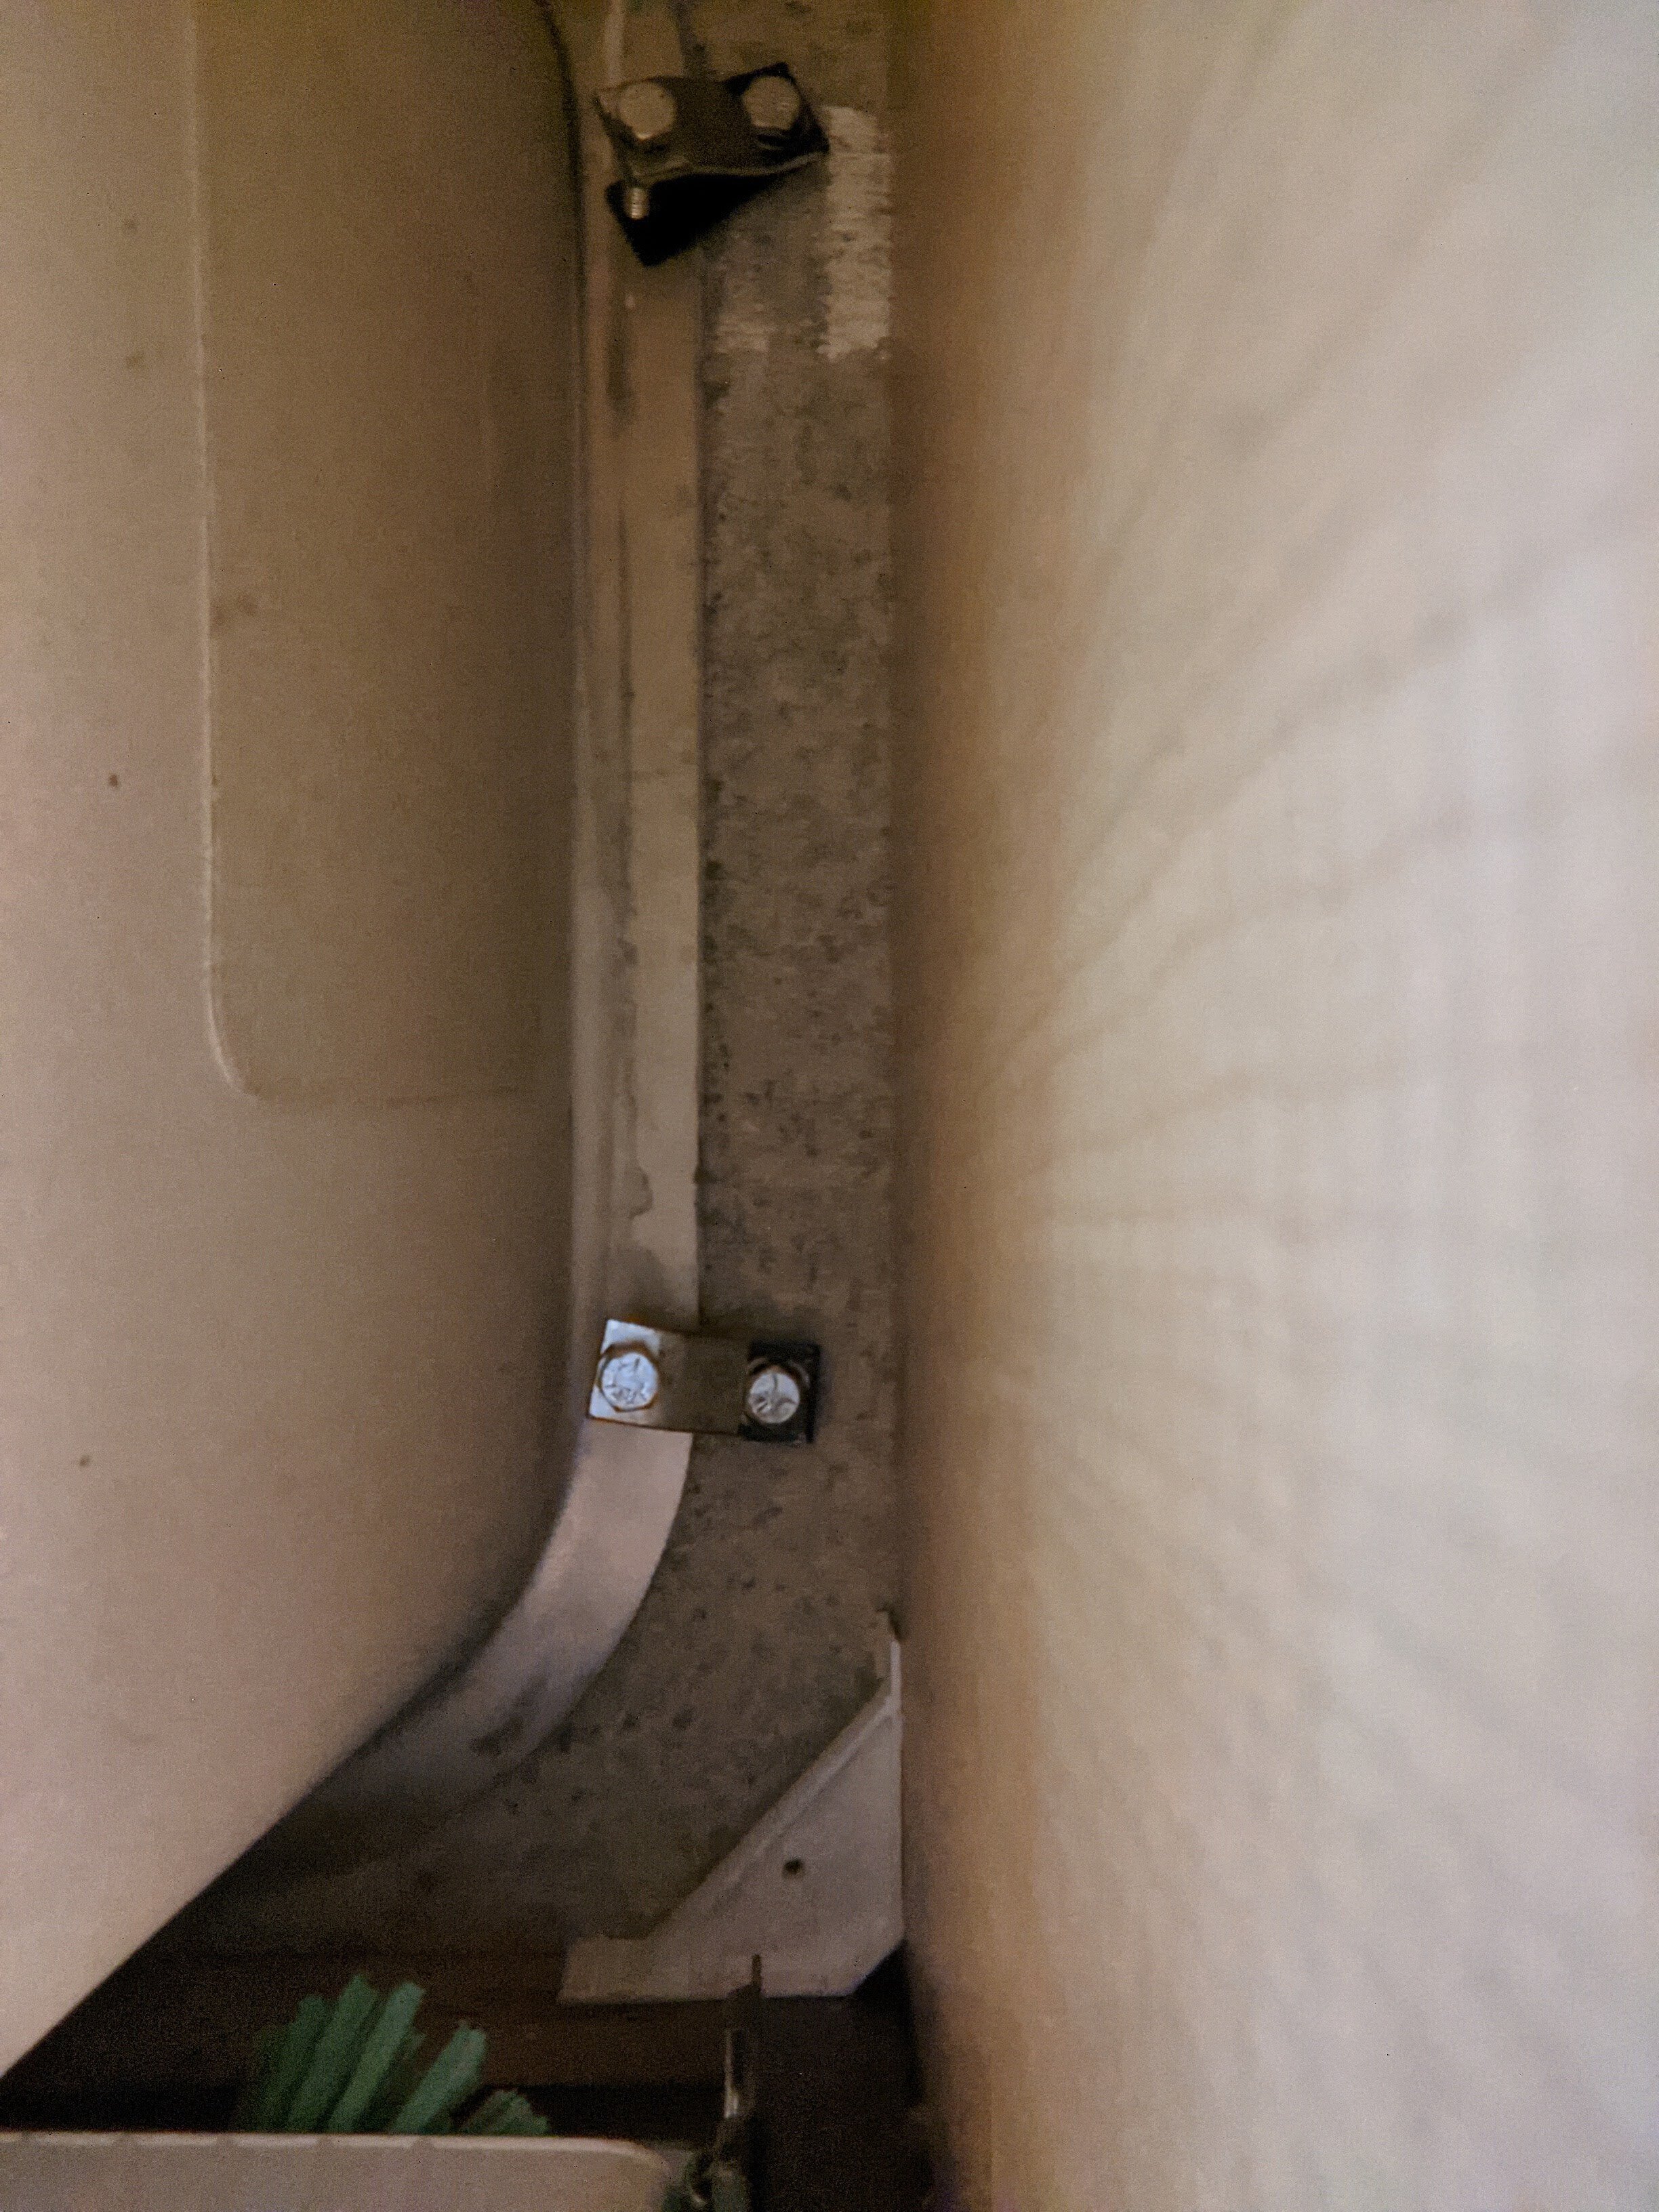
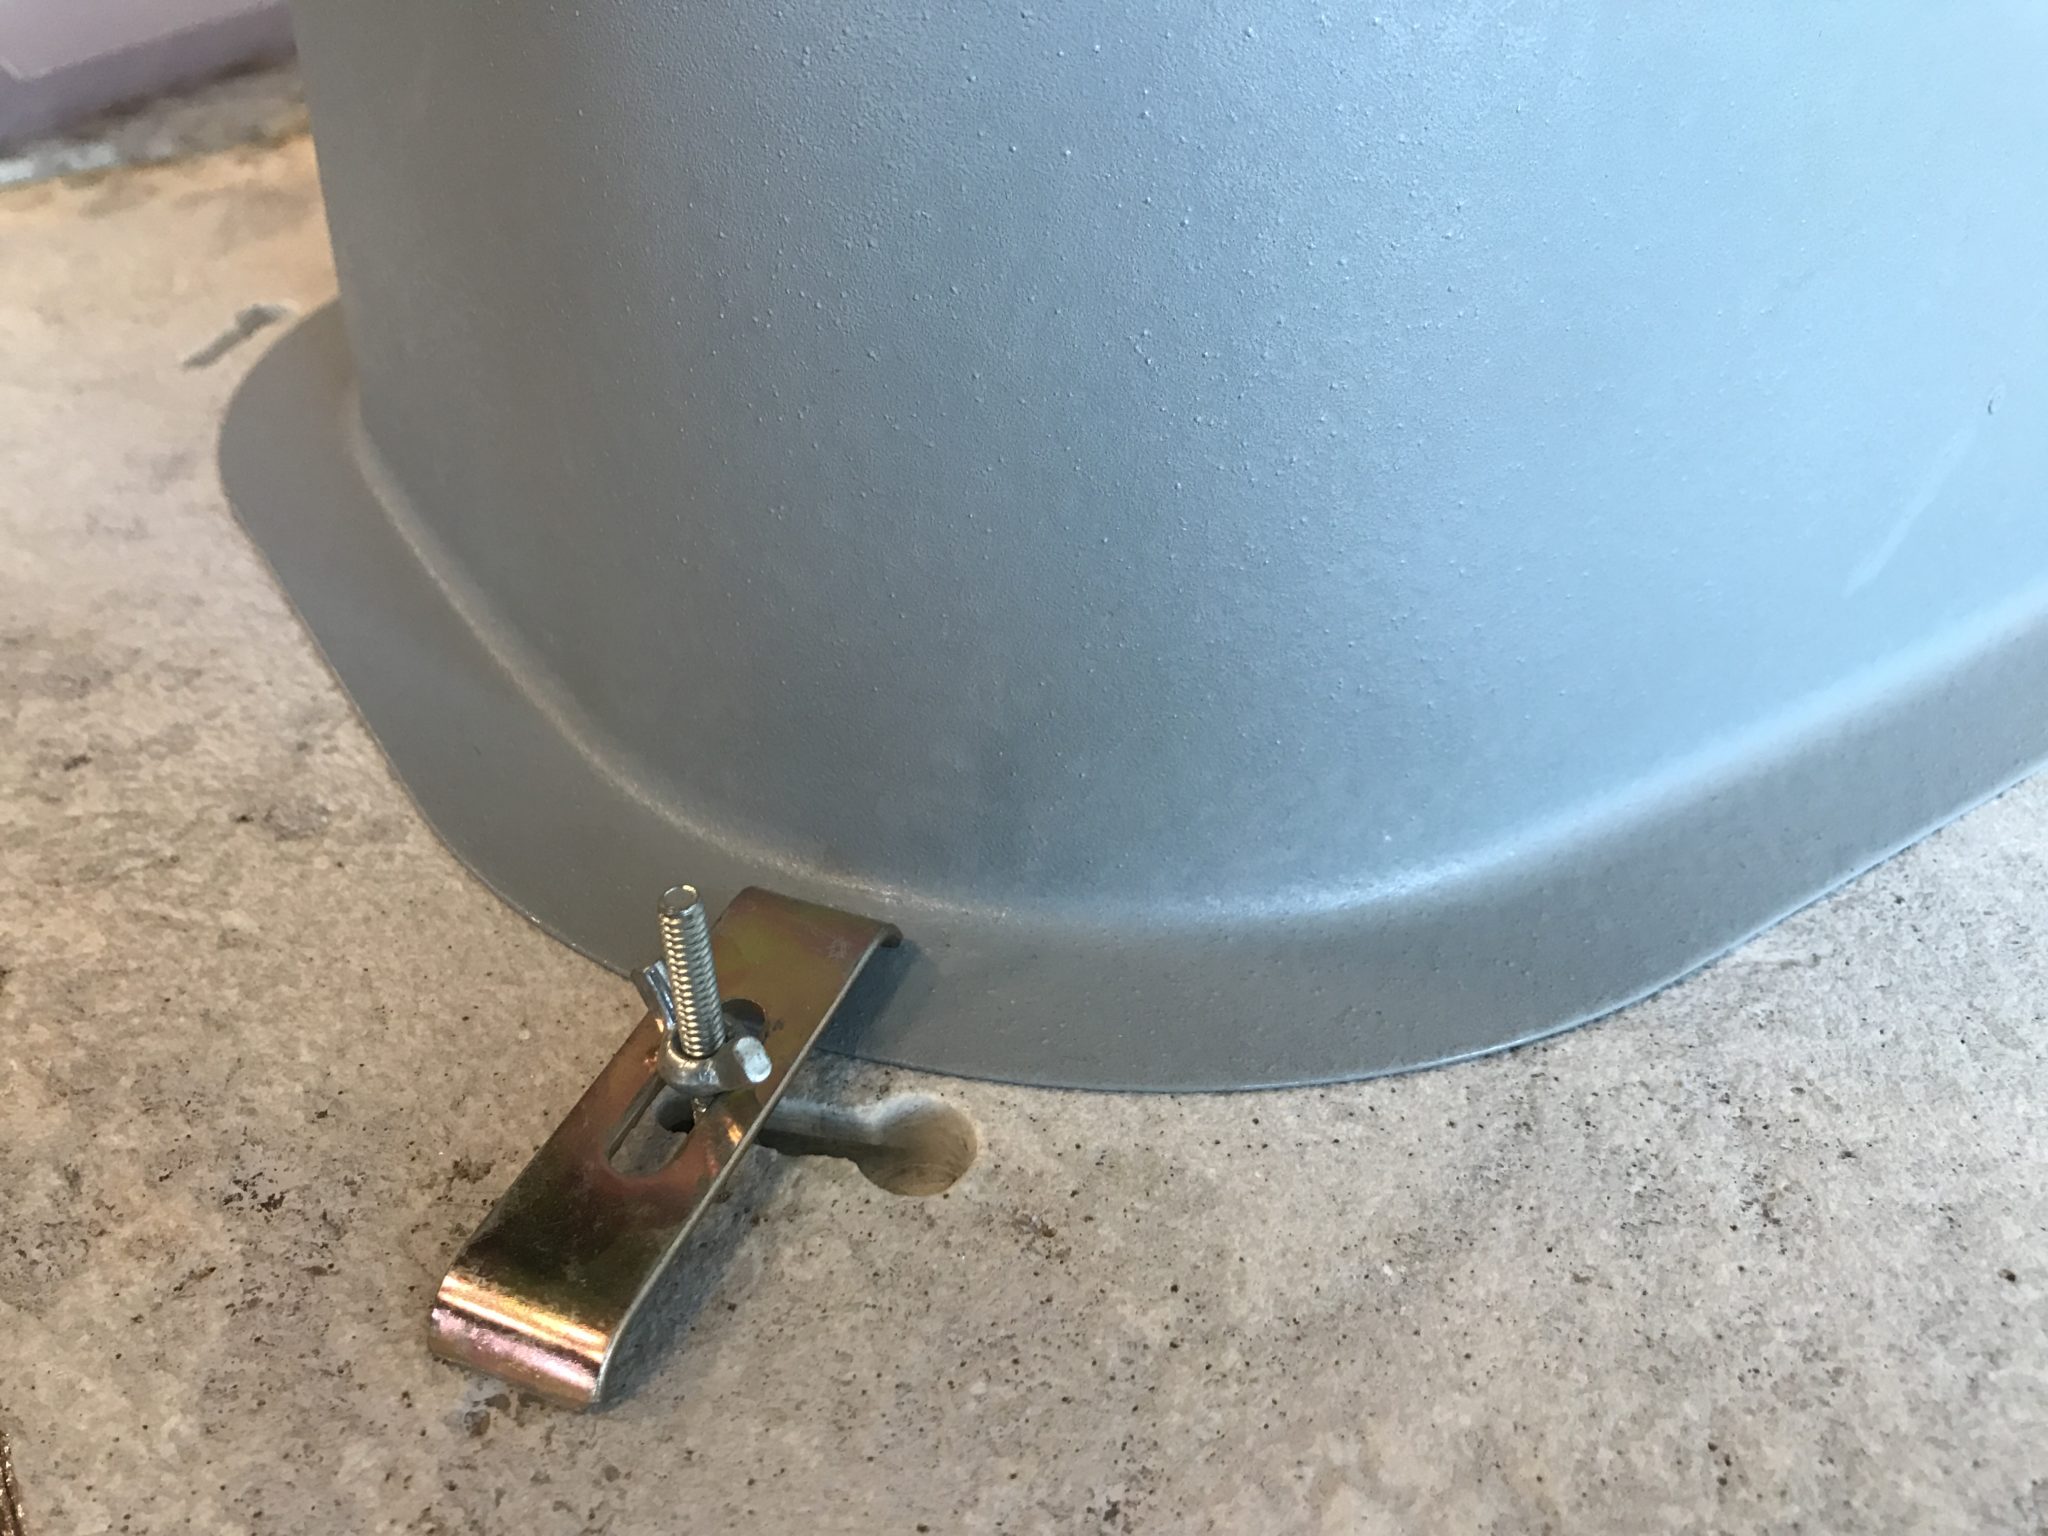
Step 4: Attach the Clips
Next, attach the kitchen sink clips to the underside of the sink using the provided screws. Make sure to align the clips with the pilot holes. Tighten the screws with a screwdriver until the clips are firmly in place.
Step 5: Secure the Sink
With the clips attached to the sink, carefully lower it onto the countertop. Make sure the sink is level and aligned with the markings you made earlier. Once it is in the correct position, use a screwdriver to secure the clips to the countertop. This will ensure the sink is securely attached and will not shift or move.
Step 1: Gather Your Materials
Before you start the installation process, make sure you have all the necessary materials on hand. You will need a drill, screws, a screwdriver, a level, and of course, the
kitchen sink clips
. It is crucial to use the correct size and type of clips for your sink, so be sure to double-check before starting.
Step 2: Position the Sink
Place your sink into the designated space and use a level to ensure it is even. Once you have determined the correct position, use a pencil to mark where you will drill the holes for the clips. Be sure to mark all four corners of the sink.
Step 3: Drill the Holes
Using a drill, create pilot holes on the marked spots. These holes will guide the screws into place and prevent any splitting or cracking of the countertop. Make sure the holes are slightly smaller than the screws to ensure a secure fit.
Step 4: Attach the Clips
Next, attach the kitchen sink clips to the underside of the sink using the provided screws. Make sure to align the clips with the pilot holes. Tighten the screws with a screwdriver until the clips are firmly in place.
Step 5: Secure the Sink
With the clips attached to the sink, carefully lower it onto the countertop. Make sure the sink is level and aligned with the markings you made earlier. Once it is in the correct position, use a screwdriver to secure the clips to the countertop. This will ensure the sink is securely attached and will not shift or move.
Benefits of Using Kitchen Sink Clips
 Installing kitchen sink clips not only adds stability to your sink but also has several other benefits. It helps prevent water leakage, ensures proper drainage, and extends the lifespan of your sink. It also makes cleaning and maintenance easier, as the sink will remain firmly in place.
Final Thoughts
 Incorporating
kitchen sink clips
into your kitchen design is a small but essential step in creating a functional and long-lasting sink. By following the simple steps outlined in this article, you can easily install the clips and enjoy a sturdy and secure sink in your kitchen. Remember to use the correct size and type of clips for your sink and always double-check the level before attaching the sink.
Incorporating
kitchen sink clips
into your kitchen design is a small but essential step in creating a functional and long-lasting sink. By following the simple steps outlined in this article, you can easily install the clips and enjoy a sturdy and secure sink in your kitchen. Remember to use the correct size and type of clips for your sink and always double-check the level before attaching the sink.


:max_bytes(150000):strip_icc()/gray-kitchen-cabinet-ideas-22-cathie-hong-interiors-scandinavian-c08d577bdaf54eb7a7715b0bacfec108.jpeg)
